- Hover the Mouse over Text, Links, and Pictures for more Details -
Thank You for Visiting - Suggestions are Always Welcome
by Dennis & Terry Struck
About Bicycle Touring, Bicycle Tour Issues,
and
Bicycle Tour Planning
{Self, Couple, Groups; Short - Expedition; Lodging - Camping}
v43
"The Journey Is Its Own Reward." - Attributed to Amelia Earhart
Table of Contents
Related Subject Pages
About Bicycle Touringbike touring, bicycle touring, bike tour, bicycle tour, bike touring checklist, bicycle touring checklist, bike tour checklist, bicycle tour checklist, bike touring 101, bicycle touring 101, self contained bike touring, self contained bicycle touring, self contained bike tour, self contained bicycle tour, fully loaded bike touring, fully loaded bicycle touring, fully loaded bike tour, fully loaded bicycle tour, about bike tours, about bicycle tours, bike touring, bicycle touring, checklist, bicycle camping, cycling, bike touring checklist, bicycle touring checklist, All About Bicycle Touring, All About Bike Touring, All About Bicycle Touring, About Cycle Touring, About Bicycle Tours, check list, velo, bici, bicicleta, travel trip, campaign, expedition, group, expeditions, issues, about, How to get started, tandem bicycle touring, tandem tour, fully loaded tandem, tandem bicycle communications, tandem bicycle terminology, tandem touring, tandem bicycle touring, What challenges exist for different touring circumstances, plan, planning, metric, metrics, road, mountain, bicycle tour configuration, Group Cycling, Group Touring, and Group Issues, Group Organization Issues, Group (or Solo) Route Planning, Major Issues, Group Self Contained Cycling with Camping, Group Food Logistics, Tandem Rider Communication Terms, Tandem Communication Terms, Tandem Touring Issues, Travel Leg Planning and Management, Travel Leg Planning and Control, Tandem tours, tandem tour checklist, Group Supplies checklist, group Equipment Checklist, Group Communication and Behavior Action When Riding Together, Group Riding Decision Issues/Communication/Ethic, Bicycle Hand Signals, Foot Signals, Silent Signals, Voice Signals, Expedition/Group Tool Kit Checklist, Expedition Bicycle Touring Issues, Foreign and Domestic Tour Planning Checklist, Tandem Tours, Tandem Tour Riding, Tandem Tour Checklist, Tandem touring checklist, Tandem Communication, Tandem Rider Communication, Tandem Communication, How to communicate on a tandem bicycle, Tandem bicycle Tours, Tandem bicycle Tour Riding, Tandem bicycle Tour Checklist, Tandem bicycle touring checklist, Tandem Communication Terms, Tandem Communication Terminology, Tandem Teamwork, Tandem Bicycle Communications, Tandem Bicycle Communication Terminology, Tandem Bicycle Teamwork, Tandem Bike Communication Terms, Tandem Bicycle Communication Terms, Tandem Bike Communication Terminology, Tandem Bike Teamwork, Tandem Communication, Tandem Rider Communication, Tandem Communication, Self bicycle tour, Couple bicycle tour, or Group bicycle tour, Tours, Weekend Adventure bicycle tour or Long Expedition bicycle tour, Camping bicycle tour, Guided bicycle tour, Self Guided bicycle tour, Foreign bicycle tour and Domestic bicycle tour, campain, campaign campaigning self contained supporting supported tool tools holiday, supplies packing adventures adventure stories story saddle tale tales, fully loaded, Getting Started (for New and Experienced Cyclists), bicycle Tour Planning Metrics, How Much Do I Carry on a Bicycle Tour, Bicycle Tour Travel Leg Planning and Management, Bicycle Tour Planning Traps, Bicycle Tour Configurations, Bicycle Tour Body Conditioning, Bicycle Tour Road (Survival) Rules and Positive Behaviors Actions, Bicycle Tour Long Distance Bicycle Hire/Rental Issues, Bicycle Tour Group Cycling, Group Touring, and Group Issues, Bicycle Tour Group Organization, Bicycle Tour Food and Logistics, Bicycle Tour Signals, Bicycle Tour Self-Contained Group Camping Issues, Bicycle Tour Supplies/Equipment, Bicycle Tour Group Communication, Bicycle Tour Decision Issues and Remote Communication, Bicycle Tour Expedition: Touring Issues, Tool Kit Checklist, Tandem Bicycle Touring, Bicycle Shipping and Transporting, Bicycle Tour, Tour Planning and Issues (Foreign and Domestic), Bicycle Tour Travel and Cultural Things to Know, Bicycle Touring (Survival) Tips, The Bicycle Touring Checklist, Issues to Consider for Selecting a Touring Bicycle, How to Select a Touring Bicycle, How to Select a Tour Bicycle, How to Select a Tour Bike, tandem bike touring, About Bicycle Touring, Bicycle Tour Issues, Bicycle Tour Planning, Bicycle Tour Plan, Bike Tour Planning, Bike Touring Plan, Bicycle Touring Plan, tools bike touring, bike tour planning, bicycle tour planning, bicycle touring plan, planning bicycle touring trip, self supported bike touring, bicycle tour planner, plan bike trip, how to start bicycle touring, planning a bike trip, enough food, enough clothing, enough water, food planning, clothing planning, water planning, tools bike touring, planning bicycle touring trip, self supported bike touring, bicycle tour planner, plan bike trip, how to start bicycle touring, mountain bike tours, mountain bike touring, planning a bike trip, cycle journey planner, plan bike trip, bicycle route planner, bicycle route planning, bicycle vacation, bike travel, Bike Tour Planning, Plan a Bike Tour, Plan a Bicycle Tour, Bike Travel Planning, Plan a Bike Travel Tour, Plan a Bicycle Travel, cycle journey planner, plan bike trip, bicycle route planner, bicycle route planning, bicycle vacation, bike travel, bicycle tour planner, plan a bike ride, bike tour planner, bicycle route planning, bicycle vacation, bike travel, planning for bike touring, planning for a long distance bicycle tour, planning for cycle touring, planning for a long distance kike tour, planning for bicycle touring, Plan a Bicycle Tour, Bike Tour, Bicycle Tour, Cycle Tour, tools bike touring, bike touring tools, planning bicycle touring trip, self supported bike touring, bicycle tour planner, plan bike trip, how to start bicycle touring, mountain bike tour, planning a bike trip, gear list, equipment list, bike gear list, bike equipment list, bicycle gear list, bicycle equipment list,
 Top
Top"It is better to travel well
than to arrive."
Buddha
For Prospective Cyclists!
-
Bicycle touring is exciting! It is fun to share the experience with a friend and/or family. Get one's self, bike, and gear into a situation where everything can travel from Point A to Point B and spend the night there and then, either, go back to Point A the next day or ride onto point C. It does not have to be a big distance and motels are just as acceptable as camping. Many people have never camped before and it may be wise to avoid the stress of learning too many new things at the same time. Also, if the reader is new to camping, consider looking for some help or advice from experienced travelers. In any case, work from a plan that allows one to learn in steps and be able to make repairs or adjustments to everyone's learning experience.
The learning process is exhilarating.
When riders have developed confidence for basic bicycle tour travel, then direct new efforts to learn about and perform transport to and from different places via car/truck, bus, plane, and/or train, which ultimately is leading to foreign travel. Bicyclists have one advantage right from the beginning because almost everyone worldwide respects a person brave enough to tour by bike, no matter their nationality. In fact, foreign travelers are usually extra respected because of their courage and effort to visit another land and its people, in person.
For Every One
For every Bicycle Tour, there are 2 Plans:
1) How to 'Get There' to the Tour Location, and
2) How to conduct 'The Tour Itself'.
Sometimes, a local tour merges both plans.
We share the issues involved for both plans.
- Anonymous

Bicycle Tour Planning - Linked Graphic Table of Contents:
Bike Tour Planning, Plan a Bike Tour, Plan a Bicycle Tour,
Bike Travel Planning, Plan a Bike Travel Tour, Plan a Bicycle Travel,
cycle journey planner, plan bike trip, bicycle route planner,
bicycle route planning, bicycle vacation, bike travel planning,
bicycle tour planner, plan a bike ride, bike tour planner, Plan a Bike Tour,
cycle journey planner, plan bike trip, bicycle route planner,
bicycle route planning, bicycle vacation, bike travel, planning for bike touring
planning for a long distance bicycle tour, planning for cycle touring
planning for a long distance kike tour, planning for bicycle touring,
Plan a Bicycle Tour, Bike Tour, Bicycle Tour, Cycle Tour,
tools bike touring, bike touring tools, planning bicycle touring trip,
self supported bike touring, bicycle tour planner, plan bike trip,
how to start bicycle touring, mountain bike tour, planning a bike trip,
Top,
Travel Leg Planning,
Planning Metrics,
Route Planning,
Scheduling /
Itinerary
This is an Education and Planning Section, for an Actual Tour USE THE CHECKLISTs.
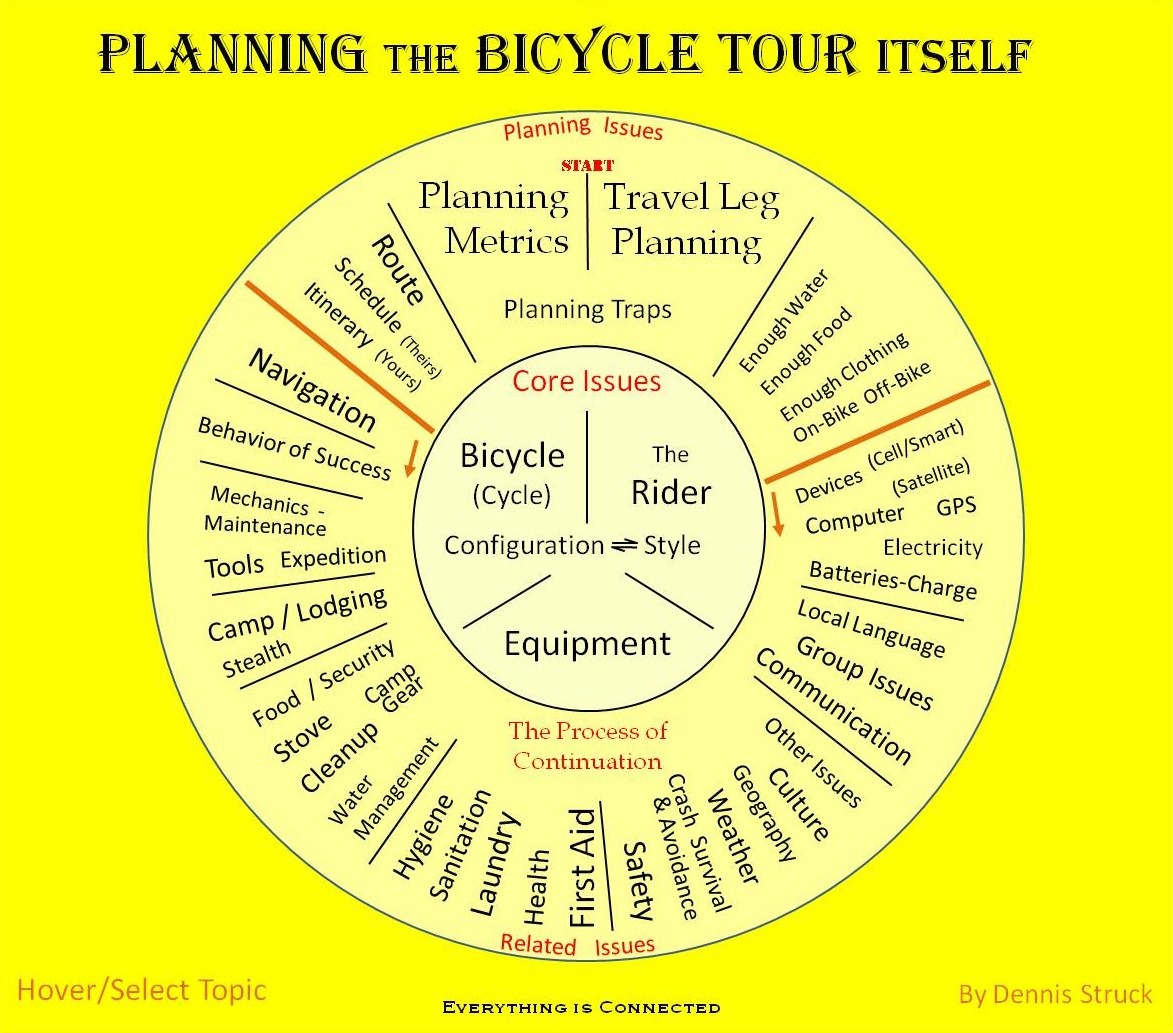
Interactive Graphic, Click on Topic.
 Bicycle Tour Planning Metrics
(For Self Contained Tour Loads, aka 'Fully Loaded'):
 cycle journey planner, plan bike trip, bicycle route planner,
bicycle route planning, bicycle vacation, bike travel,
planning for a long distance bicycle tour,
 Top,
Bicycle Tour Planning Graphic,
Travel Leg Planning and Management,
Route
These are good, base, distance calculation figures for planning bicycle tours for carrying fully self contained loads. These figures represent a pace that is between leisurely and pushy. These Metrics can be adjusted with experience or a change in variables (like terrain, load, tour purpose, health, or performance).
Calculation Metrics For Bicycle Tour Planning Purposes
(For Self Contained Tour Loads):
- Road Touring: 10.0 MPH / 16.0 KPH (hard pack or asphalt);
Expect 7.0 MPH / 11.2 KPH for dirt/gravel road, wet, or wind conditions
(-1 mph / -2 kph for panniers + trailer). - Mountain Touring: 7.5 MPH / 12.0 KPH (dirt road),
Expect 5.5 MPH / 8.9 KPH for single track, rocks, soft, or wet conditions
(-1.5 mph / -2.5 kph for panniers + trailer).
-
Times (X)
-
Plan & Target for 6 Hours of Cycling Time / per Day
- The cyclist adjusts for known long/short or difficult stints and allows for people/place/event visits.
- Reduce estimates for rides known to be in windy areas or possible single track, rocky, soft, or wet conditions.
- On a Loaded Road Touring Bike (non-mountain and mostly paved roads):
- 55-65 miles/day / 85-100 k/day is comfortable and allows for a couple of tourist stops/visits per day.
- 65-80 miles/day / 100-130 k/day is a push.
- On a Loaded Mountain Touring Bike (on mountains or mostly dirt roads):
- 40-50 miles/day / 65-80 k/day allows for a couple of tourist stops/visits per day.
- 50-60 miles/day / 80-96 k/day on a bike with panniers or a trailer makes for an arduous day (fully loaded).
- 20-30 miles/day / 32-48 k/day on a bike with panniers and a trailer on steep climbs, bike pushing, rough/exposed rocks, lots of gravel, stretches of soft sand, recently graded dirt, or wet conditions (fully loaded).
Which works out to (=)
Additional Bicycle Tour Planning Metrics and Caveats:
- Schedule at least one non-cycling day about every seven days - This is often called a Down Day, a Self Maintenance Day, or a Bike Maintenance Day. These Down Days are usually better scheduled in a larger town with an open bicycle shop, grocery store, and a wash facility. These days are often associated with a lot of battery charging while conducting other bike tour duties and/or activities.
- Allow adequate time for people to visit attractions or events (which are often the real reasons for the tour). Especially for bicycle tours that go through areas that are rich in culture or history. Note: When touring, we have found interesting local history places that were not on tourist maps or brochures.
- Some Caveats:
- On tours of ten or more days, it is not unusual that on at least one day the cyclist will need to travel 80-90 miles in one day and typically the reason has to do with food, water, shelter, or climate.
- These metrics are for healthy adults.
- Most people who exceed these long evolved formulas either do not have a good time or they develop physical injuries (like blown knees) or they get so sore that they quit the journey and they may never return to cycling again. This is especially important to the other riders invited to join.
Apply these Metrics to Travel Leg and Route Planning (which follow).
Bicycle Tour Planning:
Travel Leg Planning and Management
(Bicycle Travel Planning, Issues, and Management)
cycle journey planner, plan bike trip, bicycle route planner,
bicycle route planning, bicycle vacation, bike travel
Once a person understands the Travel Leg concept,
planning for how much food, water, and clothing
to carry becomes much simpler. - Dennis Struck
Top, Tour Planning Metrics, Route, Geography, Enough Clothing and Gear, Enough Water, Enough Food,
Food Security, Travel Planning (International and Local - How to Get There), Bicycle Tour Planning Graphic (the Ride Itself),
Bike Clothing Checklist, Off-Bike Optional Clothing Checklist, Bike Tour Checklist
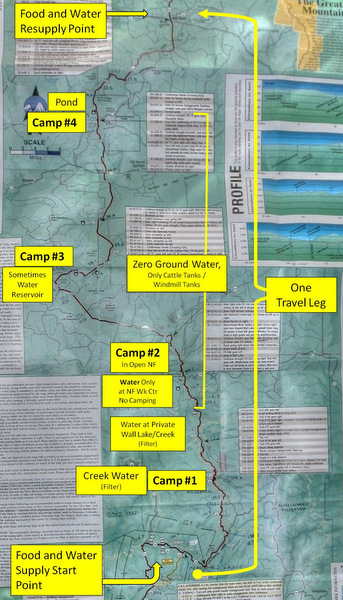
- A Travel Leg addresses all of the logistical issues involved to get from one Supply Point to the next Resupply Point.
- The Beginning and Ending of a Travel Leg is a Food and Water Supply Point.
- A bicycle tour is a collection of Travel Legs. Most planning and logistical issues in the field are centered on the concept of travel legs.
- The main variables are supplies of food and water, as most of the other supplies and gear for a bicycle tour are constants (which are generally present at the beginning and ending of the tour and carried throughout the tour).
- Travel Leg planning and accomplishment is oriented about successfully planning for and completing Travel Legs and addressing the risk of something going wrong (ergo cyclists may carry contingency supplies, especially in terms of extra food and water).
Travel Leg Planning: Questions to Answer:
- First: Identify the Travel Legs.
- What is the longest Travel Leg of the planned journey?
- What is needed, in terms of food and water supplies to get to the End Point of the Travel Leg(s)?
- How much travel time will be involved (which determines the 'per person' meal counts and water volume needs)?
- Are there interim water resupply points (cyclists should consider water filter/purifier system(s) and bulk water storage containers.)?
- Address Travel Risks, What can go wrong?
Travel Leg Planning Characteristics:
- 45% of all Travel Leg distances are attainable in 1 day.
- 70% of all Travel Leg distances are attainable in 2 days.
- 85% of all Travel Leg distances are attainable in 3 days.
- 95% of all Travel Leg distances are attainable in 4 days.
- 99.9% of all Travel Leg distances are attainable in 7 days.
- Access to safe drinking water, while enroute, is a major survival issue.
- It is very difficult to carry more than 3 days of water supplies on a bicycle. Such a journey can be achieved but it usually changes the travel mode from tourist mode to travel survival mode (virtually no personal bathing, no salty foods, protein foods rule, maybe no cooking, ultra minimal cleanup, no frivolous things to carry, no wasted travel time or effort, distance matters; travel time of day, temperature, and weather are movement control factors; give careful consideration toward helping others, and be very wary of strangers).
- Do see and know Water Management and Planning Issues.
- Carrying bulk water supplies (4+ Days) usually requires an extra/third wheel device or a trailer as well as bulk water containers.
- Carrying 7 days of food is cumbersome, achievable, and not that unusual; the durability and sustainability of selected food stuffs must be considered (often with a high calorie to weight ratio).
Generally:

 THE ROUTE - Bicycle Tour Route Planning,
Bicycle Tour Planning and Issues,
Bike Tour Route Planner:

Top,
Tour Planning Graphic,
Travel Leg Planning,
Tour Planning Metrics,
Enough Clothing (and Gear),
Enough Water, Enough Food, Weather, Geography, Navigation, Camp/Lodging,
Bicycle Tour Route Planning and Management
Table of Contents
1) Organization,
2) Planning,
3) On the Route
Some Bicycle Routes are obvious or already exist and some routes have to be determined by the cyclist(s). Planning a bicycle route can be very exciting. It is highly recommended that the route planning process be shared by ALL of the participating riders.
Bicycle Tour Route Planning Notes:
1 - Organization:
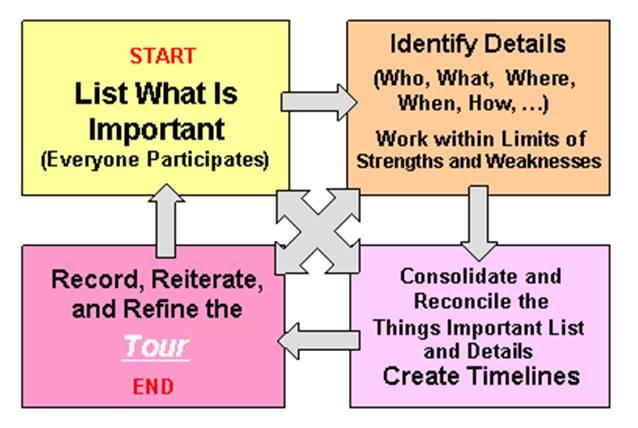
- Share the Bicycle Tour Route Design with ALL of the tour participants. The 'Route Design' is a Task within the greater Tour Plan. The Tour Plan can and should use the same model (or anything similar).
- The Route Design will be and should be a Reflection of the Strengths and Weaknesses of the Bicycle Tour Members. Strengths and Weaknesses are also known as:
[Positives] Capabilities, Capacities, or Competencies
[Negatives] Boundaries, Constraints, or Limitations
and they are "Indicators" of available Time, Location, Resources, Skills, and Assets (Money, Material, Mental ...) and they are balanced against Wants, Needs, and Risks.Determine early on and identify the constraints of the tour, setting time limits and/or time frames (if they exist). Loosely determine where the tour will take place and maybe evolve a generalized start-point and end-point location. Informally or formally establish: the generalized tour purpose or goals, the financial boundaries, and identify the sites and/or events that are desired to visit (very often this is what sparked the tour idea).
- 'It is not the Plan that is important; it is the Planning that is important', Famous Generals have said. (Eisenhower, Rommel, Yamamoto)
While in the planning process, many planners have learned of several different alternatives or scenarios, and based on what happens in the field at reality time, there comes to be different options to implement based on the actual field situation.
Plan, but 'Be Flexible' to implement course changes based on changed situations or changed expectations. - Not a single Bicycle Tour has been entirely executed 'As Planned'.
2 - Planning:
-
Route TOC
 This entire Website is about Bicycle Tour Planning.
Almost every important Tour and Route Planning Topic has been discussed in some detail under some Bike Touring Subject Heading within this website - The links to all of these Route Planning Subject Details are listed in this 'Route Plan' section.
- These issues affect Route Requirements as well as Places of Stay (everything is related):
- Determine, early on, if the tour will incorporate 'A Style of Mostly Camping or Lodging Only' AND simultaneously Determine if the Route must be riden on Solid Paved Road, Off-Road/Trail, or Mixed On-Off Road?
- If camping, determine if there will be a Stove for Cooking?
It is possible to implement a Non-Cooking Meal Plan that incorporates eating all-to-many meals from (either or both):- Roadside Vendors, 7/11s, Petro Markets, Grocery Stores, Restaurants, ...
- Sandwiches, Protein Spreads (Nutella, Peanut Butter, Almond Butter), Cheese, Bread, Granola, Trail Mix, Jams/Jellies, ...
- Determine, early on, if the cyclists will be carrying Water Filter/Purifier Hand Pump Devices.
- Determine How Much Clothing (and gear) to Carry. This process affects the route selected and the route selected can affect how much and what clothing to carry.
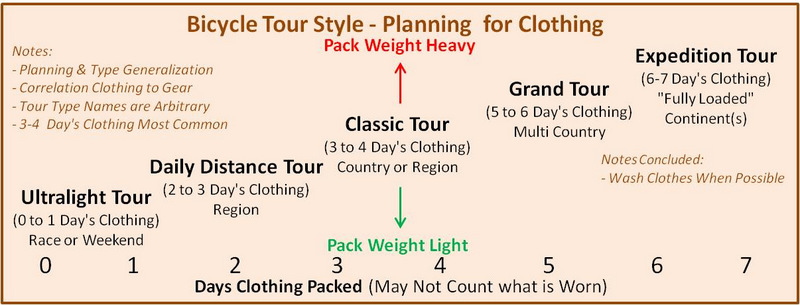
- Review the Planning Relationships between the Touring Style, Gear Carried, and Clothing Carried
- See Bicycle Tour Planning Traps and Pitfalls.
- Use the Route/Distance Planning Cycling Metrics.
- Be familiar with the concept of a Travel Leg. All Travel Legs start and end at Food and Water Supply Points.
- Objective: Plan Routes such that the Cyclist(s) have Enough Water and Enough Food.
Always know where the Food and Water sources are located. If needed, shift the path of the Planned Route in order to accommodate access to known or more preferable or safer Food and Water sources.
- If there are calculated times where the Cyclist needs to go for days at a time without supplied Food and Water, then the Cyclist will need to carry such supplies (and have the bike equipment to carry such supplies). See the Bicycle Touring Checklists and various Ways to Configure a Bicycle, depending on situational needs.
- Rider Safety is very important. Generally, a cyclist will avoid heavier automobile and commercial traffic areas/roads and select the safer cycling route(s), off of the main roads. Often these safer routes are at a cost of more time or distance to be traveled and they are often the more scenic choice. Most cyclist perform this task without thinking about its importance.
- If arriving by public transport (airplane, train, bus, ...) plan the tour start for the next day, it allows for transport things to go wrong. If you arrive on time AND everything is in order, then take time to tour the local site (think of it as a bonus). There are way too many things that can go wrong with arriving at a foreign destination and departing by bike or other arranged transport all on the same day - DO TAKE IT UPON YOURSELF to build in a risk mitigation buffer of time.
- Determine and work around Holidays (Home and Destination).
- Use Maps, real or virtual, for Planning: Sources are Map Stores, Google, Internet, Local/Country Bicycle Tour Network(s), Bike Clubs, and some of our tour planning maps (a limited listing).
Also see the Route Planning Notes on the same page (most of it is repeated elsewhere). - Don't confuse Kilometers with Miles (know the Country's Unit-of-Measure).
- Map/Route Marking: Mark your Map, make side Notes. See Map Marking.
- Post necessary phone numbers or notes onto the map's route AND/OR onto a Schedule/Calendar styled Itinerary.
- See Travel Tips and Lessons Learned
- See Navigation, Old World Issues (lots of stuff, takes a while to digest, many travel lessons).
- See Things to Consider for an Itinerary.
3 - On the Route:
-
Route TOC
Be familiar with the Travel Experiences of others, as they can save a cyclist some time, frustration, or worry.
- Be prepared for unexpected changes:
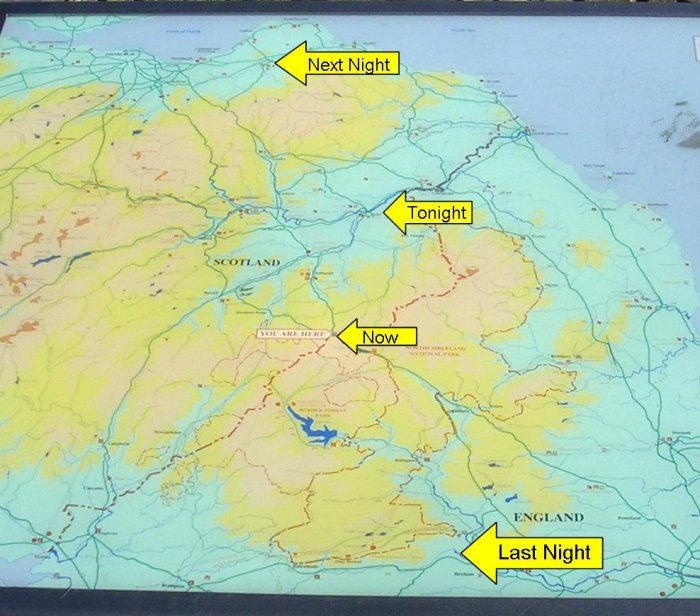
We have had to deal with canceled flights (throwing off timing and pre-paid reservations), a military training exercise closing a town and roads to all but military traffic, a large segment of a town being closed for construction, a large segment of a city being closed for a huge political state visit (see right side picture), washed out bridges and trails, floods, the only grocery store is closed (family emergency), the only campground is closed (see stealth camping), nothing open on a weekend (common outside of EU & USA), riding the wrong train, missing a train stop, late buses (broken or driver takes a nap), late hotel checkout due to bikes being locked up and the manager with a key arrives late, foreign rail depot under construction with no lighting at night, and broken ferry ships.
- While touring on the route, it is smart to ask others coming from your destination about the conditions there and conditions along the route. Do not be surprised to find another cyclist asking you similar questions about from where you are coming.
- At places of stay in cities, ask for the best/safest cycling route out of town.
- In hot climates, there is a reason for Siesta's and many Mom and Pop Food Shops (Water sources too) may be closed at Mid-Day. See Hot Climate Issues
- Many cyclists tour with an eye for Do-It-Yourself Laundry Facilities.
- Know how to use a Compass, Clock and the Sun for Navigation, know your hemisphere.
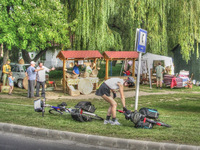
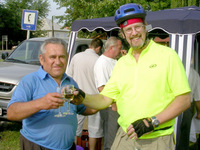
- Many cyclists tour with an eye for unexpected local village events, celebrations, or holidays. These things represent the heart of what touring is about, Do Drop In! - See Images Below.

 Bicycle Tour Planning: Traps and Pitfalls
(For Self Contained Bicycle Tour Loads, aka 'Fully Loaded'):

Enough Clothing (and Gear), Enough Water, Enough Food,
Use the Bicycle Tour Planning Graphic for the Ride Itself (plan/route and issues to address) and use Travel Planning Checklist (for planning to get to the Cycling Destination). The following Cautions or Warning are enroute travel Traps and Pitfalls - Be aware of these situations while carrying 40 to 80 pounds of gear and while planning a trip.
- One pass a day, valley floor to valley floor, in 8,000+ Foot Mountains, can represent a full day's workout, energy wise. Two passes in a day, fully loaded, can leave cyclists bonked and cause physical energy depletion problems.
- Take your Breaks! It is wise to build and conform to a routine that generally facilitates:
- Rest for five minutes, about once an hour.*
This is usually a water sipping break, sometimes associated with a potty break. - Break for 15 minutes, about every 2.5 hours (twice a day). This may coincide with time to be a tourist at a site, or it may make for a nutritious break at a road-side overlook or rest area. Usually this is the time for a mid-morning snack and a mid-afternoon snack.
- Take at least 15 minutes for lunch. Some people take little 15 minute cat-naps at lunch time (especially in groups, where the Break's duration may be 45-60 minutes). In groups, one may have a lunch preparation duty to perform.
- After cyclists are in routine, these breaks seem to occur naturally.
- Don't forget to Eat! Stick to the previously mentioned rest/snack schedule. Experience: We once had a heavy dinner the night before a major tour. No one felt like eating breakfast at the tour's start. We had mechanical trouble and resolved it when we would have normally have had a morning break/snack. We had the break but not the snack. This was an uphill climb, all day long. As the noon break arrived, we realized that we were energy depleted. Up till this point, we were running on the excitement of a new tour. We ate but we were mentally and physically behind the energy curve for the rest of the day and our metabolisms were out of sync for two days. We survived, but the tour was not as much fun as it should have been.
- The best daily biking routine in the mountains, for us, is to: start the morning with a climb (because it's cold out and climbing warms one up and we have fresh legs); be over the pass in the morning (because rain and lightning appear in the afternoon or evenings on most passes); spend the warm part of the day on the lower altitude flats (where and when one is expending the least body energy); and by noon time, start climbing up the next mountain (a sufficient distance to get into trees, cool air, and available water and still leave about 3-5 miles to the next summit).
- Travel Direction Planning/Considerations: The core idea here is to remind cyclist to use Nature to one's advantage
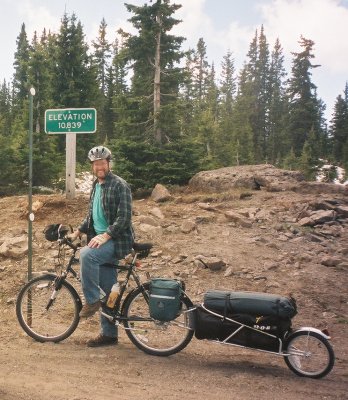
 Sun and Mountains: One generally wants to be moving from North to South (in the northern hemisphere) so that the sun is not to one's back for long hot climbing work - There are always exceptions to consider. One exception is cycling continents or major portions of a continent, like the entire Great Divide Bike Trail (in North America) over a few months time frame. In the case of the Great Divide, We've seen snow in June in Wyoming and Colorado, and passes in Montana may still be closed until July (because a snow plow can't get through). Look at our June 25, 2005, Meaden Pass Adventure (alternate Great Divide Route). Many people bike the Great divide from south to north, starting in late May or early June (Summer Break/Summer Vacation), so that the passes can melt free of snow or the mud can dry out in the high country of the Northern USA or Southern Canadian Mountains by the time that the cyclist gets there.
- Wind and Season: Most routes or locations have favorable winds, trade winds if you please; take the time to learn of typical winds for typical time frames. Kansas is famous for mid-summer winds that go from east to west for the Trans-American Bike Route where most of the remaining route's winds are west to east. Most large loops, over four days travel have favorable directions for wind or terrain. Caribbean and Mediterranean Islands typically have a best direction for cycling (assume such for other Islands).
- Temperature: Sometimes a cyclist needs to be cycling early in the morning to avoid mid-day heat/sun. Sometimes it is smart start the day late and end the day late to avoid freezing morning temperatures. Sometimes it is wise to 'Hole-Up' (stay in lodging) for an entire day or half a day because of a storm front passing through.
- Sunrise and Sunset: Usually, this isn't an issue to cycling navigation so much as "Be Seen" Issue for Vehicular Traffic.
- If bogged down in the planning detail, just go. Don't get bogged down in planning entropy. This knowledge is learned over time. Besides, the really good stories come from one's mistakes. Go out there, HAVE FUN, and learn!
- Assumption: Road Bikes will typically have smoother and slightly narrow tires and the Mountain Bike will be on knobby or grip like heavier and wider tires. Smooth tires on hard roads get about 3 MPH more speed than knobbies and smooth tires on mountain gravel trail slopes or wet dirt slopes have to be pushed more frequently; also street tires suffer more flats in off road conditions.
- Trailers and Rolling Resistance: A cyclist can feel a distinct difference in rolling resistance (tire drag) when a trailer or wheel is added. The additional wheel's road friction is noticeable. That first additional wheel seems to add or take 30 Percent more energy or effort (everything else being the same). There is no need for trailer wheels to have knobs or significant treading; a tough slick tire offers the least amount of resistance.
- Don't confuse Miles with Kilometers: See Measurements and Conversions.
- 1 Mile = 1.6 Kilometers
- 1 Kilometer = 0.62 Miles
- 25 Miles = 42.3 Kilometers
- 25 Kilometers = 15.5 Miles
- Hot Climate Issues:
Night Routine Issues:- Cultural habits formed way before electric air-conditioning. In hot climates, it does not get cool enough to sleep until about mid-night, so people stay up later, eat later, and work at home later than in Temperate Climates.
- Hot Climates stay cool enough to sleep well until 8 AM, so culturally, there becomes an ethic to sleep about 8 hours which ranges from 12 PM to 8 AM. The work day may start from 9 to 10 AM. This causes planning adjustments to cyclists who may want to start at first light and take advantage of cool air environmental conditions.
- There is a reason for Siesta's. It can be dangerous to be outdoors during the high sun.
- This can be a good time to be out of the sun, but note that some smaller businesses are virtually closed during siesta time in most villages (including food markets).
- Try to makes plans such that the cyclist is indoors or attending a site seeing tour during the heat of the day. This is the time to visit a Museum, Castle, Fort, or attend a local tour on an air conditioned bus.
- Try to start cycling earlier in the day (like 6 or 7 AM) in order to avoid cycling in the hot sun after noon; sometimes this means making arrangements with the lodging facility to issue a bagged breakfast meal (sandwiches and fruit) because this may mean that the cyclist will miss the scheduled 8 or 9 AM breakfast serving.
- Perform any Market shopping for Lunch or other future meals, early in the day. Markets often close anywhere from noon till Three PM.
- Managers won't show until 9 or 10 AM. So, if they have locked your bikes away or locked the cash register, you will not be able to depart until the Manager shows up to work. Pre-Pay for the lodging and do let the manager know your departure intentions and needs.
- It is wise to pre-discuss your early departure plans with the owner or manager. This is the time to make arrangements for some food supplements like lunch and interim snacks.
- Many Cyclists like to start biking at first daylight (to take advantage of the cool of the day). If the cyclist is at lodging, then let the owner/manager know of the intentions because they/staff may not show up until 0900-1000 hrs (as is their local custom). It is good to prepay and settle all debts the night before. Also, if a continental breakfast is involved (which may not be setup until 0900) then consider requesting a bag breakfast to-go.
- Changing Countries: Generally bicycles are not impeded, but to be safe and because of political weirdness, plan on nearby stays and short travel distances for days that include a Foreign Country Immigration / Customs check. This process does seem to go faster for established travel groups. See Next Note.
- Airplane and Arrival: Air flight timeliness is becoming more problematic; it is wise to NOT plan a bicycle tour start date for the same day as arrival by way of international flight. There are just too many things out of the control of airlines (let alone the aircraft issues) that can delay or cancel an airplane flight or a connecting flight.
- It is becoming very wise to plan a one day arrival-departure risk mitigation buffer.
- If all of the arrival travel goes as planned, then have a day or night touring and/or dining in the town, think of it as a bonus.
- It is also helpful to know where a bike shop (missing/lost part), big grocery store (basic load, see next bullet for food issues), and pharmacy (last minute meds/hygiene) is located near the arrival point or place of stay.
- It is wise to plan your first night's place of stay be near the same locations.
- Food, Agriculture Zones, and Country Boundaries: It is quite typical that most foods, especially meat, dairy products, fruit and vegetables, can NOT go across borders or agriculture zones. Usually canned and bottled foods may go across a national border. While national borders are known and understood, sometimes agriculture zones can sneak up on a biker without prior knowledge. We got caught in one of these zones, unbeknownst to us, between South Australia and Victoria and we had to throw away food that we just bought that morning. There is another famous Agriculture Zone in Arizona that prevents many types of fresh food goods from going into California.
- Bicycle Touring is about life and its enrichment for everyone. Remember to be a Tour-ist, visit local culture! Drop in on festivals. Share life with the local peoples, stop and talk especially when someone stopping their work to make a friendly greeting or gesture. Visit historical monuments. Take time to enjoy life! Touring is NOT about distance or days. Participate in Life!
* This can be problematic if wearing a hydration pack, whereas stopping to sip from a water bottle automatically creates a little rest break for the body, hydration packs allow a rider to keep riding without stopping - this can be good for fluid intake but sometimes bad for muscle recharging/longevity. Imagine hiking without stopping for body break/rest, it's not good for the body in the long run. Take your body rest breaks!
and to avoid situations where one is fighting Nature.
Back to:
- Bicycle Tour Planning graphic (the Ride Itself)
- Travel Planning (International and Local - How to Get There).
Bicycle Tour Style:
"What to Bring" -
Style Reflects the Mindset and Attitude of the Cyclist
(AKA The Tour Travel Mode, Peragro Modus Operandi, How I Ride)
Bicycle Tour Style, What to bring on a bicycle tour, bicycle tour choices,
Mindset and Attitude, Travel Mode, Peragro Modus Operandi, How We Ride, How I Ride,
How I Roll,
Top,
Bicycle Tour Planning Graphic,(AKA The Tour Travel Mode, Peragro Modus Operandi, How I Ride)
Lodging Location: Camp Site to Hotel, Lodging Gear: Full Camp to Town/City Stays,
Food Preparation: Stove Cooking to Eating Out, Food Quantity: Full Duration to Daily Shopping,
Food Gear: Full Kitchen to Spoon & Pot, Water Quantity: Full Duration to Daily Re-Supply,
Water Source: Water Purifier to Tap Water, Clothing Quantity: Expedition to Ultralight,
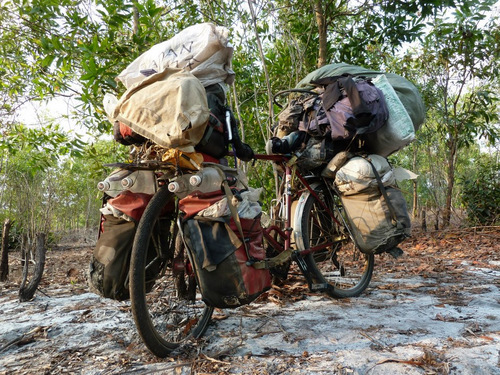
Ultra-Light Expedition-Heavy
Bicycle Tour Style is all about 'How one Rides.' Bicycle Tour Style becomes a reflection of the Cyclists Mindset and Attitude for a particular Tour. A person's Bicycle Tour Style may or may not change over the course of time but for most riders the Bicycle Tour Style changes a little for each ride, each change reflects a learning experience or a desire to, either, try to improve some aspect of riding or just to experience a change. Bicycle Tour Style addresses the varying levels of travel risk that a traveler sets or accepts for their self for a particular bicycle tour for a particular issue.
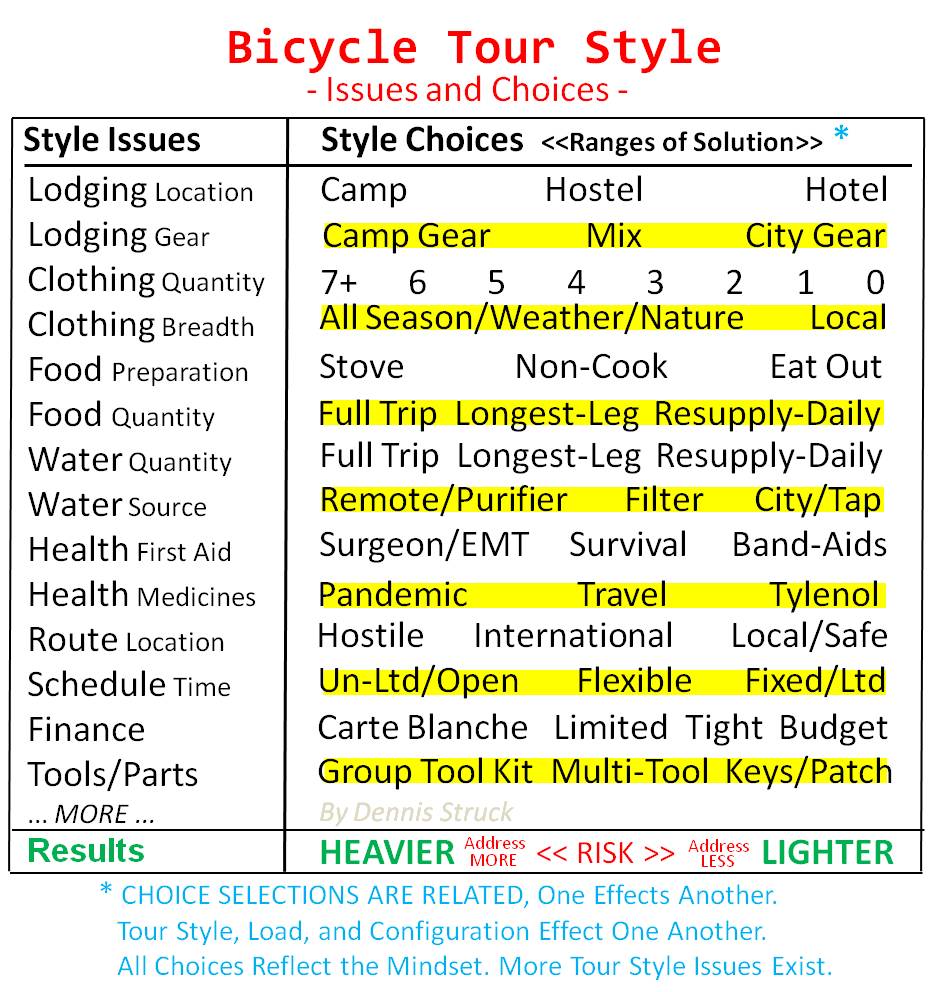
The 2 most important Bicycle Tour Style decisions address Water and Food, but oddly the 2 issues that typically cost the most time (and stress) address Lodging and Clothing.
A cyclist's Bicycle Tour Style ...
- reflects and affects the cyclist's attitude and mindset for a particular tour.
- is effected by the Budget, Time, Location, Resources, Skills, and Assets and they are balanced against Wants and Needs.
- addresses how much food, water, and gear the bike should be capable of carrying (which directly effects bicycle configuration).
- solutions or decisions affect one another (food, stove, sleeping bag, tent, and gear).
- addresses what and how much clothing should be carried (type and quantity).
- addresses how the cyclist will spend their nights (hard roof, cloth roof, or open).
- addresses one's bike maintenance status (bicycle tools, repair, and parts).
- addresses one's health status (medicine, OTC to Rx, location issues).
- addresses meals (whether one cooks, carries pre-cooked food, or purchases as one travels).
- addresses where one travels route wise (cities, country, off road, safeness and remoteness).
- may be influenced or changed by a group need or a learned travel need.
- effects one's bicycle configuration (panniers, racks, cages, bags, devices, trailer, ...).
Lodging Location: Camp Site to Hotel
For Bicycle Tour Planning
Top, Bicycle Tour Planning Graphic, Travel Leg Planning, Bicycle Tour Style, Route Planning, Stealth Camping
Places for a ciclysts to sleep (night or day) range from camp grounds, stealth camp, open areas, yards, homes, hostels, pensions, motels, and hotels (and other creative places have been used in special circumstances like cars, trailers, and park benches). When a cyclist or group of cyclists formulate their Bicycle Tour Style (aka strategy or plan), one of the first considerations is whether to perform Mainly Camping Style or Only Lodging Style.
Where one chooses to cycle may well determine the Lodging Choice. For example, if one is cyling the Great Divide Mountain Bike Route (GDMBR), the Outback, or Patagonia and since their are very few places to lodge, then one must camp - The location choice dictated the decision. In other situations like coastal Europe or Asia, one usually has a choice of mostly camping or staying in hard lodging (rooms to let, motels, hotels).
The BIG POINT of determining the Lodging Bicycle Tour Style is that the outcome helps determine what is needed for travel and the same outcome helps determine the touring configuration of the bicycle. A decision for one Bicycle Tour Style Issue effects one or more other Bicycle Tour Style Issues (like what and how much clothing to bring, what and how much camping and cooking gear, what and how much personal gear/acoutrments, and what and how much bike maintenance gear).
Finding a place to stay is not a given, the process may require attention and prior planning. The issue is particularly problematic during the Summer around Destination Resort Areas, where the cyclist will be competing with motor vehicle drivers for Lodging Space and Campground Space.
- 'Lodging Demand' rises for weekends or holidays and peaks for Summer Weekend Holidays.
- In the USA Northeast and a lot of Highland/Mountain Europe, and a growing number of other places, unless a traveler has made a reservation, there may be 'No Room at the Inn'.
- Holiday Weekends, now, have to be booked weeks in advance.
- Almost all Weekend lodging has to be performed 2-4 days in advance.
- Week day Lodging will typically require 24 hours notice (or more).
- If a person is touring by bicycle and staying at Hotels, Motels, Resorts, Cabins, Hostels, or Pensions they will likely need to make advanced reservations.
- USA Parks and National Forest Campgrounds are following the same line of track. Most of these places now have contract campground reservation management and all reservations are done by phone or internet services. The days of 'First Come, First Serve' are over, now it is 'First Call, First Serve'.
- If the name of the campground's campsite is known then finding a telephone number is relatively simple. But if the cyclist is looking at a map, and a campground is indicated without a name, then finding a telephone number can be much more difficult.
- The Good News is that if one is camping off of a bike (fully Loaded, Self Contained), then the campground officials will typically accommodate cyclists as 'Walk in Campers' (people that camp in tents and do not have to have an adjacent Car Park). The Bad News is that during a Holiday, Campers may be turned away without reservations.
- It is becoming increasingly more important to carry a smartphone and maintain paid campsites or lodging a day or two ahead and really pay attention to weekends.
- There have been cases of campers having to wait at one site over a weekend because the next place(s) down the road were all booked-up for the weekend. The Yellowstone area is notorious for this kind of situation and the Great Divide Mountain Bike Route snakes around the southwest corner of Yellowstone NP.
- All over the world, if a person books more than a day ahead, the lodging will likely be less costly than waiting until the last day to find a place of lodging.
- Almost ALL rates go up for that evening if one waits until that same evening to book or drop into a Place of Stay. This is especially problematic in tourist and resort areas during their prime season (which is when people like to ride bicycles).
- The Good News for many campers on back trails in USA National Forests (NOT to be confused with National Parks) the cyclist can camp anywhere that is not near a No Camping Sign nor near a Camp Ground.
- See Stealth Camping.
Always try to book at least 24 hours ahead, because the lodging prices generally go up on the day-of versus the day-before (an ancient business practice).
One must have a cell phone now, if touring for days at a time, especially if not camping.
It is to the point that one must have a cell phone and a computer or one must have a smart phone, in order to book camping/sleeping reservations ahead of time.
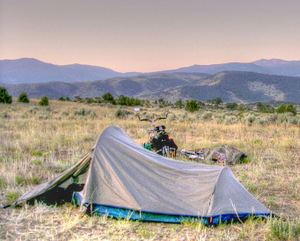
Bicycle Tour Lodging Gear
"What to Consider" - From Camp Gear to Town/City Gear
Tour Style and Planning Reflects the Mindset and Attitude of the Cyclist
Bicycle Tour Style, What to bring on a bicycle tour, bicycle tour choices, Mindset and Attitude, Travel Mode, Peragro Modus Operandi, How We Ride, How I Ride, How I Roll,What to Bring, How much to pack, How much to Carry, Method, Planning, Reflects the Mindset and Attitude of the Cyclist,
"What to Consider" - From Camp Gear to Town/City Gear
Tour Style and Planning Reflects the Mindset and Attitude of the Cyclist
Bicycle Lodging Gear encompasses the range of supply/gear considerations from a Full Set of Camp Gear (tent, sleeping bag, and associated outing materials) to carrying zero Camping Gear and maybe carrying City Gear for Living and Touring in a Local Metro Area, the tour selection may even be a mix.
Planning a Bicycle Tour?
First, these Questions needs to be Answered.
Q2: What is the approximate ratio of Desired/Planned Soft Lodging to Hard Lodging for the bicycle tour?
A1: The answer determines whether a cyclist needs to pack and carry camping gear and it will indicate whether City/Town Gear may be necessitated. On long tours, most cyclist carry camping gear and a little city wear.
A2: The Ratio of Camping (Soft Sided) to Non-Camping (Hard Sided) Lodging may HINT to the Degree of What Camping Gear the cyclist may want to carry (depending on their individual style) versus What City/Town Gear the cyclist may want to carry (depending on their personal style). A Higher ratio indicate a Higher Camping percentage which implies a more dedicated camping type/style of touring, conversely, a low ratio implies a desire for more Hotel/Friend type/style lodging.
What Camping Gear should a cyclist consider for soft sided lodging (tent, stove, food, clothing, if any at all) versus What City/Town Gear should a cyclist consider for hard sided lodging (suit, dress, slacks, backpack, if any at all)?.
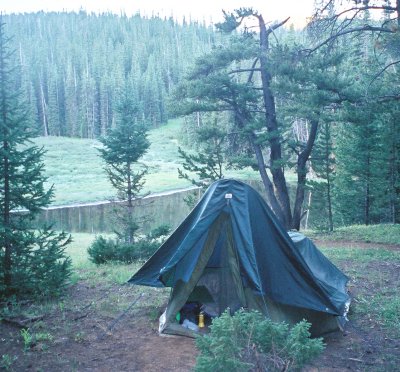 The Good News is that Camping Gear can reduce much of the stress about finding a place to sleep. If a person needs, they can Stealth Camp (remember that Stealth Camp means not being discovered, often the Camper is in and out of camp while it is still dark, read more about Stealth Camp).
The Bad News is Camping gear adds weight to be pedaled every time that the cyclist is bike touring. The amount of Camp Gear (Expedition to Ultralight) depends on the Cyclist's Expectations which consider route remoteness, distance to be traveled daily, and how often one camps versus staying in hard lodging. Town/City Gear is not heavy per se, but it can be bulky and take up space.
See the Main Checklist Pages for:
-
Bicycle Tour Checklist
Bicycle Camping Checklist
Off Bike Clothing
Bicycle Optional Tour Items Checklist
Bicycle Ultralight Camping Checklist
Bicycle Expedition Tour (30 + Days)
Soft Structure and Hard Structure Lodging Attributes and Issues
(All Restated from Previous Listed Checklists):
- Please note that Basic Food/Sustenance, Non-Cook Food/Sustenance, Cook + Non-Cook Food/Sustenance, Cooking suuplies and Gear, On-Bike Clothing, and Off-Bike Clothing are separate issues but what a cyclist carries is interrelated. If someone is Camping, they are more likely to be carrying Cook Gear, more Food, and more Clothing. There are many cyclists, camping or not, who do not cook, See Non-Cook Meal Style.
- There is an Ultralight Camping Checklist, Basic Camping Checklist and an Expedition Bicycle Touring Checklist. All of the Checklists are worthy of a pre-review just to understand various cycle tour style options for travel along with their advantages and disadvantages (weight/distance, security/stress, performance/duration).
- Usually a Bicycle Camper carries additional camping supplies in a ratio of the expectation of Camping (versus Lodging). For example, if a touring cyclist were planning on a 10 Day tour and the cyclist was planning on Camping and Hostelling every other day (a 50% Ratio), then the cyclist probably will not carry a Solar Charger, Satellite Phone, Nylon Cord, Espresso Kit (some would), Binoculars, ... (versus if the cyclist were to be in the field the entire time).
- In an emergency, outside of cities, a person can usually stealth camp if they have Camping Gear and conversely, a person cannot camp without camping gear.
- A person can usually find lodging or a friend inside large cities.
- There can be tours where camping gear is not needed.
- There are cyclists who have never camped.
- There are cyclists who have only conducted supported bicycle tours.
- Most Cyclists, over time will try multiple lodging styles.
- There are cyclists who go into wilderness areas and occasional come out of the wilderness only go town for supplies (mostly food supplies).
- When Cyclists are conducting more Hardside Lodging, they often consider: more travel books, address book, and personal reading material (granted that more and more of this is becoming digitized), GPS devices, city and inner city transportation maps, fanny packs, electrical outlet converters, simple back packs, shirts beyond bike shirts, pants/skirt, non-bike shoes, sleep wear, more coins for laundry and transportation, laundry bag, bus pass, notebook computer, umbrella, ...
- Many Senior Cyclists gravitate toward All Lodging or Mostly Lodging for a few reasons. The Ground gets harder over time, their financial situation is much better than when they were younger, and after a while cycling with a load becomes much less enjoyable (the may carry a single ultra lightweight emergency tent (or bivy sack) and lightweight emergency sleeping bag much like an ultralight rider).
Bicycle Tour City/Town Item Checklists
(All Restated from Previous Listed Checklists)
2012-08-29 210.JPG[ ] Bicycle Security (Remove Panniers and other Bags/Kits, Pump, Tool Kit, use locks and cable/chain, lock or remove wheel unsecured wheel. Else use cable/chain through both wheels and frame). [ ] Carry Bag, Back Pack, Fanny Pack (Note that many travelers carry their packs facing forward in crowded tourist places, especially if in a known pickpocket area) [ ] Shirt (non bike) [ ] Pants/Skirt (non bike) [ ] Jewry (simple) [ ] Shoes (non bike, good for walking) [ ] Waterproof Jacket (rain and cool evenings) [ ] Hat/Cap [ ] Sleep Ware (PJs, Long Cotton/Silk Shirt) [ ] Hair Dryer (more than realized) [ ] Travel Book(s) (digitized or internet access is lighter weight) [ ] Address Book (digitized better) [ ] Reading Material/Book [ ] GPS (may be part of a smartphone) [ ] Telephone/Smartphone [ ] Notebook Computer, Smartphone [ ] Smartphone Security and/or Theft Shutdown Plan [ ] Local Data Access (local telephone plan or city pre-paid wireless plan or wire plan; most bigger cities have Cyber Cafés and/or block purchase plans that can be time lengthened via credit card) [ ] City Map (digitized better) [ ] Transportation Map [ ] Pre Planned Tour Schedule
[ ] Pre Paid Tickets/Receipts [ ] Bus/Train Passes (always cheaper to buy ahead for the amount of local visit days than to buy daily). [ ] Electrical Outlet Converters [ ] Access to Money (Bank, ATM, Wire, get/arrive with small bills) [ ] Coins (usually) for Laundry (sometimes in a Place of Stay, sometimes a Credit Card) [ ] Laundry Bag, Detergent/Soap (Some camp soap doubles as laundry soap, in general liquid soap dissolves better under more conditions than powder soap. Almost all soap costs less than if buying at a laundry mat. Sometimes reading the instructions can be problematic in another language.). [ ] Umbrella [ ] Blister Treatment Materials as part of First Aid Kit [ ] Allergy Meds [ ] Sunscreen [ ] Toiletry Kit/Bag [ ] Note Pad, Pen/Pencil [ ] ID, Drivers License, Passport, Insurance Card (some people photograph this material and keep it on their Notepad or Smartphone or in some cases their Camera Memory) [ ] Compass, Alarm Watch [ ] Word/Phrase List, simple Pocket Sized Translation Book [ ] Camera, Correct Download Cable [ ] Batteries/Charger [ ] Flashlight [ ] Optional: [ ] Pocket Knife [ ] Note: Bicycles and Gear parked in cities require extra security.
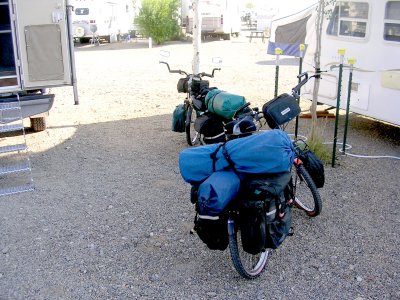
Bicycle Tour Planning: Enough Correct Clothing;
How Much Clothing to Carry on a Bicycle Tour:
Top,
Travel Leg Planning (Logistics),
Bicycle Tour Planning Graphic,
Travel Planning (Getting There),
Route Planning, Enough Clothing (Here), Enough Water, Enough Food, Food Security, Cultural Issues,
Clothing Issues, Bicycle Tour Load and Riding Style
![Sean Connery [James Bond] Commuting by Bicycle. Sean Connery [James Bond] Commuting by Bicycle.](CheckListPics/Sean_Connery_Bicycle.jpg)
This is an Education and Planning Section, for an Actual Tour USE THE CHECKLISTs:
On-Bike Clothing Checklist, Off-Bike Optional Clothing Checklist, Bike Tour Checklist
Bicycle Tour Clothing Objective:
'Take Just Enough Correct Clothing'
to address the needs of the Cyclist(s) for the Touring Climate(s) and Temperature(s).
It could be zero shirts and one rain jacket or seven changes and a complete winter/mountain survival outfit.
About Bike Tour Clothing and Clothing Quantity
Table of Contents
1 - Reasons for Various Clothing Quantities
2&3 - Clothing Quantity Distribution Charts
4 - Peace of Mind Bicycle Tour Facts
5 - Bicycle Tour Clothing Quantity Details
5A - Mainly Camping Bicycle Tour Examples
5B - Lodging Only Bicycle Tour Examples
6 - About Bicycle Tour Clothing Types and Issues
1 - The Amount and Kinds of Clothing to be carried on a bicycle tour are Directly Related to:
- Rider Size/Strength
- Rider Condition/Capabilities
- Tour Purpose/Need/Requirement(s)
- Lodging Type/Availability
- Geography
- Weather
- Culture
- Costs/Funds
- The Bicycle/Cycle System itself
- Travel Gear Limitations/Capabilities
|
|
|
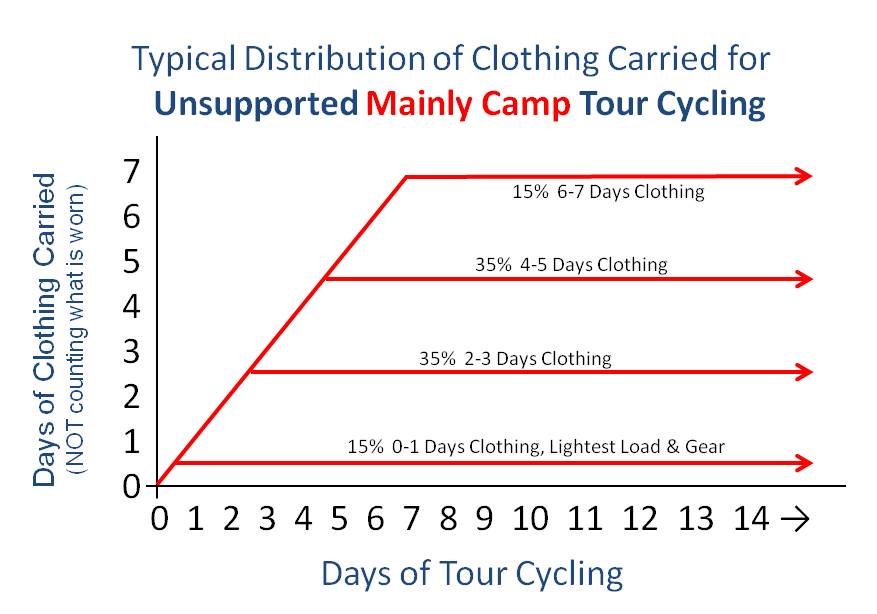
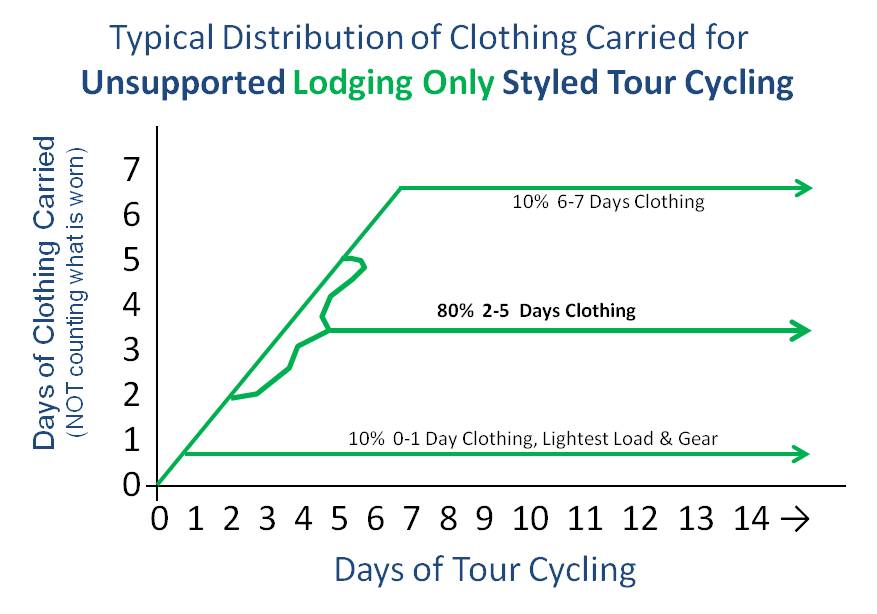
- Typically, there is No Distinct Difference between Other Things carried from 2 or 5 days of Clothing for 'Lodging Only' Tour Cycling,
but a Noteworthy Difference exists for 'Mainly Camp' Tour Cycling - See Bicycle Tour Load and Riding Style for Details.
3 - Some Bicycle Touring STYLE Caveats:
-
Clothing TOC
- Most cyclists mix up their carry loads from tour to tour.
- Some cyclists are physically limited to carrying the lightest of loads.
- Some cyclists are speed & distance oriented.
- Some cyclists are time limited.
- Some cyclists prefer to address a wider array of contingencies.
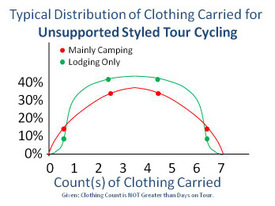
- Statistically, the data point results come close to forming a Bell Curve.
4 - Some nice to know details about bicycle touring:
-
Clothing TOC
| 1st | There are Many Ways to perform a Bicycle Tour. I.E., There is more than one way to have a successful tour. |
| 2nd | Over Time a cyclist will travel in a mix of Load/Riding Styles. |
| 3rd | All tours are controlled by Travel Leg Accomplishment and Risk, 'one leg at a time'; a Travel Leg addresses the time and distance between food and water resupply points. |
| 4th | Every kind of bicycle and person has successfully toured at some time or another; there are some things that people have learned that make touring more enjoyable. |
Herein we discuss bicycle tour styles and how to make tours enjoyable,
having learned from those before us.
5 - Bicycle Tour Style Statistics
For Camping and/or Lodging
-
Clothing TOC
- 15% of riders carry 0-1 day of clothing, carry the minimum of weight, and camp.
- 35% of riders carry 2-3 days of clothing and camp.
- 35% of riders carry 4-5 days of clothing and camp.
- 15% of riders carry 6-7 days of clothing and camp.
- 10% of riders carry 0-1 day of clothing, carry the minimum of weight, and NO Camping.
- 80% of riders carry 2-5 days of clothing and NO Camping.
- 10% of riders carry 6-7 days of clothing and NO Camping.
- 'Days of Clothing' addresses Variable Clothing counts of shirts/jerseys, riding pants, underwear/underliners, and socks..
- 'Days of Clothing' Does NOT address Constant Clothing that ALL Cyclists usually should carry One-Of-Each, for instance: ONE rain parka or rain jacket, ONE heavy sweater/polar-fleece/flannel shirt/jack, ONE pair of gloves, ONE hat, maybe ONE pair of boots, and maybe ONE nice off-the-bike city shirt and pants (for city dressing), [and maybe ONE skirt wrap, shoulder wrap, and/or dress for ladies] ... ). These are Constant-Must-Have tour items (not daily changes of clothing, not Variable Clothing).
- No two people pack the same and usually the same person does not duplicate their clothing tour packing twice in a row.
- More Gear - More Clothing / Less Gear - Less Clothing: There is a Direct Ratio between How Much Gear is Carried and How Much Clothing is carried (which is why we no longer separate the two issues).
- Limit: 7 Days of Clothing: No One carries more than seven days of clothing (and yet seven is not all that unusual). In some situations some cyclists will carry none to one set of extra clothing but they will almost always carry cold and or wet weather clothing. See Typical Clothing Carried Statistics/Graphic.
- Lodging Only riders do NOT carry camp gear but may carry a stove (hot morning beverage and hot meals).
- Mainly Camping riders may occasionally stay at a place of Lodging or a Campground that has electricity, warm showers, and laundry facilities.
- Recharging computer, smartphone, and/or camera batteries has become a much bigger time management factor than in the past (it is a necessity to some, especially to cyclists who have always had a smartphone). See about the In's and Out's of Battery Charging
- See On-Bike Clothing Checklist, Off-Bike Optional Clothing Checklist, and/or the Bike Tour Checklist.
Scenario Examples:
Scenario Examples:
- Total load limited up to about 25 pounds.
- Attributes similar to Ultra-Light rider touring (1 person tent/tarp/tube/bivy).
- If tent, typically it weighs 5 pounds max (including every component).
- Sleeping bag, lightweight: either a 45F/7C summer bag for summer camping in warm areas or maybe a down bag good to 20F/-7C for spring, fall, mountain camping. A Bivy Sack will usually convert a Summer Sleeping Bag to a 3 season Bag
- Situational:
- 0 extra clothing, often on 2 or 3 day (weekend like) jaunt, some riders may not carry spare clothing and may not perform clothing cleaning; personal cleaning may be modest. May still carry outer ware clothing, See Notes Above.
- 1 day of extra clothing (plus what the cyclist is wearing) for long distance touring, requires daily clothes washing (or roughing it for a day or two).
- Stove optional, may be living off non-cooking meals: bread, peanut butter/Nutella/similar-spread, sometimes modified non-cooked MRE type meals, fruit (not much food carried at one time, more frequent stops at markets than riders with heavier loads).
- Total Tour carry load usually around 40-50 pounds.
- 1 or 2 man tent (mostly 2 man tents or couples with 3 man tent).
- Stove, 2 pots, some cutlery/kitchen tools.
- 2-3 days of food: either MRE or dehydrated meals, plus granola type road snacks/supplements, may or may not eat at restaurants, will visit village/city grocers when opportune, seldom carry more than 3 day food supply, may carry/use bulk water container.
- Clothing often addresses monsoon riding, snow pass riding, and tropical/humid/heat riding (a broader weather risk coverage).
- Total Tour carry load usually around 55-65 pounds.
- May carry enough water for 2 days or 3 days if frugal; will carry bulk water container or many bottles or a few jugs, sometimes empty, sometimes full.
- 1 or 2 man tent (mostly 2 man tents).
- 1 or 2 Stoves (extra fuel, stoves may or may not be same fuel source), 2 pots, some cutlery/kitchen tools.
- 2-5 days of food, as needed, dehydrated package and/or MRE type meals when possible, food mix gets creative, sometimes high calorie more compact/dense foods (jerky, trail mix).
- Clothing often addresses monsoon riding, snow pass riding, and tropical/humid/heat riding (a broader weather risk coverage).
- Total Tour carry load usually around 75-100 pounds.
- Big guys typically gravitate to this class but many other long range cyclists also gravitate to this class.
- This class often has riders with full loads stacked on front as well as on the back of the bicycle, often with objects tied to the gear (like plastic bags of additional food, gear, and/or water jugs).
- May carry enough water for 3 days or 4 days if frugal; will carry 1 or 2 bulk water containers or many bottles or a few extra jugs (sometimes empty, sometimes full). If 4 or more days of water are needed (very rare), then the cyclist usually needs panniers on the bicycle and a trailer or a 3rd wheel bulk water carrier (usually for dessert and outback travels).
- 2-3 man tent (almost exclusively 2 man tents for soloist, 3 man tent for team/couples).
- Often 2 Stoves even if 1 is a simple alcohol burner or tin-can (extra fuel, stoves may or may not be same fuel source, usually every kind of liquid fuel can be burned), 2 pots, some cutlery/kitchen tools.
- 2-7 days of food, as needed, dehydrated package and/or MRE type meals are common (MRE's for water sparse areas, dehydrated for water available areas), food mix gets creative, sometimes high calorie more compact/dense foods (jerky, trail mix), and sometimes fatty foods are not the enemy for endurance situations.
- Sometimes this is called Credit Card Touring.
- The total load, for non-camping tours, ranges from 20 to 40 pounds.
- No tent, no sleeping bag.
- Stove, Pot, and Cooking are optional.
- The cyclists may carry a day's worth of food (sometimes 2 days), but usually the riders are eating out of stores and restaurants. Typical carried foods are bread, peanut butter, Nutella, or similar protein in small jars; fruit, jelly/similar, maybe cheese, fruit or dehydrated fruit (not much volume is carried on the bike; food is often fresh eaten at or around the market/place of purchase). Also, granola (in one of its many forms) and/or power bars may be carried for interim snacks or for just-in-case.
- Lodging locations tend to be Hotels, Motels, Hostels, Pensions, B&Bs, Friend's Homes, and/or Homes of Online Cyclists.
- Clothing:
10% of the riders carry 0 to 1 day of extra clothing. These riders with super lightweight loads are typically riding for distance, or positioning themselves to be able to ride for distance if that is a necessity between tourist locations, or they are physically incapable of carrying heavier loads. These riders are performing daily or near daily sink/tub clothing washes, drying overnight on room hangers (or such). A laundry mat or hotel machine may be used when available. The cyclists are usually working from a very purposeful route plan for each day.
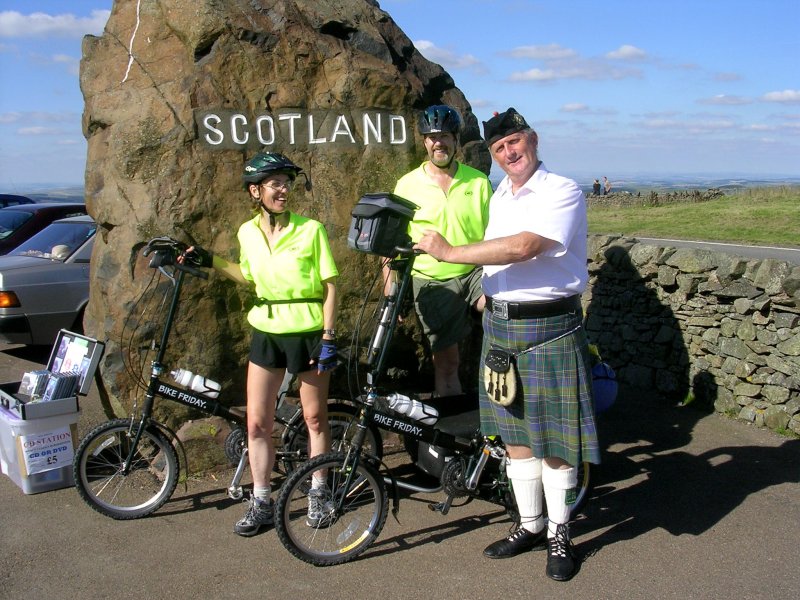 80% of the riders carry 2 to 5 days of clothing. These riders with interim weight loads are purposefully dividing time between distance riding and touring. These riders can still perform a strong degree of distance riding but they may also perform short stays in one location as a tourist, or perform loop rides from a central location. This cyclist is usually working from a general plan. Usually clothing is washed in little batches every two or three days at the lodging's machine, or when passing a laundry mat or a campground with machines. Usually, there is very little distinction between what else is carried between 2 and 5 days of clothing for Lodging Only Cycle Touring.
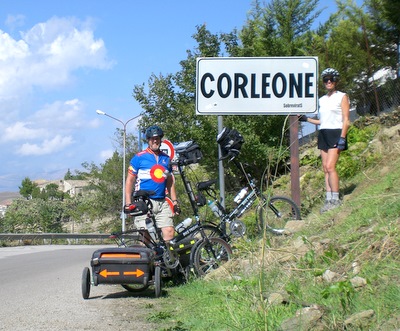 10% of the riders carry 6 to 7 days of clothing. These riders with a heavier non-camping tour load are typically performing batch laundry sessions every 4 to 5 days (usually with a washing machine at a laundry mat, hotel, or as passing by a campground) but the cyclists may still be perform daily washing from a sink/tub if need be. In some locations, a local laundry person or business may be known to be available to perform laundry services, often overnight. This bicycle riding style is less common but allows flexibility for unplanned touring. On occasion, this group of cyclists has been known to wear cold weather night clothing (parka or coat) for sleeping in an alpine hut, or a covered rest stop, or an adirondack for one night.
5A - Bicycle Tour Style: Mainly Camping, Details
Clothing TOC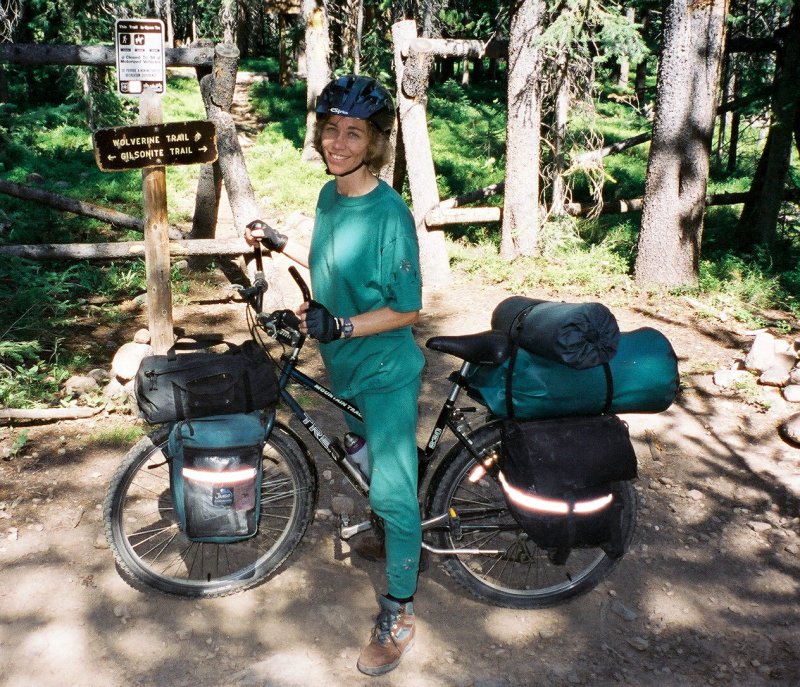 35% of riders carry 4-5 days of clothing (clothes washed when possible, sometimes at camp each night, sometimes in planned batches as opportunity presents itself: like passing by a washateria/laundry mat, campground washer, hotel machines, or local service). This classification includes many cyclists on self-guided self-contained tours.
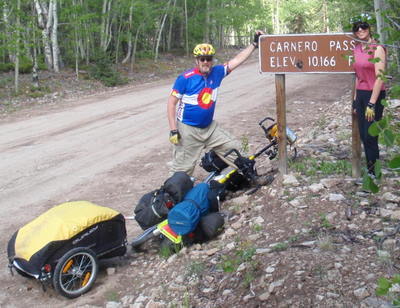 15% of riders carry 6-7 days of clothing (clothes washed when possible, sometimes at camp each night, sometimes in planned batches as opportunity presents itself: like passing by a washateria/laundry mat, campground washer, hotel machines, or local service).
5B - Bicycle Tour Style: Lodging Only, Details
Clothing TOCThe amount of clothing carried varies very little. Typically, riders with little to no extra clothing are often going for distance and riders who carry more clothing are looking for touring flexibility. Most riders carry an 'in-between' amount of clothing (between 1 to 7 days of change, including jerseys, underwear, and socks).
6 - Bicycle Tour Clothing Types and Issues
Clothing TOCA) Synthetic versus Organic, B) Storms and Clothing, C) Survival Secrets, D) Additional Clothing Issues,
Topics Related to Clothing: Laundry, Cultural Issues
6A - Synthetic versus Organic Clothing:
Clothing TOCA) Synthetic versus Organic, B) Storms and Clothing, C) Survival Secrets, D) Additional Clothing Issues,
Topics Related to Clothing: Laundry, Cultural Issues
- Generally synthetic clothing is lighter in weight, holds/retains less water, dries much quicker and tends to reduce the amount of bacteria or yeast naturally held in the material.
- Synthetic clothing, when designed for such, can wick moisture away from the body far better than for organic clothing.
- Organic clothing, particularly cotton, can be more comfortable on a hot day because of the sweat retention and evaporation.
- Synthetic clothing tends to be much more prone to fire spark damage and burns faster than organic clothing if flash exposed to open fire.
- Synthetic clothing, when worn in a fire/hot atmosphere will damage the human body more than its organic clothing counterpart, in fact cotton and wool offer a little protection or burn delay when compared to synthetic clothing. Military Pilots are only allowed to wear cotton undies under their Nomex (flame retardant) flight suits for this reason.
- Many synthetic clothing items will virtually dry by spinning it overhead but organic clothing may need an hour or two to dry out in a best case scenario. When compared side-by-side in identical conditions, synthetic clothing will ALWAYS dry faster.
- Synthetic clothing tends to not hold as many germs over the long haul.
- Synthetic sleeping bag materials dry faster than goose down and can provide insulation when partially wet, goose down cannot. Synthetic sleeping bag materials tend to be heavier than goose down for the same amount of insulation R Value. More about Sleeping Bags.
- Synthetic clothing generally lasts/wears longer than organic clothing.
- Synthetic socks designed for hiking tend be far superior to organic materials for wear and for causing less blistering.
- Organic clothing can hold up to direct applications of DEET but synthetic clothing may melt. DEET will destroy or ruin the effectiveness of synthetic clothing.
- See Insect Repellent discussions (DEET and Permethrin, read the hyper notes).
- See Laundry (How to Clean your Clothes on an ongoing Bicycle Tour).
6B - Storms and Clothing:
Clothing TOCA) Synthetic versus Organic, B) Storms and Clothing, C) Survival Secrets, D) Additional Clothing Issues,
Topics Related to Clothing: Laundry, Cultural Issues
One big variable addresses whether one is in a passing thunderstorm (where the sun will likely be out later in the day) or a monsoon (where one may be socked in for days of rain).
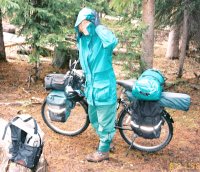 'Weather out the Storm?' - The expression means to stay put for the duration of the storm and it is a valid consideration; some related variables are safety for the particular location, weather protection, food supplies, sanitation, and one's general ability and capability to stay in place for a while. Sometimes one must bike for a while in wet miserable conditions just to get to dry lodging where one can hole-up for a few days.
- 'Dry Out Now or Dry Out Later?' - The expression addresses the issue of whether to pack and leave an area with wet gear or stay in an area and dry the gear in sunlight? A big mitigating issue is whether it will be sunny along the planned travel route? AND, when will the sun be rise high enough to effectively dry wet gear? AND, how low will the drying process take?
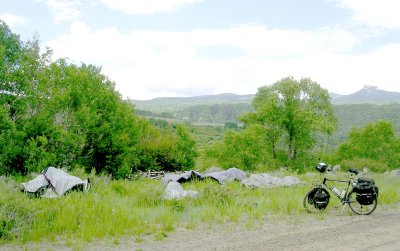 - Generally, we have learned to pack up wet, and take time to dry the gear and clothing at mid day in what is often the sunniest/warmest part of the day (when the Sun is as its most efficient and effective heating angles). If one waits to let the morning sun dry the gear it takes longer (which is lost travel time in what is often the desirable and cooler day light cycling hours). On the other hand, wet gear is heavier and unless it is packed correctly it can get other dry things wet - It takes a little deliberate packing finesse to pack wet gear and not get other gear wet. Generally, from experience, we pack wet and move out (in these conditions).
 - During the noon-lunch rest-stop, if it is bright and sunny, hang items out to dry while lunching AND the conditions may also be the best time to run a Solar Charger..
- Usually the mid day sun dries items faster than the morning or evening sun.
- Except in arid and semi-arid areas, washed gear will often not dry out at night. So, the best/most-efficient time to dry clothing is under the midday sun. That means that one often stops for an extended lunch and hangs laundry on a bike, fence, or picnic table in order to dry items of use.
- While cycling, it is common to leave wet gear under a strap or net, exposed to the wind and/or sun, in order to dry objects (especially for the morning's microfiber washcloth and towel).
6C - Clothing Survival Secrets
(How to Be Seen, Stay Dry, and NOT Hang-Up on Obstacles):
Clothing TOCA) Synthetic versus Organic, B) Storms and Clothing, C) Survival Secrets, D) Additional Clothing Issues,
Topics Related to Clothing: Laundry, Cultural Issues
- Always use a waterproof bag for clothing storage, clear bags seem to be the most serviceable but any waterproof bag is better than nothing. Also use waterproof bags for the sleeping bag(s) and the sleeping pad(s). However, note that if a sleeping pad gets wet, one can cover it with a space blanket (recommended to carry). A wet bag or wet clothing usually ends touring for a while (or in total) and the effort to dry said gear becomes the focus of most of one's effort, like finding a town or place with a Clothes Dryer.
- Most of the time the cyclist will be carrying their own clothing so total weight matters. One can carry as much as they want but most people want to carry as little as is needed.
- Most of the time, the cyclist's own bike clothing is serviceable for off the bike activities, but not always. Make choices, the trade off is extra/more weight to carry.
- Reflective strips can be bought in most good fabric stores or ordered online and added onto clothing and/or gear. Sewing, while time consuming, will outlast iron-on strips.
- Cargo Pants/Shorts: Wearing pants with many pockets are becoming increasingly popular for touring cyclists, especially those pants designed with Zip On/Off Leggings.
- Note: There are at least two different ways for the Clothing Manufacturer to Create/Make/Sew-On Cargo Pant Pockets:
1 - Flat edge sewn.
2 - Baffle edge sewn. - Warning: In the field, Baffle pockets can hang up on or snatch anything that you walk by or bike by, this is especially problematic in brush country, almost any narrow access path or bike path, in and around many vehicles, walkways, and places of lodging; the pockets can hang-up on just about everything that sticks out at thigh level (drawer knobs, plants, sticks, protruding rocks, brush, fence posts, fence wire ends, almost any barbed wire, door handles [especially those for physically challenged people], vehicle arm rests, door jambs, hand rail ends, gate posts). Most of these examples have come from actual personal experience.
In the sample picture to the upper-right, the writing instruments are about 1 inch inside the pocket baffle - Items are nearly always hanging up the wearer when baffle side pocket pants are worn outdoors in the back country. The issue is how the pockets are mounted, not that the pockets hold a lot; the left side pant pocket is well designed and the right side pocket is poorly designed. - Solutions:
- Do NOT Buy or obtain pants with any kind with baffle pockets.
- Technical Issue: Be aware that some pockets have flat sewn edges but darted baffles in the middle or pocket center, avoid these too.
- If you have pants like this, either get rid of them or sew down the edging in a manner that the pockets won't hook on or snag on any objects when you walk by or bike by said objects.
6D - Additional Clothing Issues:
Clothing TOCA) Synthetic versus Organic, B) Storms and Clothing, C) Survival Secrets, D) Additional Clothing Issues,
Topics Related to Clothing: Laundry, Cultural Issues
- Generally, select and pack clothing for a Layers Capability.
- Warning: Packing at warm-lower locations-elevations when the destination is cool, cold, or freezing, leaves many distressed at altitude.
- The work of bicycling in cool weather keeps one warm, but as soon as one stops biking, a physical cool down occurs. Keep a jacket and a hat handy to stay warm and sometimes gloves are useful.
- GoreTex or similar Jackets are handy for rain, warmth, and wind.
- Lady Modesty: Just a reminder that in 3/4 of the world, the showing of bare shoulders and/or bare legs is culturally sensitive (to include southern or eastern Europe) and sometimes that style of dress can bar one from entering some establishments, especially government buildings, shrines, churches, and religious centers. It is wise to consider the dressing customs of destination countries.
- It is common to see long distance cyclists in regular out-of-doors clothing that is fit for the climate(s) and region(s) - It often has to do with snow covered mountain passes, rocky mountain roads, floods, marshes, rain, mud, hot sand, and walk-pushing a damaged bike.
 Geography
For Bicycle Tour Planning

Top,
Travel Leg Planning,
Weather,
Route,
Navigation,
Bicycle Tour Planning Graphic,
Planning Traps
For Bicycle Tour Planning
Geography is one of the major inputs to 'Ecoregions' [Ecological Regions, sometimes called Climate Zones] where landforms, plant forms and animal forms are similar. Cyclists should be familiar with the concepts and implications of Eco-Regions; some of the more commonly known Ecoregion names are Desert, Arid, Semi-Arid, Alpine, Savanna/Plains, Rain Forest, Tropics, Tundra, Montane/Mountain, Woodlands, Temperate, and Maritime (there are more classifications and many sub-divisions).Each Eco-Region requires a different kind of Life Survival Preparation.
Eco-Regions [Ecological Regions]
-
Most Ecoregions have seasons and/or periods of great stress (rain or drought, temperature extremes, wind or still periods, bloom or blah [my scientific term], ...). Ideally, for planning purposes, one should know which Ecoregion or Ecoregions that the Planner is about to Bicycle Tour into and the Planner should know the 'Periods of Stress' (and either avoid them or be well prepared - Also See Weather). The Bicycle Tour's preparations should address specific issues of concern for each Ecoregion to be visited.
Some Examples and Issues Follow (we're not detailing all eco-regions/climatic-zones here):
Desert, Arid, and Semi-Arid Regions:
In dry areas one should realize the importance of water, access to water, and long stretches between water locations.
- If the Cyclist, through route planning, has determined that they need to carry more than a day's water supply, then the bike will need to be configured for heavier loads. The typical solution is to add a Third Wheel or Trailer for water and that is typically added to a bike with full panniers (two front, two rear). Also see Bicycle Configurations and maybe Kinds of Tour Equipment.
- Not all desserts are Hot, but one should address the heat and/or cold issues with appropriate clothing (sun shade/protection and breathable).
- A cyclist should be familiar with the common medical issues like heat exhaustion and dehydration.
- One of the issues with hot deserts is that they can become very cold at night because there is no atmospheric retention of heat, all of the warmth radiates out to the night sky, frequently taking temperatures right down to freezing.
- The chronic lack of humidity dries everything quickly, including the human body.
- Pay attention to hydration - One of the symptoms of dehydration is a headache (Tylenol OK, Aspirin NOT, drink water).
- This type of dry climate increases the chance of developing nose bleed(s). Petroleum Jelly (like Vaseline) is a common dry nose treatment. Chapstick/Lip-Baum is a common field treatment solution (finger application).
- In all hot climate zones, the indigenous people often go to sleep when it is naturally cool enough to sleep, this is often mid-night. These sleeping habits evolved before the advent of Air Conditioning. Also, the same people are likely to sleep 8 hours and then eat breakfast, so their work day often starts around 0900-1000 hrs.
- When the sun and day is at its hottest, many people just get off their bikes. It is a good time to be a tourist, visit a museum or such. Note that in some areas, this may be Siesta time (or the functional equivalent) and many shops may be closed.
- In hot climates, it is too hot between 11am and about 3pm so activity just comes to a stop, people just rest. In some places this is called Siesta Time. It effects travelers because Mom and Pop Stores close at this time, and a cyclist my not be able to buy simple supplies or food during this time frame. If the cyclist is in a town at evening or morning, that is the time to supplies or food (buy and carry heat survivable food to eat later at mid-day in the morning or evening before).
- Many Cyclists like to start biking at first daylight (to take advantage of the cool of the day). If the cyclist is at lodging, then let the owner/manager know of the intentions because they/staff may not show up until 0900-1000 hrs (as is their local custom). It is good to prepay and settle all debts the night before. Also, if a continental breakfast is involved (which may not be setup until 0900) then consider requesting a bag breakfast to-go.
Alpine Region ('Alto-Pine' or Above the Treeline)
-
Geography TOC
The Alpine Region is the area above tree-line and it can mimic Tundra Regions, often having the same feel and fauna.
- The likelihood of snow or freezing temperatures may happen at any time of the year, even during the summer, especially at night.
- The Alpine clothing issue is dressing for warmth and layers, especially for cyclists. Cyclists are often pedaling and are therefore warm while doing such, but when they become idle (at rest, break, setting up camp, or conducting maintenance) they can slowly start cooling down and may need a jacket or over-shirt or both (as well as gloves and/or warmer head-gear). The effect can be quite dramatic if the sun is down or going down.
- What are common Alpine medical issues? Dehydration, Altitude Sickness, and Physical Exhaustion (Bonking is the common Cycling term).
- How smart is it to bring in some or all of the water at night? Very.
- How about a Balaklava/Balaclava for pedaling in that freezing morning air? Yes, Helmet covers too.
- It can be very beneficial to wear a hat in camp. Also consider slip on leggings (like rain pants) as well as good footwear (boots and/or hiking socks).
- When Sleeping in a bag at night, a sailor's type of watch cap (lumberjack's knit cap or ski hat) can be very beneficial for staying warm (since the head radiates 110% of the body's heat - old joke, but the head's heat loss is substantially disproportionate to its surface area). Some people can handle being wrapped up in a mummy sleeping bag, but most people cannot, ergo, the knit cap.
- There is a higher index of UV light above the treeline, sunscreen and clothing protection is important.
- Layering is important, cyclists are often working and don't realize how cool it is until they have been idle for a while.
- These areas frequently have low humidity even though snow may be on the ground, hydration is important, and dehydration often manifests itself as a headache (Tylenol OK, Aspirin NOT, drink water).
- This type of dry climate increases the chance of developing nose bleed(s). Petroleum Jelly (like Vaseline) is a common dry nose treatment. Chapstick/Lip-Baum is a common field treatment solution (finger application).
- Protecting the eyes from sun glare can be an issue (Polarized Sunglasses).
- Also see Montane as it is often the climatic zone/region just below Alpine.
Savannas, Plains, High Plains, Prairie, Chaparral, and Open Regions
-
Geography TOC
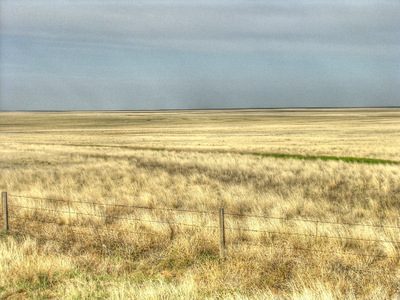 Savannas, Plains, High Plains, Prairie, Chaparral, and Open Areas are notorious for winds (and by the laws of nature, the wind will always be against the cyclist and only appear when the cyclist is ready to cycle), thus a planned and budgeted easy and flat 40 mile trek may take all day long and go into the night and if the cyclist does not have a food reserve, this condition can turn into a medical emergency for the body's physical energy depletion (called 'Bonking', Exercise Exhaustion) where one cannot think properly and cause a lack of body system anti-bodies which in turn can allow a rider to become sick for a week (from a low immune system). It is best to 'Be Prepared'.
- Warning: Fast moving grass fires are always concern in Prairies/Savannas. Grass fires can be caused by lightning or man. Note the difference between dry grass and green grass (usually a lawn or farm/ranch grass product), green grass is way safer than dry open prairie grass. Position the camp as best as one can for fire safety, avoid pitching a tent in or next-to standing prairie grass or bushes. Sometimes the cyclist is not given a choice. See tent site selection issues. In campgrounds, sometimes other campers (often rookies or drunks) cause quick moving fires in the campground (just in the campground), again position the tent away from these kinds of campers and camp issues.
- Experience: Terry and I have sat out some horrendous lightning storms in the only semi-protected structure, a bathing/toilet/wash-room facility. Once, the lightning was so bad that in time of eating of our supper, that we grabbed our meals and took them in the washroom with us, we were just too tired to wait. This has happened more than once.
- Experience: Always keep some water bottles in the tent.
- These areas are famous for summer evening and late night evening thunder storms. Tents need to be staked, fly's tied down (wind flap proofed), any fires thoroughly extinguished, and all loose gear secured. Bikes should be chained/cable locked/secured to an immovable object and all bag and pannier flaps closed (rain comes in sideways for a brief period of time). If the cyclist is carrying a bike cover, set it up but make sure that the cover is anchored (sometimes those things are found a mile away or never found at all).
- The cyclist needs a mindset to close up the tent and all gear bags as soon as something is accessed and one has to be careful about tent side flaps/screens. If the tent is a screen tent, as many summer vent tents are, then securing the tent cover should be the only task remaining in the camp for rain/wind security.
Tropic (sometimes including Rain Forests, Jungles, and Savannas)
-
Geography TOC
In the Tropic's (typically between the Tropical Latitudes of Capricorn and Cancer) and defined by relative heat (average temperatures above 18C/64F), they can be wet or dry but will always have a wet season (monsoon season or rainy season).
- Typically, when things get wet, they may stay wet for a long period of time. Avoid cotton clothing, although a cotton T-shirt will feel good while riding (because of the evaporation). Synthetic clothing dries faster, often wicks better, and is far less likely to retain residual bacteria, fungus, or yeast microbes.
- Avoid riding in cotton underwear.
- Staying hydrated is an issue as a result of heat sweating all day long, even though the environment may be quite humid. Many people add a little salt and lime/lemon to their water to help absorb water and retain it a little better (the original basis of Gatorade).
- Bugs, Mosquito, and Flies can be murderous. Use DEET but, if possible, consider pre-treating all clothing with Permethrin (which can kill or mal-effect cats, cannot allow cat access - READ the Directions and Warnings). Permethrin repels bugs and will last for a few washings. It works on clothing especially synthetic clothing where something like DEET cannot/should not be directly applied. Permethrin cannot be used directly on the body and it is speculated that it should not be used on/around pregnant ladies.
- Material things tend to rust quicker in the tropics and there are frequent mechanical issues with rust and other mechanical wear (often caused by hidden moisture corrosion). Excess oil and lubrication attracts and hold dirt/grime - wipe parts, chains, and lube points from excess lube.
- Tents should be synthetic and have good netting. Carry net repair kits, but know that I have used duct tape for net repairs. Always carry duct tape.
- Consider carrying your own Mosquito Net (with its own method of suspension and/or standing) for use in lodging outside of netted tents.
- Many places do not use window screens.
- See a medical authority before arriving, take all necessary preventive shots/measures, and start all prevention meds on time (some are ongoing, like for Malaria). Malaria, yellow fever, travelers' diarrhea, and hepatitis A are preventable through the use of vaccines, prophylactic medications.
- Higher instance of Reptiles and rodents.
- Higher instances of bugs getting to food
- Sunscreen
- Daywear (uv protection plus wicking, breezy, evaporative)
- Calamine and Hydrocortisone creams
- Anti fungal / anti biotic creams
- Do not display your valuables to the world; this will keep you from being the target of theft.
- Do not display jewelry.
- Bright colors (such as whites and blues) attract wild animals as well as insects.
- Camouflage clothing, is in some cases, illegal to wear.
- Never approach a wild animal, even if they appear harmless
- Water - it is safer to drink bottled or mineral water, then Boiled water (tea), and manufactured (bottled/canned) sodas and beers are alternative safe beverages.
- Stay away from Bush Foods. There is a wide array of sanitation and ethical standards, it is just difficult to tell something like farm grown and restaurant prepared food from a sick or road kill animals or fruit sold on the same dirt roads that animals use.
- Oranges and Bananas still rule as safer foods.
- See Food Management Issues and Solutions.
Tundra
-
Geography TOC
 In Tundra country, the summer Mosquito populations in Alaska and northern Canada can be so dreadful that cyclists (or all humans) need Mosquito Net hats and DEET (or such), and the tents need Mosquito netting (and integrated solid flooring) for protection from Mosquitoes and other bugs in general. In some areas, flies can be just as problematic (Lap and Sami Lands, Yupik and Inuit too).
- DEET, DEET, DEET or Insect repellent of your choice;
Nothing works better than DEET. - Bugs, Mosquito, and Flies can be murderous. Use DEET but, if possible, consider pre-treating all clothing with Permethrin (which can kill or mal-effect cats, cannot allow cat access - READ the Directions and Warnings). Permethrin repels bugs and will last for a few washings. It works on clothing especially synthetic clothing where something like DEET cannot/should not be directly applied. Permethrin cannot be used directly on the body and it is speculated that it should not be used on/around pregnant ladies.
- Net hats, fully enclosed tents with nets.
- The likelihood of snow or freezing temperatures may happen at any time of the year, even during the summer, especially at night.
- The Alpine clothing issue is dressing for warmth and layers, especially for cyclists. Cyclists are often pedaling and are therefore warm while doing such, but when they become idle (at rest, break, setting up camp, or conducting maintenance) they can slowly start cooling down and may need a jacket or over-shirt or both (as well as gloves and/or warmer head-gear). The effect can be quite dramatic if the sun is down or going down.
- What are common Alpine medical issues? Dehydration, and Physical Exhaustion.
- Bring in some or all of the water at night? Very.
- Bring a Balaklava/Balaclava for pedaling in that freezing morning air? Consider, Helmet covers too.
- It can be very beneficial to wear a hat in camp. Also consider slip-on leggings (like rain pants) as well as good footwear (boots and/or hiking socks).
- When Sleeping in a bag at night, a sailors watch cap (lumberjack's knit cap or ski hat) can be very beneficial for staying warm (since the head radiates 110% of the body's heat - old joke, but the head's heat loss is substantially disproportionate to its surface area). Some people can handle being wrapped up in a mummy sleeping bag, but most people cannot, ergo, the knit cap.
- Layering is important, cyclists are often working and don't realize how cool it is until they have been idle for a while.
- Hydration is important, and dehydration often manifests itself as a headache (Tylenol OK, Aspirin NOT, drink water).
- Cook with stove, avoid strong smelling foods. Cook away from camp, never cook in a tent.
- Clothing should address full array from hot days to winter storms.
- Sunscreen, Lip Balm
- Waterproof and Insulated gloves.
- Protect the eyes from sun glare (Polarized Sunglasses).
- Depending on the region to be visited, there may be issues in common with Plains or Alpine Regions
Mountain/Montane Regions
-
Geography TOC
Mountain/Montane Zones: Everyone seems to grasp the concept of hills and mountains. Many paved-road climbs occur at 4-6 mph/ 6-9 kph and many dirt-road climbs seem to occur at 3-5 mph/5-8 kph. Stopping for rest is required while climbing and it is important to stay hydrated and take little snacks over the course (like a bite of trail mix once every 20 minutes or a small hand full every hour or so - this method of eating is called Birding (eating like a Bird).
- It is difficult to pedal at less than 3 mph/5 kph, usually at the point, it is easier to push the bike and its load. Also, if a dirt road is rocky with those thumb to fist sized 'loose rocks' then it may be more efficient to push the bike than to ride the bike.
- The steeper climb the harder it is to move your loaded bike up the incline, sometimes it can take all day and there are places in North and South America and in the Himalayas where a cyclist can spend 2 or 5 days 'roller-coastering' up and down the slopes of hills and mountains to a high altitude park (like Leadville, Lake Titicaca, or Hemis).
- Warning: Riding a bicycle down some loose rock steep roads can be hazardous to your health; Do NOT be afraid to walk your bike down some slopes.
- The best daily biking routine in the mountains is to: start the morning with a climb (because it's usually cold, climbing warms one up, and the cyclist has fresh legs); ride over the pass in the morning (because rain and lightning appear in the afternoon or evenings on most passes); spend the warm part of the day on the lower altitude flats (where and when one is expending the least body energy); and by noon time, start climbing up the next mountain (a sufficient distance to get into trees, cool air, find water, and still leave about 3-5 miles to the next summit).
- Don't forget to Eat!
- Stick to the rest schedule mentioned in Planning Traps .
- It is better to start the day climbing, than descending (cold air).
- Lightning in the evenings, stay off those ridgelines.
- A lack of Air to breath. See Altitude Sickness and Acclimation Issues.
- Higher doses/concentrations of UV light/radiation - Sunscreen.
- Typical temperature drops with elevation (not constant): 3.57F per 1000ft / 5.5C per 1000m.
- Also see Alpine (life above the mountain treeline).
Travel Direction Planning/Considerations for Geography:
-
Geography TOC
- Sun on back, sun on face?
- Trade winds (typical wind patterns and direction for certain times of the year).
- Sunrise and Sunset: Usually, this isn't an issue to cycling navigation so much as "Be Seen" Issue for Vehicular Traffic.
Culture, Customs, and Respect
For Bicycle Tour Planning
Top,
Enough Clothing,
Bicycle Clothing Issues,
Aditional Clothing Issues,
Language Issues,
Behavior(s) of Success
For Bicycle Tour Planning
The following Cultural and Customs discussions are to be considered an integral set of customs, not as singular things to consider.
Culture and Bicycle Tour Planning:
Remember to be a Tour-ist, visit local culture! Drop in on festivals. Share life with the local peoples, stop and talk especially when someone stopping their work to make a friendly greeting or gesture. Visit historical monuments. Take time to enjoy life! Touring is NOT about distance or days. Participate in Life!
Most of the people touring the world by bicycle, be it one or multiple countries at a time, are trying to learn about other people and how they think, behave, and express themselves spirituality. Most of the people in those cultures will accept a bicycle traveler as long as the cyclist is making an attempt to learn and show respect.
Oddly, one of the more interesting online sources about culture comes from the CIA's World Fact Book. It gives overviews of language, religion, geography (with simple maps), government, and history.
Language:
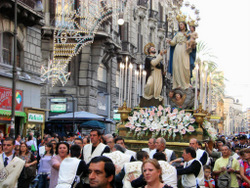 Always learn basic words and phrases: hello, good morning-afternoon-evening, excuse me, please, thank you, yes, no, and do you speak English?
Always start with a kind greeting!!! If you don't know anything, the word "Hello" is known internationally and commonly used as a telephone greeting and is acceptable, but know the language terms above.
Always learn basic words and phrases: hello, good morning-afternoon-evening, excuse me, please, thank you, yes, no, and do you speak English?
Always start with a kind greeting!!! If you don't know anything, the word "Hello" is known internationally and commonly used as a telephone greeting and is acceptable, but know the language terms above.See more about Language Issues.
Clothing:
 In 3/4 of the world, the showing of female bare shoulders and/or bare legs is culturally sensitive (to include southern or eastern Europe, North Africa, Middle East, and all of Asia) and sometimes that style of dress can bar one from entering some establishments, especially government buildings, shrines, churches, restaurants, meeting places, hotels, and religious centers. It is wise to consider the dressing customs of destination countries.
Sometimes even the wearing of pants is considered inappropriate for women. In these areas women cyclist may wear a dress wrap over pants, a skort, or culottes (a split skirt which hangs like a skirt, but is actually pants) as soon as they are off a bike, or as soon as they begin to enter a suburban area, or for the duration of the ride.
Generally, it is not difficult to find or wear cycle jerseys that cover the shoulders but in some cases the ladies may need to have biking/cyclist sleeves available to add to their arms.
When a female is wearing a biking helmet, then most cultures will tolerate the variation of dress custom. Many lady cyclists carry a scarf. Even in most of Europe, Central America, and South America women are expected to wear a scarf in public and certainly for church. For cyclists, the issue is visiting a Church. It is just appropriate for ladies to be covered and have no bare shoulders or bare legs.
See more about Clothing Issues.
Female Alone:
Female on a Bicycle:
-
There are places where a female is not allowed to ride a bicycle, like North Korea. And there are places where females would never be alone on a bicycle (like parts of Africa, Middle East and some Asian Nations).
Touching, Shaking Hands, Hugging, Kissing:
 There are places and religions where the toughing of a female by a non-related male is against the custom. This is common among Muslim beliefs as well as in countries from Africa to Asia. This is not usually an issue for female cyclists but often an issue for male cyclists being introduced to family members. A simple spoken greeting/acknowledgement and head nod is acceptable but the shaking of hands is not acceptable. Hugging or cheek kissing is not acceptable between opposite sexes but may be acceptable between males in a greeting.
Men greeting with hugging and kissing on the cheeks is common from France to Russia. The rest of Europe is mixed about this kind of greeting.
Left Hand:
-
In the Muslim faith and among the Desert Tribes from West Africa to Mongolia, the left hand is used to wipe one's butt and a person never eats or greets with the left hand, it is a very big insult to do so. It is improper to touch anything with the left hand that others will touch.
Physical Displays of Affection (PDA):
Muslim Help:
-
There is a Muslim custom that if one asks for help, they are supposed to help a stranger. Sometimes this custom only applies if the request is spoken in the language of the Koran (Arabic).
Help:
Water:
-
There is nothing wrong with asking for safe drinking water. Most cultures teach that A Person should NOT be denied water when they ask for it. Even in the American Depression Years, virtually no one was denied water who asked for it. In addition, the further that one is from big cities the more friendly and helpful are the people (no matter the country).
Marcia D Lowe, The Bicycle: Vehicle for a Small Planet
Bicycle Touring Configurations:
Top; Back To: Bicycle Touring Checklist (What to Bring), Back to Bicycle Tour Planning Graphic,Related Issues: Electronic Device/Accessories Setup (Issues), Touring Equipment and Supplies (Tour Facilitation),
How to Select a Touring Bicycle (Issues - Best Practices).
- Bicycle Touring Configurations have evolved to meet different cyclist needs. At present, there seem to be four typical touring equipment setups and few hybrid mixes. This is a generalization and there are no stead fast rules.
- Road Bike with Panniers: This setup is the oldest and was influenced by the French, who more or less created first bike mounted bags called Panniers. Pannier or Panier derives from Middle French and Latin meaning Bread Basket (literally: pertaining to bread). Now, Pannier equates to Saddle Bag (as in western horseback riding).
- Mountain Bike with Trailer: While the use of trailers is not new, some riders of Mountain Bikes do not like the bike handling with panniers on some narrow trails and they evolved a single wheeled trailer to easily follow in the same single track trail while leaving the bike light and free of accoutrements.
- Bike with Ultralight Backpack: The bike type doesn't matter and the rider carries a maximum of 20 to 30 pounds of equipment, food, and water, distributed between a backpack and a bag on a rear rack, and maybe a small handlebar bag. Either a Road Bike or a Mountain Bike remains light, maneuverable, and free of major accoutrements. There may be a small bed roll or tent strapped to the handle bar. We have a separate Ultralight Checklist created with a two time Great Divide Race Winner.
Bike with Baggage Support: The cyclist handles the pedaling and touring while a support crew shuttles the luggage from place to place and there can be a wide range of support services (for pay). This is a common bicycling configuration for people who travel by air/train/bus/ship to other/remote/foreign destinations. A cyclist may or may not bring their own bike and may carry one or two panniers to carry personal belongings, weather gear, or purchases. We happen to have a separate Suitcase Travel/Packing Checklist designed for international travel.
- Bike with Panniers and Trailer: Usually this is for a long haul (weeks or months) for which the riders are not in a hurry, are self sufficient and living in travel style (at the expense of slightly more weight than average).
- Bike with Trailer and Backpack: Usually, a Mountain Biker stretching out the travel load, keeping the bike free of accoutrements, and still traveling relatively lighter than average load(s).
- Additional Gear Carrying Methods/Equipment for Touring (In addition to Saddle Bags and Trailers):
- Frame Bags fit inside the area between the Cross Tube, Down Tube, and the Seat Tube (or the bicycle equivalent).
These bags are typically used to carry narrow objects and/or may have small pockets. It is typically about three inches wide and may hold additional water bottles, first-aid kit, and objects that are often carried in a handlebar bag. Frame Bags are usually homemade but sometimes may be found online (eBay, Amazon, search, ...). They do increase the side wind profile a little more than any other type of bag. Some are top tube oriented, some are seat tube and top tube oriented, some are top and down tube oriented, and some are full space oriented. These started as home made but can now be found online [check Adventure cycling's Store].
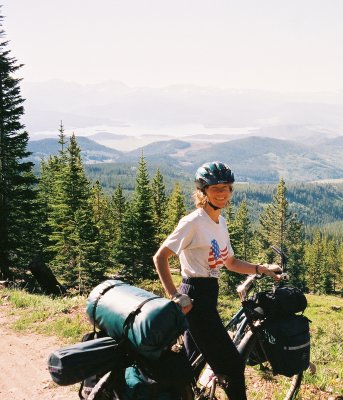 Top of Rack Bags can be found in most bicycle stores as well as online - See far right image's front rack, top.
- Handlebar Strap and/or Bag commonly seen on Great Divide Races.
It can be a separate elongated bag (about 18"x6" cylinder shape) with independent straps or it can be a combined bag and strap system. Use of such a bag may require adjusting brake and/or shifter layout or grab angle.
- Traditional Handlebar Bag commonly seen on long distance tours or road tours. It ranges from about 8"x3" (cylinder shape)
to about 14"x10"x10" (lunch box shape). It may mount directly to the handlebar or have an extension mount. There are more details listed under the Bike Tour Checklist's Equipment's Handlebar Bag topic as well as under the Bicycle Touring Tips' Handlebar Bag topic. Bigger sized bags typically have a plastic covered map holder.
- Back Pack: It needs to be fitted so that it does not swing with the cyclists pedaling motions. Packs may contain hydration systems (like CamelBack). They typically carry up to 30 pounds of gear or gear plus water, usually the gear is the soft bulky stuff (like clothing).
- Wheel Extension allows a cyclist to move the rear wheel further to the rear (about 6-12 Inches or 15-30 Centimeters). This is used for a variety of reasons like for bigger/wider/taller wheels, more stability, longer wheelbase (for more load on the rear end), bigger bags, heavier loads, and supper sized city/urban carry/saddle bags (for shopping goods and such). Found online and in specialty bike catalogs.
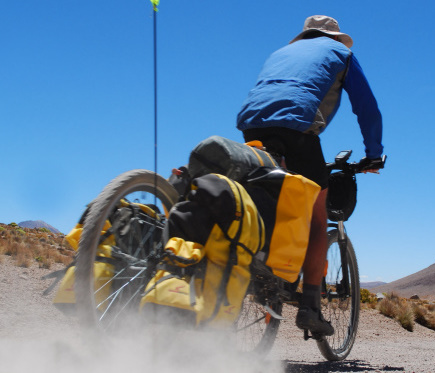 Third Wheel:
- In General: These device types have a narrower profile than a trailer and allow a cyclist to have supplies slightly higher off the ground which is a great benefit in Semi-Arid to Desert Climates (to include Chaparral, Savanna, Outback, and Bush environments). Found online and in specialty bike catalogs.
2 Kinds: - One type attaches to the seat mast or post but sometimes to a heavy duty rear rack attachment. This Third Wheel is similar to the device used to add a kid to a saddle and pull him/her behind Mommy or Daddy only there probably is no saddle.
- Another type attaches to a special (at extra cost) rear wheel axel that has yoke mounting points (or groves, or something akin to that) so that a large fork-shaped mount may connect and pull the third wheel much like some trailers. This device typically is used to carry additional panniers (saddle bags) and/or bulk water supplies.
- Bike Purchase Configuration Considerations
- There is some merit in giving thought to bicycle Break Down and bicycle Shipping/Transport Issues. See Bicycle shipping and Transport Issues. Light weight and durability are always good features that support bicycle riding configuration and bicycle shipping/transporting. Of the two features, durability is the best long range and long term feature. Also, before buying a Touring Cycle, see What to look for in a Touring Cycle (there is all kinds of touring bike information worthy of your study).
- Touring Configuration Considerations:
- When touring, if bikes are the very latest in cool technology, then one has to address security and theft temptation at a higher degree than would be normal.
- When touring, if bikes are the very latest in cool technology, then one will probably have to address replacement parts non availability issues.
- When touring parties have the same (interchangeable) equipment like tires, rims, tubes, spokes, derailers/dérailleurs, chains, brakes, pads, and cables then less kinds of spare equipment need to be carried.
- When touring, if bike components are common and NOT at the bleeding edge of technology, then replacement parts (or solutions) are more likely to be found worldwide.
- Bicycle Configuration for Rider and Distance Endurance:
- This Section formerly listed desired ergonomic rider setup methods for a Tour Bike.
- All suggestions have been merged into Rider Comfort and Endurance.
- Also see the Next Section.
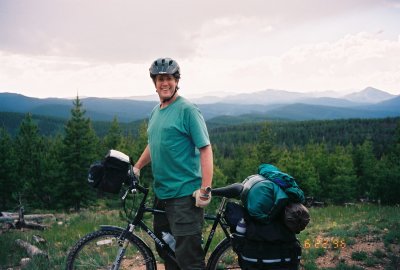
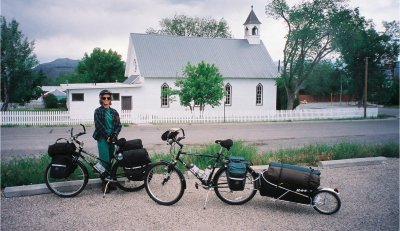
Additionally, there are mixes of the previous listed configurations, such as:
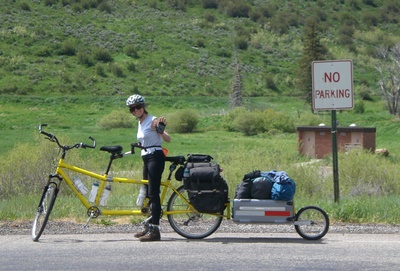
There are debates about Pannier versus Trailer and there are Benefits and Detriments for either and the solution does not have to be mutually exclusive. See Adventure Cycling's Article, called "The Big Debate" by John Schubert on the subject of Pannier versus Trailer. Also see A Noteworthy Incident.
Top Back To: Bicycle Touring Checklist, Device Setup, How to Select a Touring Bicycle.
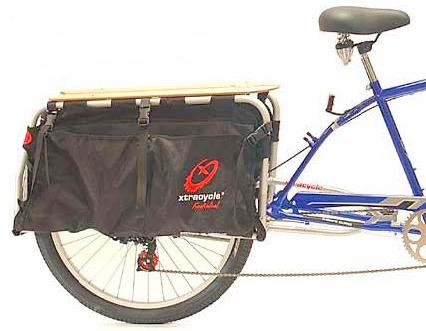
* All pictures copied from their respective websites.
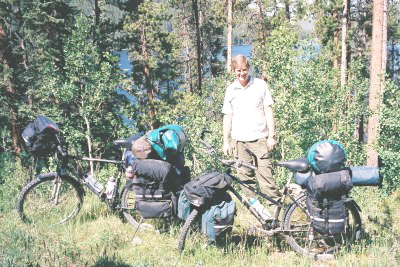
Body Conditioning - The Physical Bicycle Tour Preparation
Top, Rider Comfort/Endurance Issues, Choosing a Touring Bicycle/Cycle TOCA KEY to FUN Bicycle Touring is obtaining the physical and mechanical endurance attributes for moving a heavy load over a variety of terrain, over time. This "key" breaks down into two major components, Cyclist Body Conditioning (discussed here) and Bicycle Touring Configuration (discussed at Touring Setup Configurations).
- The Body (Condition for Endurance): We're not saying what a traveler has to do to get one's body into bike endurance shape, but we find that a person needs to be capable of riding Eight Hours total in one day, no matter the road or weather conditions (and not necessarily continuous hours but certainly total hours).
- It may be difficult for working people to get 8 hours of riding practice. I have learned that if a person can ride 4 hours without getting a sore butt and/or sore quad muscles, a person will last for 8 hours while on a bicycle tour (spaced with normal breaks). Each Spring, for most seasonal riders, life is an exercise in re-conditioning.
- Body Riding Position: Answer - Whatever is comfortable for the long haul.
- Discussion: Bicycle design has followed the path of Bicycle Racing. Subsequently, most bike designs are engineered for the rider to present a narrow wind resistance profile (by being sharply bent over while leaning forward) in order to maximize the leg's power stroke to the point that in order to achieve maximum power and leverage, a rider may not actually be seated while using the front handlebar as an immobile force to push against. Frankly, this kind of typical (back, shoulder, neck and arm paining) bike setup potentially discourages half of the probable tour bike riders from ever riding a bike for cross country adventure.
- Most Road Bike designs are great for road racing but not for bicycle touring. For touring, one needs to be able to pedal for days at a time and still be physically and mentally capable of enjoying life. Touring is not about racing, it's about enjoying life. Most people can enjoy touring with a different bike set up, designed around comfort for the long haul. Sometimes, a tour rider has to be quite forceful about getting a bike setup the way the rider desires (see the next paragraph).
- Body/Bike Ergonomics: We have found ourselves riding more and more erect over time with increasingly wider saddles and we are now using split saddles that are friendlier to anatomical parts. We have shortened or even reversed the handlebar stem in order to move the handlebar grips rearward and we have raised the steering axle tube in order to position the handlebar upward to a coordinate where the hand places itself naturally when one is sitting upright in a saddle.
- If the reader has missed the news articles, a mitigating issue is that quite a few professional racers and other speed riders, male and female, who have ridden in the bent over power biking position for decades on narrow saddles, are developing nerve damage maladies in the lower back/spine, crotch, and/or upper leg/thigh areas (often effecting sex drive, and/or the biological capability to become a parent, let alone, effecting normal quality of life with soreness, numbness, or pain).
- We have needed more and more body (and butt) break-in time for each season. The significance of this statement is important. We are snowed in during the Winter and we don't get to ride bikes. During the Winter, we can hike or snow shoe for hours at a time, but in the early Spring we can't physically sit on a bike seat for more than a couple of hours - it takes a while to get our derrieres into endurance riding shape. (Like others, we don't have the temperament for stationary biking).
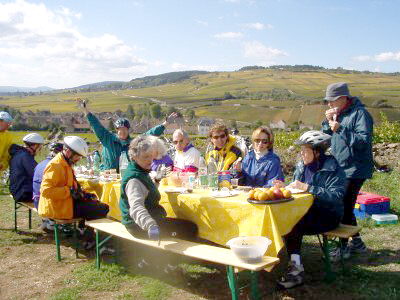
Issues to Consider for Selecting a Tour Bicycle,
What to Consider for Selecting a Tour Bike,
How to Select a Tour Bicycle,
(Requirements/Criteria for Selecting/Making a Tour Bike or Touring Bicycle;
How to Choose a Touring Bicycle)
Top, Touring Bicycle Table of Contents (TOC):
-
Touring Bicycle Selection Issues/Considerations
(Tour Types, Duration, Surface, Load, Pace, Support, Organization)
- PERFORMANCE or ENDURANCE, pick one.
- Any Kind of Component Design result that is between Performance and Endurance,
is a Design COMPROMISE.
Touring Bicycle Frame Issues (Main Frame, Forks, Stays, Shape, Racks, Suspension, Material)
Touring Bicycle Drive Train Issues (Chain, Sprockets, Rings, Cranks, Pedals, Shifters, and Derailers)
Touring Bicycle Rider Comfort/Endurance Issues (Bike Design, Posture, Ergonomics, Condition, Saddle, Challenges)
Touring Bicycle Setup (Necessary Bike Touring Accessories and their Setup)
Touring Bicycle Wheel Issues (Tire, Rim, Spokes, Hub, Brake, Reflector and Fender):
Touring Bicycle Caveats (Tour Bike Selection, Facilitation, Security, or Shipping)
The decision maker is facing an age old design dilemma from the start of the consideration process:
- THEREFORE -
ALL Bicycle Tour Bike Selection Solutions should gravitate toward ENDURANCE over Performance.
-
No two tours are the same and no two people are the same, thus each tour faces different requirements and each person has different expectations (needs, requirements). All tours are affected by outside influences (weather, geography, lodging, politics, ...), some of which can be controlled and some not.
it doesn't magically make the bike a useful long-distance touring machine.
People who tour on bicycles may need Cycle-logical Evaluation! - Shelly Mossey
Tour Bicycle/Bike Selection Issues/Considerations:
Top How to Choose a Touring Bike - TOCThe following Characteristics of Bicycle Tours can help the reader view the major, global, Bicycle Touring Issues and the subsequent sections look at Bicycle Touring Issues from different Bicycle Types, Designs, and Setup Issues as well as some issues from likely Bicycle Touring Situations.
- The Type of Bicycle Tour affects the characteristics
for the Touring Bicycle Selection/Specification. - The following represent a 'Broad View' of Bicycle Touring
(Bike Touring, Bicycle Tour). - This list of Attributes of Bicycle Touring
forms the basis of Tour Bike Requirements. - Typically, the first two items rule the selection decision(s).
- Self Contained, Self Guided, Self Supported, Fully Loaded (Weeks)
- Expedition (Months)
- Day Tours
- Ultra-Light (Days), Heavy (Days/Weeks)
- Loop (Days)
- Large Groups (15+), Small Groups (14-), Couples, Solo
- Hired Company, Hired Individual, Self Organized, Group Organized (determines gear to carry)
- Guided, Un-guided / Self Guided, Consensus Leadership (determines food and lodging arrangements)
- Supported, Un-Supported, Some Distributed Communal Wares (effects what one carries and/or how much one carries)
- Pavement Only/Mostly, Off-Road Mostly/Only, Back Roads, Mix of Road/Track Surfaces (definitely a Tire selection issue which reflects on the bike's tire mount/size/style capability/functionality)
- Camping, Hotel, B&B, Mix (load, weight, and configuration determining)
- Planned in Detail, No Plans (actually quite rare), Loose Time Table, Loose Destination (rare)
- Low Cost, First Class (effects what and how much is carried by individuals for the group)
- Food Service: Self Cook and Cary; Catered; Some Meals Provided, some not; Tour Group and/or Guide Managed (Cook Ware, Food Quantity, Stove[s] Carried, ...)
- Special Purpose Tour(s) (XC Race, Geographic Issues, Hydration, ...)
- Pace and/or Distance; Flat, Hills, Mountains; Cyclist Capability (affects planning, timing, scheduling).
- Physical Challenge Issues (requires pre-tour solutions)
- Frame Requirements: A Road Bike frame is just not tough or rugged enough to sustain a long fully loaded bike tour, especially if any off-road riding is required (which is a characteristic of most bike tours). Mountain bike frames are usually OK (tough enough, but maybe not long enough). Road Bike and Mountain Bike frames tend to be too short in length for long term bike tour durability. Road Bikes tend to be built light weight for speed and performance (at the expense of durability/survivability). Road Bikes are not built to carry tour loads (60-80 pounds) for extended periods of time. Generally, Mountain Bikes are tough enough for tour loads but are generally not built for long duration riding comfort.
- Tour Bikes need built in mounts (like braze-on mounts) for fenders, racks, and/or water bottle cages (these necessary items should not be after thoughts for a tour bike frame). Tour bikes must be pannier friendly. The frame needs to be tough enough to handle rear pulling and/or side pulling stresses and/or load weight of a loaded bike rack, pannier, trailer or an added wheel (3rd Wheel).
- Usually Steel has the best endurance and is the easiest to fix/repair, worldwide. Aluminum is OK for light weight and toughness issues, but Aluminum costs more and Aluminum Mechanics or technicians are not available in most of the world; Steel Welders are the least difficult to find. The same problem exists with Titanium frame issues and repairs, it is difficult to find a repair tech. Forget about Carbon Fiber, it is just not a durable material for bike touring. Survival is the key to long distance bike touring and durability matters.
- Tour Bikes need to be Load bearing (30-100 pounds of gear [plus the rider], 70-80 pounds is very typical [gear + camp equipment + food + water]). On Road Bikes and Mountain Bikes the rider tends to sit far to the rear because of a short wheel base and short drive train for performance purposes but when pannier weight and/or rack loaded weight are added, it tends to make the bike very heavy in the back and very light in the front [a handling problem]. However, an elongated bake frame, especially from adding room behind the rider by using elongated chain and seat stays, allows a rider better front-rear balanced riding control (see next bullet). This concept, of course, fits with other elongated/longer frame requirements or proposals for better touring bike designs.
- A longer bike frame, especially for riders of traditionally short-length bikes, yields far greater handling control over washboard roads. This is particularly important for those times that a rider is riding downhill, minding their own business and enjoying the view, when suddenly they come upon washboard bump conditions at a higher rate of speed than they would normally use when riding over washboards. Washboards are treacherous for short-length bikes and the solution is to secure a longer length bike (but not an overall bigger bike frame, just longer). Traditionally this is done by moving the rear wheel further back from the seat post and away from the crank/bottom bracket, therefore also lengthening the seat and chain stays. Note that shock absorbers will not eliminate the steering control problem of a light front end. From an Engineering Perspective this is more analogous to a long ship riding across many waves compared to a short boat riding up and down each wave. Additionally, better manueverbility is obtained if the cyclist can turn the wheel without hitting their own foot
- A longer bike frame, for better steering maneuverability on the front end, is obtained if the cyclist can turn the wheel without hitting their own foot (no matter the foot position). In emergency situations or for BMX type riding situations, riders with free feet (not strapped, clipped, or locked in the pedal) often center their shoe/boot at the foot's arch (just in front of the heel, the heel acts as a catch on the pedal) - All positioning is a waste of energy and a wastes of effort if the rider cannot steer and turn (maneuver) because the front top is hitting their two and stopping a full emergence turn.
- A longer bike frame, so the rider (or stoker) is not hitting the rear panniers with their heel.
- Tour Bikes need to have Ground clearance (one rides over big rocks, big holes, obstacles, and curbs). A tour bike should be able to ride up/over/down a curb without pedaling a crank ring or pedal into the obstacle and hopefully not dragging its chain across the obstacle. This is not an issue for Mountain Bikes but it is contrary to most Road Bike designs (which aim for low center of gravity riding for maneuver performance).
- Frame Sizing rules change from Road Bikes to Tour Bikes configurations. Tour bikes need a higher ground clearance (than a road bike's bottom tube) but not a proportionately higher top tube. The resulting tour bike profile may have a more elongated look. In fact, one may need to lower the top tube so as to step across the top tube for bike mounting, as very often an item like a tent or sleeping bag may be (can be) strapped across the top of a rear rack thus preventing the ol' Swing the Leg Over the Saddle mounting method that is common to most road bike riders and mountain bikers (male and female).
- Tour Bikes need a longer wheelbase (takes bumps easier and gives the rider and frame better endurance, smoother ride, better handling stability for loads, improved washboard situation endurance, and most importantly a longer chain run favors a larger quantity of usable front and rear gear combinations).
- Fork/Front-End: A tour bike should be able to ride directly into a curb (to go over at a slow speed) and not bend a fork nor snake bite a tube (therefore also supporting a tougher tube, rim, and tire assembly). This tour bike property supports pot hole survival/endurance much more so than on a road bike.
- Experienced Bike Tourers and Bike Designers argue about whether to tour with front shocks (or shock mount handlebar systems). It appears to be a personal preference and it correlates nicely to the expectation of riding mostly on road or off road. Shock mounts do add to weight and they yield a slightly longer shipment assembly time. There are different shock designs (air, hydraulic, spring, and combination systems) that yield different durability probabilities - One usually selects durability over performance features. Bike shops and designers are usually up to date on the ride, assembly, maintenance, and durability/performance issues. The decision must be made before a bike design/purchase, because changing a fork system after the fact affects all related ride features.
- Racks and Suspension: It is easier to find rack mounts (for panniers) for rigid suspension bicycles. It is slightly easier to ship and assemble bikes with rigid suspensions. It is difficult to find quality touring racks for shock/flexible suspension bicycles (that can hold 50 pounds of weight over multiple long distance tours). Flexible suspension racks do exist but it is terribly difficult to find a rack for a specific bike/situation/set-up. These are considerations to address before one buys/orders/makes a bike frame. Most people forego a flexible suspension for touring but some people have physical needs for a front suspension or a full suspension bike.
Pannier Rack Highlights:- All About Pannier Racks
- All About Panniers
- All About Handlebar Bags
- Pannier Rack Bolts are usually the first bolts to work loose on the road/trail.
- All About Threadlock, Purple is Best, Blue is OK (best if only carry one threadlock agent), Do NOT use Red.
- Rack Durability is more important than looks or performance.
- Panniers need the ability to adjust the mount, low mount is usually best (see About Panniers).
- Racks with top plate/deck serve more needs than if absent.
- Top plate/deck best, front and rear, if flush across the top (or tied down gear bags wear faster).
- Pad the rack's top plate/deck (reduces noise, reduces bag wear). Some use foam padding, some use small pipe insulation, some use self stick rubber pads.
- Caution: Seat mounted racks are very limited in weight capacity, some are limited to 10 pound loads.
- Suspension Seats and Handlebars: Some people (need to) setup their bikes, often after purchasing the bike, with shock/suspension seat posts and/or handlebar stem shock/suspension mounts - it can be an after purchase solution for a physical need to have a suspension ride. When road riding, for the most part, control is not an issue, but control can be an issue when one needs to be correcting their course while the suspension seat or handlebar is flexing at the same time that one is steering or pedaling - it takes a short while to become accustomed to these features (flexible steering or pedaling) and some people cannot adapt to either of these features.
- Drive Train: Tour Bikes need a longer chain, chain-stays, and drive train (this is a huge big deal, it gives the rider more gearing options, less chain rub [or none] when out of chain line alignment or 'cross chaining'). This desired feature melds nicely with the concept of an elongated Bike Tour frame.
- Tires: Tour Bikes need to be built for wider tires (usually about 1.5 inches has the best endurance, but the frame should be able to facilitate 2.25 inch mountain knob tires).
- Control: Please note that some people do not like the handling of a bike with fully loaded panniers, especially on the front wheel. Bike handling is especially a big deal when riding on mountain sides (narrow trails/paths) and this is why some mountain bike riders may pull a single-wheel trailer. So far there are no bikes designed specifically for pulling a trailer (with factory mounts or a combination system for a trailer and pannier mounting).
- Warnings (Rider Weight, Frame Shape, Single Wheel Trailer): Please note that some small frame bikes and some less common shaped bikes (other than diamond/trapezoid shape, to include most girl frames and mono-tubes) may have problems pulling a single-wheel trailer, this safety issue may be associated with light weight people as well (seemingly under 125 pounds). There are some Bike and Single-Wheel-Trailer combinations (perhaps Bike and Trailer and People combinations) that have resulted in bicycle steering/handling problems (frame shake or resonance steering control dangers that have resulted in bike crashes). If a touring cyclist is in this category, then be very cautious and/or maybe stay only with pannier based rigs or two-wheel trailer rigs. Read about Shake Recovery.
- Weight: More weight causes faster chain and bike wear. More weight requires more cyclist energy.
- Rider Strength: Some people just cannot pedal big loads and they physically must travel very light (often at the cost of some material convenience) - These cyclists are often less than 110 pounds in their own body weight and they can tour very well with the right setup. On occasion the right setup may involve your favorite bike shop or a specialist bike store that works with physically challenged people - There are plenty online. In the Colorado Springs area one should contact Angle Tech Cycles.
- Kick Stand: Considered dead weight in Road Bike circles and it is considered as a obstacle catching contrivance in Mountain Bike Circles. Side mounted kickstands are a waste of time and money (even in the Tour Bike world). However, a bipod stand on a Touring Bike has a few conveniences: it can remain standing under breezes, it keeps a bike and it's components and personal gear out of the dirt, it minimizes (to a greater extent) exposure to creepy crawlers and things that slither, but most importantly a bipod allows one to do maintenance on the drive train and work on related rear wheel system issues (because one can raise the rear wheel off the ground).
- Other Frame or Setup Solutions: Recumbent bike frames (with the right setup) favor many physical human challenges. Recumbent bikes are not allowed in most long distance bike races because they out-perform most diamond frame bike designs (everything else being equal) - Go figure.
- Recumbents (and Tandems) don't ship/pack as easily as diamond frame bikes. Another bike shipping issue is that Touring bikes tend to be bigger than road bikes and may cost more to ship. All of the touring gear together will always add to the total bike shipping weight and it is not unusual to be over the 50 pound weight penalty for some airline shipping.
- Transport/Shipping: If one is going to conduct international flights or shipping for bike touring, then be sure that the bike can be easily packed. Consider frame break down (like S&S couplers) or fold-up bikes (like BikeFridays). Give consideration to re-usable packing boxes or cases and give consideration to cases that can be used as trailers. There can be many logistical issues to consider (see next bullet). Most expedition bikers ship and use their own solid frame bikes; however one may buy or rent bikes at or near the Tour's start location. Also, consider reading about Bike Shipping.
- A bike that breaks down for shipping should have a come-apart drive chain (like SRAM Quick-Links) and removable rear derailer and quick connect shift and/or brake cables. The quick connect shift cable allows a person to disconnect a derailer and then reconnect the derailer without having to re-tune the derailer (invented by and sold by daVinci Designs - found online). The quick connect brake cable facilitates easier, no worry, removal of the handlebar without having to manage several feet of attached brake cable and it prevents having to re-attach the cable to the pinch bolt, over and over (which destroys the cable end). Hint, many long range cyclists meld solder into the brake and shifter cables at their ends and in the area of the pinch bolt contact [solder binds the cable together and prevents or slows down cable fraying].
- The net effect of designing a bike for shipping tends to shorten the frame length, shrink the frame size to rider ratio, rob space from the bike for mounting accessories, rob rider ergonomic positioning, and lighten the bike such that material strength is reduced.
- Generally, even with the recent added Air Carrier baggage cost increases, it is usually less expensive to pay the added Air Carrier Costs than to send a bike via Air Freight (with UPS or FedX for example). The advantage of sending a bike Air Freight is that one does have to limit their Air Plane luggage (by the bike or accessory weight difference[s]), one does not have the hassle of extra check-in and check-out time nor extra baggage inspection time (very often bicycles are picked up and dropped off at the air carrier's Freight Office which is a different location than used for regular suit-case check-in/check-out), and one does not have to deal with the burden of lugging extra luggage at the air port nor enroute (like in a taxi or bus).
- The bicycle needs a power drive train setup that specifically facilitates a person to pedal uphill all day long, carrying/towing a load, while the rider is in a seated position. By hill, we mean a mountain, by pedal, we mean climbing 7,000 Feet (~ 2,000 Meters) in a day, sometimes twice a day.
- One usually needs a minimum of three front rings and a supporting front derailer for climbing but some bikes may use a special rear hub gear box device for some Tour Bike situations.
- One needs to be able to ride up a steep slope sometimes. It is OK to push a bike (this happens on many interesting global type tours), but one should not have to push a bike for a long time nor very far. One needs good gearing for hill climbing.
- Longer chain runs are a whole lot more forgiving about chain line issues (thus making the system more durable).
- One should consider another drive train or another bike if one cannot pedal a Touring Bike in full cross chain situation (without chain side grinding noises). For example, on a 3x9 drive train (3 front rings and 9 rear sprockets), one should be able to bike in a 1-9 combination or a 3-1 combination (which on a short drive train will make grinding cross-chain noises) - granted that one may need to trim the front-derailer (see next bullet).
- Front Derailer Trim means being capable of moving a shifter to an interim setting between full shifts. For example, if there is an interim index click/position between the #1 ring (low gear/granny front ring) and the #2 ring which allows a 1-9 (ring-sprocket) combination that does not make chain rub noises on the front derailer's cage/basket (and there is no sprocket-ring side chain rub/grinding noise) then that gives a much more flexibility and capability for long riding duration than if not. This is very much a performance bike versus touring bike issue - A road bike is significantly shorter in length (ergo a shorter drive train length) only to cut down on bike weight (rider comfort and bike endurance are not concerns of performance/race riding/biking). See Comfort/Endurance Issues in the next section.
- A good touring Front-Derailer will facilitate interim trim positions. 1) This allows for what would be called a cross chain operation on shorter drive trains (by being able to move the rail cage off the chain). 2) As wear and tear occur over time, trimming a derailer often allows a cyclist to postpone a mandatory trail side derailer adjustment - allowing a rider to ride through a trying circumstance. [This statement is not advocating delayed maintenance, just appreciating that on special occasions a good endurance bike may support a slight delay before maintenance on the drive train for a kind of tough touring bike that is sometimes called a 'War Horse' - it endures well under stress].
- Brake and Shifter Controls: Integrated brake/shift systems were created for performance purposes (lighter weight and race speed performance, and not for endurance nor for maintenance). Integrated brake/shift systems are much more difficult to repair or replace than separate brake and shifter setups. One problem with integrated brake/shifter systems is that they are often unprotected (mistake #1) - Bar-Ends can be used for protection. And Two, being combined makes trail/road side maintenance much more difficult than that of separate systems (mistake #2) - This can make bike tour survival more difficult. Integrated brake/shifter systems are seldom repairable (they are usually swapped out for a new assembly), granted that one does not normally carry brake levers or shifter assemblies as a spare part on a tour.
- Rear Derailer Multi Gear Shifting: The act of mountain biking and mountain touring often presents a need to be able to shift through more than one gear at a time, especially when climbing with a load. Such 'skip gear' and 'jump gear' shifting can easily be performed on Grip Shifters and most Trigger Shifters but not on Integrated Shifters. Experience has shown that passing over one and sometimes two rear cogs is manageable by most rear derailers, however most derailers cannot handle passing over three rear cogs (as the amount of time that it takes for the chain to re-rail robs the cyclist of the bike's forward speed). Mountain Styled shifters perform a little better in the mountains than their Integrated Shifter counterpart for fully loaded climbs, all cyclists need to be down shifting ahead of the need.
- Frame Designs that work for Road Bicycle Speed and Performance often will not work for Touring Bicycles or for a rider's personal long term Endurance. A longer bike yields a smoother (more enduring) ride to the cyclist. A longer drive train enables a wider use of all available gear (ring/sprocket) combinations. See previous section.
- Steering: A longer frame and geometry from the front tire to a rider's foot on the pedal should be such that if a rider had the pedal under the arch (not ball of foot) then the rider's shoe toe area should NOT touch the front tire. This area tends to get shortened for race bikes and for road bikes but should not be shortened for tour bikes.
- Tires: Wider Tires (1.5 to 1.75 inch widths are more supportive of long distance rider endurance than race skinny tires - Also, further discussed under Wheel Issues). Skinny tires wear out too fast, have more flats, and do not perform off-road for very long.
- Posture: Riding bent over for hundreds of miles gets tiresome in a hurry, one needs a multiple rider position capability and one way to achieve this by having bigger/longer handlebars that allow multiple holding positions for the hand (thus giving other hand, arm, shoulder, back, and neck muscle groups a way to relax while still pedaling). The riding posture that allows a rider to last the longest is to ride sitting upright (basic human ergonomics).
- Rider Position Over Time: Quite typically, the older any rider has become, the more upright a rider needs to sit. One specifically needs to address the riding base posture and the capability to take on multiple positions in order to systematically rest or relax certain muscles or muscle groups while still pedaling.
- Saddle: The more that one needs to sit up-right (often associated with age and/or riding over time) the more that one needs a wider seat (often called a saddle).
- There are some seat designs that facilitate reduced crotch or butt nerve irritation over time. Riding with the back prone for long periods of time (years) has been known to cause male and female reproductive issues and it has caused, in some circumstances, irrecoverable nerve damage and or pain.
- Sometimes a modified chair is needed for long term rider endurance/survival (recumbent style).
- Prepare yourself for Bicycle Tour riding: No matter the type of saddle, all riders need bicycle sitting experience over time to be able last all day in the saddle. This is also called Butt Break-In Time, no-one can go several months without riding much and then take off on a bike tour without feeling the pain of more time in the saddle than the body can handle.
- Handlebars need to facilitate multiple hand and arm positions. On mountain bikes with more or less straight bars, long bar ends serve to facilitate different body positions. Drop Bars probably offer the most rider positions, as is. Note that there are aftermarket drop bar arm rests and there is a manufacturer that makes a kind of upright handlebar extension that works on most other kinds of handlebar designs/shapes.
- A bicyclist will feel better at the end of the day if they can ride in a variety of positions. Changing the rider's position allows the resting of some muscles while working other muscles - this is a characteristic of all long distance riders. A handlebar that facilitates a variety of riding positions will enhance rider endurance, especially in the long haul. Traditional drop bars meet this requirement, in fact we have seen drop bars mounted on cross country mountain bikes and we have seen forearm rests mounted on tour bikes. The addition of bar-ends can help tremendously for any handlebar. There are P shaped handlebars, H shaped handlebars, C shaped handlebars, drop bars (traditional road style), inverted drop bars (for bend-over relief, much like upright bar ends), half-drop bars, L shaped add-on bars, and other aftermarket handlebars designed for long distance touring (or rider special needs).
- Touring handlebars should be tougher and longer in tube length (side to side handlebar width). Performance Handlebars are usually small in size, length, and lightweight (designed for a narrow profile bent over race position). Touring Bike Handlebars need to be able to mount additional hardware/accessories on the handle bar (or sometimes on the bike Stem/Headset). See next Tour Bike Setup section.
- Wider and beefier Handlebars (wider than stock bars on performance road bikes) allow better control of a pannier loaded front wheel.
- Handlebars should be strong enough to be able to take a few mishaps/drops/crashes.
- Stem-Riser/Steering-Tube: Sometimes the stem-riser needs to be taller (longer) to accommodate a cyclist's sitting more upright position. This will raise the center of gravity and it can make quite the moment/lever when a handlebar bag is added (therefore, it is easier for the bike to fall over when resting on something or if the bike is on a side mounted kick stand). Sometimes, raising the riser requires a shorter stem piece or even a reversal of the stem piece.
- Physical Challenges: Sometimes one needs to address a special bike configuration just for body mechanics; in fact maybe a special setup may be required and maybe another style of touring bike is needed, like a recumbent, quad, trike, or special tandem. There are plenty of Bike Shops online that cater to the Physically Challenged Cyclist. It happens that Colorado Springs has a special group of guys that work with physically challenged cyclists at Angle Tech Cycles.
- Lights (front and rear - be aware that gear tied to a rear rack often blocks a rear light mounted on the seat, seat bag, seat stem, seat stay or seat post)
- Bar End, Extra Bar, Bar Rest (both for multi-position ride duration comfort as well as to protect the brake lever and sometimes the shifter lever when a bike falls over as well as for crash protection)
- Bell, Alarm, Polite Noise Maker
- Computer-Speedometer-Odometer
- Handlebar Bag, Map Case, Trip Notes, GPS Mount
- Water Bottle Cages and Bottles (more is better)
- Fenders (front and rear)
- Pannier Racks (front and rear)
- Mirror (can also be helmet or glass frame mounted) - everyone should ride with a mirror
- Reflectors (frame, wheel, clothing, baggage, pannier, trailer, ...)
- Wheel Systems should handle the additional weight of touring loads, still ride comfortably, and have a commonly available tire/size. This issue needs to address all of the wheel components (Tire, Rim, Spokes, Hub, Brake, as well as address the Brake system and Fender Dust, Dirt, Gravel, and Mud Protection).
- Tires Size Issue #1: The best Sized Tire Short Answer is 26 inches. The Long Answer has to do with shipping. The best/desired tire size is directly affected by shipping. In the USA, and other international airlines copy this policy, any shipping case is LIMITED to 62 linear inches total measure or the person carrying/shipping the container must pay OVERSIZE Baggage FEES. Many bike carry cases are 26 X 26 X 10 inches, such that the linear count is 62 inches (26 + 26 + 10 = 62 linear inches). It is not worth buying/owning/having a case unless it meets the commercial carrier's maximum acceptable size which is usually 62 linear inches.
Tires Size Issue #2: The average wheel hub width is 5 inches (sometimes the rear hub is a little wider and the front hub is a little narrower). In a 10 inch wide shipping case, hubs will knock/rub into one another UNLESS the wheels are offset from one another. Thus explaining and supporting the importance of a 26" tire size, larger tire dimensions rob capacity from a case that is limited to 62 linear inches.
Tires Size Issue #3: This sounds silly but make sure that the front and rear bicycle tire are the same size or else the cyclist will probably have to carry two different tubes and maybe three different shipping cases ($$$$$).
Tires Size Issue #4: This sounds even sillier but make sure that the front and rear bicycle tire are have the same type of tire valve or else the cyclist will probably have to carry two different tubes and maybe two different pumps. I have only actually seen this problem in way remote bicycle rental situations but if you are not looking for such an issue, then the problem can be sprung upon you. I have never seen a dual pump that worked as desired for more than a few months.
Experience: We place the wheel into a case with foam pads duct taped to each case wall and we offset the wheels by pushing one edge down such that the wheel sits in the case in a tilted geometric plane (compared to the wall of the case). We then put a little foam pad between the hubs and offset the next wheel placement (parallel to the other wheels plane). Depending on the actual tire diameter, we may or may not deflate the tire BUT we only deflate the tire to make the wheel (tire + rim) fit into the shipping case. No consideration is given to deflation for air pressure - we give consideration only to making sure that the wheel is snug in its case
Don't get 700 mm tires nor 29" tires for international rides - Doing the Math: If one were to use 700 mm tires (27.55 inches) then the remaining width of the case would be 7 inches (62 - 27.5 - 27.5 = 7 inches), thus only having enough room for 1 typical sized hub (same issue for the even bigger 29" tires). - Reflectors: Keep or add-on the bike Reflectors (including non-wheel reflectors). Being seen at night is a big deal. Most people remove reflectors for performance purposes (a lighter bike goes faster). Touring cyclists want to be seen at night, it is more important than shaving a second off of the travel time. Sooner or later: 1) Everyone will find themselves on the road at night (it often results from: poor directions, poor planning, or a mid day delay/incident). 2) A touring cyclist may set up an emergency camp at night on a lonely unused dirt road and wake up to an XC Jeep with Night Lights performing a night run (don't ask) - You want to be seen versus being run over in your sleep.
- Rim(s): Stock rims may eventually crack or wear thin from braking activity or load stress. Sometimes, this stress, including mountain trail riding, may result in broken spokes, spoke stretch, spoke nipple (nut) loosening, and wheel wobble issues. One activity that usually needs to be done is to buy/install beefier wheel rims. Heavy Duty Rims typically have a stronger material, thicker material, more spokes, stronger spoke fittings, and/or better quality spokes. The majority of New Bicycles are not sold with Heavy Duty touring wheels. Heavy Duty wheels (often an aftermarket purchase) endure better than most stock bicycle wheels. Most bicycle shop techs can be very helpful in helping a cyclist to secure a suitable touring wheel/rim setup. Often, only the rear wheel is at issue. Many touring cyclists only beef up the rear wheel. Again, a bicycle shop technician can help address this topic/issue.
- Heavy duty rims are especially important if touring with clamp on brake systems but note that disk brake systems are better for loaded touring bike longevity.
- The best type of touring rim is A Shaped (called Aero, for Aerodynamic), the very design allows more weight to be carried and it can take more abuse than flat C Shaped rims. Aero rims cannot work with clamp type brake systems but only with disk brake systems. It happens that Aero shaped rims are faster than flat C shaped rims, everything else being equal.
- Spokes: Flat (aerodynamic) spokes require more wheel time maintenance and are not touring durable, avoid. Tapered end spokes are OK but full round spokes seem to endure best. Use thicker than stock issue round spokes (2.0 mm or bigger = 14 gauge or smaller g value). Use a 3x or 4x lacing pattern (4 cross preferred, 3 cross quite OK), with a count of 48 spokes (48 is best in the 26 inch to 700 mm wheel size, 40-44 is OK, the spoke count is usually in multiples of 4).
- Tube (Presta versus Schrader): Schrader valves are slightly bigger, more durable, easier to operate, and more serviceable at any petro/gas station air pump (on earth). I have never seen a fuel station pump that would handle Presta valves, therefore a touring cyclist should always have a Presta/Schrader valve converter (costs about $3, found at most bike shops). Presta valves are smaller, lighter in weight, have a slightly smaller wind resistance profile, and are a little more problematic to operate (than Schrader Valves) - they require screwing the valve in or out for closing and opening (this is in addition to a valve cap). Always cover valves with a valve cap for touring (not done for racing, lighter weight).
- Every tour biker has a 'I hate Presta Valves story'. However, due to the narrow top (on the spoke side) of the Aero rim (a double walled, A shaped rim, the best for touring) most manufacturers will only make narrow hole openings for tubes, ergo while the Schrader Air Stem/Valve is the most common in the world (the same as car tire valves), most manufacturers will only provide a narrow hole opening (for rim stress safety purposes) and therefore only tubes with narrower Presta Air Stem/Valves will fit/work.
- There are people/cyclists that drill out the Aero rim holes for Schrader Valve sized tubes. For liability purposes, manufacturers and bike shops will not perform this task, but I have not actually heard of anyone who has caused rim damage or a rim failure. While I have not done this, I imaging that the drill-out must be done with drill precision, leaving a perfect hole (no chips, not oblong, and just big enough to take a Schrader valve and stem).
- Many hardware stores, sporting goods stores, retail outlets (like Sears and Target), gas stations and tire shops may carry standard bike tube sizes with Schrader valves and do NOT or will NOT carry bike tubes with Presta valves. Always carry at least one spare tube (and a tube repair kit) no matter the valve type. On week long or longer tours carry two spare tubes if riding solo and insure that others have at least one spare tube each (and insure that the spare tubes match the tire type). See Tire Repair Issues.
- There are punch-out spacer rings sold on the bicycle after market (found in some bike shops as well as online) to put in a Schrader rim sized hole that will resize the hole to fit a Presta (smaller sized) air valve, so as to allow either a Schrader or Presta sized valve/tube to be used, thus facilitating an easier to find Schrader valve tube (for emergency purposes, if starting with Presta stemmed tubes). Thus a rim with such a knock-out spacer will increase the tour's endurance/survival factor/probability. Please note that this kind of flat ring/spacer will not properly fit in a curved Aero rim's top hole (spoke side).
- Pump: Avoid automatic Presta/Schrader selector pumps with dual outlets; they always fail, usually sooner than later. Manual selector pumps do work but they are usually too big and heavy to carry on a bike tour. Pumps with one outlet seem to work the best in the long run (versus duel air outlet) - usually one has to manually change the valve fitting between Presta or Schrader valve types. It would be a perfect world if all tire valves were the same, but even in the bike tour world, most bikes are Presta and the trailer is Schrader - Yes, it would be nice to have the same valve and there are bikers that always make that conversion before a major bike tour. I try to avoid brand names, but the ToPeak Mountain Morph (no longer made) and the ToPeak Road Morph is the only pump that I ever used that actually reached the advertized 100 PSI (and 110 pound cyclists have also attained the same 100 PSI).
- Tires: 26 inch tires and Euro 700 mm (diameter, 700mm = 27.5 inches) tires are the most common tire diameter sizes in the world (don't use 700 c tires, they are road bike tires). One wants commonly available touring tires and rim sizes. Tire availability is a functioning characteristic of Survival.
- Wider tires (versus narrow racing tires) last longer, absorb bumps better, and endure better [Adventure Cycling]. Everything else being equal about a touring bike, wide tires statistically yield less flats. Yes, there is a change in performance (which is why racing tires are narrow). Racing tires do not endure long rides that are measured in weeks, period.
- Good Touring Wheels generally have more spokes, thicker/tougher spokes, and a 3x or 4x spoke lacing pattern (pronounced Three Cross or Four Cross).
- The Tires of a Touring Bicycle need to be a little wider and thicker than Road Bike Tires; 1.5 to 1.75 inch widths are more supportive of long distance rides than race skinny tires. Touring bike tires need to be able to handle heavier loads, last longer than road bike tires, facilitate a smoother ride (for the load), and take a little more abuse (usually at the cost of being slightly thicker and heavier).
- Whereas Tread is almost a non issue for road bike tires, Touring Tires need to be able to minimally perform in non-pavement conditions and may need to have some degree of dirt traction knobbing to the probability of off road use (there is always some off road riding on a tour).
- Trailer Wheel Tire(s) do NOT need any tread, in fact, the slicker/smoother that they are, the easier the effort it is to pull the trailer behind a bike. Trailer tires DO need to be tough enough to resist tire wear as well as to resist thorn punctures.
- Additional Wheel and Tire information may be found at this site's ALL About Wheels link.
- Caution: A few Trailer Wheel Rims need to address the heavy duty stress issue and people over 200 pounds need to address the heavy duty wheel/rim stress issue up-front.
- Brakes
- Disk Versus Clamp (or Drum): It comes down to this (which has actually happened to this author). A Clamp Brake wears down the Rim Side of the very Rim upon which one's International Tour depends for carrying the cyclist and all that gear. I have ridden a rim until it cracked from wear - If you think about it, the idea of a Rim Brake is Dangerous.
Warning: The RIM CLAMP style Brake can and does wear out the side of the wheel rim from repeated brake activity, it is only a matter of 'When', NOT 'If' the rim will wear out to the point of failure. Touring on Rim Brakes is Dangerous to One's Life.
A disk (rotor) is a separate item that fits on the wheel's hub and when a disk/rotor wears down, one simply easily replaces just the disk and the wear does not affect the rim. Granted, that stop and go movement does affect the torsional spoke to rim/hub flexing; no matter if the wheel has clamp, disk, or any other kind of brake. There are drum (hub) brakes which were an intermediate solution used on HD Solo and Tandem Bikes before disk brakes were widely available at a reasonable cost (drum brakes, IMHO, should no longer be suggested for new bikes or new wheel systems if disk brakes are available).
When changing brake systems one should get a new wheel (hub with rotor, spokes, and HD Rim [an 'A' shaped Aero style rim is best]). There are different sized diameter disks, talk to your favorite bike shop/mech/tech for issues and suggestions; generally, bigger (to a point) is better, especially between a choice of two sizes (everything else being equal). Select common sized rotors/disks (easier to replace in remote countries), insure that both wheels have disk brake systems, and insure that the both disk brake systems are of the same rotor size. Note that on tours, we no longer carry a spare rotor but we do carry one set of spare brake pads. A cyclist can continue touring on just one disk brake. It is statistically improbable that both pads would wear out at the same time or that both rotors would be unusable at the same time. - Cable operated Disk Brakes Versus Hydraulic: Cable is generally more mechanically dependable than hydraulic disk systems. Hydraulic fluid, while still permitted to be carried on airplane flights, but only in stored luggage, cannot be carried on person or carried in carry-on luggage. Supposedly, the fluid from bicycle hydraulic systems is to be drained for shipping but I have never actually heard of this being enforced. Shipping a dry bike, adding fluid and then removing air out of a hydraulic system for destination setup/usage can be a difficult to task to perform (it will need a brake fluid bleed system and knowledge of how to use it), but some people still ship or fly their bikes in this manner.
Note, if one ever has a leak, be it from a bike or a fluid container in a suit case, one may have a messy situation on their hands from other people's damaged goods. Imagine a leaking hydraulic fluid bottle in a suitcase located above a lady's suitcase where the lady is flying home with her custom made wedding dress. For the record, this is when one should consider shipping their hydraulic dry bike to and from a bike shop (or have a cable operated disk brake system). - Rotors/Disks (Brake Disks and Rotors are names for the same thing):
- The Type of Brake Disk/Rotor Matters and there is a Suspected Rear Brake situation to be aware! Riders should request rapid cooling rotors; these rotors are usually the kind of rotor that have many holes or slots and the rotors may be of a special composite or ceramic sandwich construction.
Caution: It is suspected, by my own experience, that full sized rear panniers may dam the air while in motion and perhaps to some degree block/reduce the normal flow of air to/across the rear disk, thus perhaps preventing the disk/rotor from normal cooling. If any part of a brake system is too hot it does not operate as efficiently as when it is cool - In a worst case scenario, any super hot brake will probably fail to operate properly. This is not an issue of using the front brakes more or more often (as front brakes do stop any bicycle or motorcycle more efficiently than a rear brakes). It is more a matter of rear brakes not cooling down as quickly as front brakes (generally front brakes have direct air flow across the pads and/or rotor, even with large front panniers mounted). Most bike techs will know about rapid cooling rotors but probably will not know about the issues as related to fully loaded bicycle touring. - It is wise to remove brake rotors for shipping. Re-installation is easy and straight forward and requires having the right tool, but everyone on a bike tour should have and carry a brake rotor install tool (usually it is a T-25 Torx Tool but other types and sizes do exist). Know your bike's requirements tool and torque. Some multi-tools have a T-25 Torx Key. We store the rotors in individual zipper plastic bags and then place them inside a homemade (with duct tape) corrugated cardboard envelope for shipping. Carry the bolts ins separate plastic bags or one or two will disappear in shipping.
Caution: We have had loose bolts disappear in air-transport and we have had loosely attached bolts disappear in air-transport. There is no explanation but the result will leave the biker having to look for replacement bolts at the travel destination. Warning: Do NOT touch the brake pad contact area on a rotor. A little finger oil can weaken the effectiveness of a brake system. Do pick-up and hold a brake rotor by the edge of the inside spokes. Use rubbing alcohol to clean and remove oil from brake rotors (these are the same instructions as for Halogen Lamps, NO Touching on the lamp glass).
- The Type of Brake Disk/Rotor Matters and there is a Suspected Rear Brake situation to be aware! Riders should request rapid cooling rotors; these rotors are usually the kind of rotor that have many holes or slots and the rotors may be of a special composite or ceramic sandwich construction.
- Braking Technique Matters: Dangerous Clamp/Rim Brake Issue
- Background Knowledge: As with automobiles, motorcycles, and bicycles, when one brakes hard on dry level hard surfaces the weight of the vehicle gets heavy on the front wheels and light on the rear wheels; in some cases the rear wheel may lock in place and still slide across the road surface because the weight on the wheel is too light to be effective. On the other hand, there is relatively much more weight on the front wheel such that the front brake is extremely effective in stopping or slowing the vehicle when strong braking is effected. HOWEVER: on a motorcycle or bicycle, sometimes if one locks the front brake, then the vehicle may lock the front wheel and the inertia may flip the rider over the handlebar (called a Header by cyclists [been there, done that]). This is problematic on light weight/load cycle conditions, for example on solo bikes carrying no load. Flipping a bike is less of a problem on loaded tour bikes or on longer bikes, like tandems. Learning to brake with a front brake pulsing action (on, off, on, off, on, off; performed by the rider) is one way to learn good braking control for straight ahead level road stops. Most experienced riders can use a more steady-on front brake technique using a front brake lever pressure squeeze and pressure reduction in longer pulses with micro pressure differences. The rider intuitively eases up slightly on the front brake just before lockup - this only comes from experience. Turns, descents, wet roads and dirt roads require different techniques, all of which are easier to manage if one is already cycling slower before one enters into a turn and/or deceleration event. The subject is beyond our scope here.
- *** Bicycle Touring Brake Technique: *** On loaded bicycle tours, when braking for long dry straight paved road descents, it is better to brake hard and then coast back up to speed than it is to apply a long and steady applied braking technique [per many biking articles and blogs on this subject, the latest touring article is from Jan Heine called 'Mechanical Advantage' in the March, 2011 issue of Adventure Cycling, V39, #2, p54]. Brake using more force on the front brake than on the rear [something akin to a 70/30 ratio]. Another reason to use your front brakes more is that the front brakes typically have nothing to block the air flow. Rear brakes; however have a rider, frame, and pannier interfering with air flow, which in turn, may prevent the rear brake from cooling as efficiently as the front brake. ALSO, if a cyclist can only afford one good cooling brake rotor then put it in on the rear wheel. On long distance bike tours it is always wise to have identical parts that serve the same purpose - i.e., the same brake system and rotor, front and rear.
- Least enduring to the brake system: Steady On for a Long downhill run - this method seems to heat up the disk or rim the most. It also heats up the pads; hot pads are not as efficient as cool pads; it does not take long to cool a pad, pads start cooling as soon as they are not used.
- Better: Pulse Braking (both), 1-2 seconds engaged, 1-2 seconds disengaged.
- Better: Alternating use, front then rear, 1-2 seconds engaged, 1-2 seconds disengaged.
- Best: Hard Braking (both), significant change in speed from fast to slow, then coast back to braking speed.
- Warning - Brake Lever Position: In the USA, it is customary to position the Front Brake Lever on the left side of the handle bar; this lever position is an old established custom, like driving on the right side of the road. There are exceptions for people with physical challenges, both in position as well as side. In Europe, it is customary to position the Front Brake Lever on the right side of the handlebar. To the best of my knowledge, ALL Modern Motorcycles have Front Brake Lever on the right side of the handlebar. Bicycle Shops in other countries may or may not change the position of the front brake lever and they may leave the lever position as it arrived from the manufacturer OR the bike shop may leave the brake position as it was last setup by the last rider.
- Issue/Warning: Once a rider is used to a Front Brake Lever being in one position (left or right side), then one's braking performance in emergency conditions may be negatively affected if the brake lever is positioned opposite.
- Issue/Warning: A rider can and should state a preference when buying or renting a bicycle.
- Issue/Warning: Outside of the USA, in the absence of a stated/desired brake lever position, upon a bike shop learning that the renter is American or coming from the USA, the shop may re-position the Front Brake Lever to be on the left side of the bicycle by just trying to be helpful. Be Aware of this possible action and be advised that it is always best to state one's preference.
- Issue/Warning: A rider can and should physically change the setup if it is not to their preference (I do this on foreign rentals).
- Issue/Warning: A rider should walk away from any arrangement that does not accommodate their bicycle brake usage, expectations, skills, and/or habits.
- Issue/Warning: If a bicyclist comes from the motorcycle world, where they are used to a Front Brake Lever being on the right side of the handlebar, then they should strongly consider riding a bicycle with a similar setup (insuring that the Front Brake Lever is positioned on the right side of the handlebar).
- Body Inertia (When braking): Solo riders usually have no problem controlling their forward momentum when braking because the same person that conducts the braking is the same person that has to body shift for deceleration. HOWEVER, on a tandem, this is a different issue: the Captain nearly always needs to warn the Stoker of an impending/known stop so that the Stoker may perform the necessary body position shift for a quick stop. It is highly possible that the Stoker May NOT be looking forward or that the Stoker my not have their hands on the handlebar when the Captain is about to Slam on the Brakes. Stokers will accept emergency stops without being informed, otherwise the Captain is going to hear or feel the Stoker's displeasure.
- Fenders: It's not hard to convince long distance bicycle tour riders that fenders are a necessity. Using a fender is a shift in mindset from speed performance riding where a fender is just seen as extra weight. For those riders, remember that touring is about endurance and survivability. Cycling all day long in the rain is par norm for touring. Two or three days in a weather front is not an unusual occurrence in any fourteen-day time frame. Reducing the amount of dirt, grime, mud, and water from the roadway or dirt-path to the bicycle, its components, its rider, other bicyclists, and trailers and/or panniers, greatly enhances Tour Survivability, rider comfort, and attitude.
- Note that security is always an issue. Pretty things attract people (especially kids) and ugly things repel people. There are decals for sell on the Internet that make bikes look old, dented, dirty, scratched, and un-desirable. Some people put on address labels and then strip them off, leaving that ugly white gummy look of an old sticker (rub some dirt on it to make it non-sticky and more ugly). Some cyclists put short wraps of duct tape around tubes (like the stays or seat mast) to have available for emergency use, but it also can serve to ugly up a bike.
- Typically, security is a big city issue and not a rural, village, or remote outpost issue.
- See the Bicycle Packing and Shipping Checklist for bike shipping and transportation issues.
- Most good touring bike designs are very general looking.
- As a Rule-of-Thumb, it really helps to Keep Add-On Components Simple to un-mount for shipping, remount for tour use, and easily operate when needed. Give consideration to the mount and un-mount issues, usage, and shipping aspects when buying components or accessories.
- There are third party post and/or mount extensions available for adding devices to an already crowded or small handlebar or short stem/mast; available online or through your favorite bike shop.
- It also Helps with component replacement and repair when pieces are common and available worldwide (versus at the bleeding edge of technology where only a FedX shipment in a big city hundreds of miles away will resolve a missing, stolen, or broken component issue).
- The Pretty Things of new technology have a habit of disappearing too easily (some new technology bikes don't make it past the shipper).
- Further (and perhaps more detailed) reading about Tour Bike Selection Issues may be found online at Choosing a Touring Bike for the Road (http://www.adventurecycling.org/features/bikefortheroad.cfm), written by Larry Diskin (current or updated in 2011).
- See also, How to Choose a Touring Bicycle, written by Hal Amen, December 6, 2008 (still current), found at http://matadornetwork.com/notebook/how-to-choose-a-touring-bicycle/ .
- Cyclist in Trouble:
- Having dealt with the issue of needing to know the foreign word for word 'Air' a few times (hint, hint), more people understand the word 'Atmosphere' than the word 'Air' (in all Latin based languages).
- I have never had trouble pantomiming the up-down motion of operating a floor stand air pump to convey the fact that I need an Air Pump (I am usually directed to a Petro Station or a Tire Store, either of which is very satisfying).
- There is no place in the world (outside of big cities, heard of by me) where people will not stop to help a touring cyclist that is in trouble - it is an amazing statement about the human character.
Attributes of Bicycle Tours, for your Consideration (mixes occur):
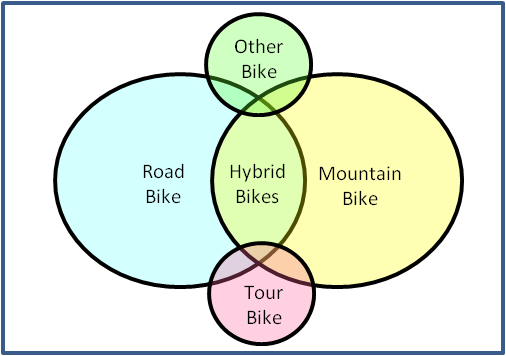
Note: 'On the Road' Touring Tips, Tricks and Learning Lessons are located at Touring Tips.
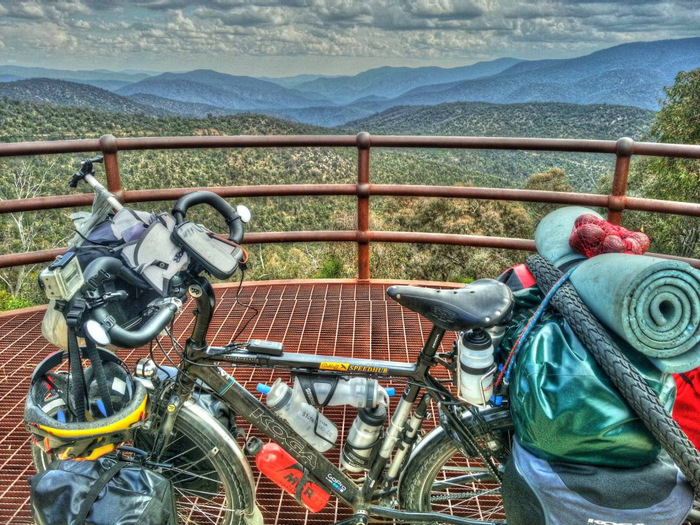
Fully Loaded Bicycle Tour, January, 2013;
The Barry Way, New South Wales, Australia
"A good Touring Bicycle will always have fenders and racks designed into its development"- Dennis Struck
Touring Bicycle Frame Issues
(Main Frame, Forks, Stays, Shape, Racks, Suspension, Materials):
Top
How to Choose a Touring Bike - TOC - There are a multitude of Facts and Considerations for a Frame Selection.
About Touring Bicycle Drivetrains and Issues
(Chain, Sprockets, Rings, Cranks, Pedals, Shifters, and Derailers):
Top,
How to Choose a Tour Bike - TOC, Also See Common Mechanical Problems and Solutions
Touring Bicycle Rider Comfort/Endurance Issues:
(Bike Design, Posture, Ergonomics, Condition, Saddle, Challenges)
Top,
How to Choose a Touring Bicycle - TOC,
Body Conditioning and Rider Ergonomics
Touring Bicycle Setup (Necessary Bike Touring Accessories and their Setup):
Top How to Choose a Tour Bicycle - TOCOne should have designed space or room on the bike handlebar, stem/head (sometimes), and frame, in order to mount devices or equipment. This is yet another reason for a larger elongated frame for a Touring Bike and a good reason to have a side-to-side wider sized Handlebar. Some typical and common add-on tour aids are:
Note: Also See Bicycle Tour Checklist, Bicycle Camping Checklist, Bicycle Load Carry Configuration.
Touring Bicycle Wheel Issues
(Tire, Rim, Spokes, Hub, Brake, Reflector and Fender):
Top
How to Choose a Tour Bike - TOC
How to Brake Summary (Don't get paranoid, have fun, use your brakes):
Touring Bicycle Caveats
(Tour Bike Selection, Facilitation, or Shipping):
Top
How to Choose a Touring Bike - TOCRoad Rules, Road Smarts, Road Survival and
Positive Bicycling Actions:
Top,
Cultural Issues
- ALWAYS Ride Bicycles With the Traffic,
generally to the outside-edge of the outer-most road lane;
NEVER Ride Bicycles Against the Traffic:
- ALL VEHICLES drive in the in the designated vehicle direction of the lane.
- Bicycles are non-motorized vehicles (BUT Bicycles are Vehicles).
- Pedestrian rules and customs do NOT apply to Vehicles:- First of all, these are the laws in about 99% of the world countries. The laws are thought to be so common sense oriented that they are NOT posted on roadways.
- Second, cycling against traffic dramatically cuts down reaction time of the, now, oncoming vehicles, whereas cycling with the traffic increases the reaction time of oncoming vehicles.
- Third the likelihood of a cyclist (pedaling into traffic) being in an accident or causing an accident is increased above the statistical norm.
 - People who (incorrectly) think about riding a bicycle against the traffic are thinking that Walkers are encouraged and instructed to walk facing oncoming traffic. The notion of "Walking against Traffic" is advantageous for both the walker and a motor vehicle operator but it is mainly to help the walker. Walking towards traffic helps a walker to see traffic. It partially forces a walker to look at traffic. Whether a walker is right or wrong, the walker will get injured and the vehicle will likely not be damaged. It is to everyone's interest to force walkers to look at traffic. Walking towards oncoming traffic facilitates the capability of a quicker reaction time for the walker to jump out the way of an unwanted situation (quicker than having one's back to oncoming traffic).
- Most of the advantage of "Walking towards Traffic" is for the Walker. All of that 'Facing the Traffic' advantage is lost for bicycles at cycling speeds. The oncoming vehicles have little to no reaction time and have virtually no place to dodge the cycle; and at the same time, the bicycle likely can't be jumped out of the way of an oncoming vehicle. This is especially important where [I have seen this happen] maybe the front motor vehicle can see a rouge cyclist coming at the driver and a second motor vehicle cannot see the cyclist and the second driver may swerve into the next lane to pass or avoid the front most slowing vehicle, thus taking up all roadway space, thus further endangering the cyclist (by removing all exit options except the side ditch or fence).
NEVER Ride Bicycles Against the Traffic. - Do remove road/trail debris that can damage bicycles. See a screw, bolt, or nail on the road; remove it. Yes, it seems that in some cases one could spend all day cleaning up debris, but do make the roadway a little better and safer than you found it. Sometimes the foreign object is too big or long to carry as trash; in that case it is probably better to just move it off to the side of the roadway.
- Road Karma: I can't explain this, but on long tours, there have been many a time that someone has stated that they need x object and later, in time, someone would find x object along the way.
- Blocking doorways, entryways, workways, pathways, walkways, roadways, or bike ways by standing or bicycle parking is very déclassé. It is Bad Karma to negatively interfere with the actions or attempted actions of other people. Blocking cycle paths is easy to unintentionally do when the leader/map reader is stopping in order to orient one's self for a map reading or for route directions and other bikers queue up behind the leader; it is wise to get off to the side and not block traffic (bike, pedestrian, or motor). When parking for personal matters, get completely off the travel way. Get far enough off the road, that if you were to fall (or drop something), you (or it) still would not be on the travel way.
- Offer appreciation to someone when you see people do good.
- Taking food into restaurants is very rude and gives other cyclists, unfairly, a bad rap [Adventure Cycling issue too].
- Be courteous of the needs of other people and cyclists around you.
- Parking or leaning bicycles against glass windows is very dangerous, at worse one can break or scratch a window, and at best it makes one look extremely inconsiderate. [Adventure Cycling issue too].
- In Right-Side driving countries, ride cycles to the right side of the trail. Allow and facilitate other cyclists to pass your self/group. Provide a cheerful greeting or acknowledgment. If about to pass other cyclists or pedestrians, call out your intention (with enough time for the other party to react): "On your Left", "On your Right", "Behind You", ... . Provide a cheerful greeting as you pass people. [Left Side for Left driving countries - same same, flip sides.]
- Mind the mirror (and have a mirror).
- Always assertively announce one's self as one comes up behind someone on the trail - Be extra loud for Senior Citizens.
- Wearing ear plugs for music systems while cycling is not only dangerous to the wearer but to others around the wearer, especially to other passing cyclists or vehicles and to escalating situations. By-the-way, most tour operators will specifically NOT allow the wearing of ear plugs (for music listening) while cycling - it is grounds for terminating tour participation.
- There is a relatively new courtesy that we've seen on mountain dirt roads and paths. The lead biker or the lead of a tight group of bicycles will announce by voice and/or count of fingers how many people are in the group. "Two more bikes", "Six more bikes behind me", and/or hold up fingers for the same count, three bikes, three fingers. This good behavior comes from the ATV, Motocross, and Snowmobile worlds - Thanks.
- COURTESY SIGNALING AUTO TRAFFIC: Signaling Traffic is not for rookies nor the faint of heart, there is a lot of faith in mankind and experience involved. See the Cyclist Communication Signals Section for Cyclist to Cyclist Communication (it's different).
The Situation is that a Lead cyclist or Solo cyclist will very often find themselves near or at the top of a hill where they can clearly see over the hill but no vehicle driver behind them can see over the hill or a lead bike can see clearly around a bend when those behind can't see clearly. Motorized vehicles will have slowed to the bikers speed for safety but they are anxious to get by the bikers. If conditions are right, the traffic can be signaled to pass or not pass - It is a much appreciated courtesy. - If it is unquestionably clear over the hill or around the bend, I wave back to the traffic with the "OK to pass wave" which is much like the military's "move forward" signal (open palm at rear hip or side, high arc extended swing of arm and palm moving forward to front of body, palm always facing forward except for the initial reach back). Some people won't pass no matter what, that's OK. Most will creep by and give a wave or short beep of thanks.
- If it is Not clear, I give a "Do NOT Pass" signal which is arm straight out to the side, open hand, palm facing rearward, fingers splayed. I have Never had anyone pass once I gave the Do NOT Pass signal. I have saved some lives, perhaps my own.
- If it is a judgment call, Do NOT get involved, leave the decisions up to the vehicle drivers.
- blank
 Electronics and Communication

Top,
Bicycle Tour Planning Graphic,
Electronics and Communication:
Electricity Issues Around the World,
Battery Charging Options:
Electricity Locations,
Self Generated,
Storage Device(s),
Solar Energy,
Commercial Charge Port,
Extra Battery
Devices:
Travel Computers,
Cell Phones,
Smartphones,
GPS,
Satellite Telephones,
Cameras
Overview:
-
The explosion in electronics communication and the global sharing of information is AMAZING (like the sharing of the contents of this website). A complete change in a communication method over a short period of time is causing a paradigm shift in how we do Bicycle Touring. This is such a shift that some people (cyclists) do NOT even own 'Land Lines.' they just own a Wireless Telephone (and their telephone works no matter where they live, no matter how often they move, or no matter where they are located right now).
- The GOOD NEWS: Data Processing and Data Storage - Most Smartphones are capable of processing and handling more information than was processed on the biggest IBM mainframes of just 20 years ago.
- The BAD NEWS: Data Security and Identity Theft - So much private and financial information is carried on Smartphones, that the loss of such a phone (lost, stolen, or broken) can nearly stop the planned activities of the owner for a time frame from 2 weeks to 2 months.
- Our youngest generation of cyclists have ALWAYS HAD A SMARTPHONE.
- Smartphones are Peripheral Memory Devices to their owners.
The Energy Question:
-
It takes Electricity to keep Electronic tools running AND that is the heart of the Bicycle Touring dilemma;
How does a Touring Cyclist keep the Batteries Charged?
Electricity Around the World:
Electronics and Communication: Electricity Around the World, Battery Charging Options,Travel Computers, Cell Phones, Smartphones, GPS, Satellite Telephones, Cameras
There is NO universal world wide standard for Electrical Power (Voltage), Frequency (Hertz), or Outlet. See the Global Electric Directory <--- Tells the VOLTAGE by Country, Frequency (HERTZ), and Outlet Type.
- Caution: There are two (2) Kinds of 'Adapters' discussed within this Electronics Topic;
Please Do NOT Mix up these two items/functions: - AC/DC Charge Adapter (converts AC electricity to DC electricity for a Specific Electronic Device).
- Electrical Outlet Adapter (converts the wall's outlet type to a specific electrical plug type).
Any single country can have any electrical standard, but typically a block of countries will have the same Power, Frequency, and Outlet Types.
- KNOW which outlets serve the areas of your Bicycle Tour (including Airport, Train, Bus, and Ship Terminals). There are about a dozen different Types of Electrical Outlets (two prongs, three prongs, L prong(s), Round prong(s), Flat Prong(s), Parallel, Perpendicular, Inline, Grounded, ...).
- In just a few cases, it is possible to catch a country in transition from old to new outlet types, thus maybe 2 outlet adaptors may be needed for one country. It is usually the older B&B or Hostel type dwellings which may not be up to the new code.
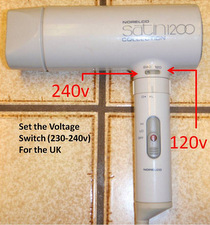 Adjust each appliance or device to the correct Power (Voltage) and Frequency (Hertz), usually by use of toggle switches on the object.
- Hertz cycles per second will have little effect on the operation of a hair dryer but it will effect anything that is timer, time, or clock based (like a clock, alarm clock, incandescent light bulb, computer, Smartphone, ...). If there is a Hertz/Frequency toggle, then set it as is appropriate.
- Most computer and phone AC/DC Adapters/Chargers will Automatically adjust for Voltage and Frequency through the Adapter, but always be sure. It is usually printed on the Adapter's backside, get help if in question.
- Use the correct electrical outlet adapter.
- Carry/Use 3-4 electrical outlet adapters, so that multiple things may operate or charge at the same time.
- Remember to recover the electrical outlet adapter after unplugging the unit (electrical outlet adapters have a habit of sticking in the plug). Experience: This can be more problematic for couples/teams where one person plugs the unit into the electrical outlet with an adapter and another person removes the plugged-in device.
Battery Charging Options:
Electronics and Communication: Electricity Around the World, Battery Charging Options,Travel Computers, Cell Phones, Smartphones, GPS, Satellite Telephones, Cameras
Battery Charging Options
- Table of Contents -
A - Access Hotel, Hostel or Campground Electricity
B - Dynamo and Low Voltage Storage/Capacitor/Charger
C - Energy Storage Cell (like Power Monkey brand)
D - Portable Solar Energy Converter Panels
E - Commercial Charging Port/Station
F - Spare Batteries (One-Time or Reusable)
- Access Hotel, Hostel or Campground Electricity
- One of the problems with staying at a campground and not paying for an electrical outlet is that the cyclist (you) may be forced to share 1 or 2 outlets with 20 other campers and cyclists.
- Hotel/Motel/Hostels cost a little more, but the benefit is that the individual usually gets private access to electricity and usually some degree of device security as well as personal security.
- One of the benefits to staying at a Hotel/Motel/Hostel is that one generally gets a warm shower and often a Simple/Continental Breakfast.
- Caution: Sometimes, the cyclist just has to watch their stuff (literally sit right next to it) or it may disappear.
- Stay at a Hotel/Motel/Hostel type room that has one or more electrical outlets and run the chargers from the very start until done. Usually a cyclist needs to charge more than one thing at one time (i.e., phone(s), camera(s), shaver, computer(s), GPS, ...).
 Caution: Always make sure that there actually is electrical power coming from the outlet - Usually one's charging unit has an LED light to indicate that there is power. Sometimes the cyclist needs to check the device that is being charged (for any indication that it is in fact being charged). Validate that the system is not discharging.
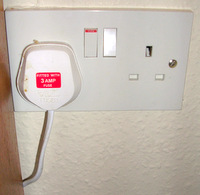 Caution: Many places of stay have Two (2) Electrical Switches (especially outside of the USA). The Room's Master Switch may be near the entryway and then a Second Outlet Switch may be on/at the Wall Outlet itself. Validate by the electronic device actually being charged that the electrical system is operating in full circuit.
Caution: Some Hotel rooms have an ecological/green 'I am Home Key Card' and if the Key Card is not placed into its 'I'm Home' slot (usually by the door) then the electrical outlets to the room will not flow electricity. In other words, the electronic gear will not only NOT BE CHARGING, in cases when the unit is powered-on it WILL BE DISCHARGING.
Lesson (Learned in China): A thin piece of cardboard or a piece of paper folded a over twice (4 sheets thick) inserted into the 'I am Home Slot' will activate a micro-switch trigger inside the device; so far one does not actually need a special card (but something must be inserted to turn-on access room electrical power).
Caution: Carry 3-4 electrical outlet adapters (for the regions visited) or the Cyclist will be limiting how many devices may recharged at the same time.
Caution: Older Hotel/Motel/Hostel Bathrooms/Toilet-Rooms used to have a Special Low Voltage Outlet (Labeled 'For Charging Razors Only' or words to that effect) that are NOT full juice outlets. Those electrical outlets may charge a Computer or Camera in One Week - Generally, a cyclist is better off to look for and use another outlet. - More and more Touring Cyclists are deliberately staying at a Motel/Hotel/Hostel or Campground every 2-3 days for one or more of the following reasons:
- To Fully Charge all Devices with batteries.
- To take a Warm Shower/Bath.
- To Do Laundry.
- To catch-up on electronic/cyber correspondence and/or travel log postings.
- To Perform Electronic Synchronizing/Balancing/Back-Up/Copy Work.
- To set-up/confirm the next Travel-Leg series of reservations for the Tour.
- To perform one or more tasks in town that probably cannot be done on the road (multitask between a couple or small group, visit a bike shop, grocery shop, perform some maintenance or preventive maintenance, and/or buy other touring supplies).
- To take their weekly touring break and just perform most of these listed tasks.
- If needed, unplug the TV and/or lamp(s) to get to those hidden electrical outlets. Remember to plug those devices back in when the charging is complete.
- Remember to recover your outlet/plug converter.
- Sometimes one is forced to use the one and only electrical outlet. It Happens. There have been times when a cyclist has to get up in the middle of the night to unplug one (charged up) device and re-plug another device to be charged.
- There are times when not everything will get fully charged. In those instances, the Cyclist needs to decide which is more important. Be aware that what is most important one time may not be what is most important another time.
- There was an Internet Article that mentioned that Tim and Cindie Travis of downtheroad.org (fellow Cyclists) carried an Old Fashioned Electrical Light-Socket converter for a Light Bulb, such that they could unscrew the only electrical Light fixture in an African Hut, plug in their own electrical outlet adapter which had a light-socket with a pull-chain switch, electrical outlet, and then they could charge their devices and keep the light operating, On or Off, as desired.
- Most AC/DC Device Adapters automatically operate on 100-240 AC and 50-60 Hz electrical lines/outlets, otherwise make sure that the correct toggles are selected for the correct current.
- Most of the things that cyclists need to charge up with electricity do not use a lot of electricity. It is NOT like running a blender, microwave, and coffee maker at the same time. It is VERY WISE to carry a 'Three-way Outlet Device' for a single plug, in this manner the Cyclist(s) may actually Charge Multiple things at the same time. It may be worth investing in such for Foreign Outlets as well. This allows multiple usage of outlets by multiple people, at airports and other waiting areas as well (like if you arrive and someone has plugged into the only single outlet already, then you can plug in your three-way and share the outlet with the original user).
 Mark/ID All of your AC/DC Electrical Adapters for the following Reasons:
- Your Name/ID, (Yes for theft purposes) but far more likely to make sure your Adapter/Stuff does not get mixed up with someone else's Adapter/Stuff. A lot of people travel with the same gear or gear that looks close enough to the same. Avoid a situation where you may be quickly separated forever from your proper/matching gear/adapters - It will probably render what you have as useless for the remainder of your tour.
Device Name/ID, over time a person will have different models and types of similar looking gear and after a while all of the AC/DC Charge Adapters start to look the same. Rather than allowing yourself to be confused about what adapter goes with what device, it can be quickly figured if the adapter is Device Name Marked so that you (or any helper) can quickly figure what belongs to what, what to bring on tour, and what not to bring on tour.
- Put a rubber band or Velcro self stick band on the AC/DC Adapter or wire in order to wrap-up the cord/wire/cable (to keep it organized and from bundling with other loose cord/wire/cable).
See Rubber Band (not used) on AC/DC Adapter, above right. - Batteries
-
Keep/store in waterproof zipper lock plastic baggie or dedicated battery plastic holder box.
- Invent a way to tell charged batteries from those that need a charge.
- Avoid loose batteries as they can discharge one another.
- Store with Ends Protected or Covered by Non Conducting Tape
- Some Cyclists deliberately store batteries in a handlebar light (or such) with the batteries opposed so that they cannot be accidently discharged or the light turned on by mistake. If you do this, be sure to test your batteries before a trek.
- Older AA, AAA, C,& D Battery Chargers that are 110/115v cannot be used on 230/240v systems AND older AA, AAA, C,& D Battery Chargers that are 230/240v cannot be used on 110/115v systems. Some, not all, of the newer AA, AAA, C,& D Battery Chargers can work on multi-voltage or hertz.
- WARNING: Some battery chargers are '15 Minute Quick Chargers' for ONLY Ni-MH quick charge batteries and the use of the wrong battery can burn out the system and cause a fire.
- WARNING: Ni-Cad is NOT the same thing as Ni-MH and they CANNOT be substituted - Dire explosive consequences.
Note: Ni-MH means Nickel-Metal Hydride (it is Hydrogen Based) and its properties are more like Lithium for Charge Power/Duration. - It is not unusual to carry two batteries for some devices (camera, phone, music unit or such).
- Always take advantage of an opportunity to charge rechargeable batteries, especially cell phones, cameras, and computers.
- Dynamo and Low Voltage Storage/Capacitor/Charger (with USB Port)
- Front Hub Dynamos (Internal Hub Electricity Generators) were more or less invented to give power to some fairly bright/powerful bicycle headlights. It did not take long to realize that the Electrical Generator could be used for other purposes.
- The next Dynamo improvement was to figure a way to store electricity; it was initially stored in a capacitive battery that was kept in the front water-bottle cage. This location was only OK and many people did not like giving up a water-bottle holder (to anything but a water bottle). Then it was realized that the hollow area of a handlebar's stem mount could work as an internal electrical storage unit whose location is very convenient as most of the electrical devices are (or can be) mounted to the handlebar. It was only a matter of time before one or more USB ports were added to the energy storage unit (at the Stem).
- Caution: Some USB stem devices are only power transformers or converters, they may not be capable of storing electricity like a battery. See next note.
- Sometimes a storage battery (at an additional cost) can be strapped to the frame (with a dynamo's electricity transfer wire running to it along the frame) such that the storage battery is charged during the day (no headlights being used) and then the charged battery can be used to re-charge a phone or camera (or such) in the evening. The headlights can be used at night (if needed). So far, this dynamo storage battery is only designed for re-charging USB chargeable devices (meaning that there is an International USB Electrical Standard).
- To the best of my knowledge, anything that can use a USB port for charging will be at or less than 5 volts (DC); it is an electrical standards compliance.
- Other devices, like digital cameras (both pocket and SLR), GPSs, and Palm/Notebook Computers, are starting to be made with USB charging ports.
- There is also some degree of product simplification as many manufacturers are trying to standardize their battery types and sizes.
- In a manner of speaking, the Stem mounted electrical storage unit is much like a Power Monkey (next item) that is permanently stored on the handlebar's stem.
- Energy Storage Cell (like Power Monkey brand):
The Power Monkey is a sophisticated battery that can be charged up at an electrical outlet and then stored for later use. Its purpose is to re-charge an USB device (typically an I-pod, Pocket Camera, or Mobile Phone) in a remote area that has no electricity.
- See Image - Power Monkey Battery/Energy Storage Unit along with Camera Fittings (top left), Electrical Outlet fittings (right side), and AC/DC Adapter (bottom left).
- Usage of a Power Monkey means having to carry its AC/DC Charging Adapter and wiring gear for plugging into an electrical outlet and also carrying the appropriate USB charge cable for one or more devices (often using the same type of cable but sometimes a cable can be quite specialized - Sony is good at forcing people to buy proprietary cables in a world that already has common standards).
- Caution: The Egg Shaped Power Monkey has an On/Off Switch which has been known to accidently Flick-On while in storage on a bicycle and discharge the unit.
- So far, by my experience, the time that it takes to re-charge a device with a Power Monkey is the same amount of time that it takes for an electrical outlet charge, it is still a slow process.
- Power Monkeys, for the most part, can only be re-charged at an electrical outlet.
- Cyclists on tour, often change/adjust their routine every 2 or 3 days, in order to be at locations that have electrical outlets.
- Portable Solar Energy Converter Panels
- There are a few commercial Solar Panel units on the market for Charging Cell Phones and similar devices. There are, basically two types of Solar Charging Systems, those that are the size of a wallet (they are jokes) and those that fold or roll which when packed are the size of a notebook and opened up have the surface area of 4-5 notebooks (they work, they are not cost efficient, but they can do the job).
- These units are by NO means state-of-the-art. Older models seem to charge in the 4 watt/hr range/rate and at best it may be called a Trickle Charger, However, most of the new models can charge most Smartphones in a day given no use, good sunlight, and time spent aligning the array for the best sun angles.
- One must pay attention to the angle of the face of the Solar Panels to the sun. If the panel angle is not perpendicular to the sun or where the sun is behind clouds then the charge conversion rate diminishes dramatically.
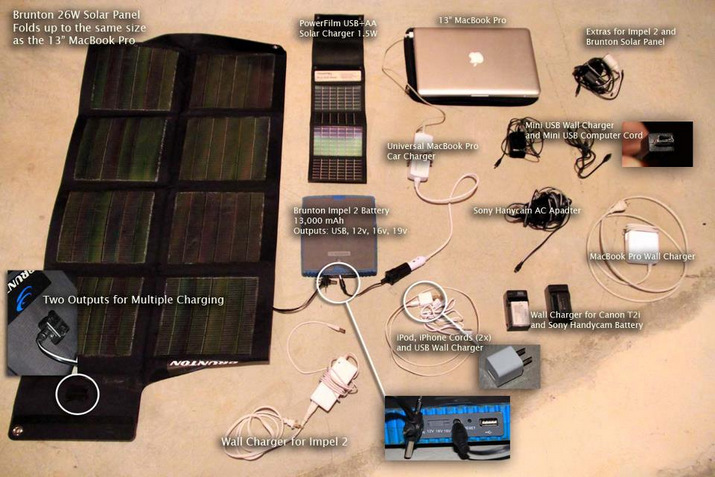
Working with Solar Panels, Cords and Chargers. This Device and Electrical Charging Layout Image is from fellow traveler Patrick Hendry's http://worldsbetweenlines.com Website (by permission).- It will not be anytime soon that the cost of the portable camping Solar Panels will justify the cost of the unit of electricity. It simply comes down to whether the Cyclist wants remote off-the-grid charging or not.
- In most bicycle touring situations, the Cyclist is not going to be in camp long enough for a full charge and at best the user is only going to get a partial re-charge.
- To get a full charge the cyclist may need to spend a full day at camp (under full sun).
- A cyclist who is moving daily will probably still need to be re-charging the battery at an electrical outlet every 2 or 3 days.
- In order to get a full charge from a Solar Panel, the user may have to forgo usage of the device a few days.
- The most efficient solar charging 'Time-of-the-Day' is when the sun is highest in the sky, usually in the 1000 to 1400 hrs time frame. Most people are NOT in camp during this time frame. Charging can become one's lunchtime activity (while eating, sleeping, or doing something else). The solar panels must be perpendicular to the sun and this also requires adjusting about once an hour. So, once again, the cyclist may be adjusting his or her schedule to fit around Cell Phone and smart Phone charging needs.
- Commercial Charging Port/Station:
- Some airplane terminals, cafés, hostels, and campgrounds are starting to carry commercial charging ports (a little array kiosk) where for a few coins (?) one can plug-in and charge a device or two. This usually means that the user needs to hang around and keep an eye on their devices.
- Spare Batteries (One-Time or Reusable):
In most cases, such as the battery charging state of the art is today. A cyclist may be better off using one or more spare batteries and charging all of the batteries every 2 or 3 days (versus putting all the trickle charge and re-charge EFFORT-TIME into power management).
- There is still a strong case for standardizing batteries and charging units.
- The AA and AAA batteries, including the rechargeable and fast re-charge types, are still the most common batteries in the world and are commonly available world-wide.
- There is a lot of merit for making and owning equipment that runs on AA and AAA batteries (and for making better AA and AAA batteries).
- Some of the newer Ni-MH quick charge batteries seem to have a charge that is lasting as long as basic issue one-time use batteries.
Battery Charging TOC
Battery Charging TOC
Battery Charging TOC
Battery Charging TOC
Battery Charging TOC
Battery Charging TOC
Electronic Devices
Travel Computers:
Electronics and Communication: Electricity Around the World, Battery Charging Options,Travel Computers, Cell Phones, Smartphones, GPS, Satellite Telephones, Cameras
- The importance of a Sustained Bike Tour with something that has Computing Power, Data Storage, and Internet Access capability is no longer an outstanding question. It is just a matter of selecting the right support tool, Computer or Smartphone. Some people actually carry both - Here, we will discuss Computers (also see Smartphones).
- The Notebook Computer and the Cell Phone are still an awesome bike touring combination.
- More and more Cyclists are using Smartphones but the Cell Phone and Notebook Computer combination still serve the cyclist's needs quite well.
- Wireless is a must.
Most cyclist still carry some Cat V [Internet Connecting] cable or as appropriate. It is usually more secure and it does not have dead zones, like one side of a bed only for wireless reception. See Image.
- Carry the electrical outlet adapters, AC/DC adapters and any cables in a waterproof plastic bag. Also include the other adapters and cables (phone, camera(s), ...). By the way, carry 3 to 4 of those electrical outlet adapters or you will be limiting how many things that you may recharge at the same time. See Image.
- If the cyclist has music or movies on their notebook computer (or smart phone), then remember to bring/carry ear phones and maybe a 'Y' connector. We often carry 1 or 2 DVD movies for waiting situations, like for airplanes, airports, or rainy days; sometimes the DVDs never get viewed.
- Internet Security, Malware and Virus protection is a must; get a security package that has it all.
- Save online or hard copies of booking transactions.
- Have a way of 'On-and-Off Loading Data' from a hard source, like from a CD or FlashDrive (not counting the ability to up and download material).
- Personal and Travel Records: With the advent of Digital Data Storage capabilities, more and more cyclists are uploading copies of their: Itinerary, Medical Data, Bicycle Owner's &/or Repair Manual (Bicycle, Trailer, GPS, Phone, Stove(s), Bike Computer, Notebook/Pad, Watch, and other system info); Reservations, Places to Stay, Flight Info, Shipping, Insurance; Photo Image/Copy (Passport, Health Records, Any/other Hardcopy documentation, Maps ([travel, tour, city, transport, schedules]); Bike Touring Checklist; Bike Shipping Checklist, Music/Entertainment, Emergency Home/Family/Business/Medical Contact Info); and Travel Related Links/Favorites. All of this information is to be secured with a Password.
- On the tour ride itself, store the Computer in a waterproof container (the sealable clear waterproof document holders work nicely), often wrapped in clothing. We wrap the Notebook in dirty or clean clothes, depending on which ever provides the most padding for travel.
- Sometimes a person can print hardcopy in a business office or library, sometimes there is a token paper fee, and sometimes I refuse to pay their stupid fees like at most resorts. Often a copy to a flash drive and using a Cyber Café, Campground, or Public Library will be free. You will develop a nose for this over time; it never hurts to ask other travelers.
Most computer AC/DC adapters will operate on 100-240 AC and 50-60 Hz electrical outlets. On other devices, make sure that the correct toggles are selected for the correct current.
- Do NOT try to charge a computer in an outlet that says 'For Electric Razors ONLY'. Read all of the battery charging notes at Battery Charging.
- Consider avoiding a mouse or other such device (instead, use a computer with a finger/touch pad, granted that some people do have other preferences). Bring all of the peripheral equipment that you may need/desire to operate the computer. Also consider a three-way outlet, so as to share one electrical outlet at an Airport, Bus, or Train Terminal.
- Consider carrying a Netflix DVD. It tends to get viewed on at Airports or such (not during bike tours), will also need Earphones and a 'Y' adapter.
Cell Phones:
Electronics and Communication: Electricity Around the World, Battery Charging Options,Travel Computers, Cell Phones, Smartphones, GPS, Satellite Telephones, Cameras
- The need for Cell Phones (versus Smartphones) will not die anytime soon, although a higher and higher percentage of people (cyclists too) will buy Smartphones. Cell Phones still operate on the same voice areas and offer the mobile access to the same telephone (cellular) network as Smartphones.
- In order to conserve power, Remember that there are many stretches of time when there is NO Real Need to have the Cell Phone turned On.
- Cell Phones are good for emergency calls
- Cell Phones are good for handling verbal affairs while on the go (away from home).
- Cell Phones are good for handling reservations and call ahead issues (that maybe a computer cannot do).
- The Cell Phone and Notebook Computer are still an awesome traveling team.
- Cell Phone Plans while in a different country can be problematic:
- The first issue is that the home plan may not cover a visited area or if the area is covered, the pricing plan may be horrendous.
- Some Competitive Cell/Smart Phone Companies sell their own International Calling Chip so that the cyclist/customer may bypass his/her own telephone service company and use another service provider overseas.
- Note that most cell phones come with a custom lock that prevents another chip from being used.
- The Lock can be undone (simple Internet search) with a series of numbers that have to be entered just right in order to open the phone for another company's chip.
- Unlocking a Cell/Smart Phone is not difficult to do, it is just time consuming.
- See the Battery Charging Issues above.
- Security:
- Everyone Needs a Stolen Phone Emergency Plan: On paper should be listed the Carrier's Emergency Lost Phone Telephone Number, you phone number and any special codes, credit card company phone numbers and card numbers. Many other issues and notifications probably apply.
- There is some security software for the Cell/Smart Phone. One such application, once installed, will allow the owner to call a monitoring agency and permanently shutdown the Cell/Smart Phone once a phone call is attempted.
- Put your ID on the physical Phone Unit Itself: Many people use an ID vibration marker, some people carve with a sharp pointed object.
- Place you Name and contact Method as the owner inside the phone's software.
- Some people list their Business, Travel Agent, or Parent for a I'm Lost contact.
- Use/set/turn-on ID and PWD for travel.
- List your Travel Phone Number on you itinerary and place one in each Luggage, so that lost items can find you.
- NO Reception: There are many places that people conduct Bicycle Tours that do NOT have Cell Towers or Cell Reception - Just having a cell phone does not guarantee that a person can communicate by phone.
- Keep the phone handy (except in rain), some people carry in their back jersey pocket, some in the handlebar bag, some in the seat post bag, and some in a cargo pant pocket. In foul weather store the phone in a clear waterproof document bag or in a plastic zipper bag.
- In really humid weather, if the Cell/Smart Phone is not waterproof (most are not) carrying the phone in a pocket on your person can cause the phone to become supersaturated with moisture and it will either quit working or misbehave - In these circumstances it is best to store in a waterproof plastic zipper bag or document bag.
Carry the phone's paraphernalia in a gallon Sized Plastic Waterproof bag along with all Batteries, (Phone, Cameras, Light(s), ...), Shaver Cord, Electrical Plugs, Power Converters (120/220), Computer Cords, Multiple USB-Camera Cords, and All Electrical adapters (usually stored in a pannier). MARK all AC/DC Charge Adapters for their Correct/Matching Device.
- Always know how to make a telephone call, by actual practice, back to the home country from another country and how to make a call in that country (or countries). If this requires a card code, code numbers, and/or correct coins then be suitably prepared. Practice in a place such that if something goes wrong or does not work correctly a person can remedy the situation. The act of practice is a wise investment and the call will usually make someone's day.
- Most Cell Phones have an STANDBY OFF Position that is really just a standby or sleep mode but the system is still on and the system is still using electricity, and then there is a REALLY OFF / POWER OFF position - Be sure to know the difference.
Smartphones:
Electronics and Communication: Electricity Around the World, Battery Charging Options,Travel Computers, Cell Phones, Smartphones, GPS, Satellite Telephones, Cameras
-
Smartphones are a combination Computer and Cell Phone.
- In order to conserve power, Remember that there are many stretches of time when there is NO Real Need to have the Cell Phone turned On.
- Some Smartphones have GPS (Global Positioning System) features (or options). So far, most people, not all people, in the cycle touring world feel that they put more effort put into managing a GPS System than is returned in benefit.
- All Smartphones can add Applications (called Aps) that, for instance, could tell you the location of the nearest coffee shop, grocery store, bike shop, campground, or hotel (lodging) while traveling on your Bicycle Tour.
- Smartphones are rapidly becoming the standard tool of Cycling Tours for internal and external communication.
- Internet Security, Malware and Virus protection is a must; get a security package that has it all.
- Smartphones, typically, use more power than any other communication device. See the Battery Charging Issues above.
- Most Smartphones have Peripheral Support Items that a person can buy to help manage the Operation of the Smartphone, most notably is a Soft Keyboard for computer mode operations and some Sophisticated Lenses for the built in camera.
- Smartphone Plans while in a different country can be problematic:
- The first issue is that the home plan may not cover a visited area or if the area is covered, the pricing plan may be horrendous.
- Some Competitive Cell/Smart Phone Companies sell their own International Calling Chip so that the cyclist/customer may bypass his/her own telephone service company and use another service provider overseas.
- Note that most Smartphones come with a custom lock that prevents another chip from being used (especially in the USA).
- The Lock can be undone (simple Internet search) with a series of numbers that have to be entered just right in order to open the phone for another company's chip.
- Unlocking a Cell/Smart Phone is not difficult to do, it is just time consuming.
- Security:
- Everyone Needs a Stolen Phone Emergency Plan: On paper should be listed the Carrier's Emergency Lost Phone Telephone Number, your phone number and any special codes, credit card company phone numbers and NOT the card numbers. Many other issues and notifications will apply.
- There is some security software for the Cell/Smart Phone. One such application, once installed, will allow the owner to call a monitoring agency and permanently shutdown the Cell/Smart Phone once a cell tower link-up is attempted.
- Put your ID on the physical Phone Unit Itself: Many people use an ID vibration marker, some people carve with a sharp pointed object.
- Place you Name and contact Method as the owner inside the phone's software.
- Some people list their Business, Travel Agent, or Parent for a I'm Lost contact.
- Use/set/turn-on ID and PWD for travel.
- List your Travel Phone Number on you itinerary and place one in each Luggage, so that lost items can find you.
- NO Reception: There are many places that people conduct Bicycle Tours that do NOT have Cell Towers or Cell Reception - Just having a cell phone does not guarantee that a person can communicate by phone.
- Keep the phone handy (except in rain), some people carry in their back jersey pocket, some in the handlebar bag, some in the seat post bag, and some in a cargo pant pocket. In foul weather store the phone in a clear waterproof document bag or in a plastic zipper bag.
- In really humid weather, if the Cell/Smart Phone is not waterproof (most are not) carrying the phone in a pocket on your person can cause the phone to become supersaturated with moisture and it will either quit working or misbehave - In these circumstances it is best to store in a waterproof plastic zipper bag or document bag.
- Carry the phone's paraphernalia in a gallon Sized Plastic/Waterproof bag along with of Batteries, (Phone, Cameras, Light(s), ...), Shaver Cord, Electrical Plugs, Power Converters (120/220), Computer Cords, Multiple USB-Camera Cords, and All Electrical adapters (usually stored in a pannier).
- Personal and Travel Records: With the advent of the Smartphone and its Data Storage capabilities, more and more cyclists are uploading copies of their: Itinerary, Medical Data, Bicycle Owner's &/or Repair Manual (Bicycle, Trailer, GPS, Phone, Stove(s), Bike Computer, Notebook/Pad, Watch, and other system info); Reservations, Places to Stay, Flight Info, Shipping, Insurance; Photo Image/Copy (Passport, Health Records, Any/other Hardcopy documentation, Maps ([travel, tour, city, transport, schedules]); Bike Touring Checklist; Bike Shipping Checklist, Music/Entertainment, Emergency Home/Family/Business/Medical Contact Info); and Travel Related Links/Favorites. All of this information is to be secured with a Password.
- Some people store this same (just listed) information on a private Internet Page.
- There are Language Translation Applications and a few are voice operable.
- Always know how to make a telephone call, by actual practice, back to the home country from another country and how to make a call in that country (or countries). If this requires a card code, code numbers, and/or correct coins then be suitably prepared. Practice in a place such that if something goes wrong or does not work correctly a person can remedy the situation. The act of practice is a wise investment and the call will usually make someone's day.
- Most Cell/Smart Phones have an STANDBY OFF Position that is really just a standby or sleep mode but the system is still on and the system is still using electricity, and then there is a REALLY OFF / POWER OFF position - Be sure to know the difference.
- See Device Mounting for Smartphone Mounting Issues.
GPS - Global Positioning System:
Electronics and Communication: Electricity Around the World, Battery Charging Options,Travel Computers, Cell Phones, Smartphones, GPS, Satellite Telephones, Cameras
-
Global Positioning Systems are notorious battery/energy hogs, mainly because they need to be kept ON and running in order to use/navigate by the display/monitor.
- If the GPS unit is used just at key times, then they can be turned off (full off) until needed.
- There are different sized units with different displays, all of which use energy at different rates.
- There are some Bike/Trail GPS units but many trails are not mapped yet (digitized for GPS read/display).
- Many individual cyclists, clubs, and organizations like Adventure Cycling are building libraries of GPS trails/routes.
- Sometimes navigating and getting a fix (3-4 satellites for triangulation) is problematic.
- Dashing down a bike path is not, yet, quite as easy as motor vehicle GPS systems. There are on online mapping organizations like Ride With GPS that can upload or download GPX/TCX/FIT/KML Files for sharing or personal use.
- Most GPS system will track your own movements and these raw data files can be edited (with the appropriate software), for example to remove your side trip to visit the gas station (or a wrong turn).
- See Device Mounting for GPS Mounting Issues.
Satellite Telephones:
Electronics and Communication: Electricity Around the World, Battery Charging Options,Travel Computers, Cell Phones, Smartphones, GPS, Satellite Telephones, Cameras
-
There are areas on the earth where Cell/Smart Phones will NOT get any reception and it is entirely possible that cell towers do not exist at all. Satellite Telephones will work as long as there is a direct line of site between the Cyclist/User and the Satellite.
- One advantage of Satellite Phones is that in an International Crisis when cell towers are destroyed by Nature or by a Political Machine, Satellite calls can still be made.
- One disadvantage is that a person may get some signal interference sometimes from stormy weather, like from wind storms, sand storms, snow storms, and electrical storms.
- Unit costs are about 800 USD and up, and monthly costs are about 30-40 USD/month PLUS usage fees (which vary from voice to data usage and vary in the per minute expenses - These are 2012 prices).
- There is now Smartphone looking version from AT&T (as opposed to the old brick looking phone).
- Finances aside, a Satellite Telephone is often a Good Group Investment, especially for remote tours and Satellite Phones can be rented.
Cameras:
Electronics and Communication: Electricity Around the World, Battery Charging Options,Travel Computers, Cell Phones, Smartphones, GPS, Satellite Telephones, Cameras
Taking pictures and movies with cameras is how we record 'Memories'. Most of the world has gone digital for camera usage but there are a few 35mm SLR Film Cameras and a few Single Plate [Film] Cameras still being used (mostly for commercial use or by some hobbyists). For the most part, digital cameras have taken over the photograph market and two types of digital cameras have emerged for typical use especially for Bicycle Touring:
- The 'Point and Shoot' Digital Pocket Camera.
- The Digital Single Lens Reflex (D-SLR) Camera (or similar looking camera).
- The following are some Camera Management Issues and some Lessons Learned:
- Caution: Bring at least two cameras on tour, even if one is a cheap digital pocket camera. If one camera breaks, then there is a backup camera and for the most part there will be NO Loss of Memory Capturing.
Twice, Dennis has broken the only camera in mid-tour, once in Alaska and once in Italy, with no replacement available for a few days. "I wish I had those pictures!" We, now, carry two cameras or one camera and an inexpensive 3x optical digital camera as a backup. It helps when the memory card and batteries match but anything is better than nothing.
Caution: Twice now, even with the use of a checklist, Dennis has brought the WRONG camera download (USB or Firewire) cable on a tour; Ergo, pay attention to which up/down-load cables are needed for which camera. We now mark our cables (Oly, Sony, Can, ...) as a HINT to match the correct 'download' cable with the correct 'camera'. Discussing camera cables that have different interface fittings and they do not match one-another.
- Caution: Take some good pictures of your bike (both with gear on it as well as clean) for theft purposes. Many people do not have pictures of their bike to turn over to police in case of theft. Particularly, take pictures of thing that make you bike unique. Store images in your computer, camera, phone, and have them available online at a 'back home' web page). See Theft Prevention.
- Caution: DEET will melt or dissolve camera body components (dials, buttons, switches, flash covers, ...) and/or marking on the camera (on the body, dials, buttons, ...).
- Theft Safety: Identification & Telephone # on the camera.
- Battery: Portable Solar Panels are being used more frequently for re-charging camera batteries (and other devices - read the instructions carefully). See Battery Charging issues and Solar Panel issues.
- Carry Batteries in battery containers or as a minimum in a clear waterproof plastic bag, tape the ends, wrap in tape or rubber bands (all + ends pointing in the same direction), no loose batteries (they tend to discharge).
- Try to carry one tough pocket camera (drop proof, crush proof, waterproof, and freeze proof).
- When Packing:, Remember Camera(s), Case(s), Charged Batteries & Spares, Correct Charger/Adapter (marked with Your ID and the Camera ID), Film or Appropriate Storage Media (memory card), Appropriate Lenses/filters, Appropriate Download Cable (labeled for camera X)
- The AA battery is the most common battery in the world. This knowledge should be applied to head lights, flash lights (torches), position lights, tail lights, cameras, and phones.
- Trend: Many travelers/cyclists are taking pictures of large/detailed travel maps and city transportation maps; and brochures (with address, telephone, and hours) so as to look at them on their camera/iphone in lieu of carrying all the material on them or in case of document loss or separation. Many travelers/cyclists are taking pictures of Manuals (computer, camera, watch, bicycle, packing, checklists, itinerary, flight/train/bus/ship schedules, reservation).
- Trend: There seems to be a little movement toward cameras that have USB port charging capability. Some special standards/rules apply to USB Charging Standards. See USB-Dynamo Charging System.
- Gorilla Pod (GorillaPod): A Gorilla Pod is flexible small tripod originally designed as a flexible, portable, packable camera tripod. It is quite handy. Many Cyclists enjoy the use of a long mono-pod. Dedicated Photographers carry a tripod, but most cyclists feel that tripods weigh too much and/or take up too much space.
- Many riders are mounting video recorders on their helmet or bike to record good and bad things that happen on the road (note that many riders complain of helmet control and management issues regarding the extra length, height, weight, and leverage of cameras mounted on helmets)
- Some video cameras, like the GoPro Video Camera, are designed to be mounted on the bicycle or on a cyclist's helmet. Mounting the camera system on the bike usually requires the user to give up some valuable bicycle surface estate - it has to be planned and may conflict with a Smartphone, GPS, or handlebar bag for space. It can be mounted to some front racks. Some riders with helmet mounts have noted that it takes a while to get used to a helmet mount and the camera adds movement momentum and clearance issues.
- If a cyclist buys a camera mount, the issues will be the same as addressed by Smartphone or GPS mount.
- Where does one carry a camera? Some common places for carrying a pocket camera are the rear jersey pocket (right side if right handed, left pocket for Lefties), handlebar bag side pocket (or top of inside), and cargo pants thigh pocket. I have dropped my camera while in motion a few times, the first one broke, after that I bought a Tough Camera that could take some hits (I dropped the Tough Camera twice in China, it still works). Most people carry SLR type cameras in a pannier top, padded amongst clothing like a jacket or fleece shirt or they carry the camera in the top bag of a bike trailer or fender rack (again, wrapped in a jacket, sweater or thick shirt).
- Animals: Pointing a camera at an animal and centering one's head and body in line with the camera can be very threatening. Thus, learning how take camera snap shots from the hip or chest area and at a 45 to 90 degree angle from one's frontal alignment while not starring at the animal may produce snap shots that do not intimidate the animals. Interestingly, with digital cameras, if a photographer is looking at the camera's monitor screen to see an animal and not looking directly at the animal, then one is satisfying good picture taking needs while not threatening the animal by looking at it directly - just insure that the photographer and the camera are not directly facing the animal or all in line with the animal.
- Noises will scare animals. When possible, turn off all sound to cameras, phones, and watches so as to be able to quietly take pictures.
Long Distance Bicycle Hire/Rental Issues Top Bicycle Checklist
Don't take anything for granted. We've had some good bicycle rental experiences and some real bicycle rental disappointments. In fact, these disappointments had lead us to buy Bike Friday* bicycles. We have generally found that if a bicycle service provider advertizes a type of bike or types of bikes, and maybe shows pictures of these bikes or maybe lists the bike specifications, then it seems that these types of companies deliver the goods at, or above, a desirable quality of service and product. Conversely, we have found that bicycle/touring service providers who do not specify the kind or type of bicycle that they will provide, leave a lot to be desired - These are the companies for which a traveler needs to be on guard, wary, and persistent in stating requests and/or needs.
The following list of Bicycle Items, Components, and Setup are characteristics that if not clarified, may lead to traveling frustration and regret. Another clue, to move on, is when Question and Answer communication turnaround time is greater than two weeks, especially when a third party is involved (which is not uncommon at the far reaches of the world). Remember that most foreign bicycle shops are closed from Saturday Noon till Monday Morning and this is usually the exact time that travelers arrive in country.
* The major reason why some people carry/bring/travel-with their own bike is to avoid surprises in quality standards and expectations (see below). The trade-off (or down-side) of carrying one's own bike is twofold: One, a single rider bicycle takes one case/suitcase (or one big shipping box). Two, the cyclist (or each cyclist) will probably have to be packing more bike accruements, for their bike/tour, in another suitcase, and the accruements take up valuable suitcase space.
BICYCLE HIRE/RENTAL ISSUES (Not Exhaustive):Bicycle Rental/Hire Start and End Issues:[ ] Agreed Pickup Place, Date/Day-of-Week, and Time - Careful about Holidays and Sundays, - No Tool access at hotels, hostels, inns, ... on weekends, holidays, or after the work day - People who own tools, a big deal, take them home - Shop Hours, Know/Learn [ ] Resolve Delivery/Pickup Issues/Logistics/Times [ ] Resolve Delivery/Return Issues/Logistics/Times [ ] Phone Number and Address, Know/Learn - Know/Learn how to make a phone call to, inside, and from other countries (this is compounded when extra calling codes are involved. [ ] ________________________ Navigation: [ ] Maps [ ] Written Instructions [ ] Map Case (handlebar mount?, see through plastic case? other?) [ ] Travel Computer (Required? Anyway to learn about it beforehand? Name/Brand, Type/Model) [ ] Route, Maps, Schedule/Itinerary, Directions Travel Issues: [ ] Do travelers need to carry/manage/hand-over travel vouchers? [ ] What to do or who to call when things go wrong [ ] Access to an interpreter? [ ] First Aid, emergency numbers [ ] ________________________ Bicycle Rental/Hire Issues Brakes: [ ] Front Tire Brake/Right Hand Lever (Euro/Motorcycle style) [ ] Rear Tire Brake/Right Hand Lever (American style) Pedals: The only issue that we've run into was that the pedal threads on the rental bike were partially stripped and a crank arm had to be replaced in a remote town. [ ] Clean (nothing on the pedals) [ ] Mountain [ ] Tow Clip [ ] Tow Basket [ ] Shoe Clip / Style _________ [ ] Bring your own? Potential fitting issues? Tires: We, once had a rental bike with a Presta front wheel valve and a Schrader back wheel valve and a two way pump that didn't. [ ] Schrader Valve (Universal Car Type) [ ] Presta Valve (Skinny Racing type) [ ] Puncture Lining (plastic strip) [ ] Slime Tube [ ] Tour Slick [ ] Tour Ribbed [ ] Mountain / Knobby [ ] Other Tread _____________ Tire Pump: [ ] Schrader [ ] Presta [ ] Dual Presta/Schrader Note: Dennis has never seen a dual outlet tire pump work properly, ever. Sprocket Rings: [ ] Front x {1,2,3,4}, Rear y {1,5,6,7,8,9,10} (x*y Speed) [ ] Drive {Chain, Belt, Shaft} [ ] Other ______________________ [ ] Tuned? Inspected? Tested? Some/Most bike touring companies rent their bikes through local bike shops which, in turn, may or may not care about your well being or needs. Worse, a cheap bike may be purchased locally just for your ride and the bike will be disposed after your ride (the give away was when we were told to not worry about oiling the old chain for a seven day ride). Bike Style: [ ] Mountain [ ] Tour [ ] Recumbent, Up Handle [ ] Recumbent, Down Handle [ ] Hybrid [ ] Handlebar position (way above, above, even, below: the crotch. Typically, the older one becomes, the higher the preferred handlebar height.) [ ] Other ___________ Seat: [ ] Theirs [ ] Yours [ ] Seat Mount (different countries have different seat mounts this can be a very problematic issue. The USA typical mount is NOT the world standard) [ ] Seat Post Size (seat post diameters are NOT standard. You may need post shims) [ ] Seat Shock [see previous] Helmet: [ ] Theirs (will always be cheap and crappy) [ ] Yours (Bring your own, takes up space) Tools: [ ] What is supplied, What is promised? [ ] Flat Tire Repair (patches, self stick / rubber cement, pry tools [sometimes called tire tools]) [ ] Supplied __________ [ ] Bring your own [ ] Bring ___________ Racks: [ ] None [ ] Front Racks [ ] Rear Racks [ ] Rack Type (straight frame, mouse trap, hook/loop for pannier(s)) [ ] Seatpost/tube Clamp (holds less weight) [ ] Bring your own? Insure that bike has welded rack receiver nuts, else you may need a clamp on the seat post type of rack (weight limited). Bolts/Washers/Spacers provided? Nut weld positions are NOT universally the same - Will probably need universal fitting racks/pieces. May need access to tools (rechargeable drilling tool, bit, key, etc.) Panniers, Handlebar Bag, Other bag(s): When a pannier is placed on a new/different rack, it will need to be re-fitted. This is not complicated but it is a time consuming process with a per unit learning curve. [ ] Handlebar Bag [ ] Seat Bag [ ] Front Pannier (one, both?) [ ] Rear Pannier (one, both?) [ ] Rear Rack Top Bag [ ] Front Rack Top Bag [ ] Other Lighting: (We try to not ride at night in strange lands, but when things go bad, one does what one has to do. We have. Be Prepared.) [ ] Head Light [ ] Tail Light [ ] Other __________ [ ] Battery(ies) / Types? / Who supplies?
grappling with the ego, and learning what your will is and when to apply it and how to apply it."
- John Weissender, US pro cross-country mountain bike racer
Group Cycling, Group Bicycle Touring,
and Group Bicycle Touring Issues
-
Top
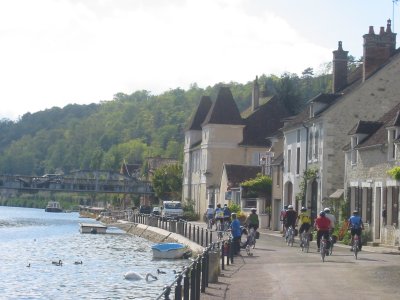 Group Organization Issues
Group (or Solo) Route Planning, Major Issues
Group Self Contained Cycling with Camping
Group Food Logistics
Group Supplies/Equipment Checklist
Group Communication and Action When Riding Together (of sorts)
Group Riding Decision Issues/Communication/Ethic
Bicycle Hand Signals, Foot Signals, Silent Signals, Voice Signals
Often Related: Expedition/Group Tool Kit Checklist
Often Related: Expedition Bicycle Touring Issues
Often Related: Tour Planning Checklist (Getting There)
Often Related: Bicycle Tour Planning Graphic (the Ride Itself)
Group Organization Issues:
- Major day to day group decisions are centered on safe water, food, route, and place of stay,
[Herzberg and Maslow would agree]. - Group Leadership and Item Distribution Issues: Usually, in non-camping tour groups, the leader takes the front position or a local guide takes the front position and the leader floats. On camping tours, depending on whether the leaders are paid or not, the tools may be split up among the riders or one person may carry. In non-paid leadership groups, the group may distribute tools and the group leader may bike from any position or multiple positions. In non-paid leadership groups, the best qualified person may carry the group first aid kit. The best qualified mechanic may carry the tools and have no other group equipment or supplies to carry, and maybe no other responsibilities (Expedition or Group Tool Kits weigh from 10 to 15 pounds!). In camping groups with paid leadership, the leader is usually at the rear or drifts back to the rear, and the leader usually carries a group first aid kit and carries bike tools - in these cases, the leader usually does not participate in food management (except to set up cook/cleanup rotations). These are additional organizational issues (tools, first aid, and supplies distribution).
- Caution, Group Tools Possession Issue:
- Fact 1 - The longer that one is riding on a tour,
especially when time is measured in weeks or months,
the less that one wants to carry. - Fact 2 - Tools are heavy!
- Fact 3 - There is usually no need to carry duplicate tools.
- Therefore, the Good News is at the start of most organized group rides, there is often an agreement to carry only one of many of the same tools.
- However, the Bad News is that sometimes, cyclists part ways or loose bikes or equipment (for a variety of reasons). The concern is about the parting biker having or having had a special tool or something else that the group needs or will need (like tickets, keys, codes, telephone numbers, ...).
- Discuss: Make a commitment to protect the remaining group's travel and safety integrity when member equipment/knowledge separation occurs. This usually means that someone/everyone in the group needs to remember to get the needed object/information from the departing biker or that the object needs to be purchased (or ordered or a particular issue needs to be addressed) at the next opportunity.
- Group Bicycle Parts/Components/Tools Issue: (Repeated from Bicycle Configuration)
- When touring parties have the same (interchangeable) equipment like tires, rims, tubes, spokes, derailers/dérailleurs, chains, brakes, pads, and cables then less kinds of spare equipment need to be carried.
- When touring, if bike components are common and NOT at the bleeding edge of technology, then replacement parts (or solutions) are more likely to be found worldwide.
- When touring, if bikes are the very latest in cool technology, then one has to address security and theft temptation at a higher degree than would be normal.
- When touring, if bikes are the very latest in cool technology, then one will probably have to address replacement parts non availability issues.
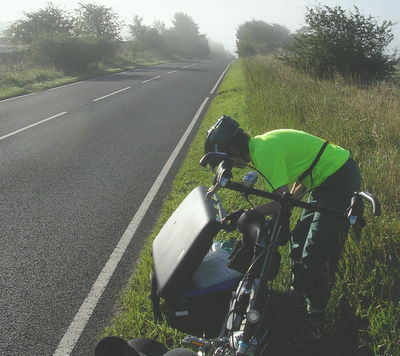
About Group Self Contained Cycling with Camping:
Top- One of the advantages of group cycling is that some of the required supplies may be be split up among the riders, thus somewhat lessening the load to carry per person. In some cases, some supplies may only need to exist once or only a few such supplies need to exist, certainly not the same supply for each person. For example, only one first aid kit needs to exist; everyone may carry their own band aid kit, but the group only needs one group first aid kit. The group only needs one set of cooking cutlery. Sharing the load creates a group inter-dependency dynamic.
- One of the disadvantages of group cycling can be that of dependability. Everyone trusts that each individual will perform their journey and their duties in a timely manner.
- A disadvantage of solo or couple riding is that all of the supplies still need to be carried, regardless of group or individual supply status. Two riders should carry a heavy duty road crash first aid kit. Two riders still require cooking cutlery.
- An advantage of solo or couple riding is that if a problem occurs, all supplies and decision making components are on hand.
- One of the risks of group riding is who should carry what, where. "Where" has to do with the enroute and arrival travel position. For example, if there is one group first aid kit, what is the statistically best place to carry it. The answer is to carry the First Aid Kit at the rear of the line. The first aid kit (and group tool kit) has little benefit at the front of the line if injuries and breakdowns occur behind the kits (the need for first aid and mechanical repair are often associated together). Usually communication forward cannot or will not exist, but when one can count on the remaining line moving forward, then the supplies will arrive, sometimes slowly but they will get there.
- Another risk addresses that of preparing and cooking group meals in a timely manner. This is a situation best served when the supplies arrive early at the destination campsite. Thus, it is statistically better if some supply items arrive early and some arrive later. A wise leader will encourage the matching of supplies to certain people based on their skills and/or their riding style. On a scale of what is important, first aid, mechanical break-down, and cooking usually top the list, other group supply and distribution issues are usually involve less risk.
- There are three key touring issues that determine tour or route logistics plans/decisions/actions.
These issues are the availability of: - Water
- Food
- Camp/Lodging Location
- The campsite does not have to be in a camp ground but it must be legal. Often, in urgent situations, a public facility may be used (with permission) like a Fire Station, Residence, Church, or School yard. Water is a must and sometimes it needs to be carried for a day or two - Water is very heavy to carry. Sometimes Food is not available for a day or more - Food must be purchased and carried so that it lasts until it's next availability in a store.
- Group Safety is not a given. Outside of the US, group safety can even be a travel planning and routing issue.
- In the mountains and deserts, what lies ahead is not always known. In addition geography changes (floods, slides, earthquakes) and weather are big variables to any travel. It is important to get information about the trail ahead from reliable resources.
Group Bicycle Camping - Key Advantages and Disadvatages
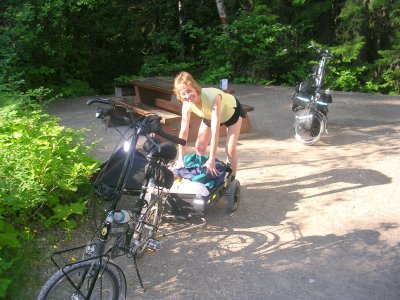
Group Bicycle Camping - Key Risks
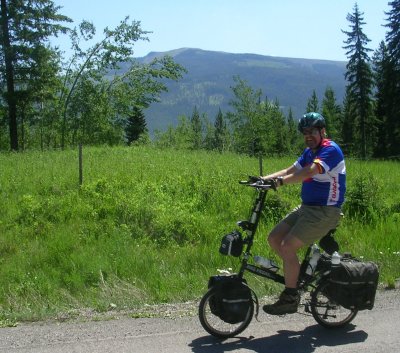
Group Bicycle Camping - Key Planning Issues
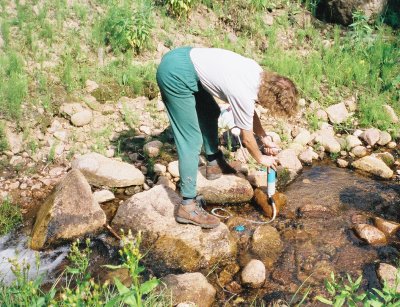
See Tour Planning (Foreign and Domestic - Getting There),
See Bicycle Tour Planning Graphic (the Ride Itself),
See Tour Distance Calculation Metrics
Food Logistics (Adventure Cycling Method):
Top- In the evening, as people arrive at camp, the first thing that they are to do is to bring their group gear/equipment/supplies/food to the cook/gear assembly area (often at a central picnic table, but not always). This act is performed before tent pitching or self maintenance.
- Each morning, after breakfast and after lunch are prepared, cyclists are to pick up their portion of supplies and food to carry for that day, the cyclists must do a good job of distributing the weight evenly among themselves (the fair distribution task is needed and expected).
- Cyclists also pickup their lunch pack for the day (during or immediately after breakfast). Of all the group supply items, key/reusable/remaining food tends to be more carried by the cooks in rotation and they usually leave camp early so as to have something purchased and prepared for the rest of the cyclists upon their later arrival at the next camp destination - Sometimes cooks need to leave before the morning's Map Briefing (by pre arrangement with the group leader).
- Usually food duties are rotated (for self contained meals) such that food is mostly purchased at/near/just before arriving at the evening camp location for that evening's (usually hot) meal, tomorrow's breakfast (which can be hot or cold), and lunch (cold and usually prepared that morning as a sack lunch).
- Cooks usually carry the things that need to arrive first (stove, pot, and cutlery) or they see that the fast riders arrive with said items. Because of work duty rotations, the supply item distribution tends to be re-distributed for each morning, i.e., people don't always carry the same item. On occasion, especially on the Great Divide, food may need to be purchased for three or four days at a time.
- Multi-day food purchases tend to gravitate towards being as light as possible (dry goods and dehydrated goods).
- Generally, no more food is carried for the group than will last to the next known place to purchase food.
- Generally in groups, people carry about the same weight in food stuffs as individuals in a group as they would carry as solo or couple riders who are bicycling the same route/segment.
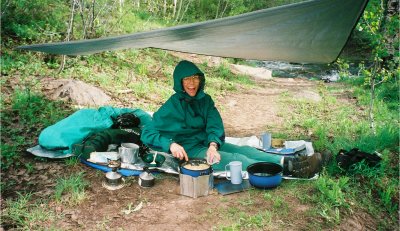
See Generalized Camping Food List
Bicycle Touring Group Supplies Checklist:
TopCyclists must dedicate about 20% of their available space for carrying their share of Group Supplies or Equipment.
- First Aid Kit [usually, the last person carries, Itemized List, a major road rash crash kit is needed even for just one rider. It is wise to discover and designate Medical People as group medics (EMTs, Nurses, or Physicians)].
- Bicycle Tour Group Tool Kit/Checklist (Itemized List; In some cases, the leader just needs to know that at least one person in the group has one of the following tool or supply items. The tool kit weight ranges from 10 to 15 pounds.
Many Comments - Pots & Pans: Usually 2 Big Pots (8 Quart, 1 is usually just for Hot Water, the other for the main bulk meal), 2 Quart Pot (for side dishes), 1 Big Fry Pan (usually eggs or pancakes, can also be for Wok purpose, and can be used to hold salad stuff. Covers too. This is the standard setup for Adventure Cycling's 15-16 people trek for 10 to 90+ self contained days). The cooking equipment usually need to be cleaned/rinsed upon arrival because people pack things into them enroute.
- Clean-Up Gear: scrounge, metal scour pad, bio degradable soap, small bottle/container bleach/sanitizing agent (also used to purify water, 5 drops per boiled gallon), paper towels, trash bags, can/bottle opener. Sometimes, a plastic basin.
- Stoves, Two (Coleman or MSR, liquid multi fuel type [White Gasoline / Coleman Camp Fuel or Unleaded Regular Gasoline - most common fuel in the world], Coleman Camp Fuel burns cleanest). Remember to top off stoves with fuel before the trip start and after each cooking meal. Make sure that at least one stove and one big pot arrive first at the camp destination.
- Fuel Bottles, 6 Quantity, usually in 12 Ounce Volume size, with fuel, numbered for usage order, usually burn about one bottle per day.
- Basic Spices: Salt and Pepper, Spice Carousel (nutmeg, curry, paprika ...), hot sauce, over time usually distribute and carry some left over things like small Vinegar, small Oil (Olive / Cooking), herb packages (Greek, Italian, Provence).
- Cutlery: spatula, large spoon, ladle, medium and large knife (can use pocket knife for small work), optional long fork, butane lighter/matches (waterproof container), plastic trash bags, pot gripper/handle, hot pot pad / glove, cutting board, grader, 1 or 2 gallon water bladder, gallon size plastic zipper bags as well as paper lunch sacks, marker pen, net to carry everything and sometimes dunk in boiling water, bottle opener (usually on a knife), can opener (often a large P-38 or on knife), some rubber bands, sometimes a group saw, sometimes a potato peeler. Wash in one big pot, rinse in other big pot.
- Water Filter: Main Pump Unit, spare filter, hoses, pre-filter, and bag. Sometimes a sanitizing agent (Chlorine Dioxide [liquid or table]. DO NOT USE Iodine in any form - Ray Hanson, AC Expedition Tour Guide). Sometimes a Steri-Stick or something similar (field reputation is mixed extremes).
- Dining Fly / Space Blanket, something in the 8x8 Foot to 10x10 Foot size range, w/ guy lines, a few light weight, easy push, stakes.
- Marking Pen: Permanent Ink, Black, Quantity of 2 is better than 1; a pen sized style is most functional (versus the fat or long markers); many purposes, especially for specifying food use (Day of Week, Meal Time, owner/preparer, ...), and eventually used often by everyone.
- Accumulated Supplies/Condiments: After a while, cyclists get into a sharing routine/rhythm and people purchase food or things for the group to share over a span of time. Some of food items just don't spread evenly for one meal or one day, like olive oil, salt, pepper, spices, leftover food, ... . Some of the supply items have their own usage cycles, like sealable plastic bags (used for multiple purposes), napkins/paper-towels, matches, ... . This group of items slowly builds over time and seems to be group regulated (you buy it, you carry it OR group shared).
- Wine & Spirits Caveat: What a touchy subject. It is best to keep such things to one's self or at least outside of group involvement and never use group money for a purchase. Remember that for some, it is a religious issue; for some it is a first or second hand abuse issue; and for some it is mental health issue - Please respect other people's circumstances.
- Food Protection - Bear Safe(s) or Bear Bag: Extra nylon cord; bear bag, nylon cords (2 long), pulley, throwing sock or big commercial bear proof food container [www.bearvault.com, www.backpackerscache.com, www.wild-ideas.net, REI, and EMS - in campgrounds with bear proof trash can bins, Wally Werner (AC Expedition Guide) places the food in a bag and sets the closed sealed bag next to a trash can inside the bear proof bin (smart actually - one may need to see the latest bear-proof canisters now at parks and forests).
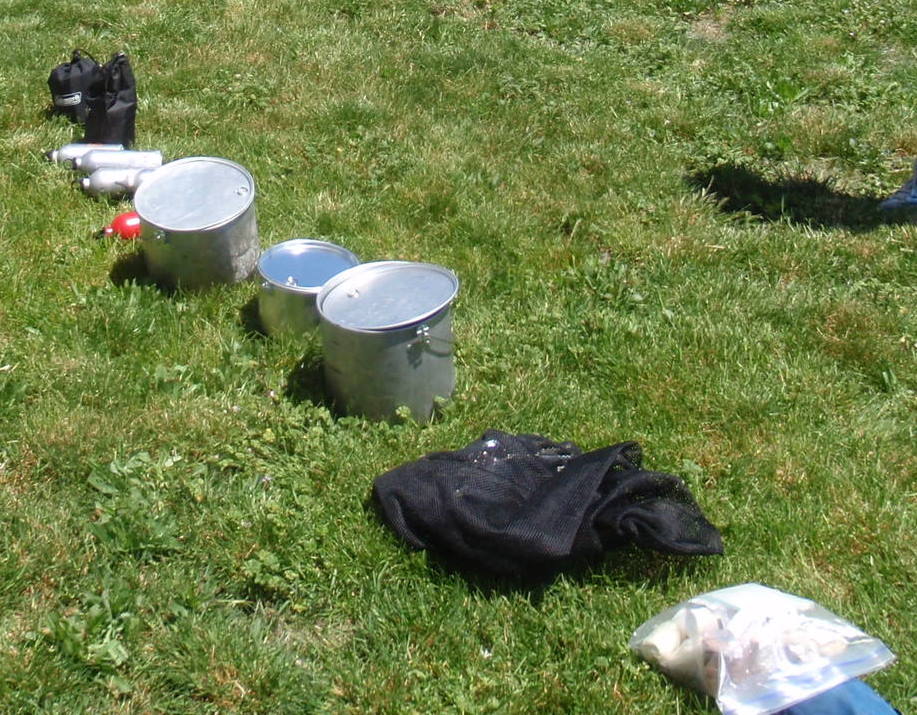
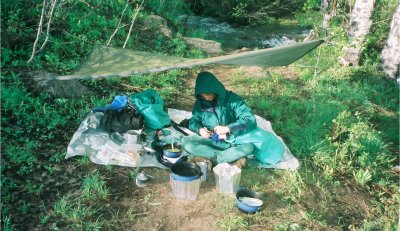
Group Communication and Action When Riding Together (More or Less):
Top- Group Communication and Traffic Warning Solutions: In groups with cyclists riding together or in close proximity, Warnings Statements are passed up and down the chain of riders and repeated. For example: "Car Back," means that a car is coming from the rear and passing everyone, usually on narrow streets. Other Common Warnings are: "Car Up" (or "Car Front"), "Truck Back", "Bike Back" (a solo biker passing the group), "Hikers Ahead", "Group Ahead", "Elk Up", ... . BEWARE, When animals are about, the signals are often only hand gestures or not given at all, people just stop suddenly and frantically look for cameras. See Photo Stops.
- Group Silent Signals: See Bicycle Hand Signal, especially for Animal(s) About!
- Group Communication and Change of Travel Direction Solutions: On non-camping tours, there are often a few hundred yards/meters of separation between the leader and the tail.
- At key places the Leader needs to and will wait for the tail to close.
- At other times, the leader will post a cyclist to give directions and physically remain until the last cyclist passes.
- In lieu of a 'traffic control posting,' sometimes when those in front have made a turn (an unobvious change of direction), the person at the head of the gap should wait at the turning point for the next rider in order to assure the following riders make the turn - this waiting responsibility is passed on to the following rider.
- Group Communication, Call for Single File (Issues and Solution): Use the word(s) "Single-File", "Single-Line", or sometimes "File-Up", as a command (to advise the other person to form up, behind, in a single line). Use the word "Filing" (File-Ling or Line-Ing) as an action statement to warn the other rider as to why one is suddenly braking and dropping back. One warns the other rider or else the other rider may also automatically brake also, thus making it more difficult to file behind them. This activity may be associated with a "Car Front / Car Back" warning statement.
- See Bicycle Hand Signal for Single File!
- Watch out for other tour groups, especially bus groups, as they tend to not pay attention to their surroundings. Let them know that you are there, shout or loudly say Bicycle (or Velo [French for Bicycle], Bici [Italian/Spanish/Portuguese for Bike, in English pronounced as 'BeeChee'], or something). Be extra observant and more careful when in populated areas and on trails that are shared with other kinds of users. Note that this site author has surprised elder people by passing from behind and had them yell at him because the seniors did not hear the verbal warning or bell signal(bad hearing, hearing aids removed, hearing aids turned down?). Also, bicyclists stopped on a trail side, talking to one another often don't watch what they are doing - many cyclists have back stepped into a bicycle path without thinking (to include moi). Give warnings early; let everyone know that cyclists are about, ahead of time. It is the Adventure Cycling Tour Policy to have bikers get 10 feet off a roadway but that, of course, may be impractical for certain real life conditions.
- Group Communication - Signal Attention (Look for It): In groups, watch for hand signals from other tour group members (no matter how far ahead they are): Particularly watch for stop, slow, and turn signals. But the hand signals in the wilderness are very important because silent signals often indicate wild game ahead and it helps if everyone remains quiet. Be mentally ready for people in front to suddenly drop or set their bikes down in order to gain access their cameras.
- Group Caution/ Bad Re-Action Warning: In groups, especially for side by side riding, when a vehicle (bike or automobile) is approaching from either direction, make a special effort to fall into a single file. There is often a tendency, since the bikes are already side by side, for the bike riders to split apart laterally (even if the riders aren't even with each other). This action actually endangers one of the two bikers, because the oncoming vehicle driver does not know what to do. Driving between the riders is unsafe and there may not be enough room. Picking which rider to come closest is unsafe and always jeopardizes someone.
- When Stopping in a Group, EVEN IF ALONE: When stopping for any reason, LOUDLY ANOUNCE that one is STOPPING and PULL OVER; a hand signal is not sufficient because the next rider may not be looking at the moment. The reason that one pulls over is that humans naturally line-up or align themselves (and their bikes), so just getting out of the common travel lane/line-up/queue will prevent many rear-end collisions. GENERALLY, most bike on bike collisions come from the following accident cascade of events:
- The lead individual is thinking that they are alone (or not thinking at all) and stops quickly without pulling over nor announcing/verbalizing the intended stop.
- The next rider is positioned in line with the lead biker.
- The next rider is looking away from the front (often looking at the same event/view that is causing the lead rider to stop).
- Action/Rule: The cyclist to the outside/curb-side/road-edge of the lane should have the right-of-way.
- Action/Rule: Children are 100% unpredictable. Around kids or kids with parents, slow down or stop - wait out the situation, give parents time to address kids or the situation. When parents are on trails with kids, the parent is trying to teach kids about the joys of biking or the outdoors - make it a positive experience, say something nice to the parent or kid - Isn't this Cool!
- Warning/Action: When driving on side by side on Right Hand Roads, it is safest for the left most rider to fall in behind the right most bike and form a single file. The reason evolved from the fact that it is the cyclist nearest the passing vehicle is in more danger - that person will most likely react to a passing vehicle once they become aware, in fact most times the cyclist's instinctive reaction is to move away from the danger (thus putting the other bike in danger - I've witnessed side impact collisions between bicycles). Note that children should not be allowed to ride to the inside at all and their action is 100% unpredictable. When driving on Left Hand Roads, it is safest for the right most cyclist to get behind the left most bike and form a single file and the same reasoning applies.
- Action for Sight Viewing or Photo Stops:
- If a person is next to or in proximity of one or more riders, then SHOUT/LOUDLY SAY the word "STOPING," to warn others that one is stopping (and perhaps driving erratically) AND PHYSICALLY PULL OVER. This statement warns the other riders to be cautious of the caller's unusually, and perhaps dangerous, driving behavior.
- If animals are about, make sure that no one is behind you, use the hand signal (Devil Horns fist overhead), pull over, be quiet and slow in motion. See Animals About Hand Signal
- The 'stop' may not necessarily be to take a photo, but maybe to just enjoy a view or a moment; then loudly state 'Stopping' and pull over from the bike way/lane/path.
- Very often, Photo Stops evolve into a snack, meal, or group break, and they often become a bladder break.
- It is very common for other people to either share the same idea of a view, see the view/event at the same time or to be curious about what one person saw that the others may have missed. Expect or be prepared for others to join the first person to stop for the view and always expect that another rider just closed-up from behind. Pull over and state 'stopping'.
- From behind, for a moment, a photo stop can look like shear pandemonium.
- Please note that about 80% of all chain breaks that happen to experienced riders, happens at the startup after stopping to look at a view because most people stop so suddenly that their bikes remain in the touring road speed sprocket setting and not in a startup sprocket setting. If needed, walk the bike into the proper sprocket setting.
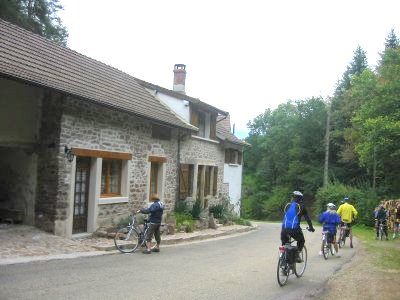
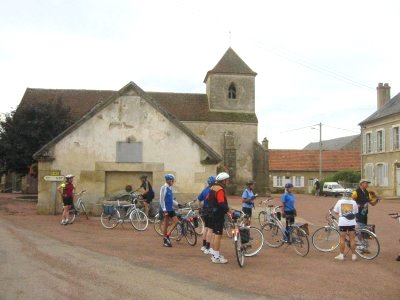
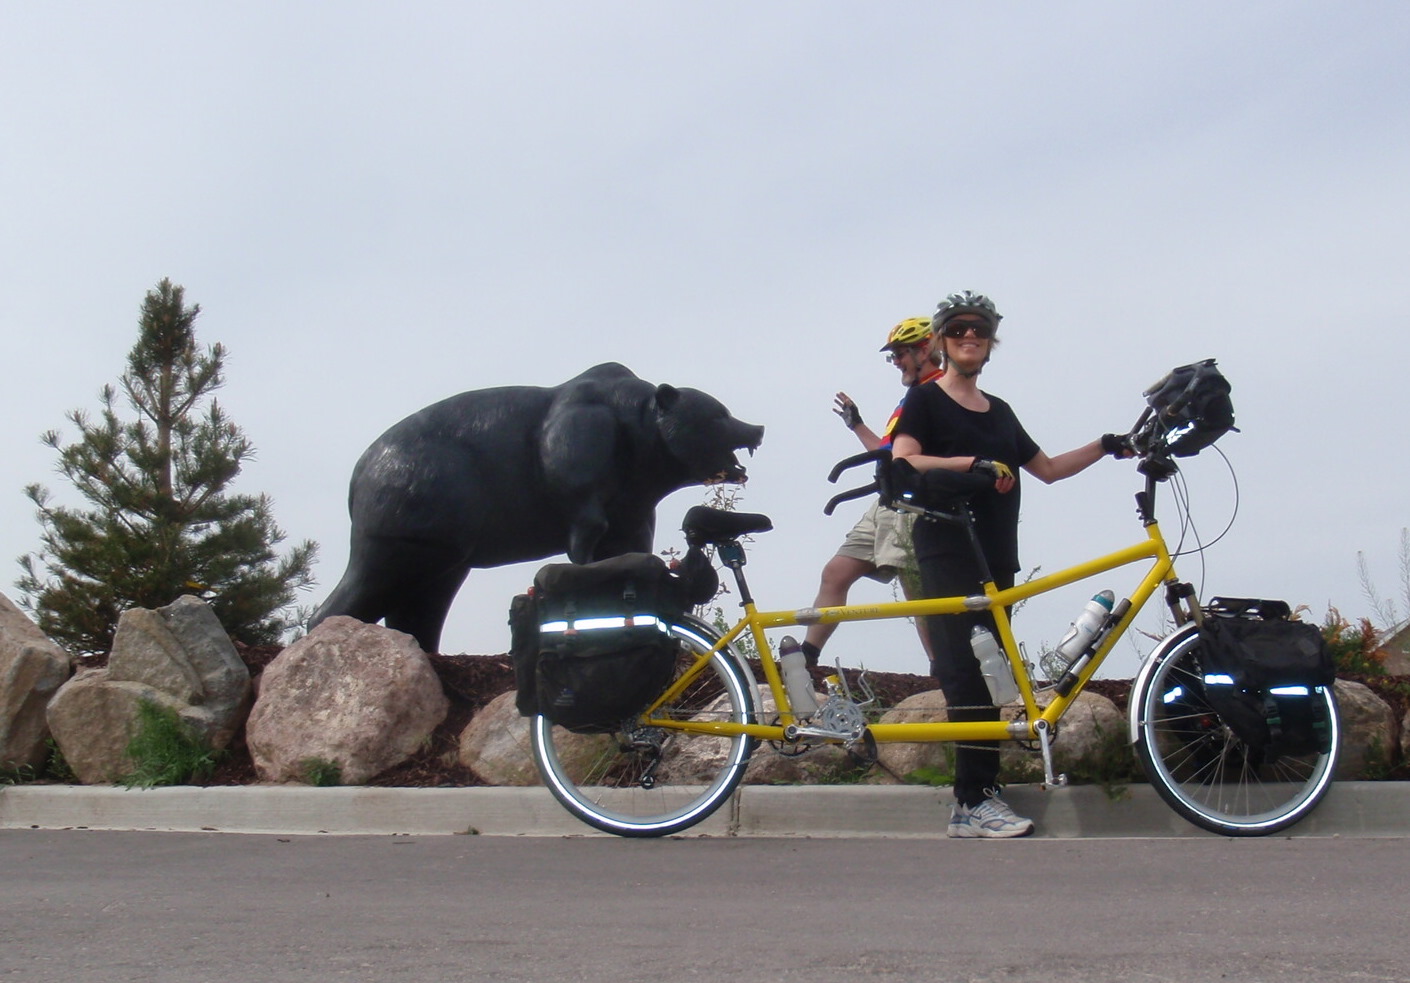
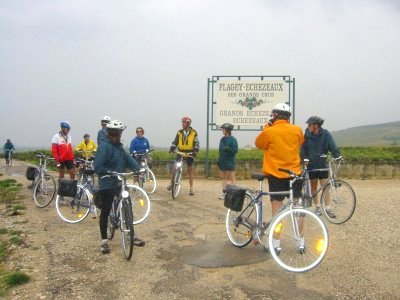
Bicycle Touring Group Riding Decision Issues/Communication/Ethic (Adventure Cycling Style):
TopThis is an evolved process, learned and refined over time (by Adventure Cycling with much feedback from its own tour guides and relayed through its Leadership Training Course).
- There can be a tremendous lack of direct communication between group members while they are cycling. By the end of a day, where average touring distances are 45-50 miles on dirt/mountains trails or 50-60 miles on gravel/paved roads. There can easily be 10 or more miles of separation between the first destination camp arrival and the last person on the road. Cell phones, often, cannot get reception in remote areas where people like to conduct bike touring. There are times when there is No Way to directly Communicate between riders.
- Cyclists are not expected to ride together, in mass, to get from A to B. It is common for some people to group up and ride in the same packet for some duration, especially if they are progressing at the same speed. But no one has to ride together. Also, there are often side stops to make (pastry shops, coffee shops, cyber cafe´s, hardware stores, bicycle shops, grocery stores, museums, and libraries or stores with Internet Access), plus tourist or historical sites or views (some of which may be someone's actual purpose for attending the tour - ergo, one expects them to take more time before arriving at camp).
- Things happen and things can go wrong. Campsites can be closed, roads can be closed, passes can be closed, fires or floods could have destroyed a route or a destination, people can have life altering experiences that force them to temporarily close their business.
- For safety purposes the person with the group tools and the group first aid kit usually rides last, or drifts back to ride last early in the day. This person is usually the group leader. This is the evolved behavior for the group and a group accepted risk. Many people carry a better than average first aid kit but hardly anyone carries extra tools (mainly because of the weight). Usually being remote from communication is part of the adventure - who wants a bicycle city adventure?
- If the group leader is at the rear, then this means that cyclists who are at the front of the column will be the first people to arrive at most unknown situations (closures, detours, and unexpected changes). The early arrivals, who are at a decision point will need to make prudent decisions for themselves as well as for the group, often on the spot. Furthermore, this decision must be communicated to the rest of the group.
- When the front runner's decision is made, it usually needs to be communicated to the group. There are (at least) three ways to communicate rearward to the group.
- This is probably the least dependable method: Sometimes a proprietor can and will communicate the issue to arriving cyclists or they can put up a sign. This does have its applications.
- Using the "Peel-Off" Method, the First Cyclist can wait for the Second Cyclist and relay the message. Then the Second Cyclist waits for the Third Cyclist, and so on ... .
- Probably the most common method of communicating backwards (for Adventure Cyclists) Cyclist-to-Cyclist, is to use the "Message Flag" Method. In this case, the First Cyclist (or the first few cyclists) write the pertinent facts and decision on a scrap of paper and stick the note inside a plastic baggie type container (if available) and place the container/note onto a Touring Reflector Triangle by use of an attachment device (blanket pin, safety pin, nail, stick, duct tape, ...) and then the Triangle is wrapped around a pole, tree, or post in such a way that cyclists will see the Message Flag.
- Flag Position Note: Cyclists must be alert for Message Flags (Reflector Triangle) and the flags should be posted where they will be seen, preferably for a long viewing distance.
- Last Person Note: The last person collects the message and Reflector Triangle.
- Flag a vehicle, catch a ride, load a down rider, and/or send a message.
- Call the destination Campground or Place of Stay.
- Notify Emergency Services (only for Emergencies).
- Assumptions:
- Remaining riders will stay on the planned course. When people go off route, they are on their own for catching up to the group. BTW, any course changes are executed together at the group's map briefing (typically held in the morning, but sometimes in the evening). If someone deviates from the planned course, then it is quite possible that they may be out of any communication about a change of plan.
- People will act responsibly. For example, if someone is the cook for the night, they should not be attending a movie or going out for their own dinner [this has actually happened - AC Tour Guide Stories]. BTW, group members tend to be wonderful for covering for one another and for addressing poor behavior.
- There are plenty of tour route distractions and in some cases, someone can just be lost or even, rarely, they could be sick or injured. It is expected that separated riders will make best efforts to return to the group in a timely manner, or, as a minimum, communicate to the group their circumstance and intention. When people become separated from the group, they are responsible for themselves and they have an obligation to communicate to the group in a timely manner.
- When riders go off the planned route they can miss enroute messages and changes in plans. There are many benefits to staying on course, but If a group member goes off course, then they are responsible for all of the subsequent effort that it takes to catch up to the group, to re-join the group, or to communicate their circumstance and intention.
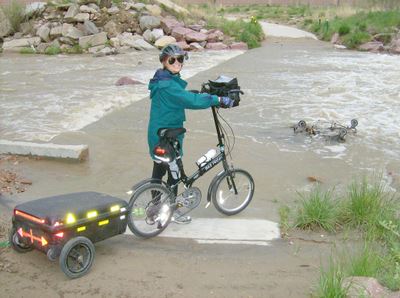
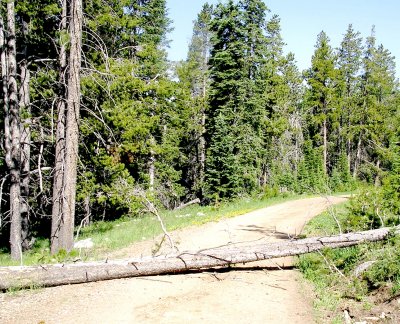 There are just about only three ways to get a message forward:
Bicycle Hand Signals, Foot Signals, Silent Signals, Voice Signals:
TopWe use these signals; the picture section is under development.
| Signal Name/Purpose | description | Image/View |
|
Hold ALL signals for at least 3 (eternal) seconds! |
||
|
Animals About: Be Quiet, Move Slowly |
Arm Extended Above,
Fist with Thumb and Little Finger Out (same signal as Aggies's Hook-Um-Horns or Surfer's Shaka sign) |
Send Clear Title Image |
|
Dogs: Be Ready for Harassing Dogs, Sometimes: Ready the Pepper Spray or Air Horn. Yelling the word "Dogs" will always attract them. |
Arm Held Low
Fist with Thumb and Little Finger Out (can move thumb and fingers in-out) (Alternate Signal: Point in-out at the dogs) |
Send Clear Title Image |
|
Ground Hazard Warning: Glass, Pothole, Debris, ... (Steer to Avoid) |
Fist with Index Finger Pointing Downward at Hazard Object on the Ground | Send Clear Title Image |
|
Ground Hazard Warning Alternate Signal Method: Glass, Pothole, Debris, ... (Steer to Avoid) |
One Foot, off of the pedal Aiming Outward and Downward (comes from ATV/Motorcycle world, less common among bicyclists) |
Send Clear Title Image |
|
Single File or Form-Up in Single File: The signal is usually for a safety reason but can be a courtesy for riding through crowded situations. |
Fist with Index Finger, Arm and Finger Straight Up (Not moving in-out) Moving In-Out means look in that directions. |
Send Clear Title Image |
|
Pointing in the Direction of Travel: This Signal is usually for Motor Vehicle Operators. The signal is very helpful at intersections or round-abouts just to let other operators know your intent. There are signals for Left and Right turns, but nothing for going straight, sometimes it is nicer and kinder to let some vehicle driver(s) know your intentions rather than to make one or more vehicle wait to figure what your intention is or is not. |
Fist with Index Finger, Pointing at Up-Angle in the Direction of Travel | Send Clear Title Image |
|
Slow Down!: Caution/Warning to a Cyclist going too fast (especially downhill runs with a single wheel trailer). Sometimes a signal to motor vehicles to warn of a hazard in front of them or sometimes warning of Police Speed Check |
Flat Palm, at waist level, Pushing Down-Up (or Flat-Palm-Tip Down-Up) |
Send Clear Title Image |
|
X Number of Cyclists in Group (NOT usually counting one's self): Let an approaching Hiker, Cyclist, ATV rider know how many riders are coming. This action can be, and often is, verbal if motorized vehicles are not involved. The action allows the oncoming people to holdup for your group (or vice versa). This is a big deal on narrow trails or in the back country narrow trails. Uphill climbers have right-of-way, but sometimes it is easier for the uphill people to pull over. In many cases, when there are two groups coming at each other, one of the groups will pull off for the other. Sometimes this is an opportunity to learn about what lays ahead. If it's another touring bike group, it may be a good time to have a brief Confab or even a snack break. |
Hold up X many fingers and Point hand directly at Arriving Rider/Hiker (often associated with verbal "X Riders" or "X Riders Behind Me") |
Send Clear Title Image |
| Never Flip Off !!! |
Never Flip Off nor give any bad intended sign. It damages the overall biking community and never results in anything positive for other people. |
Send Clear Title Image |
|
U-Turn Invented Here Let other vehicle and cycle operators, and pedestrians know that one is making a 'U-Turn'. |
This is performed by pointing downward with with the entire straight arm, hand, and index finger while making a circular motion with the arm's end parallel to the ground. Do move the arm's end in a 15 inch diameter. Do try to make the clockwise or counter clockwise motion in the direction of the intended U-Turn. |
Send Clear Title Image |
|
Gather Up Assemble. Usually to form up to begin pedaling (after a break) or gather up for a map/trail/event briefing. |
This is performed by holding the upper arm straight out from the shoulder, bending the elbow up at a 90° angle and moving a straight forearm so that just the index finger is make a 10 inch diameter circle (parallel to the ground). This is an ancient military hand signal. |
Send Clear Title Image |
"She's as smart as she looks" - Dennis Struck
or "He's smarter than he looks" - For the Cocky Stoker - Wink!
 About Tandem Bicycle Touring and
Tandem Bicycle Tour Issues
Tandem Aliases: Two Up, Two Person Bicycle, Bicycle Built for Two
TopTandem Touring Issues for Experienced Tandem Bicycle Riders
Tandem Touring Issues for Newer Tandem Bicycle Riders
Two Rules for Smart Tandem Bicycling Cooperation
Tandem Touring Checklist:
- See Bicycle Touring Checklist and Issues
- See Bicycle Camping Checklist and Issues
- See Bicycle Expedition Checklist and Issues
Some Tandem Bicycle Communication /Terms/Terminology and Issues
Riding a Tandem is a true adventure. Cyclists that ride tandems evolve a special relationship of trust, cooperation, and communication. The reason for this dual rapport is that trust must evolve in order to survive. There are people who can't ride double. The back seat rider totally depends on the front seat driver to communicate the bicycle's mechanical needs (in order to pedal or not pedal at the same time, or to know when to give a slight power-stroke pause to facilitate shifting) or to communicate upcoming movement changes (turning left, slowing, coasting, ...). The front seat rider depends on the back seat rider for mechanical information and feedback (we're in [or not in] the #2 ring, trim [derailer-basket], slow down, up shift, ...) as well as situational information (antelope at 3 O'clock - 200 meters, car coming at 9 o'clock, just passed a hidden turnoff sign for ...). Riding a Tandem is not complicated; it just takes a little knowledge and practice. Herein, we've gathered some knowledge and experience to share with tandem riders.
Tandem Bicycle Touring Issues for Experienced Tandem Riders (Newer Tandem Riders Next)
A Tandem allows an experienced cyclist to share the bicycle camping and/or touring experience with someone who may otherwise not be able to handle a bike alone or handle a bike for a period of time. Kudos to the reader for checking this cycle touring section. Remember that tandem touring does not necessarily mean camping, but we will raise the camping issues herein.
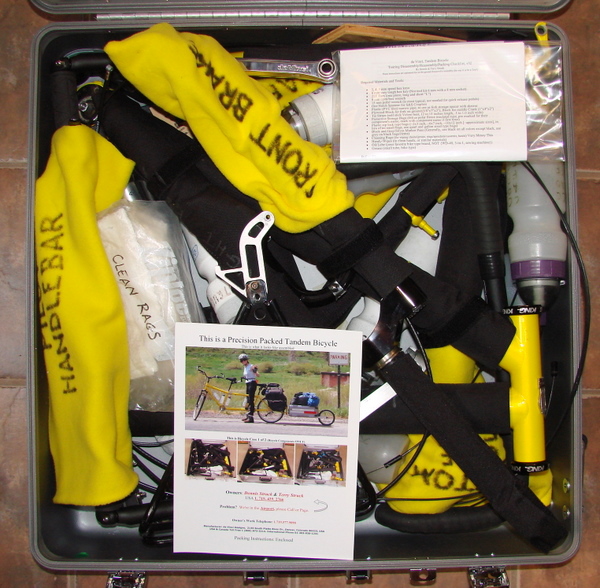 Big Issue #1, Shipping: Tandems, being bigger than single rider bikes, will require larger shipping boxes. While shipping companies like FedX or UPS will ship larger bike frames, at an additional cost, airlines won't. Thus, if one is going to air ship their tandem, it needs to be able to break down for packing. The result is that one will need to ship a tandem in a large single bike box (as 2 or more frame pieces) or two boxes or two suitcases. This, of course, is a major bike purchase issue. If one is planning on touring via an airplane for travel, then be sure to buy / own / have a bike that is designed to break down for shipping (or have a bike shop install break down couplers). Breaking down a bike for shipping is usually not needed while one uses ship or train transport. Buses are problematic for any bike but more so for tandems and almost no driver is going to facilitate a fully loaded touring tandem bike inside a bus. Also see Tandem Bicycle Shipping and Transporting Issues and Solutions (which includes a tandem bicycle transport and packing checklist).
Big Issue #2, Cargo Limit: A tandem bike can generally carry four panniers, however two bicycles can generally carry eight panniers (not counting trailers or add-on devices). So two people on a tandem cycle cannot carry as much as two people on separate bikes. That's a big deal and it effects planning and preparation work. There are pretty much two solutions, use a trailer or learn to pack lighter. We have implemented solutions with either option. Of course, if one does not have to carry camping gear on their tandem, then this issue may go away. For Tandem Bicycle Touring, use the Bicycle Touring Checklist and/or the Bicycle Camping Checklist.
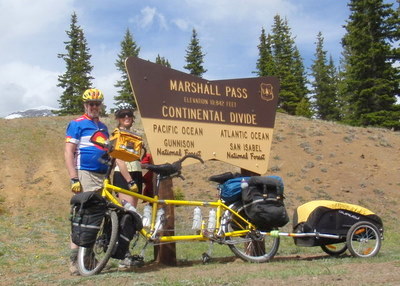 Tandems pull a trailer a little easier than their single rider counterparts. Both a longer wheelbase and two engines (versus one) seems to make trailer usage more compatible and achievable. Note that pulling a trailer on a tandem produces the turning radius of a Bus. One will learn to plan turns and rest stops more so than one ever thought about the subject on a single rider bike. There have been times where we have had to perform 180 degree turn arounds on two track dirt roads and single track trails where one person had to swing the trailer around while another moved the bike around. In fact, on one single track trail, we had to disconnect the trailer in order to turn the bike around.
Tandem Bicycle Touring Issues for Newer Tandem Riders
-
It does not take long for the front seat person to learn to make the back seat person happy and it does not take long to anticipate each other's actions.
Tradition has it that the person up front is called the 'Captain' and the person on the back seat is called the 'Stoker'. Captain is the term for the person who controls movement and direction on a vehicle. Stoker is the term for the person that generates Power, like the person that feeds coal to the fire for a steam engine. Captains are also called Pilot and Stokers are commonly referred to as the Engine; sometimes back-seat and front-seat works just as well as a reference. Many other analogous terms are used for Captain and Stoker and it isn't difficult to invent terms. More Humor - On our bike, the back seat is called Gunner (dog spray).
- * * * The actual SECRET to a faultless tandem start is perfectly neutral bike balance. * * *
- - Dennis Struck
- One method, the majority method, is to have the Copilot mounted and on both pedals.
- Another method, common to a large minority, is to have the Pilot and Copilot both with one foot on the pedals and one foot on the ground.
- Also a less common method exists where the Stoker holds the bike and the Captain is fully on the pedals.
- The Type of Brake Disk/Rotor Matters and there is a Suspected Rear Brake situation to be aware! A rider should request rapid cooling rotors; these rotors are usually the kind of rotor that have many holes or slots and the rotors may be of a special composite or ceramic sandwich construction.
Caution: It is suspected, by my own experience, that full sized rear panniers may dam the air while in motion and perhaps to some degree block/reduce the normal flow of air to/across the rear disk, thus perhaps preventing the disk/rotor from normal cooling. If any part of a brake system is too hot it does not operate as efficiently as when it is cool - In a worst case scenario, any super hot brake will probably fail to operate properly. This is not an issue of using the front brakes more or more often (as front brakes do stop any bicycle or motorcycle more efficiently than a rear brakes). It is more a matter of rear brakes not cooling down as quickly as front brakes (generally front brakes have direct air flow across the pads and/or rotor, even with large front panniers mounted). Most bike techs will know about rapid cooling rotors but probably will not know about the issues as related to fully loaded bicycle touring.
- If a bike has two disk brakes and either one is working correctly, tandem cyclists can finish the tour or find an enroute bike shop to replace/repair said rotor/brake-system.
- We used to carry a spare rotor, with the technology still being relatively new, but we quit carrying a spare rotor in 2008. Most rotors were damaged in shipping (rotor mounted to the wheel), not on the road, the exception being extreme mountain biking; almost no problems for touring bike situations.
- Do carry one pair of replacement brake pads (they are light weight and very small), one must know how to replace the pads, it is simple but time consuming, it is a tiny fingers job or a delicate needle nose plier job).
- Not all disks use a T-25 driver, there are a few exception sizes out there (but know your bike's rotor bolt size/type requirement).
- Know your torque settings: Most rotor bolts need about 55 inch-pounds of torque (4.6 foot-pounds or 6.2 newtons), the big exceptions are Shimano at 18-35 inch-pounds and Hope at 36 inch-pounds.
- People are not supposed to touch brake rotor surfaces because the oil from fingers effects brake pad life and functionality (same rules as a Halogen Light Bulb, use Rubbing Alcohol to clean/remove body oil); we grip ours (for shipping/packing) by the inside edge and the outside edge and pack each rotor in a gallon sized zip lock type plastic bag, stored in a homemade corrugated cardboard envelope with a cardboard partition.
- Carry the bolts in one or two other plastic bags, depending on bolt type differences - We label our bags and reuse them over and over.
- After we ride a long tandem tour together, the Captain, while driving a motor vehicle frequently calls out the maneuvers or conditions, 'Right Turn' or 'Bumps', still in Captain Mode.
- When riding single rider bikes, after a long tour, the Stoker frequently drafts the Captain (on another bike) and subconsciously synchronizes the pedal rotation. Meanwhile, the Captain frequently calls out for a down shift, 'Down' or 'Down-Down', unconsciously, when the Stoker is around and the Stoker responds. Verly Intaresting, Dis Behavor.
How to Start Pedaling a Stationary Tandem Bicycle:
The Stoker (typically1) needs to be positioned with both feet on the pedals and poised for a power pedal stroke (usually with one of the crank arms at 45-60 degrees from the top position) while the Captain is holding the bike, one or both brakes locked. The Stoker's pedal stroke purpose is to get the bike moving while the Captain is busy re-situating from a standing position to a seated-pedaling position. The Stoker knows to push the pedals by the Captain's mounting movement (force on the pedal) and simultaneous brake release.
The Captain needs to decide which start pedal is 'Up', it is usually the pedal on the opposite side of where the Captain is standing2. The Captain's initial position is one foot on the ground, the other foot on a pedal, and at least one hand on a brake; the Captain usually asks the Stoker, "Ready?"; and when Stoker is ready and there are no hazards and the Captain has the bike perfectly balanced left-right; the Captain mounts the bike by stand-pushing on the pedal, releasing the brake, and re-positioning onto the seat and pedals at the same time. The initial movement by the Captain is to assist the Stoker in getting the bicycle moving (first priority) and then settle into the seat more comfortably and then maybe re-position on, or clip-in, the pedals. When a tandem Captain has his or her stuff together, the entire Start event will take place in two to four pedal revolutions.
1 Start Variations:Start and Stop Issues1, 2:
- One of the neat things about a Tandem (and a Triple, Trike, or Quad) is that it can allow some people with physical challenges to ride a bicycle.
- A large minority of tandem riders start a ride with one foot each on the ground - there are a variety of reasons, the most important is comfort with a method that works for that team.
- It doesn't take long to learn to work around certain human features or bike features.
- On steeper slopes, especially if on dirt, generally start with the pedals level to the true horizon.
2 Start Issue:
- If the Captain is straddling the bike, the Up pedal will usually be above the lowest ground elevation of the two sides (often the right side, due to the road shoulder sloping away and down from the road surface), or else the Captain would have to do more of a leg reach if standing/starting from the lowest elevation/side.
There are a few different ways to start. The actual method that one uses does not matter as long as both team members agree and it feels OK:
There are good reasons for using any method, but the method that works best is what the team agrees to or migrates to, experimenting is encouraged. Note: when each team member is starting with a foot on the ground the team must pedal In Phase with one another (or else one person on a sloping hill side is going to need mighty long legs to reach up to the opposite pedal).
When stopping, a Captain should consider advising the Stoker whether to stay on the pedals. Many teams operate with a default stop method (typically, the back seat comes off the pedals at a stop) and the Captain advises of the exception (Stay On-the-Pedals, Stay-Seated, or words to that effect). One behaves differently at a Stop Light/Signal versus pulling off the road for a rest or water break, but very often the Stoker cannot see what is in front or see what is causing the Stop. It is always wise to keep the Stoker informed. Note that Verbal Warnings/Communications/Commands are listed at Tandem Bicycle Communication Terms.
Body Inertia: Solo riders usually have no problem controlling their forward momentum when braking because the same person that conducts the braking is the same person that has to body shift for deceleration. HOWEVER, on a tandem, this is a different issue: the Captain nearly always needs to warn the Stoker of an impending/known stop so that the Stoker may perform the necessary body position shift for a quick stop. It is highly possible that the stoker May NOT be looking forward or that the Stoker my not have their hands on the handlebar. Stokers will accept emergency stops without being informed, otherwise the Captain is going to hear and/or feel the Stoker's displeasure.
To Pedal or Not to Pedal: My respects to Shakespeare and it is a big question. For the most part, most Non Tandem riders do not know that the Pilot and Stoker must pedal at the same time or coast at the same time. If one of them pedals, then both pedals move at the same time (unless the bike has independent coasting, most don't). So it is extremely important for the tandem team to coordinate their pedaling or coasting efforts or else one of the team members is going to get a pedal rap on their heel and/or loose footing. This Question is the biggest initial traveling teamwork issue and it takes a little time to work out a routine. Once the routine is established, with two way communication, the thought process moves to a lower part of the brain thus leaving room in the higher part of the brain to enjoy the majesty of the tour (one of the purposes for touring). It's kind of cool!
Isn't Shakespeare a Norman word meaning Politician (Spear-Shaker)? ;-)
Some Communication Notes: It is always nice when one team member acknowledges an important statement by the other team member, but we don't get compulsive about it. A Captain may be assured that sometimes what the Stoker hears is Blah or Blah Blah and the Stoker just knows what the Captain means; the Captain is positioned to speak away from the Stoker and with wind or road noise or such, the Stoker will not always clearly hear the Captain. It is more difficult to hear for either team member when in traffic. There are different kinds of Hand (Silent), Foot, and Voice Signals presented for all cyclists at General Cycling Signals (from the previous Signals Section) and there are special Tandem Only Communications in a following section.
Some tandem teams have electronic communication headset systems. The communication systems can be wired (less cost) or wireless (more cost, more functional). These systems are powered by battery. As with other battery issues, one time batteries last longer and take up less space and rechargeable batteries don't last as long and require the supporting battery recharging equipment and subsequent battery recharge management issues (discussed under Bicycle Expedition Long Term Travel Issues Checklist). For voice activated transmission, so far there is no perfect electronic communication system, they often exist in a delicate balance between capturing wind noise (too noisy) and quiet (missing some spoken words). The push-to-speak models require hands off the handlebar to speak (which may not always be safe). Electronic communication systems can be problematic with helmets and eye glasses. Also, it is possible that a communication system may interfere with hearing sounds away from the bike (pedestrians, other bikers, shouted warnings, and emergency vehicles or operations). Some tandem teams have no trouble with electronic communication systems.
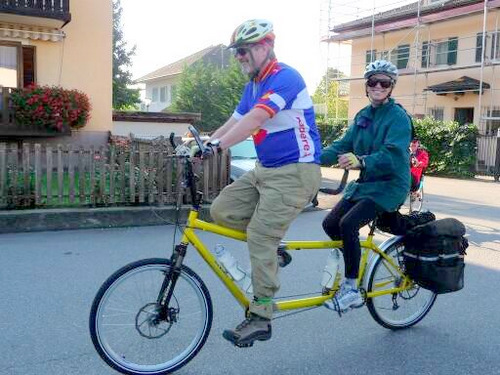 Synchronizing or Un-synchronizing the Pedals: We have evolved to having our pedals at 180 degrees out of phase. It isn't an issue until we get up to speed but at higher speeds, our combined hip swing-movement action gets fairly exaggerated and affects the bike ride. We have learned to make the down pedal stroke opposite from each other and thus the hip swing-movement action nullifies each of our hip swing actions, thus we get a smoother high speed ride. Hip swing does not seem to effect low speed actions.
Pedals at 90°s: We have experimented and discovered that pedals set 90°s give unusually good hill climb performance. Setting the pedals at 90°s is not pleasant for any other activity than climbing, so it isn't worth resetting tandem's crank and chain position just for climbing (unless one is performing a hill climbing race). But here is another big caveat, on a bike like a daVinci that has independent pedaling; it is worth it for the back seat person to manually get into a 90° out of phase motion to enhance the team's climbing capability (just for the climb).
Independent Pedaling: DaVinci Tandems, out of Denver, have independent pedaling. Their tandem bikes are not inexpensive, but if one can purchase such a bike, one will find that many pedaling and coasting issues go away. Independent pedaling is especially beneficial for riding with kids, new riders, tired riders, riders that have physical challenges, and/or riders that want to deal with less of the riding mechanical issues and more of the riding pleasure issues (touring, sightseeing, ...). In addition, independent pedaling facilitates the rider's choice to instantly ride in-phase, 180°s out of phase, or 90°s out of phase. It also allows each rider to position the pedal exactly where they want for a start. We have learned to let the back seat set the desired synchronization when riding a bike with independent pedaling.
Rider's Visual Field and Focus: More so than on single rider bikes, the Captain is often a little more focused on steering and therefore what is in front. Consequently, the Captain is looking less to the sides. In addition, the Copilot cannot see through or over the Pilot (in most cases), so the Copilot tends to look more to the sides and has the time to see more to the sides. Consequently, the tandem Captain will appreciate being informed a little more about things happening to the sides. Naturally, the Captain needs to inform the Copilot about events up front. Also, as a consequence, the Copilot may lean to the side to see what is ahead (thus effecting steering). The Pilot needs to let the Copilot know of any major steering/directional changes. It is kind of freaky to sit in the backseat and not see a detour sign or road closed sign and suddenly the bike is going left or right and mentally one is still going straight.
Copilot Riding: Most people learn the following on their own but this is a reminder. Riding in a body position that is inline with the bike frame's geometric plane makes transport control easier for steering. Most Copilots just mimic the position of the Pilot. On the other hand, no one expects a Copilot to be motionless for an eight hour ride; Copilots do stretch, re-position on the seat, stand, or lean in such a way to see around a Pilot. We've even seen Pilots sensing a look around lean by a Copilot, such that the Pilot leans in the opposite direction - that sort of thing comes with experience, but it doesn't take long to develop such bike feeling sensations. So the best method behind all of this activity is just to move slowly and controlled and not at inopportune moments (straight and level - no problem, descent and high speed turn - problem). Copilots should let the Captain know when they are going to move around dramatically.
Riding on the back seat of a motorcycle takes more or less the same riding skill as riding on the back seat of a bicycle (except for the pedaling activity), the skills and experience transfer nicely. And, driving 'Two Up' on a motorcycle yields Captain experience that translates nicely to tandem bicycle touring.
Rear View Mirror Phenomenon: This circumstance especially addresses helmet mounted mirrors. Sometimes the Stoker is leaning slightly to see ahead or to see around the Captain. As the Captain leans to see the rear more clearly through the mirror, the Stoker subconsciously leans more into the [rear] field of vision, in order to see forward more clearly. Remember that the Stoker can do no wrong, so the Captain needs to ask the Stoker to 'Lean the other way, Please'. Sometimes the Stoker is winking at the Captain. Sometimes the Stoker wants attention. Pay attention Captain.
Traction: The weight on tandem bike tires is double that of single bike tires. Consequently, tandem bikes can ride on dirt road surfaces without tire knobs (in many cases) or with a reduced amount of knobs (like a road/dirt cross tire) with great traction. So, a couple of points: One, a person probably won't be taking a tandem bike on technical mountain bike trails, but one can take a tandem bike on dirt roads that may require knobby tires for a single rider bike but may not require knobbies on a tandem rider bike (perhaps needing a road/dirt cross tire in really loose material on slopes). We have been quite surprised at how well a slick tandem bike with 1.5 inches of width rides on dirt surfaces. Thus a tandem can go long distances on dirt while using wider street tires. This was brought to our attention, originally by Todd Shusterman (Owner of daVinci Tandems). Two, while many bikes tour combined dirt and hard roads like the Great Divide Mountain Bike Route on knobby tires, we have had success on a tandem running slightly wider street tires. The only difficulty that we have run into was on the same kind of loose hill climb dirt and slope that knobbies also slipped - No big deal, if a team cannot pedal, it happens that all tandems operate very well in push mode (just like single rider bikes).
Dogs: They are a fact of life. The more remote that one rides, the more likely that domestic dogs will be running free and the larger that the dogs will believe their territory. Also, groups of dogs act different and more aggressive than single dogs. Over time we have learned to tell the difference between an excited dog that wants to run with us and bark with excitement from a dog that would like to bite a piece of us. We are not going to get into animal physiology and tail up or down modes (or ear back or up). There are mean dogs out there and there are stupid dogs out there. Stupid dogs sense no danger to their selves and will run under a bike wheel - these are usually little dogs but some are Great Dane size. If they run under a front wheel it will mess up steering control and perhaps cause a crash. It will certinly hurt the dog (and hurt dogs often even bite their owners, let alone a stranger).
Dogs can tell the difference between a slow up-hill climb and a fast downhill run. They will nearly always take on a bike that is climbing. We now carry a Pepper Spray that is approved for U.S. Mail Carriers. We only use it as a last resort. Frankly, I am surprised at how effective it is to Shout the word 'NO' to a chasing dog. That command probably works on 80% of all dogs, domestic or foreign. Thus you now have a reason to learn the word meaning 'no' in different languages. You should hear me in French (Non!). Anyway, some people use an Air Horn with great effect. See Boating Air Horn for cyclists. The principles are that dog hearing is extra sensitive and loud noises will drive them off. This particular air horn was made for boats and can be recharged via a standard Schrader Valve fitting on the bottom, i.e., bicycle pumps can be used to re-pressure the air horn. Some people use water from their caged bottles and some people make their own pepper juice, all with fair results. My wife and I have each been bitten (by different dogs) and we operate at a higher level of defense. No rider has more defensive control capabilities than a back seat tandem rider with a free hand and no worries about steering.
Navigation: Depending on the bike set-up, point to point navigation may be performed by either the Pilot or Copilot. One of the problems for tandem bikes that break down for shipping is that they often have a shorter overall length than their non-shipping counter parts. Thus, one of the areas that gets shortened is in the area between the Stokers handlebar and the Pilots seat back. Some Stoker bar positions have enough room for a Stoker to place a map holder and map (many don't) or perhaps a GPS. Therefore, some Stokers may Navigate; AKA, a Pilot and Navigator team. Also see Navigation Tips and/or Learn Sun Navigation Methods.
 Kicking the Captain Problem: This has to be a setup for a Freudian Projection joke, but it is a common problem that the Stoker's feet will slip off the pedals and kick the Captain in the calf or hamstring area. This usually happens at a bike start or during an intense hill climb and the Stoker is really putting a lot of effort into a power stroke, really trying to help the team get going, thus when the Stoker's foot slips it raps the Captain good. This happens to every tandem team and some of these raps can be so strong as to end the cycling activity for a day or two. It happened to us on a few different occasions and the Captain checked around and discovered that many Stoker pedals are setup with Toe Clips or Power Grips. Both Clips and Grips are relatively easy to slide the feet out when necessary. Our Tandem Stoker's Pedals now have Power Grips and both the Stoker and Captain are happy with the solution. By the way, if one is riding on a single-track/dirt-path situation where one wants the feet to be free, in most cases one can flip the pedal over and ride with feet free.
Disk Brakes: One, if it is a purchase option, get disk brakes! Two, if one can upgrade to disk brakes, do so. A 'fully loaded' Tandem bicycle will accelerate very quickly going downhill and it takes a lot of brake pad friction to slow it down. Disk brakes perform very well when wet (versus rim clamp style brakes, which by the way, wear down the wheel rim sides of the very wheels that one is riding with a doubled load factor - hmmm). We recommend cable operated disk brakes (versus hydraulic actuation), front and rear (8 inch diameter for each wheel). Avoid hydraulic brakes for shipping, too many potential destination issues. We remove and reinstall the rotors for shipping, no big deal, need a dedicated T-25 Torx driver for most cases and knowledge of how to mount the rotor bolts in a star pattern (just like you do for car tire lug nuts). A dedicated T-25 Torx driver will give a cyclist better assembly torque control than the T-25 driver that comes on some multi-tools.
-
Caveats:
Wheel Rims, Brakes and Spokes: This is a big deal. Tandem wheels are typically carrying twice the load as a single rider bike. Wheel Rims have a lot of stress on them (lateral, axial, and torsional [fore and aft especially from braking, but tandem riders can apply more starting torque than single riders]). The very best scenario, at present, is an 'A' shaped rim (sometimes called Aero), double walled (spoke wall + outer wall), tapered sidewall (redundant wording) with disk brakes (mounted on the hub); thicker than stock issue round spokes (2.0 mm or bigger = 14 gauge or smaller g value), using a 3x or 4x lacing pattern (4 cross preferred, 3 cross quite OK), with a count of 48 spokes (48 is best in the 26 inch to 700 mm wheel size (27.5 inches), 40-44 OK, usually in multiples of 4). These rims can be found on the internet, if nothing else, daVinci Tandems makes their own Aero type rims and will sell rims or wheels to your specifications to you or to your designated bike shop (usually the safest option).
In lieu of an Aero shaped rim, which will not work with clamping brakes of any kind, then be sure to get Heavy Duty Rims for any clamp brake system. Hub brakes are better/safer than rim/clamp brakes - tandems need at least double stopping power. Also, to a point, more spokes and thicker spokes are better than what comes with most stock issue rims. Plus a Tandem cycle needs thicker walls on the rim (both, for touring loads and for heavy duty rim braking requirements) - again, hub brakes are safety justified over rim brakes, but disk brakes are best (usually with 8 inch rotors).
Wind - Advantage Tandem (Only for a Direct Head Wind): On singles (single rider bikes), it is common to be brought to a near stop in a good head-on wind, but not so much on a tandem. One will certainly feel the effects of wind on a tandem but it is not as bad as riding a single. I suppose that there is a slight advantage to having the Stoker permanently drafting the Captain (resistance of one rider, not two), such that energy transmitted to the wheel is more so than on a single. Plus tandems have a little more mass; almost double that of a single bike (so Newton's 1st Law of Motion applies as inertia maintains a tandem body in motion a little better in gusty winds). Side winds seem to leave a tandem a little more exposed than on a single, but it's manageable. Quartering head winds and side winds are tougher to negotiate and require the most energy output on a tandem(as more rider surface area is exposed to the wind, ergo maximized wind vector force). However a quartering tail wind is a dream speed situation, welcome to Sailing 101.
Conjecture: Perhaps Tandems generally travel a slightly slower than their counterparts on fully loaded tours, but in head wind situations they seem to travel a little better than their counterparts. Maybe Tandems are the 'Sailers' of the cycling world [not Sailors], like some average horses called Mudders do better in wet conditions than most other race horses. It's pure conjecture (or maybe wishful thinking). - Dennis -
Falling Sideways: Who wants to admit or acknowledge that bikes fall over or even crash? We had one incident where we were turning for a stop (slowing from 3 MPH to 0 MPH) and the front wheel got caught in a sideways turn in superfine powder and the bike went straight but the riders were leaning in what was a turn and subsequently the riders fell over. It was a virtual zero speed fall to the side.
If this happens to you: Do NOT worry about the bike; take immediate action to soften the blow to the ground. If one can, step into the fall direction with one's foot, but no matter what put one's arm or even both arms out into the fall direction. Place the arm(s) out with a little bend at the elbow (not a stiff arm). It's that easy.
[I apologize to the reader but I have to make a negative statement, Do NOT lock one's grip onto the handlebars and do nothing - take action!] The Captain is going to feel like a Poo Poo Head, the Stoker needs to say something nice. A good Captain will be worried about the Stoker's condition. BTW, there is an article on How to Survive a Crash, written by Moi (Good reading for a rainy day).
For Tandem Bicycle Touring, use the Bicycle Touring Checklist with/without the Bicycle Camping Checklist.
- - - - - - - - - - -
For additional and noteworthy tandem issues or experiences, reader input will be appreciated - Dennis.
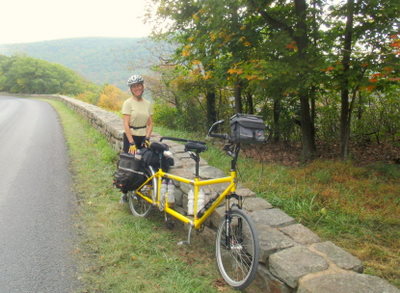 Two Rules for Tandem Biking
(paraphrasing Bill McCready and John Schubert):
- The Stoker Can Do No Wrong.
- Read Rule #1.
Once the bike Captain understands Rule #1 and Rule #2,
then 99.99% of all team work problems go away.
BIG Riding Issue:
COMMUNICATION
Tandem Bicycle Communication Terms
- Mount, Mount-Up, Saddle-Up
- Ready
- Coast, Coast(ing)-to-Stop
- Turning, Left-Turn, Right-Turn
- Lane-Jump {Left|Right}
- Track-Jump {Left|Right}
- Signal-Left, Signal-Right, Signal-Stop, Signal-Rest
- Wave
- Wave-Them-By, Wave-um-By (Team Optional)
- Hold-Them, Hold-Um (Team Optional)
- Slowing, Braking
- Stopping
- Shift, Shift Up, Up Shift, Up, Up-Up, Up-Up-Up, Shift Down, Down Shift, Down, Down-Down
- Major, Major-Down, Major-Up, Major-Shift, Major-Shift-Down, Major-Shift-Up
- Gear-Setting-n (forward Ring), Gear-Setting m-n (Forward-Rear Ring) Statement
- Out of Up's, No More Up's
- Gear-Setting? or something like 3?
- Stand / Sit
- Pedal
- 'Pedal' can be a low speed maneuver where the Captain is turning the bike around, sometimes on foot with the stoker mounted, but it helps if the Stoker keeps a little pressure on the drive-train.
- 'Pedal' can be a low speed maneuver when the Captain may be very occupied only with steering (like in a park or an event with a lot of other standing/walking people, or for low speed turns where a little forward speed on the rear wheel helps prevent falling). Also, the Captain may be working the brakes at the same time.
- 'Pedal' can be a statement for an uphill climb where two engines need to keep the pedal pressure on for a particularly steep or tricky segment.
- Pedals Level
- So, for riding a tandem over uneven terrain that juts upward like limbs or trail ditches with elevated brims that are as high or higher as a down pointing pedal then ride with the Pedals Level.
- Sometimes riding over a curb will have the same issue (so Pedals Level or walk the bike).
- Sometimes on a downhill run it is too late to do anything but ride over the object, Pedals Level, and in such a situation the cyclists don't need to be pedaling (not like going uphill where one must pedal or push).
- If the Captain rises out of the seat (standing/jump/bumps position), so should the Copilot (sometimes things get too busy for the Captain to remember call out Stand).
- Pedal-Up
- This can be a group riding command or tandem. While waiting to start pedaling, especially at a stop light/signal (or something like that), the Leader/Captain (or someone else that sees that the light is about to turn green) will say Pedal-Up which means be cocked and ready to roll when the light turns Green/Go.
- The command can be used to get a group of riders to Get-Set and Ready to move-out - There may not be a Go Command, the Leader just starts pedaling.
- Bump, Bumps, Hole
- Water
- Glass
- Sand (Soft-dirt, Sand, Wash-debris); Bumps (Ruts, Wash-Board, Degraded Road); Water (Mud, Puddles):
- Dirt-Road, Hard-Road (Road Surface Transition):
- More-Power-Scotty!
- Arrg!
- Car-Front, Car-Back, Car-Both, Car-Front-and-Back
(also Truck, Bus, Bike, People, Kids [Children], ...). - Deer, Animal, named-animal, x O'clock (12 O'clock is straight ahead)
- Photo, Photo-Stop, Photo-Op, Picture Time
- Dog
- Front-Ring:Rear-Cog: 1:1, 1:2, 1:3, Low:Low, Granny:Granny, High:High, X:Y
- Shift, Down-Up
- Trim, Trim-In, Trim-Out, Grinding-Rear, Grinding-Front
- Standing, Stand-Up
- Break, Water, Water-Break, Snack-Break, Food-Break, Lunch-Break
- Stop
- Y at X O'clock (Stoker gets to look around more than the Captain)
- Clear-Left, Clear-Right
- Slow-Down
The Stoker needs to know
changes to the status quo.
Nice mantra, iambic pentameter too! - Dennis
THUS,
Certain Actions need to be communicated beforehand, for example a warning for a shift about to occur (so that the Pilot and Stoker can pause the heavy pressure on a pedal to allow a derailer chain/sprocket change) or an advisement of a Dog ahead or a caution for Stopping. Stokers also communicate information to the Captain, like a need to trim a derailer (chain/basket rub) or to validate which ring is driving the chain or that a Deer is standing at 3 O'clock (stokers get more looking around time while Captains spend more time looking forward).
Captains can get quite good at communicating events to Stokers and vice versa. Consequently, each tandem team evolves their own terminology and methods for communication.
There are no 'Carved in Stone' rules for communication, however there are common issues that all tandem riders face.
Tandem Bicycle Communication Terms That Have Evolved:
Everyone evolves their own terms. I doubt if we have invented anything new. Not all communication is spoken; we often do not say the word 'dog' as the sound may attract a dog that is otherwise unknowing of our presence. We may use the silent signal for 'dog' (upside down hook-um-horns) or 'animals about' (right side up hook-um-horns) signal. See Signals / Silent Signals from the previous Signals Section.
We're still adding terms here, we don't always remember to write them down (feel free to share anything with us). The following will shed some light on some of the events that are shared between a Captain and a Stoker:
Captain (Driving/Startup):
- Stoker: Saddle-Up and Strap in Feet.
- Stoker: Ready, Cocked, OK or such. Sometimes the Ready statement comes
from a Stoker
before the Captain is ready and sometimes it means lets go Now.
- Stoker stops pedaling and makes a quick look around for safety.
Sometimes, this is just a downhill coast, but at other times
the Captain may be maneuvering/steering around things or
performing major shifting in order to either be able to prepare a
start from a stop or prepare for climbing a hill.
- Captain is Turning as soon as it's safe, The Stoker has two roles: 1) The Stoker should validate that it is clear/safe to make the maneuver, and 2) The Stoker should automatically get a signal up. The Stoker should verbally respond with something like: Clear/NOT-clear, Signal-Up, Signal-Down. Signals are best held for three seconds and should never be lazy. Ray Hanson (Adventure Cycling tour guide) reports that his Copilot moves her fingers in and out to simulate a blinking signal (it's a smart attention getter).
- A Lane-Jump is usually a prelude to a left turn (In Right-Side Traffic: moving from the right side of the road to the left side of the same lane or moving from a right turn lane to the left side of the lane so as to drive straight through an intersection). The Stoker should automatically get a signal up. The Stoker should verbally respond with something like: Clear/NOT-clear, Signal-Up, Signal-Down.
-
A Track-Jump is a pathway change on a two-track dirt road from one path to another (usually avoiding soft dirt, water/mud, fist rocks, or something of that nature). Sometimes the command is used on hard roads so as to position out of a right turn lane to drive through with the straight through traffic (or something of that nature). While a signal may not be formally/legally required, the Stoker should verbally respond with something like: Clear/NOT-clear and sometimes Signal-Up, Signal-Down.
- Signal-Rest is usually alternating stop and right signal on right side
driving roads or Left-Signal on left side driving roads.
It seems that it does not matter which arm is used for a signal, Car drivers seem to get it either way.
- Stoker waves at x (other cyclists, people, kids, trains, ...)
- Signal to a vehicle that it is clear to pass (Cyclists will see over hills or
around corners before the following driver.
See Courtesy Signaling for vehicle signal
involvement.
- Signal to a vehicle that it is NOT Clear for passing (Cyclists will see over
hills or around corners before the following driver,
see Courtesy Signaling
for vehicle signal involvement)
We have actually signal stopped drivers (halt signal) who were going to pass us with oncoming traffic that they did not see. I'm convinced that we have saved lives, including our own lives a couple of times (by paying attention to this issue).
- Stoker usually does not need to signal, Captain will call for it if
necessary; Captain slows the bike, significantly, often a cautionary
exercise associated with or followed by shifting and/or maneuvering.
- This is a Warning to the Stoker to mentally/physically prepare for stopping. The Stoker needs to quit pedaling as the Captain is likely downshifting for the subsequent Standing Start. A Stoker should signal a slowdown and/or stop and/or a turn. Note that stopping on dirt, especially at the edge of a hard road, may be very abrupt, as Captains learn that they can lose control of the front balance in soft dirt; stopping in soft dirt on a lateral incline is problematic as the wheel may want to gravitate laterally and not in the steering direction. Sometimes, road sides have soft dirt filled ruts and these hidden ruts too are difficult to navigate. In most rut or wheel slip situations, the best action is to stop immediately and at least keep the bike upright. Most Stokers know this, but the action may still catch everyone by surprise.
- Stoker takes the pressure off the pedal brief enough to allow a shift or
multiple shifts. Often, what the Stoker hears is "Shift."
Shift, without the word Major, indicates only a rear derailer shift.
- For us, using the word 'Major' always indicates a front ring chain change
but it does not exclude a rear derailer change. It is especially helpful for
the Stoker to advise as to which ring the chain is on, we use numbers
(the numbers that match the shifter grip numbers, no matter actual existence).
- Note: Some Bikes have four forward rings. For us, 1-1 is Low-Low, 4-9 is High-High
(using the numbers that are or would be on a shifter). This statement
lets the stoker know the gear settings (or intended gear setting).
The statement can be just an FYI, but
sometimes the Captain is informing the Stoker that they have run out of the
shifting range temporarily, as in an 1-9 cross chain situation where the Captain
knows that the team will be down shifting in a few seconds time, so why waste
time/effort trying to change a major ring and back.
- The Captain has run out of up gear sprockets to shift.
This event is usually followed by a Major Up statement.
On rare occasion, the team could stand to have another higher gear
setting but such does not exist for the bike, the bike is maxed out
(High-High).
- Stated as a Question by the Captain, the Stoker informs captain of the
forward ring setting; says 1 or Granny, 2, 3, 4 or such.
- Captain calling for power or relaxation modes, usually associated with
some shifting. Sometimes this is a visual-communication
(when the Captain stands on a crank, so does the Copilot).
- At Issue: A tandem's longer wheelbases sometimes causes a pedal or crank ring or chain to run across an object (or dirt mound) where as a single rider bike's shorter frame would allow a rider to run over an object without the object hitting the bottom of the bike.
- Hang On, Hunker Down, expect erratic handling/steering. Of course the worse
holes are the ones that are not seen, they usually live around intersections
where the Captain is engaging his or her attention elsewhere.
- On our bike, sometimes it means that the Copilot will lift her non-waterproof
shoes up high while the Pilot deals with pedaling, sometimes it means to stand
on horizontal pedals (Pedals Level) and glide through puddles,
sometimes it means that feet are going to get wet (Pedal).
- Glass, pay attention and mimic the Captain. The Captain may be coasting,
braking, or pedaling, and some erratic steering may be involved
- All are road conditions and/or hazard warnings. Stoker, hang on for wheel slip
and/or mud splatter and/or rapid maneuvering and/or deceleration and/or bumps.
In some wet scenarios, the Captain may be calling for a Stand and/or Level-Pedals.
- Stoker gets ready for dirt road riding and sometimes the initial roughness of the road, or the stoker gets ready for road smoothness and associated quiet (always a joy).
- Stoker: Laughs, "I'm given er all I got Cap'n!"
- Usually a noise made at the same time as a miss shift, late shift,
or multi shift;
it may be associated with chain-sprocket-cage grinding.
Sometimes it is associated with a "that's OK" pat on the back.
Captain (Communicating):
- A situation awareness statement, particularly important when cars are
coming both directions and will
meet somewhere around the bike riders (implies snug fit and captain
steering next to road edge). Our best call yet was 'Cows-Front'.
Always slowdown around kids, they do unexpected things, and more importantly they always admire a Fully Loaded Tandem; nothing like a 8 year old saying 'WOW' (that feeling will last for hours).
- 'Eww and Aww' moment, sometimes leading to a photo opportunity, stop,
or break.
Sometimes it's a warning.
Sometime a smart Captain will lean away from the best viewing angle for the Copilot to see forward.
- Stopping, often wildly, sometimes a danger when other cyclists are around.
- The bane of all good tours. Beware of nippers and stupid little ones that
like to get in front of the bike. This may be a silent hand signal,
See Silent Signals from the previous Signals Section.
- Captain is informing the Stoker of what the sprocket (gear) settings are (same as the twist grip numeric indicators when present - also jokingly called 'Channels' for kids (big and little), as in 'Chanel 13' where it means the 1:3 gear combination [Front-Ring:Rear-Cog]). The Front Ring is always stated first. Some folks use letters for the front Rings (John Barnett uses H, M, and L), the inner most of three rings being 'L'. Numbers start from the frame and sequence outward. The 'Gear' Settings are often stated by the Captain as an FYI to the Stoker on long climbs and fast runs. Technically, the original 'Granny' gear was the 3rd ring (vs 2 ring road bikes) and is the smallest front ring; The term Granny has evolved to sometimes include the large or extra large rear sprocket/cog, too (ergo Granny:Granny).
Stoker (Drive Train or Power related):
- An up or downshift request, a speed versus torque issue, an RPM cadence issue, or the Copilot is pedaling and the Pilot is coasting (independent pedal system). There are times when a major up-shift is needed, but the Captain has already mentally planned for a down shift in 20 to 50 yards/meters, so the Captain may just leave the ring/sprocket combination right where it is - The Captain may something like 'Down-Shift Coming' or 'Out-of-Ups' or words to that effect.
- Captain needs to shift or trim (chain-sprocket alignment issue or
chain-derailer alignment issue). Trim is usually a front derailer issue.
Trim-In means to move the basket Inboard toward the center of the bike.
Trim-Out is to move the basket outward. On the rear derailer, either shift or
adjust the cable tension. Which way to trim comes with experience.
- For power or for a variety of situational issues, stretch, having a moment,
act of bravery, ... , but letting the Captain know.
Stoker (Communicating):
- Time to stop and get off the road - it can be a bladder break too.
- Depending on tone, this may necessitate a quick stop or a gentle stop:
loose shoe laces, loose strap, open saddle bag, ... ;
stokers always have a good reason for stopping.
- Turkey at 3 O'clock. Pilot observes, if practical.
- Helping the Captain to see well (because the Stoker can see side to side
a little easier than the Captain.
- Remember, the Stoker can do no wrong. My Stoker has a built in
governor which always kicks in at exactly 29 mph. Remember that Stokers are
capable of causing immediate physical pain or delayed pain, it is always
best to accommodate the Stoker.
it requires the same effort of the brain that it takes to balance oneself on a bicycle."
- Helen Keller tandem cyclist, born blind
Nature or Wild Life Observations:
Top- People who ride horses in wilderness areas know that a person on horseback can ride by other wild game, sometimes they can ride directly through a herd of deer, antelope, or even elk, and the wild game will not be disturbed enough to run away. The animals will just stand there and look at you and your mount out of curiosity as long as the rider and horse does not make noise, stop, make any sudden movements, or stare too much. Wild animals know that horses are herbivores and they are not frightened, even when a human is sitting on top of the horse. Don't know why this is, it just is.
- We have discovered that wild animals often have the same reaction to people riding solo bicycles as they do solo people riding horses. It helps if the bikes and riders are relatively quiet. Usually, unless there is a camera at hand, any motion to dig out a camera will only scare the game away. Stopping will definitely scare the game away. Often the best thing to do is to just keep casually pedaling and just visually soak in the moment. It has happened many times with us. We once saw a spotted fawn try to jump a log on the ground and get belly stuck on the log with legs on each side, the mommy nervously came back to nose the fawn over the log. It was a priceless moment. Conversely, for whatever reason, wild animals are afraid of 2-up tandem bicycles and will turn tail immediately.
 Always, the act of starring at a wild herbivore is a threat, and the response is flight (running to exit which hopefully one is not blocking). Starring at a carnivore is also a threat but the act may trigger a fight (charge or attack). Pointing a camera at an animal and centering one's head and body in line with the camera can be very threatening. Thus, learning how take camera snap shots from the hip or chest area and at a 45 to 90 degree angle from one's frontal alignment while not starring at the animal may produce snap shots that do not intimidate the animals. Interestingly, with digital cameras, if a photographer is looking at the camera's monitor screen to see an animal and not looking directly at the animal, then one is satisfying good picture taking needs while not threatening the animal by looking at it directly - just insure that the photographer and the camera are not directly facing the animal or all in line with the animal.
- Noises will scare animals. When possible, turn off all sound to cameras, phones, and watches so as to be able to quietly take pictures.
- Human Nature Humor: Wrist watches that make Beeping Noises seem to make managers and leaders be brief. Also, looking at one's watch will help keep a meeting short.
- We have learned that animals often do NOT run away from single rider bikes acting in a non-stressful manner. HOWEVER, many animals DO RUN AWAY from tandem rider bikes - it's hurtful to the ego.
bike touring, bicycle touring, bike tour, bicycle tour, bike touring checklist, bicycle touring checklist, bike tour checklist, bicycle tour checklist, bike touring 101, bicycle touring 101, self contained bike touring, self contained bicycle touring, self contained bike tour, self contained bicycle tour, fully loaded bike touring, fully loaded bicycle touring, fully loaded bike tour, fully loaded bicycle tour, about bike tours, about bicycle tours, bike touring, bicycle touring, checklist, bicycle camping, cycling, bike touring checklist, bicycle touring checklist, All About Bicycle Touring, All About Bike Touring, All About Bicycle Touring, About Cycle Touring, About Bicycle Tours, check list, velo, bici, bicicleta, travel trip, campaign, expedition, group, expeditions, issues, about, How to get started, tandem bicycle touring, tandem tour, fully loaded tandem, tandem bicycle communications, tandem bicycle terminology, tandem touring, tandem bicycle touring, What challenges exist for different touring circumstances, plan, planning, metric, metrics, road, mountain, bicycle tour configuration, Group Cycling, Group Touring, and Group Issues, Group Organization Issues, Group (or Solo) Route Planning, Major Issues, Group Self Contained Cycling with Camping, Group Food Logistics, Tandem Rider Communication Terms, Tandem Communication Terms, Tandem Touring Issues, Travel Leg Planning and Management, Travel Leg Planning and Control, Tandem tours, tandem tour checklist, Group Supplies checklist, group Equipment Checklist, Group Communication and Behavior Action When Riding Together, Group Riding Decision Issues/Communication/Ethic, Bicycle Hand Signals, Foot Signals, Silent Signals, Voice Signals, Expedition/Group Tool Kit Checklist, Expedition Bicycle Touring Issues, Foreign and Domestic Tour Planning Checklist, Tandem Tours, Tandem Tour Riding, Tandem Tour Checklist, Tandem touring checklist, Tandem Communication, Tandem Rider Communication, Tandem Communication, How to communicate on a tandem bicycle, Tandem bicycle Tours, Tandem bicycle Tour Riding, Tandem bicycle Tour Checklist, Tandem bicycle touring checklist, Tandem Communication Terms, Tandem Communication Terminology, Tandem Teamwork, Tandem Bicycle Communications, Tandem Bicycle Communication Terminology, Tandem Bicycle Teamwork, Tandem Bike Communication Terms, Tandem Bicycle Communication Terms, Tandem Bike Communication Terminology, Tandem Bike Teamwork, Tandem Communication, Tandem Rider Communication, Tandem Communication, Self bicycle tour, Couple bicycle tour, or Group bicycle tour, Tours, Weekend Adventure bicycle tour or Long Expedition bicycle tour, Camping bicycle tour, Guided bicycle tour, Self Guided bicycle tour, Foreign bicycle tour and Domestic bicycle tour, campain, campaign campaigning self contained supporting supported tool tools holiday, supplies packing adventures adventure stories story saddle tale tales, fully loaded, Getting Started (for New and Experienced Cyclists), bicycle Tour Planning Metrics, How Much Do I Carry on a Bicycle Tour, Bicycle Tour Travel Leg Planning and Management, Bicycle Tour Planning Traps, Bicycle Tour Configurations, Bicycle Tour Body Conditioning, Bicycle Tour Road (Survival) Rules and Positive Behaviors Actions, Bicycle Tour Long Distance Bicycle Hire/Rental Issues, Bicycle Tour Group Cycling, Group Touring, and Group Issues, Bicycle Tour Group Organization, Bicycle Tour Food and Logistics, Bicycle Tour Signals, Bicycle Tour Self-Contained Group Camping Issues, Bicycle Tour Supplies/Equipment, Bicycle Tour Group Communication, Bicycle Tour Decision Issues and Remote Communication, Bicycle Tour Expedition: Touring Issues, Tool Kit Checklist, Tandem Bicycle Touring, Bicycle Shipping and Transporting, Bicycle Tour Tour Planning and Issues (Foreign and Domestic), Bicycle Tour Travel and Cultural Things to Know, Bicycle Touring (Survival) Tips, The Bicycle Touring Checklist, Issues to Consider for Selecting a Touring Bicycle, How to Select a Touring Bicycle, How to Select a Tour Bicycle, How to Select a Tour Bike, tandem bike touring, About Bicycle Touring, Bicycle Tour Issues, Bicycle Tour Planning, Bicycle Tour Plan, Bike Tour Planning, Bike Touring Plan, Bicycle Touring Plan, tools bike touring, bike tour planning, bicycle tour planning, bicycle touring plan, planning bicycle touring trip, self supported bike touring, bicycle tour planner, plan bike trip, how to start bicycle touring, planning a bike trip, enough food, enough clothing, enough water, food planning, clothing planning, water planning, tools bike touring, planning bicycle touring trip, self supported bike touring, bicycle tour planner, plan bike trip, how to start bicycle touring, mountain bike tours, mountain bike touring, planning a bike trip,
Bicycle Tour Planning (Click to go to Bicycle Tour Planning)

by Breakaway Books, Halcottsville, New York, 2007 (4th Printing).
- A Fantastic Gift from Dan and Tommie; Hint, Hint! -
