- Hover the Mouse over Text, Links, and Pictures for more Details -
Thank You for Visiting - Feedback and Suggestions are Always Welcome
by Dennis & Terry Struck
Bike Riding Tips, Bike Touring,
Bicycle Touring Tips, Touring Bike Advice,
Biking Tips, Bike Tour Tips, Cycle Touring Tips,
Cycling Tips, Lessons Learned,
and Tricks of the Trade, v49
Table of Contents
Related Subject Pages
Code of the Road
On the road, live by the Golden Rule, and
leave a place of stay a little better than found.
Positive Karma, Chi, Joss, Spirit, Hozhooji, Good-Will ... all have a habit of coming around again.
Keep On Cycling - AKA Road Survival (Things to Know to Keep Moving):
- Tire Shops are a biker's best friend (after Bicycle Shops). They have tools, air, oil, grease, and water. Tire shops can be difficult to find outside of the US. In Europe they are not allowed to advertise or have a large entrance sign. See more details at the following link, Tires, Tools, Lubes, and other help ....
- In the field, any lubricant is better than no lubricant (Engine Oil, Transmission Fluid, Grease, and as a last resort: Food-Vegetable-Olive Oil). Ivan Viehoff (world expedition bike traveler - see Extended Touring) states that he uses Hipoid [Hypoid] Gear Oil (that's 80-90 weight Rear Differential Oil). He states that it lasts longer and is cheaper than bike oils and any Auto Shop/Garage/Shade Tree location in the world will have a little to spare (even a little in a discarded can/bottle on the side of the road, will get a person a day or three of travel).
- Sun Screen works as an oil substitute in an emergency.
- We prefer oil (to include Teflon and/or Synthetic blends) over wax or grease types of lubrication, for long range touring, because oil is the least messy lubrication and presents the least management problems.
- Oil is, just as effective as wax or grease and is a time saver, wipes/removes grime easiest with a clean rag, and is easiest to apply in temperatures below 60°F (~15°C).
- Wax and oils with wax coagulate around 60°F and will not pour or penetrate where needed.
- 80-90 Weight Oil works well in heat (90°F/32°C or greater) but remember that even in deserts, the summer nights and mornings are often in the 40s-50s °F (4-10°C).
- The most convenient time for chain and drive-train maintenance is in the morning (before biking) or in the evening (after biking), however, Wax, Grease, and Heavy Oil usage often requires application when it is warmer outside (typically in mid-day).
- WD-40, Sewing Machine Oil, and 3n1 Oil all work in a pinch and we have used them all at some point, they just won't last very long as a lubricant (3-6 hours of steady tour load riding) and if the excess oil is not wiped clean, these particular oils are noted for holding dirt on chains (slightly to a lot more so than 'bicycle chain oils').
- WD-40 [Water Displacement - Formula 40 (composed of mineral oil, mineral spirits, and gasoline according to their website) - invented to prevent rust and corrosion on Atlas Rockets] is a Penatrant, water displacer, and a light duty lubricant. The problem with Penatrants is that they dry out in a very short period of time and this is good. Penatrants are used to break the bond of dry, rusted, corroded, galvanized, and/or oxidized bolts and/or nuts. Avoid using WD-40 to lubricate chains except when there is no alternative or one is trying to work out some rust. If used, wait an hour or two, the penatrant will evaporate and then use appropriate oil or grease (lubricant).
- Mineral Oil is also a Penatrant. Sewing machine Oil and light weight oils will not last very long on a bicycle (2-6 hours).
- 3-in-One Oil was invented as a Bicycle lubricant, rust preventative, and cleaner in 1894. It still works but one may not want or need the cleaning component (which is probably a Penatrant or Penatrant like compound).
- Do use 3-in-One Oil or WD-40 on a chain to clean rust or wipe off rust residue, especially on a bike that had to be put away wet, or on a bike that got wet, or on a bike that was left outdoors for some period of time (like most kid's bikes), or the bike is displaying rust on the chain. Work the chain in two or three cleaning application/wiping sessions or remove the chain and use a bottle with chain cleaner or a professional cleaning system (wheel brush and cage or basin).
- Penatrants take about 24 hours to evaporate (without external acceleration) and the presence of a penatrant can keep higher viscosity oil(s) from adhering to tight friction components (where lubrication is most needed).
- For plastic Oil Bottles with plastic straw tube(s): Cut the plastic tube into 1.5 Inch segments (about 5 cm's) and tape the extra tube(s) to the bottle using duct tape [from Michael @ Criterium Bike Shop, Colorado Springs]. These plastic straws seem to be easily lost on tours.
- For long range touring, drop some solder into the cable about the area of the pinch bolt contact; Have a mechanic perform this task or do it yourself. It helps to prevent strand breaks and insures that the cable will last longer.
- If one pulls a derailer cable wire by the 'end cap' (aka Crimp), one will likely pull off the end cap and the cyclist will not be able to remount the end cap and therefore will have loose strands at the cable's end, THUS making it more difficult to grasp the cable end for any derailer maintenance. One solution is to melt some solder into the cable wire's end. Another solution is to grasp the wire just before the end cap in order to perform any cable pulling for a derailer adjustment.
- If possible, as soon as one picks up a tuned bike from a shop (or you just tuned it perfectly OR as soon as it is opportune), mark the juncture of the derailer and frame (sometimes at two different places, using permanent marker [black or silver]) such that the stroke of the mark touches both the derailer and frame at the same time. Such an indicator is invaluable for re-aligning a derailer in case of damage, repair, removal, or replacement on the trail or at a foreign bike shop. See next Marking Bullet.
- One should mark the juncture of the seat post stem and the seat post tube such that the stroke of the mark touches both the stem and tube at the same time. Such an indicator is invaluable for re-posting or re-assembly of the bike's seat/saddle.
- Use a Black or Silver/Gray Marker to mark any component/object on a bicycle (especially for marking seat posts and handlebar positions).
Do NOT use a Scribe to mark anything on a bike unless it is a mark for cutting or trimming a component. Scribes are metal pointed markers used for to mark material for cutting. The very scratch of a Scribe mark weakens the material/metal at that scratch mark; it is especially a 'No No' for seat posts! - If one is shipping and reassembling bikes (also see Bike Shipping for more shipping details), be sure to mark other key component meeting points (like the handlebar and stem). Marking determination depends on what components need to be removed for shipping and reassembly.
- There is nothing like having a bipod stand on a bike for a long tour to help one conduct shift tuning/adjustments in the field, a travel mate will appreciate it too.
- Tuck shoe string ends under the shoe string, especially on the crank rings side (or the shoe string may get caught between the chain and drive sprocket).
- Heatshrink tubing works great as a shoe lace tip (Aglet) replacement (narrow tube heatshrink tubing is found in most electrical, auto parts, or hardware stores). Also, sometimes glue (super glue), a small strip of duct tape, resin/sap from a tree, or candle wax can be used. Sometimes nylon lace type tips can be melted and molded (CAUTION: Burning and/or dripping liquid nylon burns intense like miniature napalm and must NOT be handled by hand (use piece of wet paper/cardboard ); some repair suggestions from "Ian's Shoelace Site").
- Extra large heatshrink tubing works as a rack hook cover for metal pannier hooks/bracket mounts (found in larger electrical outlet stores or in mega hardware stores) - Hint from Todd Shusterman (da Vinci Designs).
- Always know how to make a telephone call, by actual practice, back to the home country from another country and how to make a call in that country (or countries). If this requires a card code, code numbers, and/or correct coins then be suitably prepared. Practice in a place such that if something goes wrong or does not work correctly a person can remedy the situation. The act is a wise investment and the call will usually make someone's day.
- A traveler should always have small bills and coinage of the country (or countries) being visited. Most money changers will not issue small bills and rarely will they issue coins. Sometimes we buy a package of gum or some candy at the arrival port just to get small bills and pocket change. The small bills are for taxis, buses, tips and incidentals and the change is for toilet use or emergency phone calls.
- A pocket sized spiral notebook and pencil are priceless in countries where a traveler does not know the language. It works for drawing pertinent concepts or objects, maps, names and addresses, and for making travel notes or ideas. Waterproof varieties can be found in better camping stores or online.
- In non USA towns, at hostels, pensions, residencias, hotels, and places of business, people who own tools, a rarity in itself, either lock them up or take their valuable possessions home with them at night, weekends, and holidays. When traveling, don't count on help during these time periods (siesta's too). Note that most travelers arrive and depart on weekends. Further note that other countries have different sets of holidays: See Holidays by Country.
- Before any trip, insure that the bicycles(s) are road ready the day before (or earlier). Many a time, we have found bikes with flat tires or missing/broke components. Its easy to fix or replace components before a trip but it robs everyone of precious time on the day of a trip.
- Bar-Ends help prevent damage to the shifters and the brakes. This applies to Integrated Brake-Shifter Systems too. Travel Scenario: A cyclist may be fifteen miles from a village, a hundred miles from a bike shop, the cell phone cannot connect to a working cell, and a brake won't work and/or the traveler can't shift (the bike is stuck in one sprocket ring, usually Low-Low for Mountain Bikes and/or High for Road Bikes) all because the bike unexpectedly fell over or blew over onto some rocks (and among other things, a simple bar end would have prevented any brake/shifter damage, perhaps even from a road crash).
- A strip of tire inner tube with self stick Velcro can be used to wrap around an Integrated Brake-Shifter System (to keep debris out).
- The large version of stretch plastic food bowl covers will work well as a rain cover for a bicycle seat - It seems to not matter how wet a bike is during a ride as long as the seat is dry. Sometimes, motel/hotel shower caps work well as a bicycle seat's impromptu rain cover. Little plastic trash bags work too.
- A moisture wicking headband does a good job of keeping sweat out of the eyes. Sunscreen on the forehead will almost always end up in the eyes. If a helmet and sweatband are worn, then the sunlight is likely to be blocked from the forehead (thus eliminating the need for sunscreen on the forehead).
- A helmet mounted shade bill can block out the sun or sun glare - very nice for long rides or tours.
- A helmet rain cover can keep the head dry and warm - there are cold weather and warm weather rain covers. Some helmet covers are waterproof, some water repellent, some are for shading the sun, some are very bright and are safety oriented, and some are just for decoration.
- Sometimes the daily weather cycle is such that it rains every evening or every night. Learn to dry wet gear, clothing, and/or equipment with the mid day or mid morning sun (whenever it appears for the warmest longest time). Sometimes this drying time can be shared with lunch or a well timed break for another purpose. This dry or less humid time period may be the right opportunity to patch an inner tube (removed during a super wet rain storm) and it may be the right time to perform any maintenance.
- Channel Lock Pliers are far more utilizable than regular pliers. A good pair of Channel Locks can perform most wrench functions and they have wider fitting capability than a six inch adjustable wrench or a regular six inch pliers. [suggestion from John Schubert's book, The Tandem Scoop, Burley Design Cooperative, 1993.])
- Use Thread Lock for Tours. Don't confuse permanent with temporary Thread Lock. Learn More [Hint from Adventure Cycling and John Burnett's Manual (of Bicycle Repair)].
- Reflective Cloth Strips can be purchased at better Cloth Stores or the Internet. While some Reflective strips can be glued, by hot ironing, the more lasting reflective strips are sewn. [Also known as "Do the job right the first time".]
- Note that security is always an issue. Pretty things attract people (especially kids) and ugly things repel people. There are decals for sell on the Internet that make bikes look old, dented, dirty, scratched, and un-desirable. Some people put on address labels and then strip them off, leaving that ugly white gummy look of an old sticker (rub some dirt on it to make it non-sticky and more ugly). See next bullet.
- Some cyclists put short wraps of duct tape around tubes (like the stays or seat mast) to have available for emergency use, but it also can serve to ugly up a bike. See next and previous bullet.
- Story: We read an article about the Perimeter Lady (she rides around things like parks, lakes, cities, countries). She reported that, in a foreign country, she was surrounded by many kids that expressed an interest in her bike. Clearly she did not know their intention. She happened to have some duct tape wrapped on her bike. She indicated to the kids that it was a good bike but that it needed some repairs. Their interest visibly waned and nothing happened. See previous bullet.
- Handlebar bags that detach and have a shoulder strap are great for carrying valuables that a cyclist always wants on person (passport, wallet/ID/credit cards/Drivers License, checkbook, itinerary, cell phone and important numbers list). In lieu of a handlebar bag, then having these items in one location like a dry sack is often convenient for situations where a traveler may have to be separated from the bike for a while (museums, historic places, theaters, restaurants, cafés, hotels, toilets/water closets, ferries/boats, and trains). In a crunch, sleeping-bag covers or similar such sacks work as a carry-bag substitute.
- For foreign travel, based on attending a conference (or other business-tax deductible purpose), we are starting to bike before the conference rather than after. The reasoning is based on "Jet Lag." While we can more easily overcome Jet Lag with bicycling work, we cannot overcome Jet Lag while sitting in an air conditioned room while sitting in a comfortable chair, where the lights are turned down for a projector presentation. We have evolved to taking the bike tour first, then attend the conference and we attend serious heavy weight conferences.
- When riding on dirt road trails, especially double track jeep trails, because soft dirt and sand tends to drift to the lower of the two tracks, switching lanes to the upper track (track of the higher elevation) will usually result in a more efficient ride (less pedal effort to maintain speed).
- When riding on dirt road trails, especially solid dirt road curves, usually the inside of the curve is soft dirt and/or washboard, neither of which is pleasant to ride upon and usually the outside of the curve is hard and smooth. Beware of oncoming traffic.

- William Saroyan, from his introduction to James Starrs' The Noiseless Tenor
The next best place for Bicycle Help (Other than a Bicycle Shop):
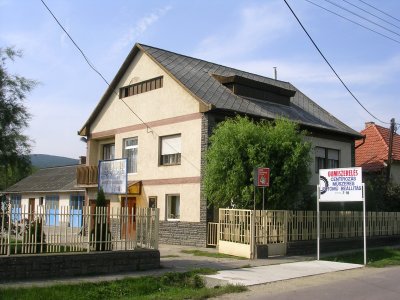
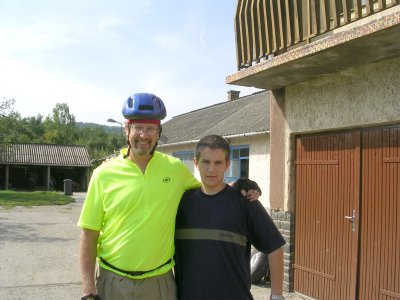
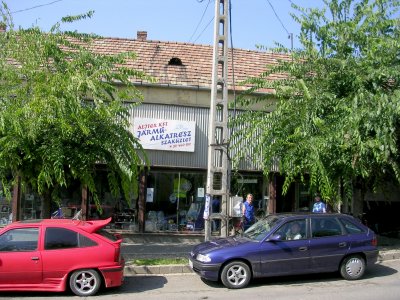
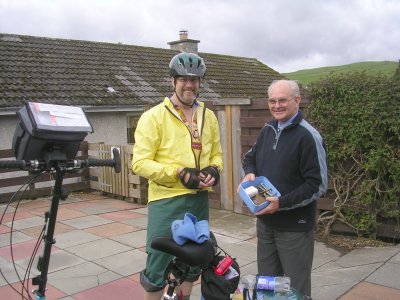
Top- Tire Shops are a biker's best friend! They have tools, air, oil, grease, and water. In remote towns and villages Tire Shops are often garages located at the back of a home and they are often not allowed to advertise. Learn to look for these places as one travels. There may only be a tiny one square foot sign of a tire in the front yard. We have yet to be charged for help while touring on bikes (a Code of the Road thing). We are seriously gracious, thankful, and we take pictures with the owner(s) and helper(s).

- Paraphrasing General Chuck Yeager, in Yeager, an Autobiography -
American Pilot, WWII Vet, P-51 Fighter Pilot, First Person to Exceed and Survive the Speed of Sound
bike touring tips, bicycle touring tips, bike tour tips, bicycle tour tips, bike touring tips, bike touring Lessons Learned, bicycle touring Lessons Learned, bike tour Lessons Learned, bicycle tour Lessons Learned, Bike Riding Tips, Bike Touring, Bicycle Touring Tips, Touring Bike Advice, Biking Tips, Bike Tour Tips, Cycle Touring Tips, Cycling Tips, Lessons Learned, Tricks of the Trade, bike touring Lessons Learned, bike touring Tricks, bicycle touring Tricks, bike tour Tricks, bicycle tour Tricks, bike touring Tricks, bike touring Tricks, bicycle touring Tricks of the Trade, bike tour Tricks of the Trade, bicycle tour Tricks of the Trade, bike touring Tricks of the Trade, bicycle touring guide, bike tours, bike tips, cycle touring tips, touring bike advice, bike riding tips, bike touring, bicycle tours, bicycle tips, bike touring tips, touring bicycle advice, bicycle riding tips, bicycle touring, cycling tours, cycling tips, cycling touring tips, touring bike advice, cycling ride tips, cycling touring, touring bike advice, bike touring guide, touring bicycle advice, bike tours, bike tour, bike touring, bicycle tours, bicycle tour, bicycle touring, bike touring, bicycle touring, bike tour, bicycle tour, bike touring checklist, bicycle touring checklist, bike tour checklist, bicycle tour checklist, bike touring 101, bicycle touring 101, self contained bike touring, self contained bicycle touring, bicycle touring mechanics, self contained bike tour, self contained bicycle tour, fully loaded bike touring, fully loaded bicycle touring, fully loaded bike tour, fully loaded bicycle tour, bicycle mechanical issues, bike mechanical issues, bicycle maintenance issues, bike maintenance issues, mountain bike maintenance, road bike maintenance, mountain bicycle maintenance, road bicycle maintenance, 20+ bicycle maintenance issues, 20 plus bicycle maintenance issues, 20+ bike maintenance issues, 20 plus bike maintenance issues, Bike Road Maintenance, Bicycle Road Maintenance, Bike Road Repairs, Bicycle Road Repairs, Bike Road Maintenance, Bicycle Road Maintenance, Bike Maintenance, Bicycle Maintenance, Bike Repairs, Bicycle Repairs Bike Maintenance, Bicycle Maintenance, Bike Tour Maintenance, Bicycle Tour Maintenance, Bike Tour Repairs, Bicycle Tour Repairs, Bike Tour Maintenance, Bicycle Tour Maintenance, on-tour help, maintenance, threadlock, chains, permatex, tires, tire, tyre, tools, inner tubes, wheels, tire, pumps, bicycle, loctite, tire lubricant, inner-tubes, bike repairs, emergency bicycle repairs, bicycle trail repairs, fix a flat tire, bike maintenance, bicycle maintenance, emergency maintenance, Keep On Cycling (Touring Survival), On-Tour bicycle Help, 20+ Common Bicycle Maintenance Issues and Solutions, 20+ Common Bicycle Mechanical Issues and Solutions, Derailer Issues, Bicycle Mystery Shifting, Bicycle Ghost Shifting, How to Shift a Bicycle, Bicycle Tools, Bicycle Pumps, About Bicycle Chains, About Bicycle Chain Management, Bicycle Nut and Bolt Threadlock, Bicycle Tire Tools, Bicycle Inner Tubes, Bicycle Wheels, Shipped Bicycle Assembly Issues/Lessons, Derailer(s), Shifting, and Shifter, Concept, Front Derailer Adjustment, Rear Derailer Adjustment, Emergency Rear Derailer Setup, Emergency Rear Derailer Hanger, Squeaking Derailer Pulleys, Mystery Shifting, All About Bicycle Chains, Bicycle Chain Facts, Bicycle Chain Wear, Bicycle Chain Lubrication, Bicycle Chain Cleaning, Bicycle Touring Chain Issues, Chain Related Touring Wisdom, Chain Length, Chain Size/Speed/Width, Chain Tool/Use Notes, Chain Holder, Cable Retainer/Guide, Broken Chain and Link Repair, Loosen a Kinked or Tight Chain Link, Front Derailer Chain/Cage-Rub Noise, Front Ring Chain/Cage-Rub Noise, Chain-Sprocket Stickiness ('Chain Suck'), Rear Derailer Sprocket/Chain-Rub Noise, 1 Click/Clink per Chain Revolution Noise, 1 Click per Pedal Revolution Noise, Bicycle Wobble, Chain Line and Cross Chain Issues, About Wheels, All About Wheels, Inner Tubes, Flats and Hints, Tire/Tyre, Bicycle Touring Rim Issues, Rim Integrity and Braking Vibration, Spoke Issues and Field Fix/Solutions, Inner Tube Truth and Myths (Talcum Powder), Air Pump, Air Pressure Conversion Table, Slime for Inner Tubes, Tire Liners, Damaged Cable Retainer/Guide, Tools (Touring Issues and What to Carry), Bar End: Crash Guard for Brakes/Shifters, Parking Brake (Stop Bicycle Roll & Fall Over), All About Thread Lock, General Noise Symptom/Solution Directory, International Bicycle Travel Issues, bicycle Tool Kit Checklist, 20+ Common Mechanical Issues, Typical Mechanical Issues, Roadside Mechanical Problems and solutions, bike tour repair, bicycle touring repair, bike tour maintenance, bicycle touring maintenance, bike tour road maintenance, bicycle touring road maintenance, bike tour tune, bicycle touring tuning, bike tour tuneup, bicycle touring tuneup, bike tour tune-up, bicycle touring tune-up, bike tour tune up, bicycle touring tune up, bike tour fix, bicycle touring fix, bike tour problems, bicycle touring problems, bike tour issues, bicycle touring issues, ALL About the B Screw
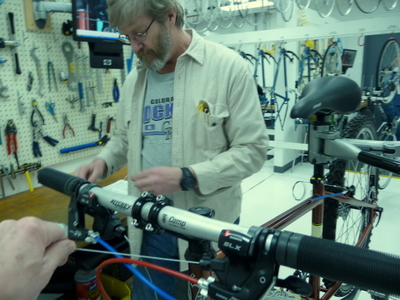 Bicycle Touring Mechanical Issues
Top
-
Bicycle Mechanical Issues Directory
Bicycle Mechanical Education the more you know . . .
Online Education Sources:
20+ Common Bicycle Touring Maintenance and Repair Issues and Solutions:
Bicycle Toolkit Checklist (aka Tool Kit Checklist, Tool List):
-
- 30 Days: Bicycle Tour Toolkit Checklist (typically needed for less than 30 Accumulated Rider Days -
This list may contain all that some long term riders carry).
+ 30 Days: Expedition Bicycle Tour Toolkit Checklist for 30+ (Plus) Accumulated Rider Days,
Especially for Groups.
Other Bicycle Emergency and/or Field Issues and Repair Sites:
-
Emergency Bike Repair (scroll down, also small
[Mike Flack - trails-edge.com] PDF file available)
Bicycle Bike Noises, Clicks, Ticks, Creaks, Clunks, Knocks and Repair by Jim Langley
Overview
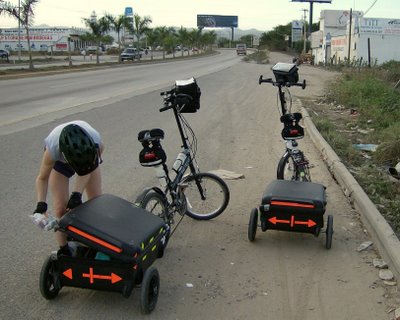 This is a multi-part section that addresses Bicycle Maintenance from three perspectives.
-
One, the more that one knows about bicycle maintenance, systems, processes and mechanics, the easier it is to identify and resolve bicycle touring mechanical issues while cycling on the road or trail. Therefore, in some cases, one is directed to online tutorials (as well as schools for the hardcore).
Two, Preventive Maintenance, now, heads off problems down the road. Active ongoing maintenance is always better than more time spent on reactive maintenance.
Three, sometimes one just has to deal with surprises. Some known and common problems are discussed herein and solutions are addressed.
Some Online Education Sources
Top Mechanical Issues Directory- Sheldon Brown's Bicycle Technical Information - A seminal array of mechanical information, specifications, and specific maintenance tips: sheldonbrown.com. Addendum: Sheldon Brown was a cool guy who lived life as well as allowed by Nature. He died of complications of MS and his dream lives on - one can learn a lot from his website.
- Alex Ramon's Bicycle Tutor - Flash Video presentations about bicycle component repair or maintenance (rear derailer, front derailer, brakes, ...). Lessons start with a simple but exact list of necessary tools: bicycletutor.com. Alex Ramon also has some very good repair manuals published.
- Park Tools (St. Paul Minnesota): A Bicycle Tool Manufacturer that has Repair How-To instructions (for a wide range of component manufacturers - scroll to the bike image and click on the problem component) parktool.com/repair and they sell a wide range of tools and kits for various shop or road needs
www.parktool.com/products. - Since about the year 2010, just about every bicycle mechanical problem and solution can be resolved through an online search. However, in the outback, a cyclist may not have telephone access, smart-phone access, nor Internet access. One must live by their wits.
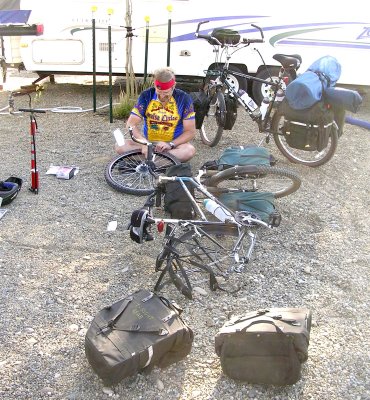
Bicycle Mechanic Schools
Top Mechanical Issues DirectoryIn the USA, there are two schools that are continuously recognized by the Cycling Community for producing outstanding bicycle mechanics and shop stewards (listed below - Like Harvard vs Yale). There are many more good schools listed on the Internet!
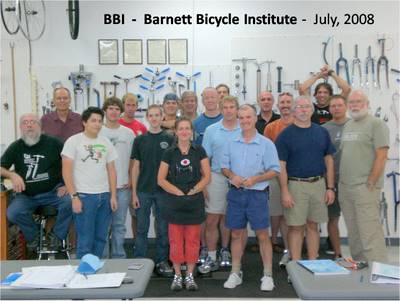 Barnett Bicycle Institute
http://www.bbinstitute.com/
manager@bbinstitute.com
Phone 719-632-5173
Fax 719-632-4607
2725 Ore Mill Road #23
Colorado Springs, CO 80904, USA
John Barnett (reader's far left in side image)
authored the Barnett Manual, now only
available as an electronic book through BBI
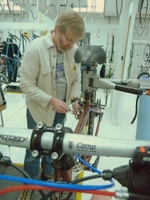
- United Bicycle Institute
http://www.bikeschool.com/
Phone: (541) 488-1121
Fax: (541) 488-3485
401 Williamson Way
PO Box 128
Ashland, OR 97520, USA
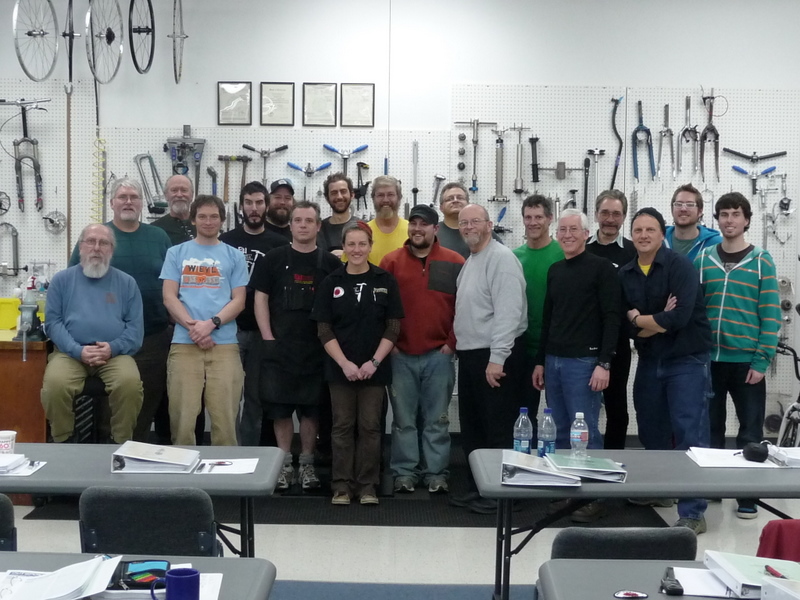
The 2010 Class was an amazing group of experienced people (middle picture, above). They are very tight knit. They formed a BBI Graduates Facebook Group Page and these guys communicate with each other like a 'Band of Brothers'. Initially for BBI Grads, other Mech/Tech/Wrenches have joined in (from all over the world).
BBI Graduates Gang at Facebook: ![]()
Common Bicycle Tour Mechanical Problems and Solutions
a.k.a. Bicycle Touring Maintenance Issues and Solutions
Also see Maintenance Schools and Self Training Web Sites.
Believe It or NOT,
No other Bike Component makes Fully Loaded Touring and Trail Side Maintenance
more convenient than having a Bipod on a Touring Bicycle;
In the Long-Haul, it is worth the extra weight.
- Dennis Struck
Bicycle Assembly Issues and Lessons (Especially for a Shipped Bicycle):
Top,
Mechanical Issues Directory,
Assembly/Disassembly: Overview, Issues, and More Details,
Tools
Assembly Work Area (for a packed or shipped touring bicycle):
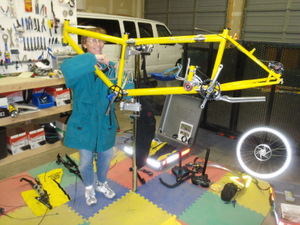 1) The best option for assembling factory shipped or personal transported bicycle is to use a mechanic's work stand.
2) The second best method is to use a simple build or assembly jig that holds a frame off of the ground while allowing access to both sides of the bike (or built in such a manner that one end of the frame can be easily switched to the other end, for further access work).
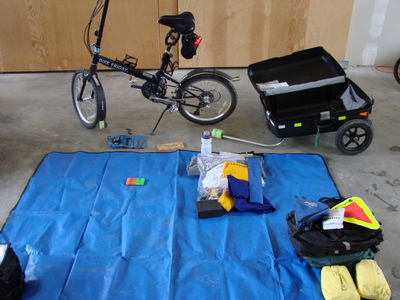
3) The third best build method is to work on top of a plastic sheet, space blanket, ground cloth, or empty cardboard box (like a bike manufacturer's shipping box), thus keeping the bike on its side until the wheels are mounted (or in process of being mounted).
3.5) If the cyclist has a Bipod Kick Stand, as soon as the frame can be set up without damaging the cable retainers/holders at the bottom of the frame, set the bike upright. This is often done as soon as the front wheel can be mounted with a rear mounted bipod kick stand (on rare occasion it is the opposite, a front bipod and rear wheel mounted). Another huge advantage of having a bipod kickstand is being able to park the bike wherever the cyclist wants; it frees the cyclist from having to park with other bikes without kickstands that are either leaning against a structure or building and it frees the cyclist from having to lay the bike on its side (which takes up a lot of space, especially if there are 20+ bikes in the same area).
Caution: AVOID putting the bottom of the frame on the ground (floor, deck, ...). The way to get into such a bad situation is to place frame upright against a wall, bench, or furniture in order to work on the bike (assembly or repair) while the bottom of the frame is on the ground (floor, deck, ...). The issue is that the cable retainers/channels will likely be damaged (squished, collapsed, or miss-shaped). How to Fix Damaged Cable Retainers.
Hint: A bicycle bipod facilitates a better assembly work area and for long term remote bicycle tours, no other single thing makes trail side maintenance easier than having a bipod; a bipod kick stand helps tremendously with derailer adjustments or repairs as well as helping with rear tire repairs (80-90% of all flats are on the rear tire).
Bicycle Assembly Checklists:
The following are 'Assembly Sections' of Specialized Bicycle Shipping and Packing Checklists
(they are all similar):
- Bicycle: General Assembly Checklist
(For the Typical Solid-Frame Road, Touring, or Mountain Bike)
- Bicycle: Folding Frame Assembly Checklist
(For Bike Friday like Foldup Frame Style Bikes)
- Bicycle: Break-Down Frame Assembly Checklist
(For Coupled/S&S Style Bikes, including Tandems)
Drivetrain Issues - Know Thy Power Delivery System:
2) The second best method is to use a simple build or assembly jig that holds a frame off of the ground while allowing access to both sides of the bike (or built in such a manner that one end of the frame can be easily switched to the other end, for further access work).
3) The third best build method is to work on top of a plastic sheet, space blanket, ground cloth, or empty cardboard box (like a bike manufacturer's shipping box), thus keeping the bike on its side until the wheels are mounted (or in process of being mounted).
3.5) If the cyclist has a Bipod Kick Stand, as soon as the frame can be set up without damaging the cable retainers/holders at the bottom of the frame, set the bike upright. This is often done as soon as the front wheel can be mounted with a rear mounted bipod kick stand (on rare occasion it is the opposite, a front bipod and rear wheel mounted). Another huge advantage of having a bipod kickstand is being able to park the bike wherever the cyclist wants; it frees the cyclist from having to park with other bikes without kickstands that are either leaning against a structure or building and it frees the cyclist from having to lay the bike on its side (which takes up a lot of space, especially if there are 20+ bikes in the same area).
Caution: AVOID putting the bottom of the frame on the ground (floor, deck, ...). The way to get into such a bad situation is to place frame upright against a wall, bench, or furniture in order to work on the bike (assembly or repair) while the bottom of the frame is on the ground (floor, deck, ...). The issue is that the cable retainers/channels will likely be damaged (squished, collapsed, or miss-shaped). How to Fix Damaged Cable Retainers.
Hint: A bicycle bipod facilitates a better assembly work area and for long term remote bicycle tours, no other single thing makes trail side maintenance easier than having a bipod; a bipod kick stand helps tremendously with derailer adjustments or repairs as well as helping with rear tire repairs (80-90% of all flats are on the rear tire).
(they are all similar):
|
Drivetrain Issues Sub-Directory: Bicycle Shipping/Assembly Chain Issues Shifter and Brake Cable Runs(s) Damaged Cable Retainer(s)/Guide(s) Shipping Issues |
Same Page Links to Related Drivetrain Topics: ALL About Chains Chain Touring Wisdom Chain Cleaning Methods and Issues Extreme Ways to Clean a Chain on Tour |
Bicycle Shipping/Assembly Chain Issues
- One issue is the chain itself. Experience: It is usually better to ship the bike with the chain removed than mounted and taped to the frame in a bag. Some really small bikes allow the chain to remain on the bike - there is nothing wrong with that unless the chain scratches the frame or comes loose from the tape job. If one removes the chain from the bike for shipping purposes, then the SRAM and SRAM Quick Link System is better/safer than the Shimano Pin Pop System. SRAM states that the Quick Link, for liability purposes, is a onetime use component. But most people get about five safe linkups. The other side of that issue is that a worn Quick Link will come apart during use - almost always while climbing a hill with a load. SRAM says that it is worn after one use. The Quick Link also facilitates easier chain cleaning while touring (long tours). Always have spare Quick Links and spare Chain Links. In fact, on tours, it is best to also have a spare chain.
- Helpful Hint: When connecting a chain, it is far easier to run it through the cage on the smallest rings (front and rear). This is a classic cross-chain situation to avoid when riding, but it makes mechanical assembly work easier for the bike builder. (Note that a 'good touring bike' will allow cross chaining, it is a performance efficiency issue). Remember to Test Spin the Pedals while Shifting; Look for smooth shifting and no chain grinding/noises.
- It is easy to miss-thread a chain through most Rear Derailers:
- Hardware Note: The best derailer swing arm (basket) design for quick touring assembly is the 'Open Cage' design type that allows the cyclist to place the chain in between the Jockey Wheels (aka Derailer Pulleys - See the Following Image from www.differentbikes.com) without having to thread the chain through a cage opening/end nor have to weave the chain around the Jockey Wheels (Pulleys) - A cyclist mounts the chain by rotating the derailer's cage 90°, laying the chain across the opening, and then releases the basket; the swing arm then snaps the tension out of the chain and it is ready to go [one should conduct a pedal spin to synchronize the cage position with the derailer's hand setting]. Shimano makes such a cage and some Bike Friday tour bikes have (or used to have) this feature.
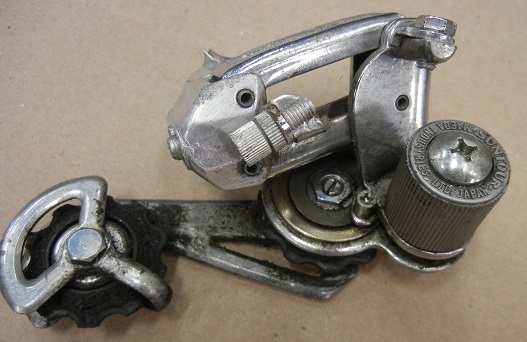
In lieu of an open faced derailer swing/tension arm/cage, then the cyclist must thread the chain through the openings for the Jockey Wheels. It is easy to thread a chain in the wrong direction around jockey wheels. It is easy to thread a chain on the wrong side of a Tension Arm brace in the middle of a Tension Arm (thus grinding the chain on the cross bar, brace, or guard). One way to avoid miss-threading a Tension Arm is to pre-mark the exact chain-run on the Tension Arm (See the Picture). About Jockey Wheels / Derailer Pullies. 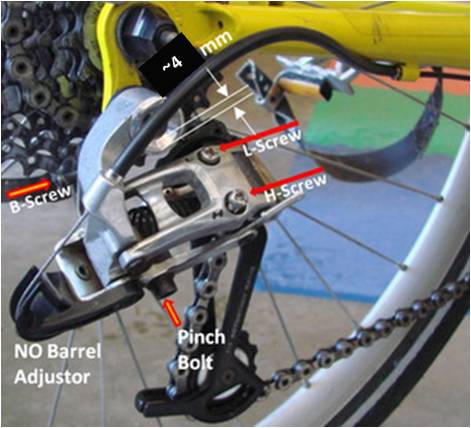 Most Rear Derailers use a Body Adjustment Screw (usually called a 'B Screw' [with no explanation]). Its PURPOSE is to 'set' the distance between 'Guide Pulley' and the closest Rear Sprocket/Cog - typically, it should be about 4 mm apart at its closest gear setting (test on each rear-sprocket/chain combination) and it hardly ever needs adjusting once it is set. See All about the B Screw. There are a few gap distance exceptions and if the pulley is ever grinding/rubbing on any sprocket/cog/cassette/gear, then widen the distance.
A PROBLEM is that if the derailer is removed and remounted (like for shipping), depending on the type of derailer, it is possible to mistakenly re-mount the rear derailer in such a way as to move the derailer's B Screw's Stop Plate (which may be on the Derailer and Not on the Frame [the real problem - an inherent design issue]). BEWARE: By NOT mounting the Stop Plate for the B Screw correctly, the bicycle assembly person may accidently cause the Rear Sprocket/Cassette to rub against the 'Guide Pulley' (aka Pilot Jockey Wheel). More about Jockey Wheels / Derailer Pullies.
PERFORMANCE: With all other things being equal, the closer the Pilot Jockey is to the rear sprockets/cogs, the snappier the shifting performance - Yes, it can be set too close (a person can tell by the grinding noise in at least one of the gear settings, but usually in can be heard in all of them).
This is a non-issue if the Bike's Frame has the Stop Plate (versus the Stop Plate being on the Rear Derailer).
IF the rear derailer has the B Screw Stop Plate mounted to the rear derailer (versus the bike frame having the Stop Plate) THEN the bicycle assembly person has to re-set the Stop Plate in the correct position, UNFORTUNEATELY there are usually a couple different Stop Plate mounting position choices (it is often NOT 'Idiot proof' [from experience]).- Long Term SOLUTION: It really helps to have the matching mounting point pre-marked with a marking pen to line up the rear derailer's B Screw Stop Plate appropriately on the Bike's Frame. Otherwise, the cyclist needs to figure it out.
- Short Term SOLUTION (and Helpful Hint): When a person mounts the rear derailer, the B-Stop Screw needs to be against the Derailer's Stop (rotate the Derailer before applying the final torque such that the Derailer's Stop is butted against the end/tip of the B Screw (take out the slack or shifting will be problematic).
Brake and Shifter Cable Runs(s):
- Perform a quick visual check of the chain run, especially if one has just transported the bike, performed shipping disassembly/reassembly work, added a new bike component, or the bike has crashed or fallen recently.
- DaVinci (the tandem bike company) sells, to the public, a brake and/or shifter cable connector (they are different sizes) that can be conveniently positioned at any interim position. The purpose of a connector it to eliminate having to reconnect a cable at a brake head or a derailer head (pinch bolt) thus eliminating a need to readjust a derailer or brake.
- If a derailer or brake cable seems loose or tight, recheck the cable run, usually a ferrule either did not seat all the way into its position or the ferrule is completely out of the Cable Retainer/Guide.
- We have seen a new and/or re-mounted bottle cage get in the way of the chain run, the bottles themselves, pannier mount and rack pieces, and a tire pump get in the way of a clean chain run or block derailer movement.
- On bikes with multiple bottle cages, sometimes it is wise to mark a mount position on the cages (as some may be purposefully bent left or right to avoid a crank or chain and re-mounting them in the wrong position after a shipping re-assembly can mal effect the drive train system).
- In the field, If their is no kickstand, ALWAYS lay the bike on its non-derailer side (left side usually); it is a good habit, even if the bike has pannier protection. BTW, leaning a bike in a public access way or area or against a window or door is considered rude behavior in most of the world (Always set a good example).
About Damaged Cable Retainer(s)/Guide(s) and How to Fix Damaged Cable Retainer(s)/Guide(s):
Top Mechanical Issues Directory Feedback
-
Field Repair: If the retainer flange (wing, furl) is still there, use any combination of a small flat tipped screwdriver, small pliers (narrow or needle nose are better), and/or a small hex key or nail. The plan is to use these tools to reshape the flange(s) so that it (they) can be used to hold the cable again. The work does not have to be pretty, but it needs to restore the retainer's function. Wrap or re-shape the flange around the hex key.
Field Emergency Replacement: If a walk out is not practical and the Cable Retainer/Guide has been broke to the point that it is missing or is unusable then the rider needs to get real creative for a functional solution. Note that sometimes, two cables can be shared in one remaining Cable Retainer/Guide (the cable's length will have to be adjusted at the pinch bolt and sometimes all of the slack needs to be removed at a barrel adjustor). Note that sometimes the cable may be temporarily laid between two cable retainers - It will rub the paint and will eventually wear into the frame but it will allow the cyclist to get out of a remotes area. Otherwise, the two best tools for emergency construction are Super Glue (permanent glue) and/or Duct Tape. Some ideas follow: if a plastic protection tube is on the cable, slide the tube to the corner/bend and tape it down; bend a penny, dime, washer or other coin (with pliers) and put that into place (tape and/or glue). Or consider using a small block of wood (just about matchbook size) with a grove. Or, glue two nuts to the frame and let the cable run in between. Or, split any kind of hollow tube (like a pen or small metal pipe for an emergency tent pole, or pipe like thing) just big enough to put the cable inside and fasten that down. Take a round metal cylinder and flatten it and then fold the sides like a taco. Take a very small flat metal bar and fold it into a spiral or twist around the cable's space (treading or twisting the cable into the inside space). A coat hanger, shape twisted tightly around a nail will work (by tight, we mean many wraps close together like a spiral back notebook). Metal will last longer but anything that works to get a rider out of a remote jam is better than nothing to include folded paper wrapped around the cable and taped down.
Hint 1: Fit the cable into the new retainer before fastening the retainer (as the process of attaching the makeshift retainer may block the ability to easily re-thread the cable through or into the replacement retainer).
Hint 2: Very often, the brake or shifter cable will need to be re-adjusted for the length of the new run and if it is a shifter cable then a derailer adjustment will likely be in order. See Front Derailer Adjustment or Rear Derailer Adjustment.
Bike Shop Cable Retainer/Guide Replacement: Usually the bike shop can either re-braze a braze on cable mount but that action will destroy the paint finish (it will burn from torch use). In some cases it may be spot welded (low probability). In some cases a cheaper stick-on (glue-on) plastic mount can be applied but this too requires a smooth clean surface and the bike will probably need to be power sanded or maybe even power grinded. Any of these actions will require paint touch-up or finishing (which is the most costly aspect of all the repair work and it is purely cosmetic).
Shipping Issues:
- The following is a very light discussion about Shipping Issues - There is a very heavy and detailed discussion of most known issues and experiences at the Bicycle Tranport and Shipping Webpage (within this web site).
- Bicycle: General Packing Checklist (For the Typical Solid-Frame Road, Touring, or Mountain Bike)
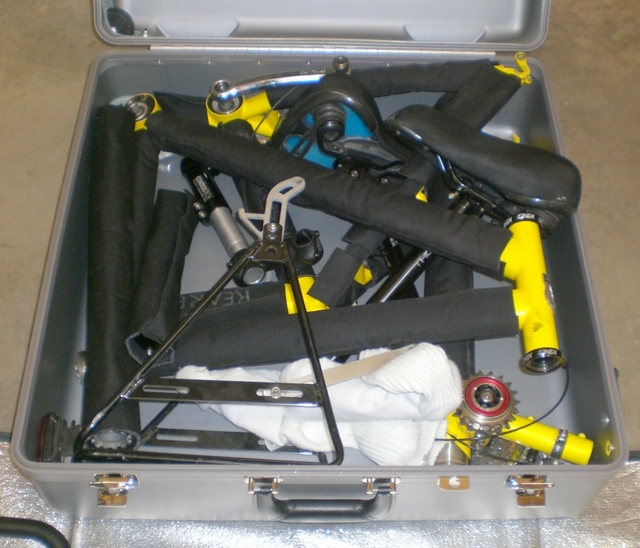
- Bicycle: Folding Frame Packing Checklist (For Bike Friday Frame Style Bikes)
- Bicycle: Break-Down Frame Packing Checklist (For Coupled/S&S Style Bikes, including Tandems)
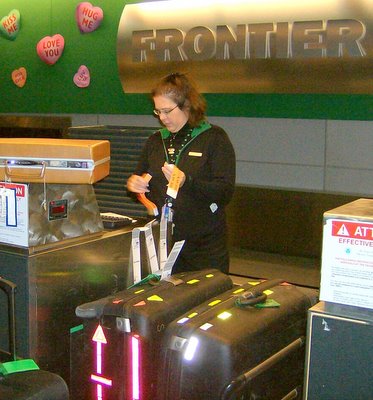
Generally it costs less to carry a packed bike on an airplane (even with the newer bag costs and weight limits and charges) than it costs to ship the bike. But, for some people in some situations where time is more of a factor than money, then it is not unusual to air/ground freight a bike to a destination bike shop and have the bike shop assemble and test ride the bike. Usually, in 2012 USD's, this assembly service ranges in the 20-25 USD cost range. A cyclist can ship directly to a Hotel or B&B but they usually do NOT like the added liability nor do they like the storage responsibilities (they too have valuable space problems) - Always get approval beforehand.
Always make a point, at first contact with a manager of a Destination Bike Shop, to let the Manager/Owner/Supervisor know that you wish to re-use the shipping box at the bike tour's conclusion. There are many stories of workers in a bike shop disposing one's shipping containers (because that is what they do with their factory shipments and shop storage space is valuable).
Derailer, Shifting, and Shifter - Touring Issues:
Top
Mechanical Issues Directory
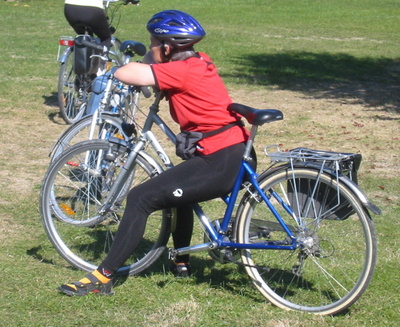 No bike performance issue is more frustrating than not being able to get a fully loaded bicycle into low gear for a big hill climb where the hill is right there in front of the cyclist and the cyclist knows to get into low gear and the sticking derailer will NOT force the chain onto the correct/desired crank ring. It is even more frustrating when the hand shifter's index is indicating that a shift took place when the derailer, in fact, did not make the ring change. By-the-Way, if this actually happens, and the problem is the front derailer not railing onto the low gear ring then try down shifting the rear derailer; very often the movement will help nudge (re-align the chain-line) the chain onto the little front/granny ring.
Arrg, Maintenance Time on the trail side!
- REMINDER HINT: Plan your gear selection before it is needed, especially for down shifting. It is naturally difficult for any quality drive system to down shift into the lowest gear settings when one is already pedaling up a slope. It is difficult to give the shift action a little pause in order to take the pressure off of the derailer and chain, in fact the very act of providing a shifting pause will probably bring the bike to a halt.
- FACTS:
- The term Gear and Low Gear comes from cars and driving vehicles.
- Most bicycles use sprocket rings and chains.
- Some bicycles use a drive shaft; some use a drive belt with teeth.
- Sprockets are driven by a Chain (from a Power Crank), Gears are driven by Gears (from a Power Crank). Remember: Car engine pistons are connected to a Crank Shaft.
- Like cars, the low gear is the setting that offers the most torque and the least speed (compared to other settings).
- The low gear on the front crank is the smallest crank ring/sprocket.
- The low gear on the rear end is the largest ring/sprocket.
- If a bike has more than two rings on the front crank, the smallest ring is called a Granny Gear, usually this is a third ring but there can be more rings on the front (like on some Tandem Bikes).
- Many mechanics tend to clarify these points so as to avoid term usage differences or misunderstandings.
- The 'H' stamp on a Derailer means 'High Gear Adjustment Screw' (Which is the Big Ring on the Front Crank or the Smallest Cog on the Rear Drive).
The 'L' stamp on a Derailer means 'Low Gear Adjustment Screw' (Which is the Smallest Ring on the Front Crank or the Biggest Cog on the Rear Drive).
Sometimes the Derailers are not labeled and one just has to figure it out. On my own bikes, I will scratch/scribe in a Letter.
Derailer Adjustment Order (Shop or Field, Front before Rear):
Front Derailer Adjustment, First Check:
Top Mechanical Issues Directory Rear Derailer Adjustment
- In the Field, Check First: If the bicycle has been shifting nicely for a couple days of travel and it is just beginning to have difficulty shifting into the smallest ring, then turn the shift adjuster barrel on the handlebar shifter, outward from the brake lever housing, 1/8 of a turn at a time (this can be done while riding for experienced rides, one may need to unlock the flat-ribbed lock-nut first. Typically, there is no rear barrel adjustor on a front derailer on and at the Front Derailer but there is often a barrel adjustor on the handlebar end.
There are a few issues to regard at the same time: - Warning, don't confuse the brake barrel adjuster with the shifter adjustor.
[It seems that everyone moves the wrong barrel adjuster at least once in their life.] - Moving the barrel outward, away from the brake lever,
takes slack out of the cable.
[Moving the barrel inward puts slack into the shifter cable and generally moving the barrel inward will make the shifting situation more difficult.
Moving the barrel too far outward may make a shift skip a ring or set the chain to rub or grind on the cage.] - Count and memorize how many rotation turns were performed, then if things get worse,
one can restore the configuration back to the start point.
Also, consider that maybe something else is out-of-place, like a bent ferrule house along the cable run or that a ferrule is partially out of its house, check the entire cable run (particularly when trail riding or if a bike fall has occurred). - Ride for a while, if the situation has improved, maybe no more adjusting is needed,
but if the situation is improving, then maybe another outward 1/8 turn adjustment
is needed.
Continue turn out trials in steps until optimum result. - Rarely is more than a full turn needed. In fact, It seems that 2 or 3 (1/8 or 1 click) turns usually does the trick.
Remember, after adjusting and testing the gear limits, re-set the gear settings to an easy start position.
Front Derailer Adjustment, Next Do:
- Understand the Derailer Adjustment Concept from the previous picture (just above).
- Perform a quick visual check of the chain run, especially if one has just transported the bike, performed shipping disassembly/reassembly work, added a new bike component, or the bike has crashed or fallen recently. We have seen a new and/or re-mounted bottle cage get in the way of the chain run, the bottles themselves, pannier mount and rack pieces, and a tire pump get in the way of a clean chain run or block derailer movement. On bikes with multiple bottle cages, sometimes it is wise to mark a mount position on the cages (as some may be purposefully bent left or right to avoid a crank or chain and re-mounting them in the wrong position after a shipping re-assembly can mal effect the drive train system). See adjacent picture.
- Put the bike on a work stand, kick stand (bipod, triangle), find a way to get the rear wheel off the ground, and/or get a buddy to help hold up the rear end of the bike or in a worst case scenario lay the bike on its non-derailer side (left side usually).
- The chain must run through the cage and be on the Low Gear (smallest front ring) for the L Screw adjustments and the chain must be on the High Gear (biggest front ring) for H screw adjustments.
- Set or Re-Set the Derailer Hand Controls.
- Start at the L or H screw that represents the At-Rest-Position: The At-Rest-Position is where the derailer cage goes when it is un-connected to the shifter cable. Typically, the At-Rest-Position is the LOW (L) gear (chain and cage over the smallest ring) position or else apply the following logic to the High (H) Position (chain and cage over the biggest ring). Almost all Front Derailers default to the Low position when not connected to the shift cable (but there are exceptions and it has to do with the design of the four-bar parallelogram that holds the chain rail cage). A way to validate the at-rest-position (without undoing the cable) is to place the shifter in either extreme gear setting (chain and derailer cage on largest or smallest ring) and physically pull in the middle of the cable (at the down tube or bottom tube for tandems +), if the cable pull moves the cage over another gear, then it started at the at-rest-position.
- Sometimes the L and H screws are not labeled. One must figure out which screw is which, in a majority of instances the L screw is to the outside on a front derailer and the inside on a rear derailer but this is NOT written in stone (it can be the other way around and it can be mixed - the safest analysis method is to actually look for the Stops and reverse think the mechanical functionality). Also, if you have the cage in the proper position (most inward or outward ring) and the chain is resting on said ring, if one makes a screw setting adjustment and the cage does not move (sometimes it takes a little effort to screw inward, but screwing outward 1/8 of a turn should have an immediate visual micro movement of the cage), then one is on the incorrect Stop Screw. If one was rotating the incorrect derailer adjustment screw, be sure to place it in its original position and then move to the other Screw (and insure that the cage and chain are positioned correctly).
- Sometimes the derailer cage can be the source of a shifting or noise problem and not necessarily the shifter or its four-bar parallelogram component. Insure that the cage is Square and Not Damaged, Bent, or Mangled. If the cage is damaged or misshaped and one can get the bike to a bike shop, then do so. However, if one is on tour (in the field), then the cyclist will need to reshape the cage as best one can - this step can entail more art than science. Also check to see if the cage is hitting a sprocket/gear (there should be 1-2 mm clearance from the closest cage-sprocket shifter setting). Cage design is ubber complex and sophisticated; the cage nose, middle, and tail may each have different chain railing/derailing concave/flat/curved shapes for chain shift management as well as high and low cage shape functions and every now and then a cage tail may be designed to curve away from the nose. It's not secret science but manufacturers don't reveal much in this topic area - Mechanics learn it or figure it over time. Inspect the cage and fix if needed. Sometimes, one must ride out with a limited gear selection. See Reshaping the Cage.
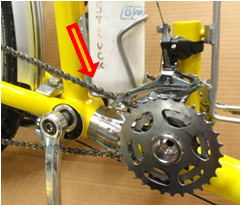
- On the Front Derailer, 'L' Screw means Low [Gear] (and 'H' Screw means High [Gear]).
- On the Front Rings, Low pertains to the Smallest Front Ring and High pertains to the Biggest Front Ring.
- On the Rear Derailer, for the Rear Sprockets (Cassette or Cogs), it is just the opposite, 'L' means Low but Low pertains to the Biggest Rear Sprocket and High (H) pertains to the Smallest Rear Sprocket.
- 'B' Screw means Body Adjustment Screw (it is used to adjust the Rear Derailer's Swing Arm 'At Rest' position - rarely needed). Read More Detail .
- Most often, the 'L' Screw needs to be adjusted Inboard using the ideas presented in the Derailer Operation Concept's Graphic/Image, such that the cage moves in a direction to positively place the chain onto the Low Gear (smallest front ring) without pushing the chain over/off the ring and without chain rub noise.
- Note: Shifter cables take much more linear force than brake cables (to me, this is counter intuitive but it is the reason why shifter and brake cables are designed different from one another and they are generally NOT interchangeable). Riders often slam a shifter into a gear setting, especially the highest and lowest gear positions and may apply much more force than tested on a mechanic's stand. One such indicator is when a rider frequently shifts a chain over the smallest or largest rings (it is time to adjust the appropriate H or L Stop screw a little [1/8 turn at a time] to reduce the cage's reach).
- Then check the adjustment for the 'H' Screw - test by placing the chain into high gear (largest front ring). If necessary, make adjustments and insure that the chain goes onto the ring without overshooting the ring, nor undershooting the ring (chain noise).
- Always adjust the default at-rest-position's screw first; usually this is the L Screw before an H Screw.
- Enter an iteration cycle of adjusting and micro adjusting and spin the pedals while test shifting as needed (screw in or out in 1/8 turn increments). Set/Re-set the H Limit and set the L Limit, looking for the chain to rail onto the ring, not go over, and not rub an adjacent ring and not rub the cage. Be sure to check the rear derailers function also, test every sprocket combination - it doesn't take long. If the cage were damaged, one may need to slightly bend/re-shape the cage (See Reshaping a Damaged Cage).
- Always test spin the pedals after an adjustment and run the shifter(s) through all gears (sprockets/cogs, rings) and always take a test ride before putting the tools away. An Aside: Because most bikes don't have stands, this can be interesting in the field, especially when your helper weighs 110 pounds and is lifting the rear end of the bike and the tour load is at about 50 pounds (just over the rear wheel) - Always be nice to your travel partner - The bipod styled kick stand can help a lot in this situation.
- Note, in case you did everything perfectly and there is still chain noise, there are other things that can cause Chain Noise worth knowing and resolving (like putting a new chain on a worn sprocket)
- Less often, the 'L' Screw or Cage is at the physical limit and will Not move the cage and/or chain sufficiently (or at all) to place the chain on the Low chain ring, OR the derailer cage will not place the chain on the High ('H') chain ring. If such is true, then one or more of the following solutions need to be implemented.
- The Shifter Cable may need to be Reset (typically, the slack or space comes out of the cable run, as tension over time, whereas actual cable stretch is uncommon).
- The Front Derailer Mount Position may need Adjustment (usually only a little). This in turn may affect the Cable/Derailer Attachment (a little too loose, a little too tight, back to item #1).
- The Cage may need to be Reshaped. Any cage reshaping will always effect derailer performance and will usually result in a derailer chain/ring alignment re-adjustment.
- Inspect the course of the chain and insure that nothing is impeding the chain or derailer (we had a water bottle in a cage, at one time, that was preventing the chain from railing onto the granny ring!).
- Insure that the derailer is mounted properly and securely (sometimes sticks get turned up and rotate the entire assembly).
- Insure that the cage is Square and Not Damaged, Bent, or Mangled (especially after a crash).
- Validate that the front derailer system operates in-line with the rear derailer and cassette (check chain line and cages not bent or mangled).
- Insure that there is no shifter cable slack and IF the pinch bolt is going to be reset, THEN reset the barrel adjustor out two turns from full in (IF a barrel adjustor exists AND they can be on each end of the cable).
- Double check the shift-cable's run for condition and any obstructions
(I have found cables that slipped out of their ferrules and cables that slipped out of their braze-on holders). - Make sure that the shifter is, in fact, set to the At-Rest gear position (usually L [or 1], sometimes H [at max of 2 or 3 or 4 front rings]).
[Caution: This Step often forgotten.] - Reset, as is appropriate, the 'L' Screw and/or H screw so that a cyclist will have a full adjustment run for the next adjustment session.
[Caution: This Step often forgotten.] - Reset the cable's attachment to the derailer's pinch bolt on the cable attachment arm. Disconnect the cable (loosen the nut the minimum amount to free the cable tension) and as soon as the cable is free/disconnected, reset the hand shifter's adjustment barrel and locknut to 1 or 2 turns out from the inside stop. If there is a barrel adjustor on the front derailer (extremely rare) adjust it to one full turn out from the inside stop.
IN THE SHOP, mechanics have a tool called a Third Hand, which simultaneously pulls out the cable slack (while not pulling on the Pinch Arm) and allows the mechanic to reset the pinch bolt. The cable likes to jump out of the way during this process. If there is a grove for the cable on the pinch arm, insure that the cable is placed there.
IN THE FIELD, Gently pull out (using pliers) the slack while you reset the pinch bolt. The perfect tension of pull is that all slack is out but no more effort than that. A new person may need to do this a couple two or three times until the work is as desired with a proper result (functional low gear shifting). Note that in the field, it is easy to break cable strands during the Pinch Bolt reset process. Handle the cable with minimum of force or effort. - Some long range bike 'tourers' melt some solder into the front derailer cable wire, in the area of where the derailer's pinch bolt meets the cable and at the cable's end/tip. One can have this done at a shop by a mechanic. This action helps to keep individual wire strands from breaking (and they do break over time/use from the clamp action).
- If one pulls a derailer cable wire by the 'end cap' (aka Crimp), one will likely pull off the end cap and the cyclist will not be able to remount the end cap and therefore will have loose strands at the cable's end, THUS making it more difficult to grasp the cable end for any derailer maintenance. One solution is to melt some solder into the cable wire's end. Another solution is to grasp the wire just before the end cap in order to perform any cable pulling for a derailer adjustment.
- Undo the cable only at the derailer.
- Go to the shifter lever/grip/device (for the front derailer, usually on the handlebar, usually on the left side) and (if this exists) set the shifter's ferule out 1-2 full turns from all the way in (one may have to loosen and re-snug the shifter's adjustment barrel's lock ring).
- Loosely mount/adjust/place the derailer where it looks like it has been placed before. Place the shifter in the same position as the Derailer At-Rest's crank ring position (usually over Low Gear for the 'L' adjustment, i.e. over the smallest front ring or to be micro adjusted over the smallest ring).
- Run the chain through the cage, usually in a L-L front-rear combo (little front ring - big rear sprocket) or else set the chain for an H-H combination (big front ring - little rear sprocket).
- Square the derailer cage to the chain line (an imaginary line from the center of front rings to the center of the rear sprockets). This should look parallel to the centerline between the two straight tires (or center of a Trike or Quad), if not, this is an additional shop issue to address (later).
- Tighten the derailer mount, insuring that it does not move during the tightening process. Sometimes this takes a few redo's or adjustments.
- Connect the Cable to the pinch bolt with the derailer in the at rest position (insure that the cable is lying correctly in the placement grove, if it exists); proper cable lies are almost always straight with no significant bends. The cage should be over or close to being centered over a ring (usually the smallest ring). See Bullet #1, Previous.
- Pull the shifter cable at the middle of the nearest run (on the down tube or bottom tube) while simultaneously spinning the pedals; you are manually shifting (bypassing the shifter); look at the clearance of the cage over all the front rings. The cage should clear the closest gap of any of the crank rings by 1-2 mm - Closest Crank Ring means the closest ring to the cage for each and every ring whose proximity tolerance must be checked.
- Adjust the vertical as required - This may be best done by using a piece of wood and tapping the wood lightly with the equivalent of a soft head hammer; in the field one must get creative (I've used or seen used: a rock and a stick, a tent mallet and a tire tool, the hammer part of a hatchet and a plastic digging tool, plastic mini cutting board, plastic writing pen, and wood pencil [cut square ended]).
- Some derailers need to be fit perfectly and that is the only way they will work (to anyone's satisfaction) - In the field, accept Good Enough.
- Enter an iteration cycle of adjusting and micro adjusting the derailer longitudinally and angularly and spin the pedals while shifting as needed. Set/Re-set the H Limit and set the L Limit, looking for the chain to rail onto the ring, not go over, and not rub an adjacent ring and not rub the cage. Be sure to check the rear derailers function also, test every sprocket combination - it doesn't take long. If the cage were damaged, one may need to slightly bend/re-shape the cage (See Reshaping a Damaged Cage).
- One may have to accept a limited set of gearing combinations. In the field, it's about survival. 'Good Enough' can get one out of the field and back to civilization. However, if the problem lies in the shape of the derailer cage, then consider reshaping the cage (see See Reshaping a Damaged Cage, the following #3 Bullet).
- Be sure to properly torque the mounting and pinch bolts for the final settings. Don't put the tools away. Go for a good test ride. Make any final adjustments. Remember that in the field, a perfect adjustment may not happen; the repairs are being made to get the rider and the bike to a 'down the road' bike shop.
- If the cage is damaged or misshaped and one can get the bike to a bike shop, then do so. However, if one is on tour (in the field), then the cyclist will need to reshape the cage as best one can - this step can entail more art than science.
- If one knows the original cage shape, then that is the reshaping goal. If one does not know the cage's shape then try to square it more or less from a top-down view and make it parallel to the chain line (center line of the front rings to the center line of the rear sprockets).
- The two likely causes of a damaged derailer cage are an impact (crash or external caused, like a protruding branch or rock) or a jammed chain in the derailer cage (which usually bends the cage upward with a side twist). The 'jammed chain' type of impact can be the most destructive. If one knows the cause of the impact, then one can work better to reverse the effect of the malevolent vector forces.
- There are repair bending motions such that some are better done with the derailer mounted on the bike and there are some bending motions better served with the derailer off the frame. Be mentally prepared to work both ways. Prevent any damage to the derailer's 4-Bar (main unit). See bullet #2 above, for Front Derailer Re-Mount Instructions.
- Needle-nose Pliers are the best field tool, then regular Pliers, and then it's a tossup between a small crescent wrench or a set of grooved pliers (like Channel-Locks). Cage steel is tough to bend and brittle - it can break. It is difficult to work on the cage and not damage the four-bar support parallelogram - be smart and forceful with control.
- When making adjustments, be keenly aware of the vertical spacing between the cage and crank rings for each ring's position - Ultimately, one wants 1-2 mm clearance from the closest cage-sprocket shifter setting of the set of all front rings.
- Start testing /shifting the derailer (cage) - make shape adjustments if needed.
- Cage design is ubber complex and sophisticated; the cage nose, middle, and tail may each have different chain railing/derailing concave/flat/curved shapes for chain shift management as well as high and low cage shape functions and every now and then a cage tail may be designed to curve away from the nose or that may the field solution when such did not exist before.
- The field solution may be to remove the front derailer and operate the front as a fixed gear and only use the rear derailer to shift as needed.
- Sometimes, one must ride out with a limited gear selection.
Actual Front Derailer Adjustments:
Some Quick Explanations:Problems and Solutions for Adjusting the Front Derailer:
1) Addressing the Cable to the Front Derailer Adjustment Issue:
First (before loosening the pinch bolt): Quickly check for any of these other conditions.
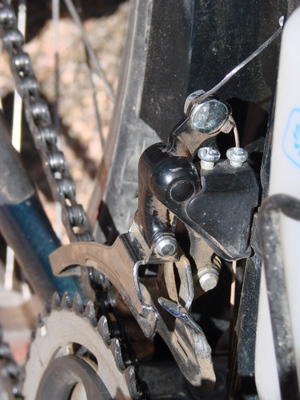
First, have checked all items listed just previous.
- Two (2) Little Field Hints/Tricks for Long Tour Survival:
2) Adjusting the Front Derailer's Mount Position:
- Field Solution:
RE-MOUNT INTRUCTIONS
3) Reshaping a Damaged Cage:
- Field Solution:
Tour Survival Hints: Front Derailer, Plus
- Drop some solder into the cable about the area of the pinch bolt contact; Have a mechanic perform this task or do it yourself. It helps to prevent strand breaks and insures that the cable will last longer.
- If one pulls a derailer cable wire by the 'end cap' (aka Crimp), one will likely pull off the end cap and the cyclist will not be able to remount the end cap and therefore will have loose strands at the cable's end, THUS making it more difficult to grasp the cable end for any derailer maintenance. One solution is to melt some solder into the cable wire's end. Another solution is to grasp the wire just before the end cap in order to perform any cable pulling for a derailer adjustment.
- If possible, as soon as one picks up a tuned bike from a shop (or you just tuned it perfectly OR as soon as it is opportune), mark the juncture of the derailer and frame (sometimes at two different places, using permanent marker [black or silver]) such that the stroke of the mark touches both the derailer and frame at the same time. Such an indicator is invaluable for re-aligning a derailer in case of damage, repair, removal, or replacement on the trail or at a foreign bike shop. See next Marking Bullet.
- One should mark the juncture of the seat post stem and the seat post tube such that the stroke of the mark touches both the stem and tube at the same time. Such an indicator is invaluable for re-posting or re-assembly of the bike's seat/saddle.
- Do NOT use a Scribe to mark anything on a bike unless it is a mark for cutting or trimming a component. Scribes are metal pointed markers used for to mark material for cutting. The very scratch of a Scribe mark weakens the material/metal at that scratch mark; it is especially a 'No No' for seat posts!
- If one is shipping and reassembling bikes (also see Bike Shipping for more shipping details), be sure to mark other key component meeting points (like the handlebar and stem). Marking determination depends on what components need to be removed for shipping and reassembly.
- There is nothing like having a bipod stand on a bike for a long tour to help one conduct shift tuning/adjustments in the field, a travel mate will appreciate it too.
- Heavy Duty Tour Load - The bicycle won't down-shift (This is about how indexed derailers actually work):
Situation: Some derailers will not push/move/derail a chain with enough force to make it rail onto the smallest front chain ring if there is any kind of climb angle or load on the bicycle - this is why cyclists set their gear selection before climbing a hill (which is a wise practice, no matter the circumstance).
Solution: Two things can offset the problematic situation of a chain not railing onto the smallest front ring on demand.
- If the chain run is longer (between the rear sprockets and the front chain ring) then there is less side to side chain-rub/resistance.
- If the derailer cage can physically force the chain onto the smallest front chain ring, then this climb angle or load problem goes away.
Assumption: 2 ring front derailers have proven to be insufficient for fully loaded touring, therefore this topic addresses 3 or 3+ ring front derailers.
Mechanical Techniques Involved/Considered (Solution #2 only happens if ...):
This is about the mechanical tricks that allow a rider to force a chain onto the smallest front ring and not having any cage rub on the chain - this is advanced mechanics.
- Non Standard tuning occurs such that the cage of the front derailer is set to force the chain onto the ring by opening, adjusting or resetting the L Stop [screw] to literally allow the cage to force/push the chain onto the smallest chain ring rather than to allow the chain to finessed onto the ring - Brute Force versus Finesse.
- In order to counter balance the auto indexing of the L Stop setting (of Consideration A, just previous), sometimes the H Stop on the High Gear (biggest ring) has to be opened up (just a little, i.e. move the cage slightly outward from the frame by adjusting the H Stop screw - slight means no more than 1 mm). This is not always a requirement but one of the symptoms of un-even index stops is a chain miss-alignment in one or two of the middle gear settings/positions.
- As needed, sometimes the rear end of the front derailer cage can be moved ever so slightly inward (toward the frame). When needed/useful, the actual movement of the rear end of the front derailer cage will be no more than 2 mm inward from center and often 1 mm will do the trick. This movement will sometimes allow a bump, bubble, shape or curved bend in the rear of the cage to nudge the chain onto the small ring, as desired. This is about using the shape of the cage to move the chain from the second ring onto the first ring and not every cage will facilitate this operation. [Talking about rotating the derailer about its clamp mount, NOT talking about bending the cage.]
- In order to manage the brute force chain movement, some derailer designs are better than others. A derailer that has micro trim movement/control is best at facilitating this Brute Force operation. This special type of front derailer has major and minor movement/cage-position control, such that the rider can select a gear setting (brute force the shift) and then trim the cage (usually with one sub-click of movement) to stop/prevent any chain-to-cage rub and still keep the chain on the desired ring. Usually these are grip shifters but some trigger shifters and STI type shifters allow micro trimming.
Rear Derailer Adjustment:
Top Mechanical Issues Directory Front Derailer Adjustment
- First, If needed, conduct all Front Derailer adjustments First, Always.
- Understand the Derailer Adjustment Concept Picture/Diagram (the adjusting concept, adjusting screws and the screw stop concepts apply to the rear derailer too).
- Perform a quick visual check of the chain run, especially if one has just transported the bike, performed shipping disassembly/reassembly work, added a new bike component, or the bike has crashed or fallen recently. We have seen new and remounted bottle cages get in the way of the chain run, the bottles themselves, pannier mount and rack pieces, pannier bottom, and a tire pump get in the way of a clean chain run or block derailer movement.
- This gets tricky! Many rear derailer cables have slack adjustment tension nuts on both ends. Make sure that the rear barrel adjustor cable housing is 'in' the ferrule. If one is in the field and one can see or feel that there is slack in the cable wire then make sure the barrel adjustor is NOT loose, check each end (if loose, fix) or else take the slack out - usually this only involves one or two 1/8 outward turns of the barrel adjustor (on rare occasions up to a couple full turns). After making an adjustment, test ride for 15 minutes or so to see if this is all the adjustment that is needed. Otherwise, an adjustment in the field while on tour, probably should not involve making any cable tension adjustments. If the rider knows that the cable housing and wire were messed up and the rider knows that the cable wire needs to be reset/readjusted to the derailers pinch bolt, then while the cable is disconnected, reset the derailer's barrel adjuster to 2 full turns out from the inside stop and do the same thing on the shift lever (reset the barrel and locknut to 1 or 2 turns out from the inside stop).
- If rear panniers are mounted, one may need to remove one or both panniers. However, make a quick check to see if a pannier has interfered with any derailer/shifting/tranmission effectivness. Then, removing one pannier may be considered, just to obtain access to the rear derailer. Note that removing the other pannier may make it easier for someone to lift the rear end and test spin the drive train system adjustment. Sometimes we additionally turn the event into a snack/rest break - It helps to be of good cheer.
- Start at the L or H screw that represents the At-Rest-Position: The At-Rest-Position is where the cage goes when it is un-connected to the shifter cable. Typically, the At-Rest-Position is the LOW (L) gear (chain and cage over the largest cog) position or else apply the following logic to the High (H) Position (chain and cage over the smallest cog). A way to validate the at-rest-position (without undoing the cable) is to place the shifter in either extreme gear setting (chain and derailer cage on largest or smallest ring) and physically pull in the middle of the cable (at the down tube or bottom tube for tandems +), if the cable pull moves the cage over another gear, then it started at the at-rest-position.
- Usually Road Bike Rear Derailers usual default position is High Gear (H), little rear cog.*
- Usually Mountain Bike Rear Derailers usual default position is Low Gear (L), big rear cog.*
- The chain must run through the cage and be on the Low Gear (largest rear cog) for the L Screw adjustments and the chain must be on the High Gear (smallest rear cog) for H screw adjustments.
- Sometimes the L and H screws are not labeled. One must figure out which screw is which, in a majority of instances the L screw is to the outside on a front derailer and the inside on a rear derailer but this is NOT written in stone (it can be the other way around and it can be mixed - the safest analysis method is to actually look for the Stops and reverse think the mechanical functionality). Also, if one has the cage in the proper position (most inward or outward ring) and the chain is resting on said ring, if one makes a screw setting adjustment and the cage does not move one knows that one is operating on the incorrect Derailer Adjusment Screw (sometimes it takes a little effort to screw inward, but screwing outward 1/8 of a turn should result in an immediate visual micro movement of the cage). If one was rotating the incorrect derailer adjustment screw, be sure to place it in its original position and then move to the other Screw (and insure that the cage and chain are positioned correctly). Seeing the cage move is proof that one is on the correct adjustment screw(there are people who can feel and/or hear a perfect adjustment).
- Always test spin the pedals after an adjustment and run the shifter(s) through all gears (sprockets/cogs, rings) and always take a test ride before putting the tools away. Note: In the field, if one is travelling with panniers (vs just a trailer) one usually one has to remove one pannier (the right rear) just to get to the rear derailer. Sometimes it is easier to remove both panniers so that lifting the rear end is easier facilitated for test spinning - keep your sense of humor!
- Note, in case you did everything perfectly and there is still chain noise, there are other things can cause Chain Noise worth knowing and resolving.
- Note, this can be an issue for people who ship bikes and reassemble the bikes at their destination. There is another screw on the Rear Derailer called the B Screw, it is usually on the mount of the derailer body where it contacts the bike's derailer frame/mount (it can be on back side of the derailer's mount). It is the 'Body Angle' (sometimes [Rear Derailer] Body Adjustment) Screw and it usually only needs to be set once in its lifetime. The B Screw adjusts the distance between the Guide Pulley and the Largest Rear Sprocket/Cog. The Guide Pulley should NOT touch the Cog at all, the Guide Pulley should be about 4 mm from the Largest Rear Sprocket (in the Lowest Gear setting for the rear derailer). See All about the B Screw.
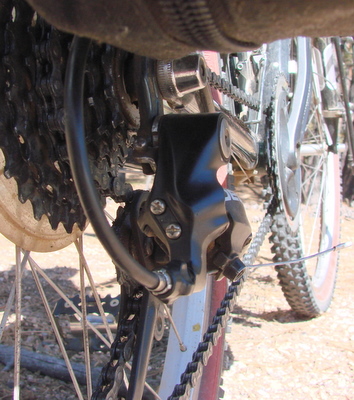

Remember, after adjusting and testing the gear limits, re-set the gear settings to an easy start position.
Chain Line and Cross Chain Issues:
Top Mechanical Issues Directory
- Problem 1: Some gear combinations force the chain to rub/grind sideways against the sprockets. Grinding metal against metal is never good. It can be heard most of the time but not always. It shortens the life of the drive train system and in a worst case scenario it may leave a cyclist stranded somewhere.
- Problem 2: When the chain is in a line that is perfectly parallel to the bike frame, then the most energy from the cyclist's pedaling is delivered to the rear end - Cross chaining robs a cyclist of power.
- Solution: Pedal in the Gear Combinations that offer the most energy return (which also happen to NOT have chain-sprocket side rub/wear).
- Technology: The drive train 'Chain Line' is set up to use the Low (L) front crank ring (smallest and left/port most) with the Low/Lower rear cassette rings (which are the biggest and left/port most). So, in general, for low gearing, the chain lines up on the front and back sprockets on their respective left sides. This is good as is minimizes chain wear and maximizes rider power. Likewise the drive train is set up to use the High (H) front ring (biggest and right/starboard most) with the High/Higher rear rings (smallest and right/starboard most). The chain actually lines up squarely on the sprockets in varying H/H and L/L combinations - this is good. Middle (M) ring/gear combinations, front and back, achieve the same efficiency combinations - this is good too.
- Issue: Avoid H/L and L/H [cross-chain] combinations. These poor combinations make the chain work at an angle across the sprockets and causes increased wear and tear on the system and it sometimes makes a notable ugly noise that sounds like metal meshing. For most touring bikers with full loads, the most likely temptation to cross chain occurs one has already made a steep hill climb and there is a little shallow [easier climbing] slope followed by steeper slope, again - why change the front ring when the cyclist is coming right back to granny in, 20 feet, for the remainder of the climb. Not saying this is right, just saying that this is the scenario that cross-chains a touring bike the most.
- 10 Speed and 11 Speed Bicycles are much more sensitive to Cross Chaining because the chain is less wide and the rings and cogs are much closer together, to the point that a cyclist must consciously up-shift and down-shift from end to end maintaining sets of chain line combinations.
- Tour Bike (Longer Chain) versus Speed Bike (Shorter Chain): The longer the drive train, the lesser the Cross Chain issue/sensitivity. Bikes with short drive chain runs are very sensitive to cross chaining than bikes with long drive chain runs. Bicycles with longer chain runs are much more tolerant of cross chaining situations (some with no sprocket-chain rub noise at all). A hidden issue is that bikes under tour loads are much more difficult to shift under pedal pressure, especially for the front rings especially for long hill climbs and/or for climbs involving multiple angle climb changes (ergo requiring more shifting at the top end of the rear sprockets versus shifting back and forth on the front ring which is much more likely to hang-up). A touring cyclist is much more likely to cross chain a bike to maintain power for a few seconds than a lightly loaded (relatively speaking) speed bike cyclist.
- Tour Bike (Less Rear Sprockets) versus Speed Bike (More Rear Sprockets): If all conditions are the same, the more space that there is between rear sprockets the less likely the effect of cross chaining (causing side rub wear and causing chain noise) - Thus improving long distance endurance and dependability. This Inference is derived from a condition where more rear sprockets means a necessity for thinner walled chains and thinner walls do not endure as well as a thicker wall, thus a chain break is more likely given everything else being equal.
Some Good Tour Bike Characteristics:
Emergency Rear Derailer Setup for a Fixed Gear:
Top
Mechanical Issues Directory
Why? Because someone crashed and the rear derailer no longer operates. The derailer may default to Low, sometimes beyond Low. A person can reset the rear derailer to contiuously run on just one sprocket. Which will it be? The following text reveals two different methods for setting the rear derailer to a desired sprocket.
Which Sprocket Setting? - Considerations: A rider can coast downhill at a fast speed, regardless of a sprocket-chain setting. A rider can push uphill, sometimes nearly as quickly as one can ride. A rider cannot walk on the flats as fast as one can ride. Typically, one selects an interim speed sprocket setting, but there are exceptions (like getting to the Leadville, Colorado, Bike Shop and it is pretty much uphill all the way).
Choice, Use the existing derailer or remove the derailer!
OPTION 1 - Use the Rear Derailer
- The Big Picture: A Rear Derailer needs to be set to one and only one selected gear position.
This solution can be applied to the front derailer also. - Situation: The most common need for failed shifting capabilities results from crashes. There are a few other odd reasons. Crashes of this nature usually have a bent handlebar, destroyed shift system, and at least one good remaining brake.
- Default Indexed Derailer Position:
- Mountain Bike Rear Derailers usually default to the lowest gear (biggest rear sprocket).
- Road Bikes Rear Derailers usually default to the highest gear (smallest rear sprocket).
- Steps:
- Detach derailer shift cable's inner-wire from housing.
- Remove the rear derailer's cable housing and stow away.
- If there is a cable housing ferrule at the barrel adjuster, then remove and stow away (with cable housing).
- If there is a barrel adjuster on the rear derailer, turn it out two turns from the all-the-way-in position.
- If the previously removed inner-wire has a good head and it has at least 5 inches of good wire (not damaged or frayed from the crash) Use the wire, as is, for now. Else, tie an overhand knot in the wire close to a good end. Pull as much slack out of the wire as possible without breaking or fraying the wire. Try to get the knot small enough to fit inside the barrel adjuster (if possible). Do NOT trim yet.
- Run the good inner-wire end through the barrel adjuster (or rear entry hole if no barrel adjuster) toward and through the pinch bolt mechanism.
- Make an effort to remove any pending slack in the wire but do NOT pinch down yet.
- Using a friend (or a lever as last resort by yourself) and align the derailer parallelogram to the desired sprocket (usually the middle sprocket or next smallest) and fasten/lock-down/tighten the pinch bolt/mechanism. This may take a few iterations and be careful with the parallelogram.
- Use the barrel adjuster for fine adjustments (if it exists).
- Caveats:
- Sometimes one may have to get creative and tie cable at bottom of seat post for the rear derailer and run the inner-wire through the remaining cable housing.
- Cut off excess cable, but leave enough to allow the cyclist to reset the derailer parallelogram and/or selected sprocket.
- If available, finish the cable with an end cap, both to stop fraying and for safety.
- Ride out of harms way.
OPTION 2 - Remove the Rear Derailer
- Remove the Rear Derailer and Chain (use chain tool to undo chain or Master/Power-Link)
- Lie out and set up the chain on the middle sprocket, front and rear (or choose desired positions). The middle rear sprocket always leaves the most flexibility for setup and selection change due to chain length. The middle sprocket is usually the statistical best one gear only riding gear.
- Because of chain length fit, one may need to select an adjacent rear sprocket or change front ring selection.
- Use chain tool to remove enough links to reconnect chain with very little chain slack.
- According to rumor, all indirect reports, if the chain is loose enough, it may jump to the next biggest sprocket (lower gear) on its own. This is OK; consider it in your chain length plan.
- Caveats:
- This is a reason to think about carrying a half-link (find online).
- This is Dangerous and requires some bike mechanical knowledge, but some bikes will allow some chain slack to be removed by adjusting the rear wheel fit in the rear drop outs. Wheels do not have to be all the way up in a drop out, but a cyclist needs enough surface area that the skewers will hold and the wheel still needs to be center aligned for its track and for brakes (disk or pad).
- Stow away and keep the rear derailer, cable (housing and wire), remaining links, and anything else that came off the bike (doughnuts, ferules, ...).
- Warning this can be dangerous but sometimes one can reposition the wheel rearward in the dropouts to adjust minute chain slack amounts.
Emergency Rear Derailer Hanger:
Top Mechanical Issues Directory
- First of all, some bike manufacturers make and sell replacement derailer hangers for their own bike frames, check with your shop.
- Second of all, many bike derailer hangers can be bent back into alignment with a special bike tool (in a shop - best option), a large adjustable wrench (preferred field option), or large tongue and groove pliers (second field option).
- Third, there is a commercial Emergency Rear Derailer Hanger product sold online and in shops. For online searches, one may need to use the word 'derailleur' but the actual French word is dérailleur. Tomato-Tomoto.
- The emergency rear derailer hanger fits on the rear skewer and there is a lot of fore and aft adjustment/set-up lee way. Set the hanger in the same axial plain as the hole was for the original hanger.
- Some derailer to mount bolt threading can be funky. Be gentle and patient.
- BTW, there is one multi-tool that has an emergency derailer hanger built into the tool frame (from Wheels Manufacturing, this is the same manufacturer of the Emergency Rear Derailer Hanger product).
- Most touring cyclists, that carry an Emergency Rear Derailer Hanger, keep it in their tool sack/bag but many mountain bikers zip tie one under their seat.
- Caution: Because of a possible chain line offset with the emergency derailer hanger there may be a sprocket or two that may not be usable or attainable.
- Caution: Before riding out, check the range of the derailer stops and Re-Tune as necessary (if possible). Start with the default derailer position first, it is possible that low gear on the derailer may now be sitting on the second or third sprocket also it is possible that a cyclist may have to mentally alert one's self to stop from using one or more of the high gears (smallest sprockets) due to possible derailer out of range limits. Know before you go.
- Thought: This is an untried thought, but it seems that the emergency hanger could be hung Inside the frame's dropout as well as Outside the frame's dropout. It is not the dropout shape that holds a wheel to the axel; it is the skewer and the cam lock force. The result, possibly, provides another choice of gear ranges (high or low).
- Good News: If a derailer frame hole is stripped, it is a very simple matter for most bike shops to tap a larger hole and drop in a Helix wire that is the exact same threading dimension as the original standard.
- Tom Hilliard, Team-USA Bike Coach
Shift (When, How, How Much):
Top Mechanical Issues Directory
- A slight easing of the pedal pressure while the bike moves from its own inertia allows for a smoother shift. The cyclist has to act in the function of a 'mechanical clutch', disengaging pedal pressure as one leaves one front-rear sprocket-ring setting and withholding the pedal pressure until the chain is firmly engaged into the rider's next selection - this is all performed in less than a second (Michael Smart). [Otherwise, one is going to hear and feel the chain grind as it moves from the brute force of relocating the chain from one ring/sprocket to another ring/sprocket and there is a chance that the chain can hang-up in the basket and jam, thus stopping the bike as a minimum, or breaking the chain, but at worst the derailer may be destroyed.]
- The derailer is physically moving the chain by brute force sideways such that the chain may re-engage the next sprocket's teeth with less effort than if there is no fore-aft pressure. Fore-Aft pressure is usually only caused by pedal pressure from the rider.
- Downshift before a hill, not on a hill (or else everything may come to a frustrating stop).
- It is wise to shift no more than two rear sprockets at a time, or else the chain may never catch up to the derailer and therefore seize/freeze (the chain wedges between the derailer cage and sprockets - can happen in the front derailer too), thus forcing the cyclist to stop and manually adjust the chain, derailer, and shifter.
- Sometimes the de-railed chain is moving so fast sideways, that it comes completely off the sprockets (when it would not happen under normal shift behavior). While this can be indicative of a mechanical problem, it is often a cyclist caused issue. This author experiences this issue of a fast shifting requirement when touring on mountain bikes on mountain trails or forest roads where there can be frenzied bursts of up and down shifting in a short period of time. Also, hard pedal pressure meant to bike out of a cage trapped chain often breaks the chain.
Shifting Theory (Theory Only, from Dennis Struck, 7 Aug 2012):
Fact: We know about gyroscopic precession where basically, movement energy applied to a disk in a rotating plane does not take effect for/until 90 degrees of rotation later. So, for example, on an operating stable gyroscope (rotating clockwise) if I pushed the top axis away from me, then the gyroscope's top axis would tip to the left (relative to me).
Fact: If we are pedaling on a Round ring/disk (not an Elliptical ring) and we are pedaling on level ground, then the point of maximum pressure from a cyclist's leg force occurs when the crank arms are perfectly horizontal. Also, the point of minimum pressure (force) from a leg occurs when the crank arms are vertical. This should apply to either shift derailer.
So, in theory (on level ground): If a cyclist were to apply their shift when the crank arms are horizontal, then the actual brute force of the shift would occur 90 degrees later at a point where the least amount of pedal pressure is applied. The implication is that there probably is a correct time to shift [method] in order to use physics to minimize energy output and to make the shifting and the process of shifting more efficient.
There are some other implications but I haven't thought through those ideas yet. One of our most challenging shifts happens when there is a lot of pressure on a chain when the cyclist is going uphill (imaging with 80 pounds of pannier tour weight too). We know that down shifting while pedaling uphill can be fraught with chain/cassette grinding noise sometimes (often) and the shift can be quite smooth at other times. I wonder if the above described physics is at play? I think that, maybe, the cyclist needs to be parallel to the angle of the slope to apply the shift correctly (versus parallel to the tangent of gravity).
Squeaking Derailer Pulleys (aka Jockey Wheels):
Top
Mechanical Issues Directory
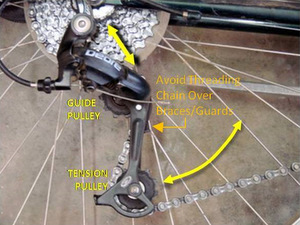 In real life, 99% of Derailer Pulleys come properly lubed from the factory and will never be a problem except that the teeth will wear out over time and the wheels will need to be replaced. But for whatever reason, 1 in a hundred become noisy (a squeaky, every now and then, dry wheel-bearing kind of noise). Pulley's can be difficult to positively identify as a noise source; their grease can dry out and it is possible that they came from the factory with little or no grease.
Be very careful with Jockey Wheels, they can be different from one another. There are just Guide Pulleys and just Tension Pulleys or they can be interchangeable, depending on the system; they can be multiple colors; made of plastic, aluminum, titanium, or ceramic materials; they can have different counts of teeth; and they may contain ring bearings, cartridge bearings, or have tiny little internal [free] bearings that are just begging to be spilled onto the ground at a road side picnic table.
The heart of the matter: The Guide Pulley is closest to the rear cassette of sprocket disks and it guides the chain from one disk to another. The Tension Pulley keeps the slack out of the chain. Chain slack happens because the sprocket disks and crank rings are different sizes. Good chain performance comes from chains with no slack; 'chain tension' is more important than oil, and oil in important.
- Working with these little things can be tricky and time consuming, especially in the field. If possible, park the bike over a clean cement pad or lay a piece of plastic sheet (space blanket, ground cloth, ...) under the bike.
- Next, one should break out a marking pen and a notebook pad, because a lot of parts look similar but are not and some pieces can go on backwards (and should not!).
- Getting the cage open is usually a straight forward process and it may require the derailer to be removed from the bike frame. Make cage alignment marks on the two cage pieces (like matching plus signs on each side of one end) - a lot of cages can be re-mounted upside down.
- The pulley axel bolts can be different from one another and should be marked (use a plus sign for the bolt that is closest to the cage's plus sign). There may be tiny washers.
- Remove the pulleys one at a time (do not pop the covers yet), and write down the markings on each pulley and on which side as they can be directional and it is best to remount everything just as it was. Sometimes, just one pulley may say what it is, thus the other pulley is for the other position.
- At a table or bench, protect an area for loose bearings, use a plastic sheet or news paper or plate or such. Be very careful at this time, because some of these jockey wheels can fall apart and they can have lots of little pieces. Pay attention here.
- Use a dental pick (or needle from sewing kit, Swiss Army knife's toothpick and/or tweezers) to pull off the covers.
- There may be tiny (plastic or vinyl) seals;
In the Field: One should not disassemble any further, just clean out the old dirty grease as best one can. There may not have been any grease. If needed, consider using denatured alcohol, Coleman fuel, or just a clean rag for cleaning. In some cases, one will just be greasing the components, knowing that at the next good bike shop one will be replacing the jockey wheels.
In the Shop: Take all the pieces out, line them up or take notes. There usually are no commercial replacement parts or seals, so what you take out must go back in. Clean out the old dirty grease. Use seal friendly solvent. Let it dry, or dry rub what one may. If a seal or component is bad, on will likely be purchasing new jockey wheels.
In Either Case: Some of these wheels have tiny bearing cartridges, some have tiny loose bearings, and some are just plastic with a cover. If the jockey wheels are just plastic (no bearings), be sure to clean and grease the area that was under the covers. For any Jockey Wheel, if nothing else, heavily grease the bearings if they exist and add a little grease on each side (under the cover area) and put it back together. - Just so that the reader knows, NO ONE that we know of, sells just jockey wheel seals or parts. One must buy new wheels; they range from 5 USD to 95 USD, each.
- Re-assemble everything.
- When putting the jockey wheel bolts into the cage, if one can, add a little LocTite to the pulley bolt threads, remember to re-thread the chain, and add a little LocTite to the cage bolts (or add your preferred thread-lock of choice, use purple before blue, but blue is OK). Read about Thread Lock.
- Note: Any time that the derailer is off the bike is a good time to wipe it clean, place a drop of oil on each of the 8 parallelogram pivots, work the parallelogram, oil the swing arm pivots (no oil on or near the cable or its attachment point), work it a few times and then wipe the excess/visible oil off the parts/components.
Mystery Shifting (aka Ghost Shifting or How to cause a Crotch Shot):
Top
Mechanical Issues Directory
The Derailer discussion (previous) addressed the topic of a bicycle not shifting on command and this following topic addresses bicycle un-commanded shifting, that is, the bike shifts unexpectedly on its own. The following percentage estimates are just based on personal experience.
- 70-80% of the time, Mystery Shifting is caused by drive train miss-alignment. Most commonly this is caused by a bent derailer hanger, wheel/axel dropout (thus effecting rear sprocket alignment), chain stay (bent, ditto), or seat stay (ditto, pretty much in that order, 80% being a bent hanger, easy to have fixed, recognition of problem is the key). An aside: this is the reason why most cyclists lay or transport (or rest) their bike to the left side (versus right side), to keep the derailer off any objects. A bent frame component causes the rear wheel cassette to NOT line up with the front crank ring(s), which results in the chain alternately aligning with the front crank or rear cassette, thus causing un-commanded gear shifting. The solution requires some professional mechanic frame bending with special tools (usually, but sometimes a frame break and weld is in order).
- 5% of the time, Mystery Shifting is caused by slightly too loose (or too tight) a shift cable. Many bikes have a barrel adjustor on the rear derailer for the shift cable, some don't, but most bikes have a front cable adjustor at the shifter. Shift cable adjustments are not needed very often but one way to tell is that the chain should sit centered on the chain ring. This is an adjustment better made with the bike upright or in a rack (as opposed to upside down). If the chain is rubbing against the next sprocket/ring (inward or outward of the present sprocket/ring) then a fine adjustment to the barrel adjustor (usually 1/8th of a rotation to lengthen the cable run within the housing) will re-center the chain on the sprocket. If your adjustment just made more noise or made shifting occur two sprockets at a time, then back off the adjustment and try the other direction.
- IF a bike has frame couplers for shipping (most don't), THEN Mystery shifting is often a symptom of coupler(s) working loose, usually at the bottom coupler position(s).
- 1% of the time, Mystery Shifting can be caused by a bent sprocket tooth/point. This situation also produces the sound like Chain Trim Noise, a sound indicating that the chin cannot decide on which ring to be (a sound like a derailer that needs tuning). What happens is that an adjacent ring will be bent just enough, sideways, that during rotation the bent sprocket tooth/point can push the chain off the current ring and onto the next ring. This brute force push of the chain can be in either direction (up or down the cassette). Also this can happen in the rear cassette for just one front chain ring and not the other(s), having to do with the angle/alignment of the chain going to the rear cassette. In the field, Sprocket Points can be gently bent with an adjustable wrench - Bend only the tip, not the ring. In a Bike Shop, there are special tools for this procedure and the Mech/Tech may have to disassemble the chain cassette in order to get at the correct ring without damaging other rings.
- 1% of the time, Mystery Shifting is accidently caused by the cyclist's hand, resting on the handlebar shifter. This problem is fixed by adjusting one's riding behavior. The issue is more prevalent at the end of a long day of riding and usually the rider is quick to figure this cause-effect situation.
- 1% of the time, Mystery Shifting can be caused by a worn out or defective rear derailer. A derailer works for a long time, even when there is noticeable combined lateral play among the parallelogram bars and swing arm and jockey wheels. A standout feature for a worn derailer is a dramatic loss of chain tension in the swing arm. Another feature pointing to a worn derailer is that all typical solutions mentioned previously have been applied, maybe even including a rear derailer B Screw adjustment was applied to take out chain slack, and yet the mystery shifting issue won't go away. Yes, derailers can be repaired, but there are lots of tiny parts and usually a worn derailer is 5 to 8 years old (or older) and one will probably have great difficulty in finding replacement parts. Do read the next bullet.
- .05% of the time, Mystery Shifting can be caused by a worn shifter at the handlebar. This decision is best left to a mechanic to determine. Usually symptoms have been ongoing for a long time and maybe the derailer was replaced with all other issues having been addressed and yet mystery shifting still occurs.
- The worst time for a mystery shift is when standing on the pedals for a hill climb, invariably a cyclist gets the saddle driven up the crotch - Ouch!
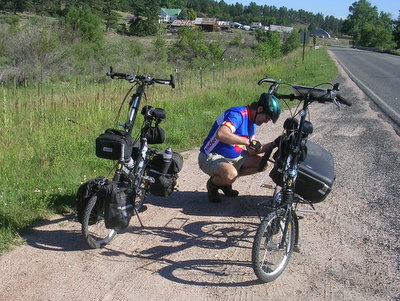
All About Bicycle Chains (A Touring Perspective)
Top, Mechanical Issues Directory
- All About Bicycle Chains Directory -
Field or Touring Issues/Solutions: Re-Attach a Broken Chain, Loosen a Kinked Chain, Field Clean and Lube a Chain, Wisdom 2, Field Repair
Errata: Noise Symptom/Solution Directory [Chain Noise as well as Other Noises]
The presentaion of this information is from a Touring Perspective (Fully Loaded, with Panniers and/or Trailer, sometimes with Camp Gear (this is not about racing, cruising, road biking, nor mountain cross).
Chain Facts and Background:
- No matter how many sprocket rings a derailer bike has, the sprockets themselves must operate a chain using 3/32" (2.38mm) wide rollers, and
- While chains get more and more narrower overall for cassettes with more and more sprockets (10 speed and 11 speed rear cassettes) the inside diameter for the chain has remained at 3/32" (2.38mm).
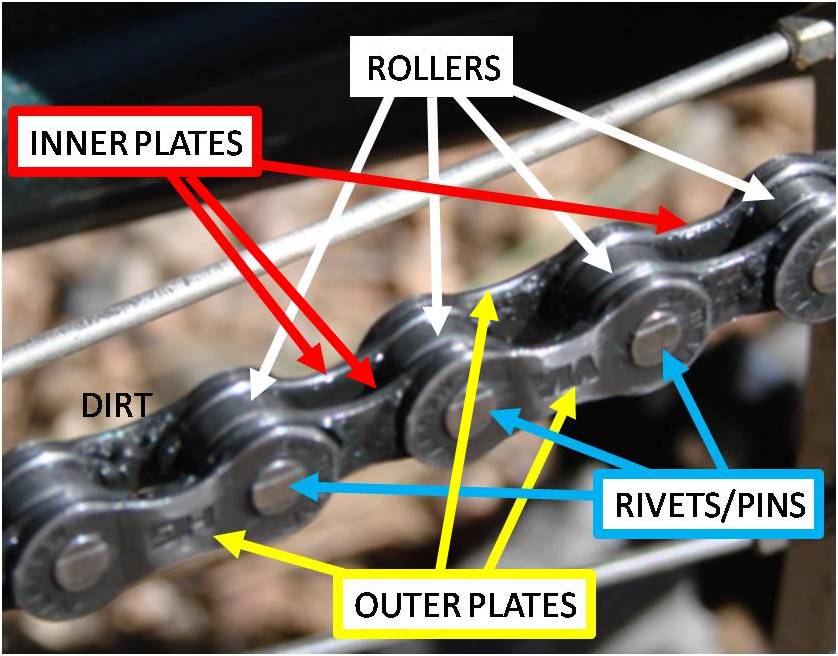 Almost all new chain pin/rivet centers are exactly one half (1/2) an inch apart from center to center (called pitch) or it can be measured from the front of the roller to the front of the next roller. The bicycle chain's 1/2 inch pitch measure (and international chain pitch standard) traces back to the first days of chain-driven velocipedes (old high-wheel style bikes; this was before anyone realized that by using a chain, one could have smaller wheels). Most new chains, for almost every chain based bike created today, have a 1/2 inch pitch (99.99%).
More Facts: One link is 1 inch and is composed of 2 linear link plates (an outer plate and an inner plate connected about a pin/rivet). The outer plates and the rivet/pin are fixed (usually stamped, peened, and/or riveted - not supposed to move on one another); the inner plate is supposed to rotate about the pin/rivet.
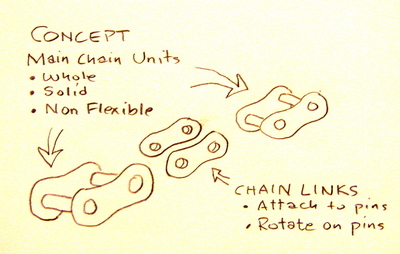 What No One Tells You: The Outer Plates are attached to the Pin (or Rivet) - The Outer Plates and Pin/Rivet do not rotate because the Outer Plates and Pin/Rivet are one fixed component. It is the Inner Plates and Roller that must freely rotate around the Pin (or Rivet). The Inner Plates give the chain its linked flexibility and rotation ability. It is the Rollers that wear out (inner diameter and outer diameter) and give cause to replace the chain.
How to Re-Attach a Broken Chain. How to Loosen a Kinked Chain.
Terms 1: A 9 Speed Chain means that the chain is made for a bicycle that has 9 cogs on the rear wheel/hub; therefore a 10 Speed Chain is for a bicycle that has 10 cogs on the rear wheel/hub. A 9 Pin replacement Pin is just for a 9 speed chain pin, ditto 10 Pin for 10 speed chain. [No 10 pin bowling jokes today.] One may see a pin designation like 7/8 Pin or 7/8 Link, which means a link or pin that works for 7 or 8 speed chain pin replacement. Usually, especially for warranty and safety purposes, a cyclist will want to use pins and links made by the same manufacturer as the chain, but there are 3rd party vendors that sell replacement pins and links that warrant their products as suitable for use with certain chains. 3rd Party Vendor means 'Not the Product Manufacturer' (of the Chain) and 'Not the Bike Shop'. It just happens that many 7 and 8 speed chain parts are sometimes compatible with one another (explained in the next paragraph)
Most multi speed chains (aka derailer chains, which means chains used for shifting Versus chains for fixed gear bikes [sometimes called 'Fixies']) run on 3/32" (2.38mm) wide rollers. So,
Bicycle Chain Quick Summary: All Bicycle Chain Pitch's are 1/2" (inch) from roller center to center (or front to front) with an ANSI (American National Standards Institute) set of common design and measure characteristics. A Link is formed by two half links and is 1" in total pitch and consists of two inner and two outer plates (and their components: pins, rollers, and formerly bushings). The main chain unit is fixed and does not flex; it is the inner links that rotate about the main chain unit (around a pin or rivet).
Chain Size, Speed, Width:
Top, Mechanical Issues Directory, Chain Sub-Directory
-
Chain Size for 5 Speed Chains: Same as 6 Speed.*
Chain Size for 6 Speed Chains: 3/32" (2.38mm) I.D.; 7.6-8.0mm O.D. (8.0mm + is common).*
Chain Size for 7 Speed Chains: Same as 8 Speed.
Chain Size for 8 Speed Chains: 3/32" (2.38mm) I.D.; 7.2-7.4mm O.D.
Chain Size for 9 Speed Chains: 3/32" (2.38mm) I.D.; 6.6-6.8mm O.D.
Chain Size for 10 Speed Chains: 3/32" (2.38mm) I.D.; 5.8-6.1mm O.D.
Chain Size for 11 Speed Chains: 3/32" (2.38mm) I.D.; 5.5mm O.D.
* No problem replacing old 5 or 6 speed bike chains with newer 8 or 9 speed bike chains.
- I.D. = Inside Diameter, O.D. = Outside Diameter.
- The Inside Diameter is the distance between two inner plates, not to be confused with the diameter of the roller but it can be the nominal roller width.
- The Outside Diameter is the greatest distance between, either, the outside of the outer plates or the outside of the widest pin/rivet [John Barnett]. Admittedly, some stated O.D. Chain Dimensions may have measured only the greatest outer plate distance (when rivets may be slightly wider). It is often the pin or rivet that wears on a neighboring sprocket and that is why the greatest diameter distance is the most important measurment - Also that is a reason why one looks for protruding pins or rivets in a chain inspection.
- HINT: If old cogs are wider than 2.6mm then the chain must be 1/8" (and not 3/32").
- Almost all chain measurements presented here are sourced to Barnett's Manual DX v7.09 or Mechanic Classroom Education Handouts at BBI (2010.02) or John Barnett himself (4/7/2010, 6/28/11).
Terms 2, Extended/Related Chain Issues:
-
The rear group of sprockets can also be called a cassette or a cluster and may have none, one, more, or all sprockets be replaceable as individual sprockets (often directly proportional to cost). Older bikes had sprockets called cogs on a Freewheel (part of the hub) versus, now mostly on a Free-Hub (independent of the hub or free of the hub). Technically, cog and gear are inappropriate words because gears are driven by a drive gear and NOT driven by a Chain; Cogs, supposedly, are for On-Hub Mounts (verses an Off-the-Hub mount) - However, the front sprocket/ring sizes and rear sprocket/cog/cassette sizes (identified by Tooth count where the teeth have a 1/2 pitch) combine to yield different [gearing] ratios (that yield different linear inch measurements per wheel revolution). BMX means Bicycle Mountain Cross-country. A bike with a 5 speed rear freewheel and 2 front crank rings was called a 10 speed bike (5 x 2). So a 10 speed bike has a 5 speed chain and a 5 speed rear cluster but don't confuse the term '10 speed bike' with '10 speed chain', two different ideas.
Two leading bicycle chain manufacturers are Shimano and SRAM (initials of owners, pronounced Schram); many other good manufacturers exist in the market place. At present, all Shimano bicycle chains use pins and only pins for connecting or reconnecting chains. SRAM uses master links to connect or reconnect chains. As one may imagine, different chain speeds use different link sizes. As far as I can determine, SRAM links are called PowerLinks for size 7, 8, and 9 speed chains; 7 and 8 speed PowerLinks are interchangeable (because the chain dimensions are the same). SRAM PowerLinks are reusable in size 7, 8, and 9 - However, size 10, called a PowerLock is not reusable. It is highly advised (for safety and warranty) that when one installs a 'new' SRAM 7, 8, or 9 speed chain, one should use a new PowerLink(s). SRAM PowerLock 10 is a one-time use only kind of connecting link. Meanwhile, as one may now intuit, Shimano has different replacement pins for each chain speed and one should never reuse a pin (for Warranty, liability, and safety purposes). Whew.
Chain Length:
Top, Mechanical Issues Directory, Chain Sub-Directory
For Derailer Shift Systems:
- Chain TOO SHORT Rule: The Chain Length is too short when the chain fits around the bicycle's Two Largest Cogs/Rings and the chain only contacts two or less teeth of the pulleys (aka jockey wheels) at any time. The chain is long enough if it touches three pulley teeth of either pulley.
- Chain TOO LONG Rule: The Chain Length is too long when the chain fits around the bicycle's Two Smallest Cogs/Rings and the chain touches itself after running around the tension pulley. No slack in the top chain run.
- Chain BEST LENGTH: There is NO Perfect Chain Length Formula that always works for every cassette, crank, derailer, or chain combination.
- If the Old System's Chain Length was OK and NO Componets were changed: If just replacing the chain, then make the new chain the same length as the old chain.
- Different Components or Bicycle? Size the Chain: Set the shifters for the smallest cogs, front and rear. Thread the chain through the cages and hold the chain with a Chain Holder such that chain link(s) may be added or subtracted to the on bike chain length. Add full links (two link plates in a row) one full link at a time to the Chain Holder until the chain is too long (per the above Chain TOO LONG Rule). Then shorten the chain by 1 to 3 plates, depending on using pins or a master link. Before actually connecting the chain ends, validate that there will not be a violation of the Chain TOO LONG Rule or the Chain TOO SHORT Rule.
- A GOOD Bicycle Chain LENGTH General-Rule:
- Before:
- Some bikes with rear suspension shock systems flex in a manner that pulls on the chain and therefore the chain needs to be measured for the fully stretched state.
- Some bikes have adjustable fore-aft rear axle mounts, reset to shortest adjustment setting (realizing that one can lengthen but not shorten the run).
- Some bikes have eccentric (adjustable) crank housings, reset to shortest adjustment setting (or neutral housing setting and be sure to NOT move the eccentric's chain line left or right).
- Some multi-gear hubs, internal hubs, and/or automatic gear systems may have a chain adjustment setting, reset to shortest adjustment setting or re-set as directed/required by the system manual (also, a cable adjustment may be in order).
- Note that when unusual components or new components are present, one should check its affect on chain length and chain line.
- Run the chain around the largest rings (cage threading is not usually needed but with two ring front derailers one may need to thread through or else the cage may be in the way).
- Pull the chain tight (the chain usually wants to fall off, use a friend or device to prevent the chain from falling off).
- Note: How the chain meets for connection can be different, depending on whether a master link is used (inner plate to inner plate) or if a pin is used (inner plate to outer plate) - properly account for correct chain meet-up.
- Determine where the links will meet AND account for whether it is a pin or masterlink connection. If the links don't quite come together then add another link or half link (depending on whether a pin or masterlink is to be used). Don't mark or cut the chain yet, there is another step.
- Note the count/measure point AND Add One more Full Link (1 inch) to that measure. Mark or tape the chain for a break point (pin removal location) BUT don't un-pin the chain yet.
- Set the derailers (for Big to Big sprockets), thread the chain through the cages and around the pulleys, tie the chain where it needs to meet (adjust for the absence of a master link if that is the connection method), then Double check for any reason that the chain should be longer AND validate that the chain does not exceed the Chain-too-Short Rule (previous section). Adjust the break/un-pin point if needed.
- Re-Set the derailers and chain (Small to Small sprockets) AND validate that the chain does not fail the Chain-too-Long Rule (previous section). Adjust the break/un-pin point if needed.
- Break/Un-Pin the chain (as required), ensure that the chain is setup through the Derailer Cages and Pulleys AND then connect the chain (See How to Pin or Masterlink a Chain).
About New Chains:
Top,
Mechanical Issues Directory,
Chain Sub-Directory
Some new chains come Pre-Lubed with good lubrication oil and some chains arrive with a Preservative that is suspected of being Cosmoline (or like Cosmoline).
- If a cyclist gets a factory oil lubed chain or the factory installs pre-lubed chains, then there is no need for further action, HOWEVER there is nothing wrong with a re-lube for peace of mind.
- Cosmoline was originally a military rust and corrosion preservative that feels like an ultra thin coating of tar. Cosmoline is now used all over the world as a metal preservative. While Cosmoline or similar preservatives prevent rust or corrosion, it attracts and holds dirty particles like dust, dirt, or earth debris. Dirty Cosmoline will not hurt idle parts but dirty parts will wear faster when put into motion (like on a Cosmoline treated bike chain).
- If a cyclist gets a chain with Cosmoline, then clean it off (it gunks up the system and collects/holds dirt and dust). Several/many wipes with a clean rag will remove most of the Cosmoline, and wiping hard a few times with some regular bicycle oil will do a sufficient enough cleaning job. Keep cleaning until one can drag the chain through a rag in a tight fist without any fibers being pulled out of the rag. WARNING: Do NOT use gasoline! Cleaning with Gasoline is a safety issue and NOT a cleaning issue.
Chain Wear:
Top, Mechanical Issues Directory, Chain Sub-Directory
- It is the roller system that wears out (what wears is the roller [inside and outside], bushing [if it exists], and to a lesser extent the chain rivet/pin). So, as a chain wears over time, the pitch changes (increases in length) and the changing pitch effects increased wear on the connecting sprockets. Chain pitch wear is often, incorrectly, called 'Chain Stretch' (the length of the chain never changes). Thus, a worn chain mal affects sprocket wear. John Barnett states that whether a chain has bushings or not does not affect the chain oiling method [Barnett Manual DX, Ver 7, Ch 26, 2010].
See How to Measure Chain Wear.
See Sprocket/Ring/Gear Wear both for Wear Issues and Chain Noise.
See the Directory of Noise Symtoms and Solutions for other kinds of Chain Noise.
Chain Life Expectancy:
Top,
Mechanical Issues Directory,
Chain Sub-Directory
How many miles should a bicycle chain last? The question is a bit like asking 'How long should an automobile last'. The answer depends on many, to be presented, variables.
- Road bikers (but not necessarily on a road bike) who are light weight, ride in flats or who take hills casually, avoid rain and dirt areas, and clean their chains regularly (like weekly) often report getting 2,000 miles (or more) out of their chains (with a few reports of 4 to 6 thousand miles).
- Cyclists who ride at gusto, always, tend to get around 1000 miles (800-1200 miles). This is a riding style, there is always pedal pressure and they are often out of their seat. Bike type does not matter but this is still mostly from fair weather, hard riding, and hard road miles.
- Hills (taken strongly) and/or all day mountain rides (time spent mostly climbing) can shorten the life of a chain by as high as 25% but 10-15% is typical.
- By far, people who ride on hard roads, versus dirt roads, get more miles from their chain. There can be a 15-25% chain wear difference just for riding on dirt roads.
- The Rider's weight matters; more weight in identical conditions will always result in more chain wear (it shortens chain life expectancy). A 170 pound rider will have about 5-15% more chain wear than a 115 pound rider. A 220 pound rider will have 10-25% more wear than a 115 pound rider.
- Gross bike weight matters, the more the load on a bike, the more that the bike chain wears. A loaded touring bike with panniers will cut chain life by 15-25%.
- Dirt or dirty conditions shorten chain life. By the very environment that people ride mountain bikes (MBs) there is more wear on the bike chain because of dirt wear in the chain that results from dirt in the environment. MBs get about a 15-25% reduction in expected chain life.
- Bicycle trailers offer automatic chain wear. Just adding one wheel increases road rolling resistance by 33% (pedal effort). Put a load in a trailer and typical chain wear increases 15-25% but this wear can be accumulative with dirty chain wear and added weight chain wear which can increase wear by 25-50%.
- Here's the typical Coup de Grâce: A bike setup with panniers (front and back) with a trailer, performing something like the Great Divide MB Route (no matter the type of bike) will be lucky to get as little as 50% chain wear - it can be worse.
- The rear drive chain of a Tandem gets about twice (2x) as much wear as solo bike chains per unit of time.
- A tandem with panniers and a trailer on a mountain road can see accumulative chain wear in the 60% shorter chain life expectancy range.
- Typical real tour loads range from 40 to 80 pounds.
- Ultralight Riders strive to get their load between 20 and 25 pounds (lighter is better).
- Chains that are cleaned often (typically using a penatrant) and are thoroughly dried (compresses air, stove/oven bake dry) done weekly and followed by a proper lubrication will last twice as long (sometimes a little longer) than a chain that is maybe cleaned once month, all other conditions being the same.
- Measuring Chain Wear: There are bike-shop tools that can indicate the states of chain wear but there is a simple do it yourself test. Take the chain off the bike, lay it out on a clean surface (ideal if there is a small nail brad to gently pull the chain slack away) and then measure the distance to the 12th link on the far away side of the roller while pulling on the 12.5" link (12 links or 24 pins is 12 inches, a link is one outer plate pair and one inner plate pair, new roller pitch is exactly 1/2 inch when new) so the accumulated distance at 12 links should be exactly 12 inches. If the total test measured distance is between 12 + 1/16 inch and 12 + 1/8 [=2/16] of an inch, then the chain is to be replaced with a new chain (the chain is worn enough to start mal-affecting the rings and sprockets - replace it! - See next related Bullet).
Consideration: If a cyclist is on tour and at a bike shop and the chain is close to 12 + 1/16 inches (at 12 links or 24 pins, strecthed), then consider installing a new chain if you are not likely to see a bike shop within 14 cycling days (2 cycling weeks). - Sometimes, at super close chain inspection, one may find one roller that is extra worn or damaged. If the rest of the chain is OK, then it is OK to consider replacing just that link section, especially if one happens to have a few spare similarly worn links.
Experience: Carry a few spare links for emergency link replacement and remember to try to be sure that the spare link types match the current chain type (9 speed vs 10 speed, pins for chain-pin match). The other important reason to carry spare links is to replace busted/bent links on a broken chain; this should be part of the tool/repair kit. - It's cheaper to replace a chain than worn rings and sprockets.
- As a rule of thumb, light casual bike riding in ideal conditions and never in dirt or mud will facilitate an environment where rings and sprockets may last for five or six chain replacements (i.e., in ideal conditions rings and sprockets may last 5,000-6,000 miles). There are many bikes out there on their original rings and sprockets (those bikes are not used for touring). Typical Touring Bikes have rings and sprockets that may last for 4,000 miles (about four chain replacements) and the heavy duty tour bikes (panniers and trailer on mountain environments with camp equipment) may last for 3,000 miles (about three chain replacements). This is based on all of the previously listed assertions. Light loads and light riders will have little better results.
- In general, thicker chains seem to last longer than thinner chains. Said another way, 8 Speed chains generally outlast 9 speed chains in identical usage environments, 8 is generally better than 9, ... . See the general chain width/size chart.
Chain Tools Usage Notes:
Top,
Mechanical Issues Directory,
Chain Sub-Directory
 Most chain tools have two chain holding Cradles/Mounts.
Concepts:
- The Front Cradle (or Near Cradle) is designed to work on just one (outer) chain plate, the front most chain plate.
- A bicycle chain Pin may only be pushed (not pulled).
- Only the front chain plate is affected.
- The back chain plate just moves along with the pin movement.
- There is no pin movement on the back plate.
- In order to affect the back plate, the chain unit must be FLIPPED over, thus the back plate becomes the front plate.
- If the inner plates are too tight on the outer plates (or vice versa) then the pin (on at least one chain side, maybe on two sides) needs to be pushed a little more, in order to release the friction/binding between the inner plate(s) and the outer plate(s).
- ALL pin and plate Logical Solutions can only involve pin pushing.
- The Back Cradle (or Far Cradle) is designed to work on both (outer) chain plates, the front and back chain plates.
- A bicycle chain Pin may only be pushed (not pulled).
- The back cradle holds, both, the front chain plate and the rear chain plate steady
- A pin can be and will be pushed through both chain plates.
- In order to connect a chain, a pin must be pushed through a pair of Outer Plates, Inner Plates, and a Roller.
- The distance between the chain tool's back cradle and back wall is fixed and favors a particular (usually specified) chain speed or type (for example 7/8 speed chain versus 9 speed chain; generally a 7/8 speed chain is slightly wider than a 9 speed chain). See Chain Widths
- ALL pin and plate Logical Solutions can only involve pin pushing.
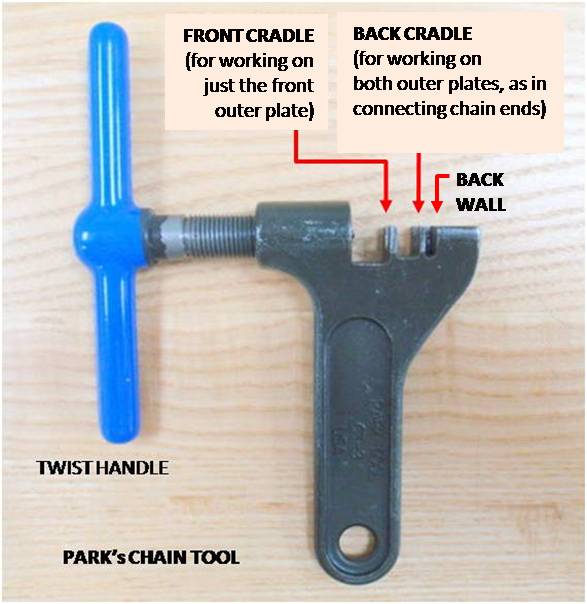 Issue: Different chains have different widths, so a chain tool cannot be universally perfect for every chain. Some chain fixes will necessitate a little plate position adjusting in order to have even link flexibility and pin/rivet evenness (so a slightly protruding pin/rivet does not hang up in a derailer cage to mal effect smooth shifting)
- Wisdom: When connecting additional link segment(s) be sure to align the link plates such that the direction is the same, some indicators are numbers or characters on the side plate that should read the same for existing and replacement links (not upside down, not reversed). Some chains have special groves and notches that are designed to benefit shifting, in fact, because of this, it is suspected that some Campagnolo broken Chains have to replace six links at a time (for something like the chain groove and notch issue) - the point is that replacement links should be arranged like the original chain's links.
- Caution: A tight link (link bind) can cause shifting problems. A Link Bind is a connection that is so tight that the chain does not flex of bend as it rolls across the sprockets or it can sometimes be viewed as kinked in clear air - a person can see a kink in the chain line as it moves through its path. A chain kink (link bind) must be loosened (mechanically by tool and/or physically by hand). Read Next Bullet ...
- Wisdom: The Loosening mount (or front cradle) of a chain tool allows one to apply direct force, reverse force (flip chain over), or just the hold chain while the person flexes the chain back and forth such that the new pin/link connection is no tighter than the rest of the chain links. Sometimes the repair person just has to get a little tough on the manual bending and lateral flexing motions.
Chain Holder:
Top, Mechanical Issues Directory, Chain Sub-Directory
How to make a simple Flat 'C' shaped 'Chain Holder', Mod 3
- Get hold of a thin old spoke or a light to medium duty coat hanger. Shape it such that the Flat C's wide points are 1.9 to 2.0 inches apart.
Note: Wider spokes and heavy duty coat hangers may be too thick for insertion between chain inner plates (to be just less than 3/32 inch or 2.38 mm).
Note: If a the resulting Chain Holder is a hair too thick, then a little side/lateral hammer pounding on the leg ends at the vise anvil is justified (and works).
Note: Chain Holders do not have to be too strong - they are just a convenient 3rd hand 'chain hold together and hold off the ground' tool. - One can make a jig by hammering two nails, 1.9 to 2.0 inches apart, into a piece of wood. One wants a little slack in the chain ends as it helps the pieces fit together easyer
- It does not have to be fancy looking.
- Bend and shape by hand and/or with pliers.
- Trim the legs after the shape is formed.
- Important: File the end cuts free of any burs (or it can scratch a roller).
- Keep one in each tool kit.
- Give as gifts.
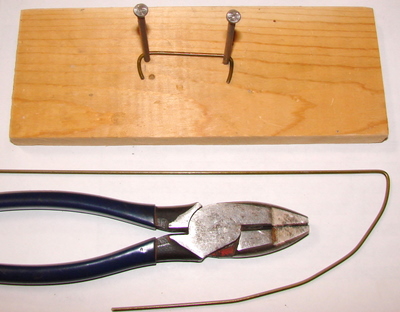
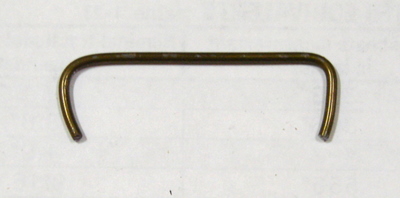
How to Use the 'Chain Holder' for Broken Chain Repair
- It is used to hold two chain ends near each other and to keep the chain off the ground. Chains are attracted to the ground like the peanut-butter side of bread.
- The best placement of a Chain Holder is to hook the pins on each side of the chain end about 1 inch back from each end, thus the end links are ready to be pinned (or master linked). In some cases, the Chain Holder will not fit in between the inner plates, so in that situation the chain holder will have to be fitted between only the outer plates.
- In lieu of having a 'C' hanger, one may use a re-usable zip tie, string, wire tie, or a volunteer to hold the chain ends together (to keep the chain off of the ground and from a free run).
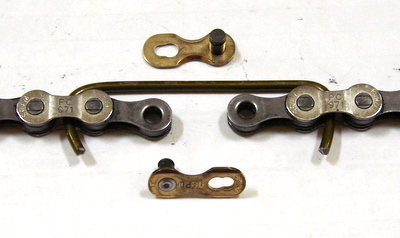
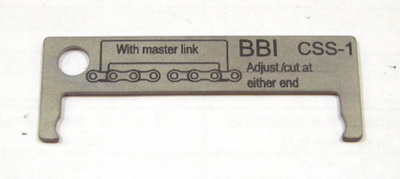
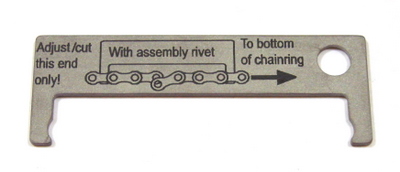
How to Lube a Chain:
Top,
Mechanical Issues Directory,
Chain Sub-Directory
Most chains made from the mid 1990's onward are Bushingless Bearings. There are a few different methods for oiling chains in the cycling industry: most methods are OK, one method is perfect but expensive, and yet another method has effective results and is still economical in its application. NOTE that ALL Chain Lubrication Methods need the chain cycled/pedaled through each and every ring/sprocket (for their lubrication).
- Method A - The Best Lubrication Method is to submerse the chain in clean oil. Waiting/ Soaking/Penetration Time is proportionately longer for heavier viscosity oils. If possible, flex all of the chain components. Pull the chain out after a sufficient plate gap and roller penetration, let drip dry momentarily. It is better to wipe excess oil off the chain before it is mounted to the bicycle (or re-cleaned), but the excess oil and chain can be wiped away while on the bike. This method is very time consuming and expensive.
- Method B (as in BBI - hmmm) - BBI has studied chain oiling methods and the best on-bike application method is very logical. FIRST, the places on a chain that need lubrication are the rollers (which ride rivets/pins or drive sprockets and are driven by cranks) and the link plate surface areas (which rub adjacent link plates, rub against rollers, and ride on the link pin/rivet [or rarely a roller may ride on a bushing, which in turn rides on a pin/rivet]). SECOND, if one quickly streams oil, using a narrow straw tube from/on an oil bottle, across a line where the link plates and roller cross the chain rivet/pin, then one can lubricate the roller and chain plate gaps of one pin and each chain pin must be treated in the same manner. See the Following Picture. Experienced cyclists use a Z or N shaped oiling pattern/motion and the Z/N Oil Method (my made-up name) takes about 30 seconds longer than the former/traditional chain roll drip method (Cat/BBI). This method works effectively, efficiently, and economically, once one gets a little application practice.
- Method C - Oiling the gap on each plate side (in two stages/chain-runs, once for each side). This method is OK but may miss some/many center rollers.
- Method D - Moving the drip bottle over the center of a stationary chain, the chain is rotated in increments between the crank ring and the cassette/cogs; the chain can be lubed on the top run and the bottom run within the same cycle/setting/rotation; somewhere between 2 and 3 crank rotations will usually achieve full chain exposure. This method is OK but may miss some/much side plate gap lubrication (between the inner and outer chain plates).
- Method E - Dripping the oil bottle in one spot while manually rotating the chain (backwards). This method is OK but misses some rollers and may miss many side plate gaps.
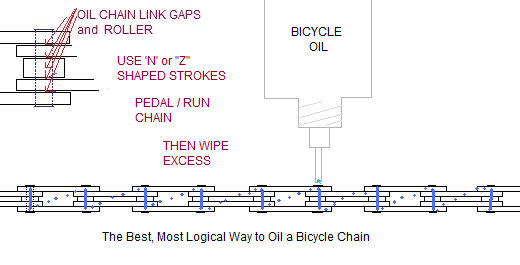
Note: ALL of the methods of chain oil application need the chain to be forward or reverse cycled/pedaled through each and every ring/cassette (for their lubrication). Also, in every case, wipe the excess oil off the chain.
About Penatrant Cleaners/Lubricants:
Top,
Mechanical Issues Directory,
Chain Sub-Directory
A Penatrant is a low viscosity fluid (about the consistency of water) primarily used as a corrosion or rust destroyer, corrosion stopper, corrosion cleaner, dirt remover, wax remover, grime disolver, old oil remover, and general metal cleaner. Penatrants can sometimes be used as a short lasting lubricant depending on its viscosity and the penatrant may be mixed with one or more added lubricants (usually in forms of light oil).
Warning; Not a single penatrant can be used in a closed space nor around an open flame. Penatrants can be extremely volatile and/or explosive (like gasoline) or they can be less volatile (like kerosene) but still flammable and dangerous to use.
- Why is the Subject of Penatrant Lubrication Important: Penatrant Lubricants are liquids (like gasoline) that have chemical properties that facilitate getting into very small nooks and crannies; penatrants can temporarily break-up or stop a corrosive or galvanic process and penatrants can temporarily act as a lubricant, but like water, penatrants are short lived. When penatrants are mixed with light weight oil, the penatrant can act as a clearing agent to introduce oil to a small nooks or cranny area (like the space between a chain roller and pin or between chain plates and rollers), but penatrants can keep oil from adhering to a chain roller, side plate, or pin.
- Some Products with Penatrant Properties Are:
- Gasoline (very dangerous to use)
- White Gasoline (very dangerous to use)
- Naptha (very dangerous to use)
- Coleman Fuel (very dangerous to use)
- Carburetor Spray Cleaner
- Diesel
- Kerosene
- JP4 (Aviation Turbine Fuel - high grade diesel/kerosene; JP5 = JP4 + Antifreeze additive [also OK to use])
- Mineral Spirits (the word 'Mineral' only means that it came from the ground) aka White Spirit
- Mineral Oil (avoid Plant and Animal Oils also; Synthetic Oil/Penatrants are OK - use safely)
- Alcohol (very dangerous to use)
- Paint Thinner (Most Paint Thinners have Additives; Don't use a Paint Thinner with Additives).
- Some Mixed Penatrant and Oil Lubricant Products Are (light weight oil(s) and/or penatrant mixes):
- WD-40 (and its clones)
- Probably 3-In-1 Oil (cleans and lubricates bicycle chains - key word is 'Clean')
- Some light Machine Oils (key word on the label is 'Clean')
- Does a Penatrant clear the way for further heavier Oil/Lubrication, or,
Does a Penatrant repel heavier Oil/Lubrication?
The answer is YES! The result is very conditional:The answer has to do with whether penatrants and multiple oil fluids keep their individual identities/properties or if the mixes of liquids meld their properties. The penatrant part of the mix will be the first compound to evaporate or disappear; penatrant evaporation is just a matter of time (usually 24 hours). Unfortunately, the typical touring cyclist usually does not have the time to wait around for a day or two. So the safest biker behavior for using a penatrant is to make sure that the penatrant is Evaporated/Removed before adding any further Lubrication. In a bike shop, the Techs/Mechs will typically use a high pressure air hose/nozzle to blow out or dry out a bike chain. At home some cyclists put their chain in an oven/stove (bake setting) and evaporate (by heat) remnant penatrant; some home cyclists have heat blowers (like a hand held hair dryer).1,3 In the field a cyclist will need to use evaporation and/or heat (sun hitting a chain in an open sandwich bag). In the field, a smart touring cyclist will alternate between two chains, thus allowing for penatrant evaporation (usually 24 hours), the use of two chains will slow down initial sprocket wear (front and back), it allows a cyclist to keep moving (versus waiting for a chain to dry), it removes the stress around chain care and management (did I wait long enough, will the oil/lube take hold), and, it is nice to have a backup chain for touring. Remember to oil the just cleaned chain on the following day.
- Bike Shops usually use Compressed Air1,2 to expedite the drying process (no matter the type chain cleaning agent).
- Some bikers use heat guns1,3 (like what electricians use for shrink wrap, like a hand held hair dryer) to expedite the drying process. Some cyclists use their home oven/stove to Bake/evaporate the penatrant.
Caution:Use protective gloves (heat proof, silicon, welder, or thick) for heat. In the field it is difficult to make the penatrant remnant evaporate in a timely manner; usually a chain needs to be exposed to a warm sun on a warm day to help evaporate penatrant remnant (place the chain in a clear plastic bag to enhance an oven effect).
Caution: Lingering Penatrant on a chain may prevent oil from reaching necessary inner friction areas.
Warning 1: Wipe all chains as well as one can before blowing, baking, drying, or lubricating (as well as for cleaning, the process reduces flammability, especially for any form of heat drying).
Warning 2: Beware of what may be in a compressed air nozzle and beware of the background blow area. A lightly held object can be blown out of the hand or holder. Over spray can cause undesired effects or safety issues.
Warning 3: Some hand held heat blowers can ignite flammable chain cleaning solvents/penatrants, be very careful, pre-wipe the chain of any free liquid with a clean rag, work in an open ventilated area free of any flammable materials and properly store all used rags and solvents. Some bike shops will not allow heat blowers inside their facility (an enclosure/ventilation issue).
Warning 4: Always plan an escape route in case of flame (think drop and roll, where to go and where to not go). Always work where a fire will not burn anything else of value nor spread.
About Cleaning a Bicycle Chain and Bicycle Chain Cleaning Issues:
Top,
Mechanical Issues Directory,
Chain Sub-Directory
Before the Gate (a priori) Some FACTS:
- Water Causes Rust or Corrosion, Period.
- Bicycle Chain Cleaning Products that are water soluble cannot be completely removed by water rinsing.
- Water from rinsing cannot be completely removed.
- Caution: Any bicycle chain cleaning activity that uses water can result in rust or corrosion particularly in the very areas that need lubrication (oil protection).
- WAX is NOT a Lubricant, But.
- Wax can protect metal.
- Wax can help prevent dirt collection (why Mom used to wax the floor).
- Wax can temporarily prevent metal to metal contact (so can water) but it is not lasting.
- Wax can prevent water penetration but it can also prevent oil penetration.
- Oil Refineries (aka Distilleries) work very hard to remove wax from raw oil because of the wax's damaging effect in heated enclosed automobile engines.
- Once there is a wax buildup in bicycle chains, it is very difficult to remove.
- Wax, because of its thick viscosity (even when melted/heated), cannot reach all roller and pin friction areas and may block (less viscous) oil penetration or may dissipate leaving no lubricant
- Teflon is NOT a Lubricant, But.
- Teflon's use came from the aviation industry (in terms of highly heated and closed bearing survival and longevity). Aircraft bearing based moving parts see a lot of heat and a lot of activity and are carefully monitored - lives depend on processes working correctly and dependably.
- Teflon (a product of DuPont) is a Fluoropolymer, a type of Polymer (discussed in subsequent lubrication caveat).
- Polymers are added to oil lubricants to enhance lubrication capabilities.
- Teflon does not attract dirt or grit and extends the life or usefulness of metal on metal friction.
- There do not seem to be any buildup or cleanup issues regarding Teflon use (certainly, not like wax).
- Penatrants are NOT a Lubricant, But.
- List of Penatrant Types.
- Examples of Mixed/Combined Penatrant/Oil-Lubricants Products.
- Penatrants can be used for cleaning a chain.
- Penatrants dissipate or evaporate after a period of time (typically about 24 hours unless heated and aired).
- Penatrants can help clear the way for proper (more viscous) oil lubrication to a chain.
- Penatrants can briefly serve as an emergency lubricant for a short period of time (typically about 2 to 4 hours).
- In most situations, just after a penatrant application to a chain, penatrants can prevent oil penetration AND repel an immediate oil application to the chain. Freshly applied penatrants can cause oil to fling off a moving bike chain.
- Use Nitrile or Latex like gloves for cleaning.
- The BEST Chain Lubrication process is complete emersion soaking in oil for a time that allows for full penetration to all chain part surface areas. Sometimes chain flexing (or 'Exercise' expedites complete oil penetration). Heat and vibration shaking seem to expedite full surface area oil contact. Hot oil has safety issues. See Best Oil Lubrication Method (the previous section), as well as other oil lubrication methods.
Chain Related Touring Wisdom:
Top,
Mechanical Issues Directory,
Chain Sub-Directory
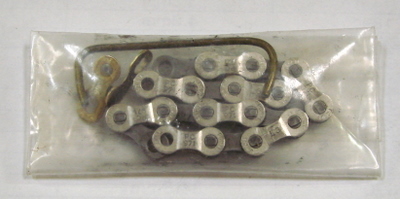 A touring cyclist should have and carry the appropriate replacement chain pins or master links for their bikes. Mountain Touring seems to have a higher percentage or likelihood of broken chains than road touring. A touring cyclist should have and carry spare chain link sections because when a chain breaks there is usually a damaged link plate or two. Therefore a half link or two may need to be removed and replaced as well as replacing the original broken link.
- Experience: One needs a clean rag and oil because when a chain breaks, the chain is either on the ground or dragging on the ground.
- Experience/Caution: Over time, many cyclists may have changed chains and chain manufacturers many times but may not have kept up with correct and matching chain segments, pins, or links (stored in the tool bag - 'out of sight, out of mind')
- Experience/Caution: Over time many cyclists come to possess more than one bicycle and when they carry the same tools and/or tool kit on the various bikes, it becomes possible that one may be carrying the wrong links and/or pins (as well as wrong tubes) for the current ridden bike. Experienced riders need to be aware of this kind of situation.
- Experience: Make an effort to have spare/replacement links and/or pins, and chain segments for the chain that is actually on the bike.
- Experience: In emergency type situations, we have reused pins with success (just to get back to civilization and then address the chain issue).
- Experience: We have mixed chain links, we have used master links on other brand chains (even with a chain size difference), and we have mixed chain segments from different manufacturers, all with no issues for us and all chain issues were later addressed and corrected later at a bike shop.
- Warning: Some hand held heat blowers can ignite flammable chain cleaning solvents/penatrants, be very careful, pre-wipe the chain of any free liquid with a clean rag, work in an open ventilated area free of any flammable materials and properly store all used rags and solvents. Many bike shops will not allow heat blowers in their facility.
- BLOG Chain Feedback/Comments: There is a sort of generalized movement among tour bike cyclists (mountain or road) and road bike cyclists (thus excluding BMX, track, fixies, and cruiser bikes) for changing chains to SRAM chains for the convenience of PowerLinks over Shimano Pin driven systems. Many Bloggers speak of ease of chain removal for cleaning, especially mountain bikers/tourers, on the other hand, there is a small contingency of riders (stump jumpers, trick riders, and city curb jumpers) that complain of PowerLinks breaking.
Chain Cleaning Methods and Issues (Between the Extremes)
Top, Mechanical Issues Directory, Chain Sub-Directory
- Tour Survival - Chain Lubrication (Experience):
- First Choice, use any known bicycle oil (those sold in bike shops - Wax is OK in some cases and Teflon is always OK).
- Second use a product advertised as bicycle oil (but not a product that lists many uses and bicycle chain lubrication is one of the items on the list - those products probably belong in Item 5).
- Third, Chainsaw Bar and Chain Oil (in the USA it is always 30 Weight unless otherwise indicated; it has No Additives Nor Detergents; available in quart or gallon jug, must transfer into dependable delivery device, the transfer and delivery device are always problematic).
- Fourth, Automobile Engine Oil and synthetic automobile engine oil work just fine on bicycles. See - About Automobile Oil Viscosity. Multi Weight is OK but will likely operate only at first Weight listing (left side).
- Transaxle/hipoid/hypoid/rear-differential 80/90 Wt oil (summer dessert), wheel bearing grease, two ounce tube of general purpose bicycle grease. Motor Cycle Chains use lubricants in this weight class (but note that Motor Cycle Chains get hotter than bicycle chains, both from usage friction and engine-transmission heat).
Comment (2012): Motorcycle Lubes have mostly gone to light weight chain lubricants (in various spray delivery systems) rather than and away from heavy weight chain lubricants.
Comment (2012): Motorcycle Chain Lubricants use wax and/or Teflon in what seems about the same distribution as Bicycle Chain products.
Comment (2012): Motorcycle Chain lubes also face the same 'Lube drips on Rim' issues as Bicycles. I.e., wipe the chain of excess and wipe oil drops from the bike, especially on the rim and fame area. - Borderline Penatrants: Lubes like WD-40, 3-In-1 Oil, and light machine oil are usually good for 2-4 tour load hours (just re-apply when needed, at or just before the first sound of chain squeak).
- Finally, in the field, any lubrication is better than nothing. Cyclists have gotten by on vegetable oil, olive-oil, sun-screen, hand cream, Vaseline, mineral oil, and mineral spirits.
- Tour Survival - Chain Cleaning Methods: Virtually any effort to clean and lube a chain will result in a longer lasting bicycle chain (to include periodic wiping, if nothing else).
- A little Coleman fuel in a re-claimed jar with lid will clean a chain - Shake it! Repeat, till clean - I find that usually three cycles/times will do the job. Yes, using White Gas or Naptha can be Dangerous but it is a cleaning fluid that is on hand or sold in a camp store in a camp ground - First heard of from Sheldon Brown (called the 2 Liter Coke Bottle Method; one may need a wire to retrieve the chain through the narrow cap opening).
Notes:- Look for mayonnaise sized jars in rubbish bins to clean and use for this task. Peanut butter or jelly jars work just as well, any jar or bottle of this size; big mouth lid openings are easier to use than smallmouth openings but smallmouth is better than nothing.
- This task will get the hands dirty and even after cleaning/wiping hands in in clean fuel there will still be a slight dark film tint on the hands that even soap and water will have a hard time cleaning off the first time.
- On a tour, let the thicker skinned person(s) of the group perform this task.
- If there is a safe recycling repository, use it; avoid pouring the remains directly onto the earth. Never perform this task unless there is a dead tree, flat rock, or news paper to pour onto in order to let nature and evaporation work its magic.
- Warning: Don't perform this task if there is an open fire or chance of ignition from any source, anywhere.
- A little Coleman fuel in a re-claimed jar with lid will clean a chain - Shake it! Repeat, till clean - I find that usually three cycles/times will do the job. Yes, using White Gas or Naptha can be Dangerous but it is a cleaning fluid that is on hand or sold in a camp store in a camp ground - First heard of from Sheldon Brown (called the 2 Liter Coke Bottle Method; one may need a wire to retrieve the chain through the narrow cap opening).
- Hand pedaling the chain through a Diesel Fuel soaked rag will work wonders toward cleaning a chain (works with Mineral Oil and Kerosene too).
- Taking the chain off the bike and rag scrubbing the chain in a pie-tin or disposable plastic sandwich box or any open container will get a chain fairly clean. One may be amazed at what can be found on the roadside if one knows to look for clean rags and clean large mouth bottles (even big clean plastic coke bottles work just fine for shake clean methods - one may need to use a wire to retrieve a chain end).
- Water based cleaners like Bio or Eco labeled Chain Cleaners solutions, Simple-Green, Orange Oil, or some Liquid Soaps will clean a chain in a jar or on the bike. Chain Degreaser Spray will also work on the bike (repeat use, just like for bottle shake). An advantage is that splatter on the bike can be washed off with a water bottle and rag. Also, this method has the least worries and least additional effort for properly disposing of dirty fluids, just wash the ground and put the rags into a trash container while enroute somewhere. However, note that remnant water will always cause rust/oxidation and there is a fine line between allowing enough time to let water evaporate/dry and lubricate with oil while any remnant water will prevent proper lubrication.
- Campgrounds and motels often offer rags upon request (so people won't use hotel towels - very déclassé) - this is particularly true to lodging facilities that support motorcycle clubs and/or snow mobile owners (common in the Northern and Western USA).
- Even spraying and rubbing a chain down with WD-40 will get the chain pretty clean. It really helps to dry the chain when done (swing the chain clean in an open area and/or hand dry wipe it and/or it helps more if the mid-day hot sun can use direct sun light to heat and evaporate the light weight cleaners, fuels, or penatrants consider setting the chain in a clean jar or plastic bag (a solar heater concept).
- Another old time remedy is to scrub a chain with a toothbrush or similar parts brush using any solution cleaner or penatrant or even oil (to include auto oil) - replenish dirty solution with clean solution as you go. Use discarded bottles on the road side to hold discarded waste and dispose of as properly as one can - We've carried trash (and dirty rags and used dirty fluid for a day or two) for proper disposal.
- Clean oil can be used to clean a chain and the biggest benefit from that process is that one does not have to re-lube the chain once the chain is sufficiently clean, it's already lubed! Recycling dirty oil is the easiest liquid to recycle (not counting water).
- Some people have used Exterior Engine Oil Degreaser (both with water or by rag wipe), in both cases it is a case of something is better than nothing but it is not the best long run cleaning method over time.
- If one is on tour and runs the bike through a hand held car wash system, using degreaser and then wet rinse clean, followed by hands on rag drying followed by a proper chain oil/lube job, then one can use a car wash; one needs to know what one is doing. Motor cycle chain degreaser and foam degreaser work with the same knowledge caveat. One of the caveats about using car washes is that accidently spraying the crank and hub bearing areas can create another problem (water in the bearings), a much more expensive issue to address whether it's the cost of your time and/or your money.
- One Chain Cleaning method is to use a flat low profile pan/lid like a cookie tin lid or the tin itself (or a Frisbee or a solid pie tin - The original Frisbee Company made commercial pie tins).
- A commercial product that is a combined Chain and Tooth Brush (as in sprocket teeth, not human teeth) remains the best cleaning tool - Yes it is worth carrying on a tour!
- Towels and rags are necessary for several chain wiping iterations.
- Use a jar or empty oil can to capture dirty oil or cleaner. It is dirty work, no way around it, wear gloves.
- Properly dispose of all used cleaning components.
- Before re-mounting the chain, insure that the sprockets have been cleaned - the Sprocket Tooth Brush works best. This process is always messier. The rear cassette is best cleaned with the wheel off the bike. The front crank rings are best cleaned with the crank arm and rings removed from the bike (most upper line bikes allow this, but not all). Very often the only way to reach deep is with a plastic knife (eating wear knife or a deep reach bicycle serrated blade of about 1/4 inch or 1 cm gapped and spaced triangle shaped teeth).
- Don't forget to clean the pulleys but try not to get cleaning fluid in the pulley bearing area, see Derailer Pulleys (aka Jockey Wheels) for cleaning and lubing issues.
- When reconnecting a chain (if removed from the bike for cleaning): Place the bike gear derailer settings to the smallest rings, get a chain holder (I use a thin coat hanger in a C shape - it can be used to hook the chain to a frame component or to hook the chain end to end). Initially wrap the chain around the smallest rear sprocket and around the front crank housing (bottom bracket). Use the chain holder and then thread the chain through the derailer cages (be careful on the rear derailer pulleys, as it is easy to thread in an improper direction) and then pin or link the chain together. Be careful not to drop or drag the chain on the ground.
A problem with using auto oil is placing a usable quantity of oil into some kind of delivery container. It's difficult finding something that does not leak. I've re-used oil drip bottles and I've used oil soaked rags with OK success (spinning pedals through the gears to evenly distribute the oil). Even quart sized bottles leak once they are opened; gallon sized plastic zipper bags can handle many oil bottle sizes (but not all). Store low, just like with water purifier Chlorine Dioxide.

(Other more practical Chain Cleaning Methods are listed under Touring Methods)
- The MOST EFFICIENT Bicycle Chain Cleaning system uses a liquid penatrant mixed along with vigorous physical brushing and ultrasonic chain vibration/shaking (chain off the bike).
- Warning: All Penatrants are flammable and dangerous; some are more explosive than others
- Diesel and Kerosene are the safer to use products of the listed Penatrant Products.
- This is not an approval for using explosive fuels, but the products in the Class of Penatrants are currently the most efficient cleaning liquids (efficient: shortest amount of time to get the job done well).
- The chain cleaning process requires time to remove the penatrant physically or to allow proper evaporation. The penatrant evaporation process can be expedited by an air hose blowing but in order to be thorough; otherwise it takes time for the penatrant to evaporate. In the field, one can swing the chain (remove loose pieces first, wink) and one can lay out the chain in direct midday hot sunlight. In the field, one can hand dry with a rag/towel as much as possible.
- The best field practice is to alternate between two chains, thus the new spare chain can have time to let the penatrant evaporate (24 hrs).
- The best cleaning system uses a clean solution (for each cleaning cycle/iteration). It is not unusual to need four cleaning cycles. This process is expensive and time consuming but it is the most efficient bicycle chain cleaning method. Be sure to properly dispose of remnant cleaner.
- An ultrasonic vibrator is best BUT hand shaking, especially in a bottle like container is very effective and clean empty bottles with a little liquid penatrant like diesel or mineral spirits can be very efficient and effective on the trail side.
- A dedicated cleaning tooth brush is a perfect tool for hand cleaning grit. Wear gloves (Latex, Nitrile, ...), otherwise the stain will last two-three days on the hand.
- Be sure to wipe a clean chain with a rag as well as possible to rid it of any loose or lingering penatrant fluid.
- Heat can be used for the evaporation process (like direct heat of the day sunlight exposure, which can be time consuming) or a heater/blower device may be used in a shop (again safety is a huge issue); some home cyclists use blow dryers (with heat resistant gloves) or some cyclists bake their chain in an oven (to heat evaporate the remnant penatrant).
- The MOST EFFECTIVE Bicycle Chain Cleaning System is to use Oil as a Cleaner:
Sheldon Brown uses this same argument with less elaboration. - Gasoline (a penatrant) can be dangerous to use, Water and WaterproofWater Soluble Products leave water remnants (rust) or cleaning product (corrosion) hidden in the bicycle chain's friction areas (nooks and crannies), and Wax is not a Lubricant and can cause problems in the long run (dry metal to metal rub and dam further oil penetration). Note that other liquid penatrants exist, like diesel fuel, mineral oil, mineral spirits and others; other penatrants may not be as explosive as gasoline but are still more flammable than oil. See Penatrants.
- One issue with using oil for cleaning is removing dirty oil, proper/safe disposal of the oil, and how to clean oneself or keep oneself from getting dirty. Soap and water works great for cleaning one's self but dirty grimy greasy stains on the hands, arms, or face may last for days and stains on clothing may be permanent in the field but take much effort to remove at home. Clean rags work great for removing excess clean oil and for removing dirty grit on the chain. The use of disposable gloves (Latex, Nitrile, ...) helps greatly to keep one's self clean.
- So far, the monetary costs of using oil to clean oil are the same or less expensive than using other bicycle chain cleaning products and/or using bicycle chain oil to clean a bike chain.
- Another issue for using any bicycle chain cleaning product is safety of use. Does the cleaner have any carcinogen properties or any negative environmental properties? While unprocessed oil comes from the ground/earth, returning processed oil to the earth is bad for drinking water and water tables. However, more so than for any other cleaning agent, there are more oil recycling centers than for any other cleaning liquid (not counting sewage and water treatment plants).
- Many auto parts stores and many specialty lube shops conduct oil recycling. Arrange to visit one of these locations while pedaling through a town or while in a campground at a town's edge.
- Sheldon Brown recommends using Chainsaw and Bar Oil, a good recommendation, but it is important to understand the reasoning. Chainsaw and Bar Oil is usually 30 Weight oil with No Additives and NO Detergents, it's just pure oil. It's the lack of additives and detergents that is important to Sheldon; however it is not a problem to use automobile oil (SAE 30 Wt or even other Oil Viscosities/Weights), read on. In lieu of pure 30 Weight oil, then auto oil is a perfectly fine substitute, both for cleaning as well as for bicycle chain lubrication. In addition, I would add this caveat: I would consider heavier weight lubrication for really hot climates (just like for automobiles) and I would consider lighter weight lubrication for cold climate riding (I ride in the winter in Colorado and this is a real issue and solution). Meanwhile, back to the cleaning subject, I find that lighter weight oils are effective for cleaning.
- Handling dirty oil can be messy and may take a few cleaning iterations. Use oil sparingly and recycle dirty oil. Use a Combination Tooth-Brush Tool for the actual scrubbing of a chain (use the Chain Brush for scrubbing exterior plates and rollers, and use the Sprocket Tooth Brush for the interior plates and rollers). Oil can be filtered at home but there are few applications for home filtered oil - If you have an application, by all means use it (and let me know about it). In the field, one should take dirty oil to an oil recycling location - it can't be burned off like dirty Coleman Fuel or dirty Diesel Fuel).
How to Re-Attach a Broken Chain (for a derailer Bicycle):
Top,
Mechanical Issues Directory,
Chain Sub-Directory
Caution: One must carefully use any chain tool as ALL LINK SEGMENTS SIT LOOSE and DO NOT PROPERLY SIT or ALIGN with the chain tool's Link-Pin Driver. The cyclist must make mental and physical effort to hold the pin and link plates centered on the outer tool cradle (the far cradle) with one set of fingers while carefully operating the twist-in Pin-Screw with the other set of fingers, all while keeping all object parts perfectly centered.
Caution: There are a few specialized drive train systems that require the use of specialized tools. The same systems usually require steps beyond what is presented herein. One such system is the Campagnolo 11 speed chain drive system which requires their $200 11 speed chain tool and chain pin finishing (like trimming and peening a rivet) - Campy's warranty is voided without the use of their tool.
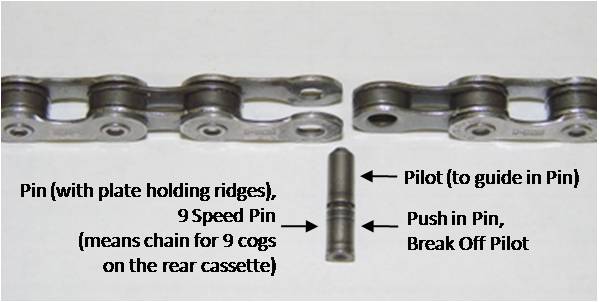
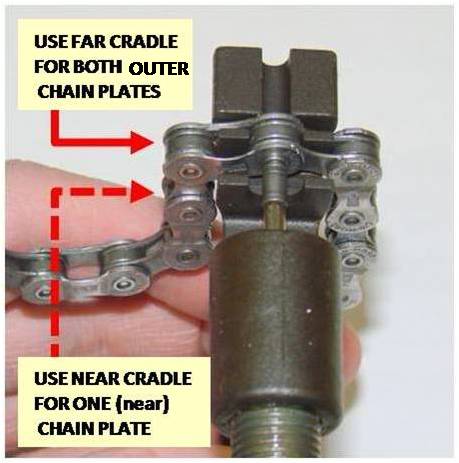
- Make sure that all the parts are wiped clean. No visible oil on the plates to be worked upon and No dirt (one may re-lube the chain after it is connected, if necessary).
- If adding a chain segment (to replace the broken or removed chain segment), add to one end of the chain, now. Try to keep/maintain character alignment.
- Get/Have/Obtain a 'Chain Holder'. Have it handy. In lieu of having a Chain Holder, one may use a re-usable zip tie, string, wire tie, or a volunteer to hold the chain ends together (to keep the chain off of the ground and from a free run).
- If the chain side plates have numerals or characters, many technicians try to lay out the chain so the characters can be read while the chain is on the top of the run between the sprockets. There are a few top-of-the-line drive train systems (cranks, cassettes, derailers, and chains) that are directional and have special instructions for chain mounting, link placement and link segment placement - owners of those bike systems will probably know about their bike's special requirements.
- In the field: Before threading the chain, set the shifters for the large sprockets (so as to use the most chain length, thus helping to keep the chain off the ground).
- Make sure that the loose chain is properly weaved through the jockey wheels (aka pulleys) and derailer cages.
- In a stand: Wrap the chain around any rear sprocket in line with the derailer, run the chain through the front cage but drape it over the front bottom bracket (from Cat). This leaves lots of slack. Use a Chain Holder (or similar device) to hold the chains together, 1 to 2 inches in from each chain end (thus allowing easier access to the open end pieces)
- In the field: Slack is the enemy and dangling chains get dirty, quickly. Before re-chaining, insure that the shifters are set for the large sprockets. If available, get a hand from another person, to hold a pedal or chain in place (to keep the chain from free running to the ground). Use a Chain Holder to hold together chain pins 1 to 2 inches in from each chain end (thus keeping loose ends out of the dirt and allowing easier access to the open end pieces).
- Make the Connection: Either, use the chain tool to drive in the connecting pin, or use a master link (PowerLink sample follows).
- Warning: Pin insertion is performed as a dry press (Do NOT lube the pin).
- If using the chain tool, use the farthest cradle and only drive in the center press when all elements are centered and aligned properly. Twist the lever clockwise, take your time, and 'Mind the Relatives'.
- How far do I push the Pin? - Make the far protrusion of the pin look that same as the other factory set pins. Sometimes people can feel the outer plates settle in between the pin ridges.
- Break off the Pin's Pilot piece. Some Chain Tools have little holes in the tool to insert the pilot to hold it and then the tool can be rotated against a firmly held chain and pin and the pilot will snap apart cleanly (the pin is pre-grooved for a stress snap) or one can use a pair of pliers.
- If faced with a choice of having the pin be positioned properly in the near chain plate or the far chain plate, position the pin for the far chain plate and then move the chain to the front cradle and push in (re-position) the pin on just the front plate. This is a similar method as used for un-binding A Kinked Chain (which is addressed in a following section).
- Warning: If the far side pin position is set correctly in the outer plate and the near side of the pin is inside the main chain unit, then the pin is too short, IT CANNOT BE USED. Get a correct sized pin.
In the Field: If the replacement pin is too short, and no other correct replacement pin is available, consider using a master link or reusing a removed pin/rivet (to get out of a desperate situation). Correct this situation as soon as one can get to a bicycle shop or secure knowledgeable help. - Master Link Examples (SRAM PowerLink):
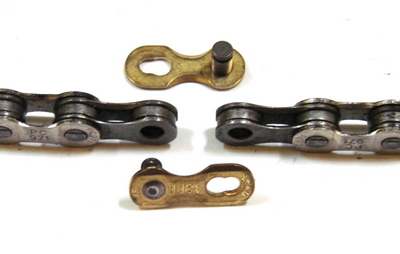
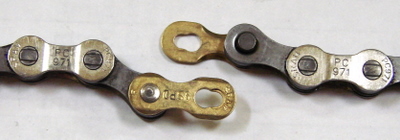
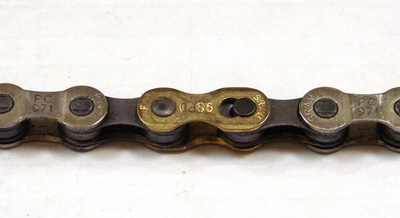
- If necessary, re-align the chain on the front and rear sprockets.
- Re-set the shifters/derailers to a more reasonable initial cycling (start pedaling) position.
- If necessary, re-wipe the chain for dirt and/or re-lube the chain and then wipe the excess.
How to Loosen a Kinked Bicycle Chain,
How to Loosen a Tight Chain Link,
or How to Push-In a Protruding Rivet or Pin:
Top, Mechanical Issues Directory, Chain Sub-Directory
- The bicycle chain mount closest to the handle (called the Front Cradle) is to be used for Link Loosening (which is technically, pushing the pin and the far outer plate away from the front plate), thus loosening the plate and pin friction on the inner plates and roller bearing.
- Review the 'Chain Tool Use' pictures and the 'Re-Attach a Broken Chain' pictures (above).
- Review the concept pictures and diagramed usage pictures (immediately below).
- Perform the task using a Chain Tool.
- Finally, if needed, flex the two inner chain links laterally at a mix of angles to help loosen (micro widen) the pin hole of the inner links.

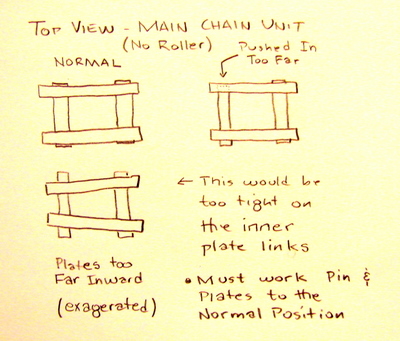
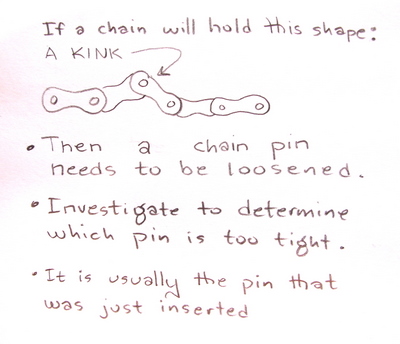
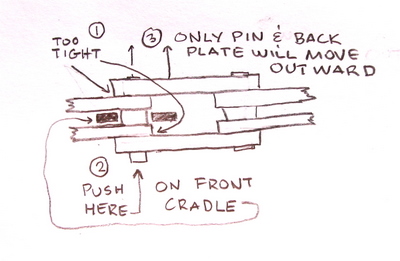
In the Field: Ways to Clean and Lube Bicycle Chains
Top,
Mechanical Issues Directory,
Chain Sub-Directory
ANY reasonable effort to periodically clean and lubricate a bicycle chain will go a long ways toward getting the most tour life out of a chain. Touring is hard on chains; bike loads usually cut a chains life in half, especially if pulling a trailer or running on a tandem.
- Field - Periodic Wipes:
- For touring, the Periodic Wipe Issue is that it is usually the accumulated dirt that needs to be removed and it is the dirt that causes chain, sprocket, and crank ring wear.
- Best Practice: Wipe the chain once a day. Chain wipes go a long way towards chain longevity.
- Always wipe a chain after running through mud, water, snow, ice, or rain. Also wipe clean just before oiling the chain.
- The chain does not need to be lubed every time that it is wiped clean.
- In terms of chain lube or longevity, a chain can last a few days without needing to be re-lubricated. Chains with tour loads can usually go 100 miles (150 kilometers) between re-oiling (with good weather and roads).
- If one has a tandem or recumbent, then one needs more disposable rags.
- Hint: The good news / bad news story is that most cyclists will bike by a clean piece of cloth (lost, serviceable, trash) on the ground or road-side, almost daily. Learn to recognize these as free rags for your use; usually one good shake will get the dust off, save for chain maintenance. Don't pick up dirty, grimy, rotten cloth (except to throw it away).
- Most Motels and Campgrounds will give anyone, upon polite request, rags that can be used for maintenance.
- Dispose of dirty rags properly (we usually get about five days use out of a rag and we store the interim rag in a sealable plastic bag).
- Wipe the sprockets and cranks too - they don't need to be lubed if a fresh lubed chain is run through the different gear ring combinations.
- Field - Chain Cleaning - Clean Coke Bottle Method:
- For touring, obtain a clean and dry plastic or glass bottle with a lid/cap (often found on the road-side and sometimes in rubbish bins), get two bottles if possible (one for clean fluid, one for dirty fluid) - 12 ounces to 2 liter clear containers will work nicely, bigger is better; typical found on road side bottles are juice or soda bottle, clean as needed; wide mouth lids are better; fill with biodegradable cleaner (like orange oil) or in a pinch (kerosene or diesel fuel, which have low flash points compared to gasoline).
- We have seen people use Coleman Fuel from/for their camp stoves - this can be Dangerous. Coleman Fuel is a commonly carried camp stove fuel for bike touring and it is readily available at camp grounds, either to buy, borrow, or leave extra fuel with another camper.
- Fill only about an inch deep; drop in the chain; cap it (or cup it); shake it (Shake, Don't Stir. ~ Ian Fleming.), pour dirty fluid into second container, repeat as needed; pull out the chain; if orange oil or liquid soap used, wash it; wipe it as dry as is reasonable then let it dry (sun it, swing it, - be careful, any combination); when dry, oil it (per the next segment).
- The nice thing about water soluble cleaning agents is that it is a Green practice that makes field work easier (don't have to worry about dirty fluid disposal) and one can use water bottles and if there is splatter on the bike, the degreaser/cleaner can often be used on the bike frame or gear components.
- If the container has a small cap, then a wire or coat hanger may be needed for fetching the chain.
- Dispose of used fluids and rags properly. Sometimes, especially in a group, two or three cyclist chains may be cleaned in combination or in back to back processes.
- It is extremely convenient to have a brush handy, be it a human tooth brush or a sprocket tooth brush.
- It takes about 24 hours for a Penatrant to evaporate on its own. Hand wiping a chain dry helps a lot. Drying a chain in the sun in a plastic bag can accelerate drying time to 2-4 hours. That can be a lot of down time for a touring bike, but is OK if the riders are in a museum or such.
- Best Practice: Carry a second chain and alternate chains, about weekly or as a result of poor riding conditions like rain or mud. Thus, one has a backup chain and one avoids the issues associated with penatrant drying and the (as much as) 24 hour waiting time. Remember to Z Pattern lube the chain on the following day (discussed in the next section).
- There is some wisdom in alternating chains, the action can even out chain and sprocket wear, extend the life of sprockets (front and rear), and address the clean chain penatrant evaporation wait issue.
- Check for chain kinks. It is easier to find kinks by performing a slow roll of the chain while on the bike. The best place to catch kinks is right at the point of rolling off of the Tension Pulley. Loosen any Chain Kinks as soon as they are discovered.
- Check for protruding chain pins or rivets. This inspection is best performed with the chain off the bike. Sometimes a pin or rivet sticks out a little more than the other pins or rivets. Sometimes one side of the pin/rivet is out too far and the other side is in too far. Re-set any pins or rivets that stick out too far (pins or rivets rub on sprockets and sometimes the derailer cage). In extreme cases, a pin/rivet rub will wear out the outer pin grip on the outer chain plate wall and the chain will come apart (usually on a big climb).
- Many other bicycle Chain Cleaning methods exist.
- Field - Chain Lubrication and Application Method:
- For touring, Bicycle Oil (small bottle) is the most common lubricant. It is the cyclist's preference for No-Additives, Wax, Teflon, Other Additives, or Engine Oil. See Chain Lubrication Issues for benefits.
- Oil Viscosity is situational (Season, Location, Moisture Exposure, and Particulate Exposure).
- Any lube is better than no lube.
- It is important to have a good lubrication delivery container, preferably with a straw (cut down to 1.5 inches or 5 cm's, tape extra to the container).
- Best Practice: The Z Pattern lube application method is particularly effective and smart to do after a really good chain cleaning - this is the time to be sure to spin/run the lubed chain over every sprocket (front and back).
- Other Lubrication Methods exist.
- For routine lubrication (not after super cleaning the chain, but after a wipe down), use the 'Hold the Bottle Stem/Tube Still Method' over the rollers as one spins the chain, Or one can 'Move the Bottle Over a Still Chain' (this is done in segments as one rotates the chain the length of one oil run, repeat till done).
- Hint: We use a Power Link for a Lube start and end point on the chain; sometimes we mark a link with a permanent and oil proof marker (which seems to last about a month); some people paint a link.
- Be sure to wipe the excess lubricant from the chain and sprockets, as needed.
Bicycle Touring Chain Survival/Usage Issues:
Top, Mechanical Issues Directory, Chain Sub-Directory
- Most chain breaks are caused by the bike being in the wrong rings for the current requirements. For experienced bikers, this usually results from unscheduled/unplanned stops, typically to take a picture, look at a view, or join a friend who stopped (for any reason). Then, when a biker starts pedaling s/he starts shifting (often many sprocket/cassette rings) and applies too much torque pressure at the same time; thus breaking a chain. In order to not break a chain, it is often best to push-walk the bike and manually shift (usually down) to a manageable drive sprocket position. [By the Way, the obvious Rookie place to break a chain is downshifting a lot while climbing a hill - Hint, down shift a lot before the hill.]
- We seem to break one chain, once, every other year. In every case of chain break, we were on mountain or steep hill trails where we were performing a burst of shifting in brief periods of time (carrying touring loads).
- Chains on bikes with trailers wear out twice as fast. Incorporate chain maintenance/replacement into long tour planning and/or a complete spare chain; in fact, there is some wisdom in alternating chains (even out chain and sprocket wear; allow penatrant evaporation).
- There is an interim period where, if a chain is replaced for wear then no major drive train damage will occur, or else the sprockets wear considerably more than normal and new sprockets will be required (front and back) at a increased time and money cost. For fully loaded bicycle touring, the point of major component wear is chain wear at or over 50% (measured using a shop tool). This represents 1/16" of wear [improperly called stretch] over a 12" span). Stay up to date on chain maintenance and replacement. it saves major money, time, and major component wear to replace chains at 50%.
- Chain links, link pins, and master or connector links are not universal. What bikers forget is that when they replace a chain, if the chain is a different type or from a different manufacturer, then the old emergency links or master link or chain pin may not be appropriate for the new chain (also, new bike warranty can be at stake).
- Generally, Shimano Chains use replacement Chain-Pins to connect replacement chain segments or a broken chain and SRAM Chains use (modern) Master-Links (called Power-Links) to connect replacement chain segments or a broken chain. Both Shimano and SRAM have different links or pins for differing chain types (7/8-9-10 cassette sprockets) and/or chain grades. X/Y chain terminology, like 7/8, means that one chain exists, now, to serve the needs of a 7 sprocket rear cassette or an 8 sprocket rear cassette. Save the Instructions, See next note.
- Chain Part/Tool/Support needs are very chain specific for 10 or 11 speed chains. However, in a pinch in-the-field, it seems that 7, 8, and 9 cassette-ring chain link pins and master link chain links are interchangeable (not so for 10 or 11 cassette-ring chains).
- We have marked the master link (or a randomly selected link on a pin system) with red or white waterproof and oil proof paint/marker so as to aid in chain lubrication so that we have a known start and end point. Also, marking a master link helps to find it faster for maintenance or repairs. Some master links are a different color from the chain and do not need marking.
- Carry Spare/Replacement Links and/or Master Links
- Caution/Lesson/Experience: SRAM Quick Links and Power Links are only supposed to be used once (by their own documentation). Can the links be used more than once? Usually the answer is Yes. What is the actual issue? The links are not designed to be opened and closed at will and the links may eventually fail to hold a chain AND when a chain link fails, it is almost always on a hill at the farthest point from any help.
Lesson: We had a main drive chain on a tandem break open on a major hill climb. Dennis had re-used a Quick Link maybe 6-8 times (guessing). The link's ability to hold together under pressure just wore out. Dennis had a warning while performing a shifting adjustment on the same bike on a bike stand just a day prior - The Quick Link just opened up and dropped the main chain while performing a pedal spin to test a cage/shift adjustment. SO, if a quick link ever comes apart, no matter the condition, replace it with a new link. AND, while one may consider re-using a Quick Link, One should replace it no matter what after four uses AND one should always carry a brand-new spare Quick Link along with the usual spare links and chain tool. - Experience: There has been many a time when we were very remote and have removed one full link from a broken chain, re-used the same pin, and finished the tour. Remember that a link includes one outer plate and one inner plate.
- Experience: We also carry a Chain Holder in order to hold the chain together while performing a chain repair.
- Experience: From Cat (of BBI), when reconnecting a busted chain (or new chain of proper length), lay the chain across the crank housing (not the crank sprocket), thus giving more slack to better manage and control the chain. Note that there are times in the field where this may give too much slack and allow the chain end to swing into the dirt/ground.
- When Travel Survival Matters, it is better to push a bike for 10 feet now, to coax the shifter & chain into the correct sprocket ring, rather than to push the bike for 10 miles, a minute from now, with a broken chain.
- The Id and the Odyssey - Sometimes the ego gets in the way. Learn/Teach to down shift while standing beside the bike for stops made without downshifting beforehand - #1 cause of broken chains for experienced riders and #1 cause of thrown chains
- The Rear/Drive Chain of Tandem Bicycles wears at almost double the rate of the remaining chains.
- All Bicycle Touring Riders should know how to repair an inner tube flat and know how to repair a broken chain (with a pin and/or a master link). In lieu of knowing how, at least ride in a group with someone who does know how.
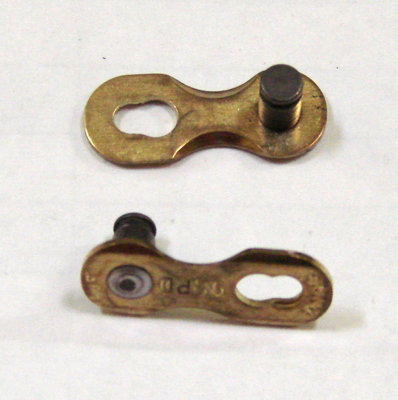
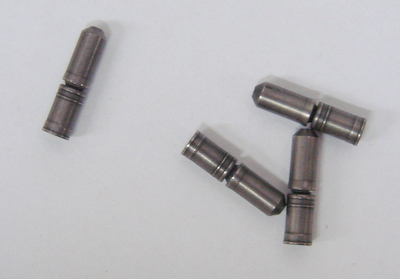
Major Field Repair Issues:
Top, Mechanical Issues Directory, Chain Sub-Directory
- Warning: In the field, a cyclist may be forced to reuse a rivet/pin that was not designed to be reused. Remember that field repairs, in this case, are just to get a cyclist out of a remote area and into a bicycle shop for a proper repair or replacement. Ergo, it is wise to have spare links, pins or master links (as is appropriate) and know how to install them. BUT, see next bullet ...
Experience: We have reused link pins and experienced no travel problems. In every case we were a few miles to hundreds of miles from any known help or solution. We had no choice and the fix worked for us (and some others). - Caution: While undesired, it is common that a cyclist may not have spare links and will be forced to ride with one or two missing links from the chain's original length. See next bullet ...
- Caution: When operating with missing chain links (and we have), a cyclist must avoid cross chaining on the largest cogs/rings as it can stretch, bend, damage, or destroy the rear derailer (especially the pulley cage) because the chain is shorter than the system was designed to manage. When a derailer is damaged, the result is that the cyclist may have to push their bike and/or ride their bike as a fixed single speed bike. Emergency Single Speed Derailer Set Up
- Caution: It is common that before re-connecting a broken chain, a half link (one set of plates) with one or two bent/twisted/damaged chain plate(s) will have to be removed. Damaged plate removal prevents other components from further degradation (like pulleys, sprocket/ring teeth, or the derailer itself).
- Caution: Replacement Chain Pins can only connect inner and outer plates (NOT two inner plates and NOT two outer plates) which is why a perfectly good half link may have to be removed (in order to reconnect a chain). Master Links always go between a pair of inner plate sets and a perfectly good outer plate link on the end of a chain may need to be removed (in order to reconnect a chain by its inner plates on the chain's end).
Generalized Noise Symptom/Solution Directory:
Top,
Mechanical Issues Directory,
Chain Sub-Directory
Noise Symptom/Solution Directory - These are All Links [within this page].
-
Chain Noise and/or Cage Rub Sounding Noise
(Recently Added a New Chain on Worn Sprockets OR Recently Added New Sprocket(s) with Old Chain) - Front Derailer Noise:
- Front Derailer: Cage Rub Noise, Chain Noise, and/or Chain Trim Noise
- Front Ring: One/Some Middle Range Gears Make a Chain Meshing Noise or Chain-Cage Rub Noise
- Rear Derailer Noise:
- Damaged Cage Chain/Sprocket Noise
- Rear Derailer Cable Tension Adjustment Noise
Rear Chain Noise and Sprocket Side Rub Noise;
Rear (Mostly) Derailer Cable Tension Adjustment (When and Why) - Chain on Guide Pulley Rubbing on Rear Sprocket Noise (B Screw Adjustment)
- Chain Rubbing on Tension Arm Brace/Support (Miss Threaded Chain)
- Clink Noise in Rotating Chain (One Click per Chain Revolution)
- Click Noise in Front Crank (One Click per Pedal Revolution)
- Cross Chain Issue and Solution (Discussed under Chain Line)
- Squeaking Derailer Pulleys (aka Jockey Wheels)
- Broke Tooth, Misaligned Tooth (One Click per Sprocket Revolution - Discussed under Mystery Shifting)
- Another Very Good Website for Sound/Noise Symptom Determination:
Bicycle Bike Noises, Clicks, Ticks, Creaks, Clunks, Knocks and Repair; by Jim Langley
Front Derailer Cage Rub Noise,
Chain Noise, and/or Chain Trim Noise
Top,
Mechanical Issues Directory,
Noise Symptom/Solution Sub-Directory
Chain Noise and/or Cage Rub Noise
Damaged Cage Chain/Sprocket Noise.
- Trim noise sounds a little similar to cross chain noise.
- Trim noise is caused by the chain rubbing on the derailer cage or against a sprocket.
- Either, the Derailer needs to be re-adjusted, or if so equipped, the handlebar shifter can be used to perform a slight/one-click adjustment that will separate the derailer cage from rubbing on the chain. If the noise gets worse, try two clicks in the opposite direction. Usually, only upper end drive systems have this capability.
- A bent sprocket tooth can cause the same sound. See Mystery Shifting, listed previously.
- There is a Trim Noise mimic that also may sound like a broken tooth or unaligned chain grind - See the following links.
Front/Rear Sprocket/Ring/Gear Wear,
Chain Noise and/or Cage Rub Sounding Noise Issues:
Top,
Mechanical Issues Directory,
Noise Symptom/Solution Sub-Directory
Derailer Cable Tension Adjustment Noise
- Issue: Just as the chain wears over time so does the front crank rings and the rear cassette/sprockets. There is nothing more symptomatic than a brand new chain on a worn sprocket to bring out the noise effect of a worn sprocket but it can just happen over time. The noise can be a result of one or more of two physical conditions:
- The chain teeth get worn, thus allowing for a chain slip sound that can sound like a cage rub.
- Warning: This is a safety issue with the smaller sprockets (less than 21 teeth) as chain slip may occur and performance may be lost at a key moment of pedal pressure.
- The sprocket tooth pitch changes, over time, as a chain wears the teeth climb and descent curve angles asymmetrically. This occurs to all sprockets but some get worn out sooner than others (the ones with the most rotation/use action).
- A worn sprocket may create a sort of repelling action to a chain with a different pitch (usually a new chain on an old sprocket ring but it can be an old chain on a new sprocket).
- In a shop, a sprocket can be tested with a Sprocket Wear Indicator Tool (Rholoff has one for about $50 USD [in 2010] - other manufacturers exist, most others are less costly).
- In the field, a clue that it is a sprocket and not a basket rub is that the shifting seems to operate perfectly at rest on a stand/bipod-kickstand/while-lifted, during inspection, but one will still mysteriously experience noise while riding that yet sounds like a cage-chain rub (especially riding uphill!). One generally suspects a bad derailer before suspecting sprocket wear.
- In the field, a clue is noise with a brand new chain on old sprockets when everything was more or less operating quietly before the new chain.
- The particular sprockets that typically need to be replaced are the ones that the cyclist spends the most time; typically this is the small front ring and/or the large back sprocket (aka the granny or climbing gears) and maybe an adjacent sprocket or two. Note that some rings and cassette sprockets are one piece and that the entire unit may need to be replaced.
- Bicycle shops generally Do Not perform Sprocket Wear Inspections often enough with a measurement tool; bicycle shops tends to make visual inspections and visual inspection tends to find overly worn sprockets way beyond their replacement time. Chain sprocket wear can be very subtle, visually.
Noise/Sound: It is extremely tough to discriminate the different kinds and sources of noise that more or less come from the same area (shift trim rub, basket-chain rub, chain/next-cassette rub, sprocket wear or sprocket-chain pitch mismatch wear - See the bottom links/references) because the noise that these all of these activity areas create comes from the same general area and sprocket wear noise is far less common than trim or cage rub noises. Most people cannot tell the difference by sound (including moi).
Test: There is a test with a simple Sprocket Wear Measure Device/Tool that looks similar to a Chain Whip, where one places the device's base between two sprocket teeth and lays the chain across the remaining sprocket teeth and if the third link (6th half link) will not hold onto the sprocket, then the pitch distance is too much (or the teeth are to worn). Roloff's point is that the 11 to 21 tooth sprockets need to be replaced immediately (because the chain can start slipping or rounding over the teeth - a safety hazard for the rider and damaging to the bike) and sprockets with more teeth can wait to be replaced (less urgent of a problem/situation). Other Manufacturers exist and tools costs and methods vary.
Solution: The solution for worn sprocket(s)/ring(s)/cog(s) is to replace the worn out sprocket(s). If the system does not have a new chain, then replace the chain too. Sprocket/ring/cassette replacement is strictly for a shop to perform (or one needs the experience, tools, and parts to perform the repair in the field). Normally when this happens, even though the noise is very bothersome, it is not critical and the cyclist that is on-a-tour can wait till they can ride the bike to the nearest bike shop.
Notes:
Noises that are similar sounding and from the same general area:
No single event robs a bicycle of wheel turning power than chain slack
Pedal Energy Loss, Sticky Chain, 'Chain Suck';
Issues with Too Much Chain Slack:
Top, Mechanical Issues Directory, Noise Symptom/Solution Sub-Directory
- Chain Suck is the term for a rotating chain that does not immediately roll-off or separate from the drive ring. It causes extra wear, poor drive/power transfer to the rear wheel, and may make noise. The solution for Chain Suck is to take the slack out of the chain. No single event robs a bicycle of wheel turning power than chain slack. This power transfer process weakness is exasperated by a dirty chain and sprockets; be sure to operate with a clean chain and sprockets. Taking the slack out of the chain may be accomplished by:
- Working with a clean chain (degrease/degrime and clean lube the chain).
- Adjusting the rear axle mount (only on some types of bike).
- Adjusting the eccentric (on tandems).
- Replacing the chain if it is worn out such that the pitch has changed significantly. Use a Chain Wear/Pitch Measure Indicator Tool - All bike shops have such a tool.
- Always Validate Proper Chain Length.
- Always Validate Sprocket Wear (previous section).
- Some bikes have an Anti-Chain Suck Device (that separates the chain and ring) in the space between the chain and ring at the point where the chain is supposed to go directly to the rear derailer. The device is pretty much like a metal finger that fits next to the chain egress to insure prompt chain-sprocket separation. The Anti-Chain Suck Device needs to be checked for wear and maybe adjusted. Note that when an Anti Chain device is functioning (that is, if/when the chain is hitting the Anti-Chain Suck Device) then that is a symptom of a drive train problem issue that needs to be resolved.
- Validate that the rear derailer is functioning to remove slack from the chain as one shifts up and down the rear cassette (strong tension arm springs, all 8 parallelogram points cleaned and lubed, Derailer Pulleys (Jockey Wheels) clean and lubed, Chain Length Not too Long [can it function one link shorter?]).
Rear Sprocket/Cassette and Chain Grind Noise,
Rear Chain Noise and Sprocket Side Rub Noise;
Rear (Mostly) Derailer Cable Tension Adjustment (When and Why):
Top, Mechanical Issues Directory, Noise Symptom/Solution Sub-Directory
A: Chain Rubs/Grinds on Something In the Rear Derailer Area
Chain and Rear Sprockets Don't Quite Line-Up
- Usually Cable Tension can be adjusted at the grip shift or shift lever. Sometimes there is a barrel adjustor at the derailer and/or brake.
- Sometimes the derailer is absolutely perfect for the range of sprocket rings, big to small, BUT the chain rides a little too snugly to the next bigger or smaller sprocket ring. This snugness may sound like trim noise and may feel like a broken tooth. In its worst case, the chain may mystery shift.
- Simply adjust the cable tension adjuster/barrel until the chain rides the sprockets centered. Sometimes this can be done by ear. Be careful, a small 1/8 or even 1/16 turn may do it - usually one is tightening the tension (taking slack out - moving the barrel away from the terminus), but it can be the opposite. Always be prepared to undo what was done and to move the barrel in the other direction for an adjustment.
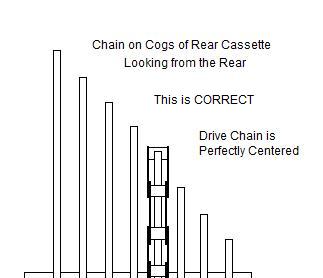
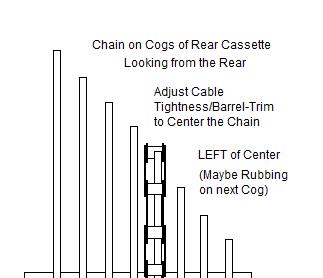
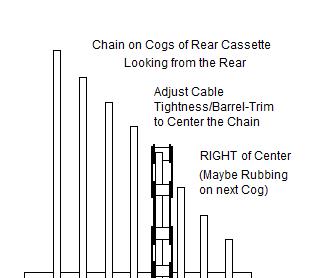
Also See Chain Trim Noise or Chain and Front Derailer Cage Rub Noise and/or Sprocket/Ring/Gear Wear, Chain Suck/Stick Cause/Effect, Chain Noise and/or Basket Rub Noise Issues.
B: Chain Rubs/Grinds on Something In the Rear Derailer Area
Chain Rubs on Rear Derailer Cage
- Sometimes the issue is chain placement/threading at the correct input or output point on the tension arm itself. [I do this myself about once a year and this is one of the reasons that I recommend marking the tension arm with little dots or dashes for the chain run.]
- Sometimes there is a little cross-support-bar in the center of the tension arm (the space in between the two jockey wheels) that the chain rubs upon. In the case of tension arm cross-support-bar rub, re-thread the chain on the other side of the cross-support-bar. [Cross-support-bars, when present, tend to be offset a little for this very reason - it is sometimes a case of intelligent engineering getting in the way of intelligent application].
 Miss-threading the Chain through the Tension Arm's Jockey Pulleys will cause metal-on-metal chain rubbing/grinding noises.
The solution is to re-thread the chain properly:
C: Chain Rubs/Grinds on Something In the Rear Derailer Area
The Chain Rubs on Itself in Rear Derailer Area
 Most Rear Derailers use a Body Adjustment Screw (usually called a B Screw [with no explanation]).
Its PURPOSE is to 'set' the distance between the 'Guide Pulley' [or Pilot Pulley or Jockey Wheel] and the closest Rear Sprocket/Cog - It should be about 4 mm apart at its closest gear setting (test on each rear-sprocket/chain combination) and it hardly ever needs adjusting once it is set.
See All about the B Screw.
PERFORMANCE: With all other things being equal, the closer the Pilot Jockey is to the rear sprockets/cogs, the snappier the shifting performance - Yes, it can be set too close (a person can tell by the grinding noise in at least one of the gear settings, but usually noise can be heard in all of the gear settings if the B Screw is out of adjustment).
GRINDING NOISE can have a couple different Source ISSUE/SOLUTIONS:- B Screw's, once set, rarely come out of adjustment on their own. But maybe it just needs to be re-set (making the chain proximity 2-3 mm at its closest point between the 'Guide Pulley' and the closest Rear Sprocket/Cog).
- If the derailer is removed and remounted (like for shipping), depending on the type of derailer, it is possible to mistakenly re-mount the rear derailer in such a way as to move the derailer's Stop Plate position for the B Screw or to just miss-mount the derailer such that the B Screw's setting is no longer correct. Unfortunately there are usually a couple different Stop Plate mounting position choices/options (it is often not 'Idiot Proof' [I can say from experience]). When a person re-mounts the rear derailer, the Stop Screw needs to be against the Stop (rotate the Derailer or Stop Plate so that the Stop Plate meets the end/tip of the B Screw [some Stop Plates are free, some Stop Plates are fixed]).
- On occasion, a bike accident, crash or fall will have caused the rear derailer mounting point on the frame to bend. This may also be caused by something locking the wheel or chain but the cyclist's pedal pressure¹ ² ³ may have caused the chain to tighten up on the derailer and physically cause the derailer's frame mount to bend or cause the derailer to bend internally (to include a combination of both objects to bend). If that happens, take the bike to a shop, but if the rider is miles away from a shop because they are on tour, then the rider will need to make their own adjustments, sometimes this means re-bending the bike frame, derailer frame mount, or derailer back into position.
Caution: Be careful, metal does not like to be re-bent more than a couple times before it cracks from bending pressure.
Survival Note: Steel is the most forgiving material and therefore the most survivable bike tour frame material and material of choice of global trekkers.
¹ Survival Note: This is a slightly bigger problem for tandems and triples … because there is significantly more combined leg-pressure.
² Survival Note: When a chain won't go into a gear properly, stop the pedal pressure, stop the bike, and physically look at the situation/problem. This is darn good behavior when you are hundreds of miles from help.
³ Survival Note: If a cyclist is in a high-gear setting and needs to be in a low-gear setting, physically stop and manually place the bike into the correct gear - A rider will live longer with this adapted behavior. - Long Term SOLUTION: It really helps to indicate the matching mount points between the frame, stop plate, and/or derailer pre-marked with a marking pen to line up the derailer, frame, and B Screw Stop appropriately on the Bike's Frame.
The 'B Screw', B Adjustment, Body Adjustment Screw (of the Rear Derailer) or
Rear Derailer Body Angle Screw - ALL About the B Screw:
Top Mechanical Issues Directory
Such a simple thing, such a dark secret.
- Purpose: Tweaking Shifter Performance AND Fine Chain Tension Adjustment by moving the Rear Derailer's Tension Arm forward or rearward.
- Goal: Obtain the snappiest shifting performance without causing wear damage to the Chain, Cog(s)/Cassette, or Guide Pulley.
- Performance: The closer the chain is too the rear cog (within reason without grinding) the snappier is the shifting performance, given that there is NO chain slack issue. There must be just enough gap space between the Guide Pulley and the rear Cog to allow room for the chain to lift off (derail) its current cog run and fit (rail) onto the next cog.
- Physically: All the B Screw does is rotate the Rear Derailer around its mounting point. The Rear Derailer rotation serves to move the Tension Arm (Swing Arm) of the rear Derailer forward or rearward (adding or removing chain slack).
- Some Caveats:
- Once the B Screw is set it hardly ever needs adjusting.
- It must be reset for a change of Rear Derailer and for a change in Chain Length.
- It keeps the Guide Pulley off of the Rear Cog(s), its gap setting is for whichever Cog and Guide Pulley setting is the closest.
- Each Cog must be validated/tested for gap distance (between the Cog and Guide Pulley).
- Adjusting the B Screw should only be done after validating that the Chain Length is correct.
See Proper Chain Length. - The perfect gap varies from system to system, but generally a 4 mm gap will be a very good setting. There is no perfect gap setting that is applicable to all systems; 4mm is a good place to start. It is important to NOT gain performance at the expense of part wear (chain, sprocket, or pulley).
- The thicker the chain, the larger the required gap, ergo, 7 speed bikes need a slightly larger gap than 11 speed bikes (other things being equal).
- If the Guide Pulley is too close to the rear Cog, then it will make a grinding noise (or in the worst case, not shift at all) - Back off the Guide Pulley and open the gap (look for no noise, no grinding, and smooth shifting).
- The Tension Arm should always be in the same plane as the cog plane.
- Please note that sometimes the rear derailer hanger is bent out of its proper plane (this is actually the most common derailer issue) and the planer miss-alignment causes mystery shifting and it causes shifting problems not related to the B Screw. The bent hanger solution is to bend the rear derailer hanger back into its correct plane/position - Let a mechanic do this (they have special tools), but in the field, as a last resort, rear derailer hanger reshaping can be done by eyeball with the use of a long adjustable wrench. See B Screw Field Notes below.
- The Tension Arm, on occasion gets bent out of its plane. Some causes are forced shifting when one is standing on a pedal (literally or figuratively) thus actually torquing the Swing Arm with more pressure than it can bear. See a Mechanic, Fix or Replace the System.
- Tension Arm Damage can also occur from an accident or from a stick like punch from road debris (scrap metal pieces) or from trail debris (sticks, shrubs, rocks).
- Lifetime Issue: As the derailer ages (hint hint). For a short period of time (before it becomes useless), the rear derailer may be facilitating/causing mystery shifting (because it is difficult to keep the tension Arm in the same plane and the Cog, due to the derailer's worn parts or the worn parts may no longer keep the tension/slack out of the chain). Sometimes, the last of the Rear Derailer's life can be extended by making a B Screw adjustment to take out chain slack.
In this case only, adjust the B Screw so as to take out any chain slack (or as much as is possible) move the Tension Arm rearward - Also, avoid any riding situation where the chain would be on both of the big front and rear cogs at the same time. - In the Field (During Bike Re-assembly): The B Screw's setting can be an important issue for people who ship bikes and reassemble the bikes at their destination. The B Screw's Stop on the back side of the Rear Derailer mount (directly next to the frame) needs be positioned correctly when mounting the derailer to the bike frame. The easiest method is to make sure that the Stop and B Screw are actually together and touching as one re-mounts the rear derailer. If the rider hears grinding noise when test riding the assembled bike, double check the B Screw and Stop's mating together and double check the chain's threading in the Tension Arm.
- In the Field (Problems/Issues): Check for proper cog/pulley gap, tension on the tension arm thus tension on the chain (old or broke system, replace when possible, move swing arm rearward to take out slack [this slows down snap shifting but is acceptable to keep on biking]), missing B Screw (I don't know of any instances of lost B Screws, but it is possible), B Screw setting/gap (thus yielding the correct cog/pulley gap), worn pullies (causes chain alignment issues thus mystery shifting), sometimes dirty pulleys causes chain alignment issues).
- In the Field (Problems/Issues): Sometimes the tension arm needs to be bent back into its proper plane or back into proper shape. Re-address this with a mechanic as soon as practical.
- In the Field (Grinding Noise Mocking Issue): If the chain was miss-hung inside the swing arm and the chain runs across a Tension Arm cross bar or structural support, then the chain will make a very similar grinding noise (like a Guide Pulley and Cog rubbing together). Re-thread the chain.
- In the Field (Bent Derailer Hanger): A rear derailer hanger that is out of its plane's geometry can be re-positioned/reshaped, by eyeball, by using a long adjustable wrench. Bend the hanger back into the proper chain line and rear cog plane.
Caution: Bending metal will always weaken the metal. Always use just the right amount of force (there is a learning curve, which is why the work is best left to bicycle mechanics).


B Screw Field Notes:
Clink Noise in Rotating Chain (One Click per Chain Revolution):
Top Mechanical Issues Directory
- Can be a chain link that is too tight. Flex back and forth sideways, also the near side cradle of a chain break tool is exactly for this purpose. See Loosen a Kinked or Tight Chain Link for details.
- The noise can also come from a pin or rivet that in not fully inserted or it is over inserted (or for other reasons). Sometimes the pin or rivet can be seen, but often it requires feeling the length of the chain on both sides for a pin or rivet that is sticking out just a little more than the others. The extruding pin/rivet may be on the inside/fame-side of the chain's run. See Pushing in a Pin/Rivet for details.
- A Derailer cable that is too loose (typically) or tight (rarely) can also cause a sound that sounds like a misaligned chain or a broken sprocket tooth. Check to see that the chain is riding centered on the sprocket ring, if it is offset or rubbing another sprocket ring (and the derailer is otherwise operating in the biggest and smallest sprocket rings OK), then consider a derailer cable tension adjustment - See Derailer Cable Tension Adjustment Section.
- Bent tooth on a sprocket or cassette. Bend the point to a straight position. Let a shop Mechanic do this, but in the field, this sometimes may be performed with an adjustable wrench - bend the entire tooth but not the ring. In the field, if the rear cassette is a single piece, then one may need to get creative with some big tools like the end of a pair of pliers, a large screw driver, the handle end of a cone wrench (with vinyl cover removed), and/or maybe a hammer stone. Check the rear derailer Cable Tension Adjustment Section also.
Click Noise in Front Crank (One Click per Pedal Revolution):
Top Mechanical Issues Directory
- It can be a bottle or cage that needs to be bent back into proper position. Experience: We have multiple water bottle cages on most of our bikes, we learned over time that we needed to label them for their positions - The cages near the cranks had to be bent away from the crank side. Some tandems have left and right side cranks.
- It can be the Tire Pump on a side or cage mounted pump.
- It can be a slightly loose saddle and/or seat mount (often the creak noise results from very slight body shift for the down stroke of a particular leg).
- Many road cycling bloggers report that they need to remove the seat post once a year, wipe off all old grease, thinly reapply a very thin new layer so thin that one can barely see it (spread with fingers), wipe any excess, re-mount the seat post and the creak or click noise goes away for another year.
- Often associated with the same position of the leg or feet for each (or nearly each) pedal cycle the sound may be pedal or foot-pedal mount (cleat) related, especially for cleat-shoes and/or cleat-mounts. On a tour, check for wear and snugness of the cleat system on shoe, on pedal, and mounted (the inspection may need to be conducted with just the shoe while one is eye-balling and listening to the sounds as one manually cycles the shoe around). At a bike shop it is easier to get the local shoe expert involved in an inspection.
- It can be a loose crank fitting/retainer or a worn bearing set or race or both. A bike shop can determine this issue and resolve it - There is a range of things that can have changed from a loose lock nut to having to replace the bearings or bearing cartridge set.
- It can be the crank's pedal arm hitting the bike frame (usually the chain stay). The cause may have come from a few different events:
- A bent crank arm, which may have resulted from a bicycle crash, drop, smash, or shipment. Replace with a new crank arm and don't be surprised if a rider must buy/purchase said crank arm as a pair of arms (left side, right side) as the bike shop supplier may have no choice. In the field, for emergency purposes, one may be able to bend a metal crank arm enough to stop the crank arm from hitting the frame - the crank arm must be replaced as soon as possible as the original stress and the secondary bend back stress ruin the integrity.
Caution: Re-Bending a crank arm takes lots of leverage. If it is done on the bike, the crank stem, bearing casing or cartridge may be damaged from the bending process. If it is done off the bike it is difficult to position the crank in a manner that allows just the correct amount of bending without damaging the stem or pedal fittings. In either case it is difficult to obtain the correct leverage with anything other than a big crescent wrench. Emergency: Some people have successfully placed the pedal end of a crank, still mounted to the bike, onto a boulder and jumped onto the arm near the bottom bracket to perform an impact bend with a friend holding the bike in place. Do not put any stress on the frame or wheels. - An out of position crank, laterally or sideways, as a crank related adjustment, overhaul, install may not have centered the crank stem, bearings, cartridge bearings, or locking nut(s) properly within the bottom bracket.
- An out of position eccentric (tandem or greater passenger size bicycle). Eccentrics are housings for cranks and they are adjustable 'fore and aft' (as well as laterally) within the bottom brackets. Most tandems have two bottom brackets (which may go by different component names) but a few tandems have three bottom brackets (for independent shifting).
Bicycle Wobble:
Top,
Mechanical Issues Directory,
Also See Wheel Vibration While Braking
WARNING: Any time that one can feel a bicycle/ride wobble, SLOW DOWN immediately, Your LIFE IS IN DANGER! - Slow down using a Lazy S Pattern (NOT a straight line). Dennis' Suspicion: A straight line does not allow high or low frequency resonate waves so dissipate within the bike frame but for some reason, based on survival experience, lazy S turns allow successful recovery. Of course some wobbles have nothing to do with resonating frames, it could be a loose fitting somewhere, but be alert to resonance. What is Resonance? It is a secondary vibration that results from the first vibration which can generate multiple following vibrations. Resonance can be felt or seen in the handle bar as the handlebar ends start to shake in repeating left and right turns and holding the handlebar tighter transfers the resonance from the handlebar to the wheel. The bicycle can literally trip over itself or the rider can loose total directional control, either event may lead to a crash.
WARNING (Experience): Use the rear brake, as using the front brake seems to exasperate any resonance.
WARNING: Any time that one can feel a wobble, one's life is in danger.
Check the following (Symptom - Solution):
- Poor tire to rim mount - redo, equal bead line
- Poor wheel mount to drop out - refit skewer to one side, eyeball balance, sometimes takes 3 or 4 attempts.
- Loose spokes - tighten, tune
- S&S coupler(s) - check tight (Lynn Hamilton, AC Expedition Guide).
Experience: S&S coupler(s) seem to need tightening once every seven rider days. - Loose headset - tighten/fix (sometimes these need to be pretty snug)
- Balance of load in panniers - Left-Right sides should be within 1-2 pounds of one another.
- Trailer:
- Trailer load must be balanced L-R also (no loose gear, tied down, problematic with partial loads)
- NEVER use/allow a trailer load where a free tongue goes upward.
- NEVER use/allow a trailer-bike connection below the level of the trailer axel.
- NEVER use/allow a trailer-bike where the front of the trailer's flat loading deck is lower than the rear end of the loading deck.
- WARNING: Going too fast downhill with a single wheel trailer - slow down, your life is at risk.
- Holding bike tightly in a death grip - loosen grip, deliberately make little, gentle, left-right steering motions
- Mountain bikes - check shock setting, air compression, holding air?
single mechanical contrivance of all human engineering."
- Eric Hjertberg, Wheel Designer
About Wheels
The Bicycle 'Wheel' consists of the Tire, Inner Tube (if not tubeless), Spokes, Rim, and Hub. Each one of the wheel components is important. Generally, the discussions herein are centered on Touring Survival rather than the merits of a wheel component brand.
General: Inner Tubes, Flats and Hints:
Top Mechanical Issues Directory
- Schrader air tire valves (the type cars use) can be filled at almost every gas/petrol station in the world and Presta valves are just the opposite.
- In freezing temperatures and freezing overnight temperatures, we've had Presta Valves slip completely out of their valve sleeve (they aren't supposed to do that, but it happens).
- Normal operating bike tires loose about 3-5 PSI per day. Beyond that, be looking for a cause (inner tube, valve, or tire). We have found that persistent problems over time often result from uncovered or unnoticeably sharp spoke end on the rim's inner base, or the tire has a single thin radial tire wire that only punctures (or can be felt) when there is air pressure inside the tire which expands the tire just enough to let the little pin do its slow leak thing.
- Twelve Inch trailer tires are very difficult to remove or fix. Plastic tire tools can actually break - thus a reason for having metal tire tools.
- Self Stick Tire Patches are usually way better and faster than using a patch and glue. HOWEVER:
Experience, we had a cold temperature patch repair problem such that a self sticking patch would not stick, period. At a temperature of 38-40°F (2-3°C), two different self sticking patches would not stick at all, so we broke out the Rubber Cement and put on a small dab of cement such that the patch area was tacky in one minute, we then applied the patch (which, in the mean time, was being warmed up in a shirt pocket). The repair held up.
Self Sick Patch Lessons: Keep that little sealed tube of Rubber Cement that comes with tire repair kits as there are occasions when using Rubber Cement is the only patch repair solution. - Self stick patches are only reliable as 'sticky' for a 1-3 year range.
- Periodically replace old patches.
- If one patch of a set will not stick, replace all of them.
- This is particularly problematic for more experienced bikers who carry Repair Kits from bike to bike, over time.
- Replace un-used rubber cement every 3 years
- Replace used rubber cement within 30 days (it dries out on its own).
- Note that older sticky patches that lost their stickiness can still be glued with Rubber Cement.
- Caution: When buying spare tubes, beware that there are long valve stems and short valve stems. Unless the wheel rim requires a long stem (because of a double rim wall) then a short stem will be easier to place into the rim. Some long stems require that a tire be completely removed in order to re install the tube and tire at the same time. Generally, a cyclist only needs to remove the tire bead from one side of the rim. When placing a tube in the tire, remember to pre-fill the tube with enough air so as to prevent tube folds and to help evenly center the tire on the rim.
- Most tire repairs made in the rain or tropical like super humid conditions do not hold up very long. Determine and address the cause of the leak, usually a nail or wire, and just replace the inner tube. Keep and fix the damaged inner tube later, e.g., in the evening under dryer conditions.
- Mark the tire rim with desired (maximum) psi/pressure/atmosphere with grease pencil. Place the pressure marking on the rim center next to the air stem (and do NOT mark the rim side where the brakes rub). We also mark the trailer wheel or trailer for trailer tire pressure.
- Place a grease pencil dot on the tire and on the rim so that the cyclist will know both:
- Exactly where the tire lines up with the rim (to help keep the tire/wheel balanced), and
- Which side of the tire and rim match (left side to left side or right side to right side which in turn keeps positions tread pattern in the most beneficial manner).
- Grease pencils are sold at hardware stores, sometimes they are only sold in packaged combinations. We like Yellow best. Also, we break long pencils into three inch lengths, as that is a handy size and packs well with a tire repair kit.
- If all of the flat tires are in the rear tire, then if possible, the traveler probably needs to be distributing more weight to the front wheel. Also, one may need heavier duty tires (or maybe just new tires).
- Flat Tire Repair Lessons Learned: Experienced Riders do and maintain Four (4) Mental/Physical Tricks when proceeding to fix a flat tire:
- Lay the tire to the side without the rear-derailer, usually this is the left side. This action keeps dirt and debris out of the drive train. Some people set the bike upside down on the handlebar and seat/saddle, do so by NOT putting the side with the derailer to the ground.
- Keep the Inner Tube's relative side the same as the bike Tire and Rim (physically and often by a mark (like a grease pencil mark on one side of the tube's stem - the same side as the tire and rim dot marks). A cyclist can also use a pen, or a spit & dirt smear). This trick is done so that one may back track from the hole in the tube to find the hole causing object in the tire (if it is still there).
- Make a conscious effort to keep the tire lined up on the rim just as it was before the tire went flat (so that one can come back and trace back to the offending causal object and be able to remount the tire and not worry about correct/desired tread pattern direction). A very good reason to have adjacent tire and rim grease pencil dots.
- When the rider finds the inner tube leak point, the rider will note the distance from the air stem point and trace the same distance on the tire, in the same direction and then find and remove the offending object from the Tire.
- Flat Tire Air Filling Lessons Learned: Sometimes when a tube appears to be installed and filled correctly, it will have twisted or folded onto itself and either anomaly creates a weak point in the tube. A pinched or twisted tube will wear unevenly and break or leak in a rather short period of time, measured in a few minutes or hours. There are three mutually supporting solutions, in fact, perform as many solutions as is possible:
- Very lightly sprinkle Tire/Inner-Tube Lubricant (like Talcum Powder) on the inside of the tire, the focal area is the tire interior surface that is opposite where the ground contacts the tire (or treat or have already treated the replacement tube).
- Pre-Fill the tube with just enough air to give the tube a round full form without any folds or twists. It should be soft enough to easily push into the tire while one tire rim is between the wheel rims.
- After the tire and tube are mounted, fill the repaired tire's tube and then deflate the tube, maybe make any required mount symmetry adjustments *, and then refill the tube again. The deflation and inflation process seems to help spread the tube more evenly inside the tire. * Make sure that the tire sidewall fitting lines (or other symmetry indicators) are equally spaced from the wheel rim on each side.
- If a person patches or replaces the Inner Tube but doesn't find and remove the offending object in the Tire, the rider will have another flat to fix in about five minutes flat (pun intended).
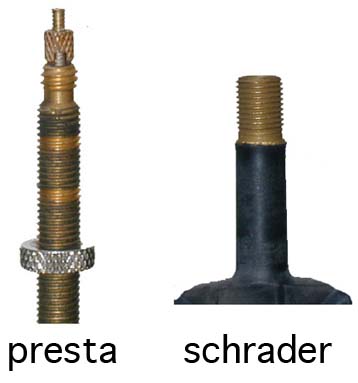
NOTE: When I was kid, I seem to remember that inner tubes came with a powdery substance on the exterior.
Tire/Tyre Selection:
Top Mechanical Issues Directory (Under Contruction)
-
Tire Selection is a bit like aircraft design in that every choice made is at the exclusion of another capability. In aircraft design, if one wants to carry a heavy load then the wings have to be big (larger surface area) but if one wants to go fast then the wings need to be small (smaller surface area). In cycling if one wants the fastest tires then the tread must be almost non-existent (for asphalt/paved roads), carcass/walls thin, and the track narrow, all of which is at the expense of thickness for safety and flat avoidance, wide track for comfort and duration, and virtually no capability to ride on wet dirt slopes.
Fact: Bicycles cannot hydroplane on paved roads as bicycles have more weight per square inch (or more weight per square centimeter) than automobiles [Source: John Barnett of the Barnett Bicycle Institute and author of the Barnett Manual]. Because tires don't hydroplane on wet surfaces of paved roads, tires don't actually need tread per se, tires need just enough cover material to protect the carcus integrity.
Warning: Bicycles can slip out from under a rider when rounding curves on oil slick road surfaces or on newly re-oiled roads or on sandy corners - Personal Experience (Dennis Struck).
Warning: Avoid cycling in the center of any paved road because that is statistically where automobiles and trucks drip/leak the most oil.
Note: On a paved vehicle lane, the two tire track lines for automobiles and trucks is statistically the cleanest part of the road.
Warning: The beginning of a rain shower/storm is statistically the worst time for any vehicle because water on the roadway causes oil spills/drips/seeps to surface - oil floats on water. If the rain shower is sustained then the oil float is washed off the road. It takes a little experience to identify road slickness and rider vulnerability. A quick shower sprinkle or the first 15 minutes of a rain shower present the most surface oil hazard on a paved road.
Warning: Leaves on a paved road or on a dirt trail can act as a road lubricant every bit as good as oil; slow down a lot before having to stop or maneuver in leaves, especially at intersections. This is true for dry or wet leaves and the worse situation is dry leaves on top of old soggy/boggy leaves at an intersection.
Warning: Gravel can be every bit as treacherous as oil, especially when going downhill and/or when deep on the trail, or at paved or dirt intersections - Reminder from Ray F. BTW Gravel is Grave in French - Grave Wines come from vines grown in gravel - good stuff.
Warning: Riding a bike downhill, fast, over 'Wash Board' ridges can cause a rider to lose directional control and loose upright stability. Smaller framed bikes and short wheelbase bikes seem to react more adversely to this condition (Terry).
The following is a list of opposing capabilities from which riders must make tire selection choices.
SPEED                                            LOAD
Light Weight                               Heavy Duty
Narrow Wall                                Thick Wall
Narrow Track                               Wide Track

HARD ROAD                                   DIRT ROAD
Tread Less                               Knobby Tread
Narrow Width                              Wider Width

PERFORMANCE                                  DURATION
Light Weight                             Heavy Weight

ROAD FEEL                            SHOCK ABSORBTION
Small Air Volume/Capacity   Large Air Volume/Capacity
High Air Compression              Low Air Compression
Narrow Radial Circumference Wide Radial Circumference

HARD SURFACE                             SOFT SURFACE
No or Little Tread                     Traction Tread
Less Rolling Resistance       More Rolling Resistance

FLAT TERRAIN                            STEEP TERRAIN
No or Little Tread                     Traction Tread

BETTER TRACTION                       LITTLE TRACTION
Soft                                             Hard

MORE FLATS                                FEWER FLATS
Thin                                            Thick
Standard Materials                High Tech Materials

SHORT LIFE                                  LONG LIFE
Soft                                             Hard
Standard Materials                High Tech Materials

SMALLER DIAMETER                      LARGER DIAMETER
Climbs more Efficiently  Rides Level more Efficiently
Maneuvers Easier           Rides Straight Comfortably
More Rolling Resistance       Less Rolling Resistance

LESS TREADS/INCH      (Carcass)      MORE TREADS/INCH
Heavier Tire Overall             Lighter Tire Overall
More Rolling Resistance       Less Rolling Resistance
Less % Road Hazard Damage   More % Road Hazard Damage

MORE             ROLLING RESISTANCE              LESS
Less TPI                                     More TPI
Thick Sidewall                          Thin Sidewall
Butyl Inner Tube  (unsubstantiated)  Latex Inner Tube
Softer Tire                               Harder Tire
Bellow Correct Pressure    Correct Inflation Pressure
Correct Inflation Pressure     Above Correct Pressure
Wider Tire Width                  Narrower Tire Width
Tread Pattern                                   Slick

NOT USED IN TIRE      CARBON BLACK       USED IN TIRE
Less Endurance                         Long Endurance
More Flexible                           Less Flexible
Wears Rapidly                            Lasts Longer
Poor Wet Traction                   Good Wet Traction
Check the Tire Surface: Insure that tire's carcass is not showing, the sidewall is not beat-up, is not rotten, nor is falling apart for road tires. If the tire is an off-road tire or a off/on road touring mix (as are most bicycle tours), make sure that treading has enough treading for braking and direction control for the front, and traction for the rear.
Tire Size and Standards: ISO discussion here ... - Under Development -
Here is a much more detailed site about Bicycle Tires and Tubes
Bicycle Touring Rim Issues:
Top
Mechanical Issues Directory
On long bicycle tours or after multiple bicycle tours, the wheel rims may crack from braking activity or load stress. Sometimes, this stress, including mountain trail riding, may result in broken spokes, spoke stretch, spoke nipple (nut) loosening, and wheel wobble issues. There isn't a whole lot a person can do to prevent this kind of wear except to: brake less, carry only light loads, and stay away from bumps, rocks, and holes - That's a joke.
- One thing that usually needs to be done is to buy beefier wheel rims.
- Heavy Duty / Touring Rims typically have a stronger material, thicker material, more spokes, stronger spoke fittings, and/or better quality spokes.
- The majority of New Bicycles are not sold with Heavy Duty touring wheels.
- Heavy Duty wheels (often an aftermarket purchase) endure better than most stock bicycle wheels.
- Most bicycle shop techs can be very helpful in helping a cyclist to secure a suitable touring wheel/rim setup.
- Often, only the rear wheel is at issue. Many touring cyclists only beef up the rear wheel. Again, a bicycle shop technician can help address this topic/issue.
- Some Trailer Wheel/Rims need to address the heavy duty stress issue.
- Cyclists over 200 pounds need to address the heavy duty wheel/rim stress issue up-front.
Heavy Duty Wheel/Rim Caveats:
Rim Integrity and Wheel Vibration While Braking:
Top, Mechanical Issues Directory, Also See Wheel/Bicycle Wobble
- Check the Axle fit in the Dropout: A poor fit of the axle in the dropouts is the #1 most Common Bicycle Touring Problem and a poor fitting causes other mechanical problems.
- Spin the wheel
- Look for evenness between the rim and the brake pads or rotor to the brake pads. This action can indicate a good or bad axle mounting to the dropouts. This process assumes that the systems were OK before the wheel mount or re-mount.
- Usually if there is a problem it is from a poor mount of the axle but note that the dropouts can wear unevenly, bend, or otherwise not be perfectly symmetrical.
- On the road, some riders learn to square the mount to one fork dropout or the other and have no subsequent problems. It is not unusual to see an experienced rider fit and re-fit a mount up to three times to get the overall fit perfect. One symptom of a bad fit is a wheel vibration that (did not exist before) occurs when the brake is applied.
- On occasion, one can sense a steering alignment issue in that the frame and wheels seem to be not lined up. Bad steering alignment causes uneven tire wear and peculiar wheel and riding vibrations.
- In any case, if there are dropout-axle fitting issues, get the bike to a shop ASAP, as shops have special tools to fix or address these issues.
- Sometimes, what seems at first to be brake rub on a spinning wheel, is in fact a Fender, Fender Brace, or Rack Brace rub; adjust/repair as needed.
- In the field, for emergency repairs only, a large adjustable wrench (1st choice) or a tongue and groove pliers (2nd choice) may be used for re-shaping a drop out and on rare occasions, a round file may be used to re-shape a dropout.
- Check for Tire Mount Evenness: An uneven tire mount to the rim causes all kinds of annoying little vibration and wear issues.
- Check for Brake Rub: Usually brake rub is caused by a poor wheel mounting to the dropouts, but it can be an indication of a brake system problem.
- Check for Wheel Rim Rotation Roundness (lateral and radial): Anything greater than 3/16 inch or 3 mm should have a tech or shop inspection/adjustment. This presumes that the tire is mounted evenly around and this presumes that the axle is mounted correctly in the dropouts.
- Check Outer Wall Thickness: Thin Outer Walls are caused by rim brake wear over time - eventually the rim must be replaced, which is often the time to beef up the rim quality.
- Outer Wall integrity can only be known by removing the tire and
- "Mike-ing" (micrometer measuring) the wall thickness, and/or
- Visual inspection, and/or
- Feel
- WARNING: If one can tell by visual inspection or by feel, then it is already beyond time to get a New Rim.
- Check the Rim for Microscopic Cracks:
- Look for longitudinal cracks, both, along the sides (Outer Wall) and the top (Spoke Wall - what faces the axle).
- The cracks are usually very fine and are usually microscopic (they typically seem to be hairline, mini-lightning bolt looking, and slightly purplish on steel/alloy Rims).
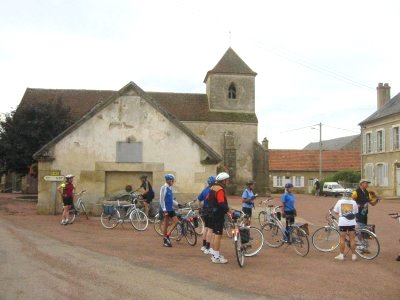
Tire Air Pressure Measures and Equivalence/Equivalents Table:
Top Mechanical Issues Directory
This crossover table has evolved because different countries have different standards for measuring air pressure. A cyclist may discover that the air pressure system at a petro station has psi (USA), atm (France), bar (British, Europe), or ksc (Asia and Metric) for units of measure. If the cyclist is lucky, the pressure nozzle may be labeled, most are not. By our own experience and observation, Atmosphere, Bar, and KSC are all so very close in unit value that the measurement difference is negligible; usually close is good enough. However, PSI is so different, that it is obvious; check some of the scale values.
Experience: We have learned, over time, to memorize the word(s) for air pressure (for international travels). It doesn't just jump out in the 'Language for Dummies' books. It is noteworthy that the word 'Atmosphere' (Greek origin) seems to be well understood internationally and also that if one simulates the up-down pumping motion on a stand up bike pump, one will have communicated completely; we have had 100% success in communicating our need (and receiving a positive helpful response). As an aside, people like to help 'fully loaded' bicycle tourists; the experiences will make a cyclist feel good about one's self, life, and humanity.This is a handy cut out Reference Table for Tire Pressure equivalence.
Let's hear it for Charades; Pictionary skills are also a rewarding bicycle touring attribute.
| Pound/Square Inch (psi) |
Atmosphere (atm) |
Bar (bar) |
Kilogram/Square Cm (kgf/cm2 or ksc) |
| 42.7 | 2.90 | 2.94 | 3.00 |
| 43.5 | 2.96 | 3.00 | 3.06 |
| 44.1 | 3.00 | 3.04 | 3.10 |
| 50.0 | 3.40 | 3.45 | 3.45 |
| 56.9 | 3.87 | 3.92 | 4.00 |
| 58.0 | 3.94 | 4.00 | 4.08 |
| 58.8 | 4.00 | 4.05 | 4.13 |
| 60.0 | 4.80 | 4.08 | 4.22 |
| 70.0 | 4.76 | 4.83 | 4.92 |
| 71.1 | 4.84 | 4.90 | 5.00 |
| 72.5 | 4.93 | 5.00 | 5.10 |
| 73.5 | 5.00 | 5.07 | 5.17 |
| 80.0 | 5.44 | 5.52 | 5.62 |
| 85.3 | 5.81 | 5.88 | 6.00 |
| 87.0 | 5.92 | 6.00 | 6.12 |
| 88.2 | 6.00 | 6.08 | 6.20 |
| 90.0 | 6.12 | 6.21 | 6.33 |
| 99.6 | 6.77 | 6.86 | 7.00 |
| 100.0 | 6.80 | 6.89 | 7.03 |
| 102.0 | 6.91 | 7.00 | 7.14 |
| 103.0 | 7.00 | 7.07 | 7.23 |
| 110.0 | 7.49 | 7.58 | 7.73 |
Observation: Atmosphere, Bar, and KSC are all close enough in value that it does not seem to matter for bicycle tire applications.
Spoke Issues and Field Fix/Solutions:
Top Mechanical Issues Directory
- Generally, if the wheel rotates OK roundly, the spokes are OK. Conversely, if the wheel rotates out of round, there is usually a spoke issue.
- The spoke issues in the field are (in this order):
- Loose only discovered by inspection, slowly spin the wheel: look at all the nipples, feel the spokes. Sometimes the spokes can be plucked like a guitar string, when every spoke goes 'ping' and one goes 'thud' then that is probably loose, inspect and verify.
- About to Break the cyclists discovers a big gash in the spoke, often caused by a thrown chain and often found at the spoke's corner bend, but a gash can be caused from a stick or rock and it is most often on the rear wheel.
- Broke it makes a racket (noise) and if the cyclist does not stop immediately more components will get damaged. When a spoke breaks, usually the spoke does not fall off the bike, the spoke usually stays mounted and causes problems often by flopping into the derailer, brake (pad or disk), and/or the chain (thus potentially causing more bike damage). If a cyclist cannot repair a broke spoke and the spoke is still attached to the rim and/or hub, then the spoke must be strapped down (tape, string, zip tie ...) to anoter spoke.
- Too Tight very rare, a shop tension meter is needed to tell for sure.
- Changing the tension on one spoke will shift the wheel rim left or right of center and in or out of round. Adding or removing a spoke has the same effect. Bicycle Shop Wheelmen have a lot of experience in 'Truing' a wheel and most cyclists lack experience and lack the shop tools. Field fixes are just to get the bike/wheel to a bicycle shop.
- There are emergency broken spoke repair kits. It is worth having one for a tour. Read the instructions. Their big payoff is for rear wheel, cassette side, hub flange mounting.
- Some people carry spare spokes. The spokes must match the existing spoke system. On occasion, left side rear wheel spokes can be different from the right side. Rear wheels require a tool or two to remove the cassette so as to access the cassette side, hub flange's spoke mount.
- If anything is wrong, don't ride but get a tech.
- If one plucks each of a series of spokes, like a guitar, and the sound is like ping, ping, thud, ping; the thud is a loose spoke. Remember the fix is not to tune the spokes by ear, but to incrementally tighten and test in order to remove the wheel wobble.
- In the Field:
- Spokes can be tightened or loosened with a spoke wrench, multi-tool wrench, or an adjustable wrench. Be careful to insure that the nipple is solidly in the wrench.
- It is very easy to accidently round a nipple with an adjustable wrench because it is not tight enough on the nipple.
- The best nipple adjustment tool is a horse-shoe shaped spoke wrench tool.
- Note that there are three common nipple/nut sizes (3.23, 3.30, and 3.45 mm - others exist, and 3.23 is the most common - AKA Park Black). It is very easy to mis-select the incorrect nipple wrench size. Also note that many different sized and shaped spokes exist.
Many touring bicyclists carry a few extra spokes and nipples. - A Spoke is a Bolt and a Nipple is a Nut (Note that the Nut's contact with the Rim is typically a flange on the other side of the Rim [there is a rare racing exception where the spoke nut is on the inside of the rim]).
- Spokes have Right-Hand threading ("Righty Tighty, Lefty Loosey" rules apply).
- Rotating the nipple/nut towards the axle, tightens.
- Normally tightening is what is needed somewhere.
- Some oil dripped into the nipple and spoke hole at the rim followed with some wheel spinning will make the nipple adjustment operation easier. Sometimes on must wait a few hours or in really bad cases, a few day for deep penetration with WD-40 or Liquid Wrench type products.
- To perform any spoke work in the field, turn the bike over (or in rarer circumstances set the bike up on a bipod stand). For either wheel remove the wheel, remove the tire, remove the tube, and remove the rim-liner.
- BEFORE performing any spoke work mark each spoke that is loosened with tape or some sort of marker with staying power. Note and write-down (memorize) the lacing configuration - If the spoke was removed before this step, compare the layout of the adjacent spokes and match their pattern. Usually a three-cross or four-cross lacing pattern is used. Be sure to match the spoke lacing pattern.
- Sometimes, because of the spoke placement pattern at the hub, another spoke head may have to be loosened at the hub end, in order to free a broke or damaged spoke. Thus, adding to the spoke count for the spokes that must be marked and re-tightened.
- Most mechanics deliberately perform nipple tightening and loosening below the axle as opposed to above the axle because the hand twist rotation direction is reversed on the top versus on the bottom.
- Work in increments that are either 1/4 or 1/8 nut turns followed by a wheel spin check. Some mechanics work in 1/6 turns because the nipple has six sides.
- There are Two commonly addressed Wheel Adjustment Dimensions to conduct herein, Lateral [side-ways] and Radial [inward-outward]). It is best to work the lateral spoke issues first and then the radial issues, however, one spoke dimension adjustment will always effects the other spoke dimension. There is a third spoke adjustment direction (fore/aft-torsion) but only advanced and very unusual spoke lacing patterns need to address this issue and it's better left to Wheel Persons.
- Lateral Adjustments are usually balanced. Left spoke in 1/4 turn, Right spoke out 1/4 turn. Or, Left Spoke in 1/4 turn and two Right Spokes out 1/8 turn. Every adjustment must result in less wobble or the adjustment must be undone.
- In the field, before spinning a wheel for truing, ensure the wheel is mounted securely and appropriately to the dropout. When cyclists spin the wheel for truing, a gentle spin will work just fine and holding one's thumb next to the stay or fork will work well for a tuning reference. I have heard of cyclists taping a small stick and clipping a stick with a binder clip. Note that in many cases, the field work is just to get the wheel in good enough shape to get out of the field and into a bike shop.
- NOTE: Spin checks are looking for less wheel wobble (left/right, up/down) per tool adjustment action. 1 MM or less wobble is the acceptable tolerance standard for most shops for most Wheel Rim types. 1-2 MM is OK for a field repair to get to a shop. 3 MM or more of wobble may be dangerous to one's health.
- NOTE: Don't adjust more spokes than two adjacent on one side or three in a row (two on one side and one from the other side) at any time.
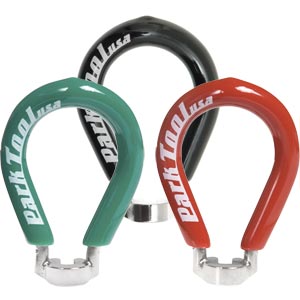
Advanced Rim/Spoke Issues:
Top, Mechanical Issues Directory,
- SITUATION: If spokes aren't bent into shape for their crossing pattern from the factory, the spokes will eventually become bent for their shape on their own just by regular bike use over time.
Unfortunately two things happen if spokes are NOT pre bent: - Spokes wear out faster
- The Wheel Rim comes out of True.
- SOLUTIONS: Pre Bend the Spokes. Spokes can be bent in a couple of different methods but the BBI Method is Best!
- BBI METHOD: Use a lever, about the size of narrow paint mixing stick (or a vinyl covered handle from a cone wrench) and lever open the spoke intersections to pre-bend the spoke. This must be done for each side (be careful, it is easy to mix-up spoke side sets). What is desired is for each crossing pair of spokes that come from different sides of the same hub flange to be pre bent.
- Another METHOD: The same spoke sets, just discussed, can be bent by squeezing the spokes together, by hand, at a point between the nipples and the intersection of the spoke crossing. This works but is not as efficient and as effective as the BBI Method because the bend is not at the natural spoke intersection.
- Always RE-CHECK for TRUE (for any method): Once the spokes are pre-bent, the wheel must be rechecked for true and adjusted if necessary.
- Theory A: Over stressing the spoke (by over tightening the nipple and then backing it off). In theory, this is like tuning/stressing a guitar string, over tighten a little and then reset it as desired, in theory the stress takes out any stretch that may occur over time. In actuality, Nipples and Spokes can be over torqued and there is no standard way to make this method work every time - it does work sometimes, it does NOT work all the time.
- Theory B: Squeezing spoke pairs together will strengthen the wheel. This method may take a wheel out of true, it may not, but it may put an unnecessary bend in the spoke (discussed previously, a bend where it is not needed, a bend in the wrong place). This is a poor emulation of spoke bending at stress points (where spokes cross and bend naturally or by encouragement).
- Always RE-CHECK for TRUE (for any method): Once the spokes are manipulated, the wheel must be rechecked for true and adjusted if necessary.
- Once a wheel it trued, before being used on a bike, the torsional wind-up of tightened spokes must be released.
- The best way to stabilize a wheel (while it is still off the bike) and undo any 'wound up spokes' (spokes twist when tightened) is to side load the wheel by pushing the center hub down (on a block) while applying palm pressure at spoke pairs 180 degrees apart. One can physically feel the release with finger tips and often hear a pop or unwind whir. Flip the wheel for each flange set of spokes. THEN Re-check the true.
Spoke Lacing: 3 Cross and 4 Cross Patterns are Quite Satisfactory
<This is for a bike mechanic to perform BUTA cyclist may be asked about this issue when a wheel is ordered or repaired.>
Spoke Lacing addresses engineering problems and solutions that were actually resolved by the beginning of the 20th Century. It was discovered that certain spoke lacing patterns gave wheels a better/improved strength, flexibility, and durability over other patterns. Theories come and go and people who have been around for a while see a cycle of about 20 years where new ideas are offered, again, but it turns out that the new ideas are old ideas and they have already been tested and resolved, amended, or debunked. Which is one of the reasons why it is wise to have institutions of learning to record ideas, test concepts, and advance proven arguments.
BBI has tested different spoke lacing patterns for different sized wheels and found that for the 26" and 700mm wheels (for this range of wheel/rim/tire sizes), that 3 Cross and 4 Cross spoke lacing patterns offer the most efficient and effective wheel support for Push and Pull Torsion, Lateral Flexibility, Load and Strength, and Durability.
Pre-Setting the Spoke Bend
(All from BBI)
<This is for a bike mechanic to perform.Sometimes this step is incorrectly called 'Stressing the Wheel'.>
Stressing the Wheel - 'Debunked'
(All from BBI)
STABILIZING the TRUE:
(All from BBI)
<This is for a bike mechanic to perform.Sometimes this step is incorrectly called 'De-Stressing or Un-Stressing the Wheel'.>
Tire/Inner-Tube Lubricant (Myth or Necessity?):
Top Mechanical Issues Directory
- ABOUT TALCUM (Persian talq) is a mineral from the ground (composed of hydrated magnesium silicate; which looks like dirty quarts but is vey soft, like Soapstone). According to Wikipedia, Talcum is used for Electrical and Heat Insulation, Baby Powder, Cosmetics (talcum powder), Lubricant, and as Filler in paper manufacture. Its Benefits to Bicyclists is that it has a distinct greasy feel and it is not soluble in water (it works in wet conditions without turning to mush) and talc can serve as an effective lubricant between the Tire and the Inner-Tube to keep them from sticking. Talc is particularly effective during the tube inflation process. Talc color ranges from white to grey or green and can be used by bicycle mechanics in its powder form (most common, using a powder brush) or (sometimes) as a wide chalk like stick. Talcum is clean and wipes off easily from brushing one's hand together, brushing from clothes, or washing hands or clothing. Its use originally came from the auto tire industry, as certain early tubes and tires would stick together (incorrectly called Vulcanization); this rubber compound sticking or melding is no longer a problem in the bicycle or automobile tire industry.
 TALCUM WILL WORK IF one was to inflate a bicycle tube straight out of the box, inside a rim and tire, with no pre-filling the tube with air, and then Talc could help reduce tube folds or twists which would eventually wear the tube and cause an air leak (thus causing a flat tire).
- TALCUM IS NOT NEEDED IF one was to pre-inflate a bicycle tube with just enough air pressure as to give the tube its round form and install the tube into the tire; then that action would usually prevent tube folds or twists (which would otherwise have eventually lead to a flat tire).
Caution and Caveat from John Salzbach of Rema Tip Top, a popular American Talc Manufacturer/Distributor (who corroborates the previous statements) hints that if a tire and tube have been dressed with talc, then one must clean the area to be patched very well or patch security may become "problematic". Also, he states that Talc is still widely used in the Agriculture Industry.
- The purpose of adding a tube/tire lubricant was to:
- Keep the tube from sticking to the tire, particularly for the inflation process,
- Help easily remove a non-sticking tube,
- Keep drying patch cement on a repaired tube from sticking to the tire, and
- And ALL of the other stuff is MYTH:
Talcum has nothing to do with tube or tire/tyre longevity, leak prevention, or leak speed reduction. Bicycle Tires can and do get hot, but nothing like an automobile tire. Tires get hot on hot days from the sun and from heavy loads (like from touring), but tires don't get hot from just riding around (like for autos and trucks). Tubes do stick to tires on occasion, just from being pressed together over a time frame, but it doesn't appear to be cause for Tire Lube alarm. - Some bicycle race teams/racers seem to use talc (to pre lube tires beforehand) for quick tube changes for races or by racers - So the concept is not dead.
- Auto Shops and Bicycle Shops use a much diluted soap-water solution to coat tires with a slightly slippery liquid substance to aid in mounting tires and for removing tires from rims. Furthermore, soap-water solutions give tires a slightly tacky bead for installing and sealing bicycle and automobile tubeless tires to the rim.
Tire Air Pump:
Top Mechanical Issues Directory
- Pumps can often be Bike Mounted but a slight amount of weight can be saved by carrying the pump in a bag (along with other wheel care equipment).
- If the pump is to be stored away, always make it easily available.
- Insure that the Air Pump is actually capable of attaining the tire's maximum desired tire air pressure. Many pumps do not achieve this requirement.
- Story: The ToPeak Mountain Morph with Gauge is the very first bicycle air pump that we have ever used that would actually achieve full/desired/advertized tire pressure (100+ PSI). Addendum: ToPeak only makes the Road Morph now; it is more slender and 1 or 2 inches longer and it performs just as well as the Mountain Morph.
- Be very careful about valve types and mixes. This issue can be more of a problem renting bikes in foreign locations (both a pump issue and a tire valve issue).
- Some tire valves require a separate adapter or a special adapter if one does not have an appropriate tire pump. Not a good thing to learn 2 days from a bike shop or tire store.
- Some (read as most) multi valve type pumps don't do a good air fill job on any type of valve.
- Since about 2003, most bike mounted tire pumps, are convertible between Schrader and Presta tire valve types.
- Don't confuse a pump that has two different air valve ends (Dual Valve, Presta and Schrader) with a pump that has one end and is convertible between Presta or Schrader. They are two different things and, in our experience, the convertible is better and the dual is NOT worth owning.
- Experience: A biker can fill a Schrader tire valve at almost any petro station in the world (including fuel, gas, or tire shops). A Schrader tire valve is the same valve that car tires have. On the other hand, virtually No fuel/petro/gas station can handle putting air through a Presta bike tire valve. Approximately Only Five Percent of car tire shops can handle a Presta tire Valve.
- There are Presta to Schrader adapters and every biker should carry an adapter regardless of their tire valve type.
- Caution: If the amount of air pressure loss is greater than 5 PSI a day, then start looking for another pressure loss cause.
- Experience: It generally seems that bike tires lose about 3-5 PSI per day, such that bike tires need to be filled/topped off every other day.
- Optional: Spare Tire and Tire [Repair] Boot
- Optional: Heavy Duty Manual Pump (Usually stays with transport vehicle or in the trailer of one biker in a group).
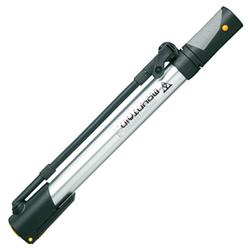
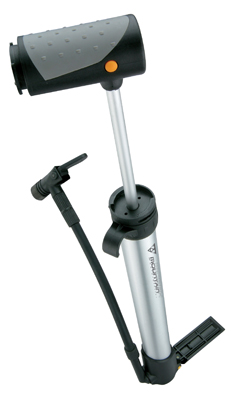
Slime for Touring:
Top Mechanical Issues Directory
- Remove the air valve component from the tire stem before adding slime. Fill with Slime. Then, install air valve (as quickly as practical).
- Be sure to store, carry, or park the bike with the air stems in any position other than straight down (as the slime tends to settle with gravity over time and work its way up the stem if the stem is at the lowest gravity position). Perhaps the 4 or 8 O'clock is the best storage positions for the stem (in order to facilitate Slime drainage from the stem). At 6 O'clock, slime can run up and into the stem by sheer volume and at 11-12-1 O'clock, slime can settle into the stem.
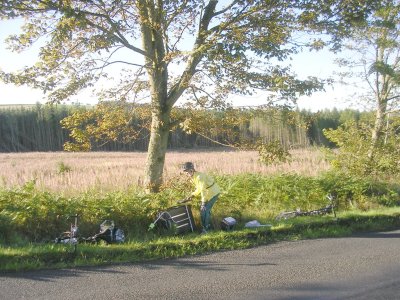 We have had no luck using "Slime" in our tires and we recommend that it not be used for touring. Slime is liquid goo that turns into a fibrous solid material when it is exposed to air. Ideally, on a leaking tire, a punctured tire will self seal as soon as the Slime material comes in contact with the outside atmosphere, thus preventing a tire from going flat. But what happens over time, nearly as we can tell, is that eventually the Slime around the air stem/valve begins to harden up from air being put into the tire. Eventually the hardening Slime will cause an Air Pressure gauge to have a faulty reading such that more pressure is in the tire/inner tube than indicated by the gauge, thus a high pressure blowout occurs (under touring conditions). We had this happen to three of four bike tires, over time - we eventually figured it out and swapped out all Slime filled tires and our abnormal high rate of flat tires problem went away.
** Feedback: From Harry, of Ted's Bicycles in Colorado Springs, has added two important pieces of information for those that do/must use Slime:
Addendum (2010): There is, now, a new kind of double lined tube that has slime in just the lining and the lining is just on the tread side of the tube. The lining protects the slime from the air valve and normal tube air pressure. So far we have not used/tested this product nor found it with an extended presta valve.
Tire Liners for Touring (Avoid Them):
Top Mechanical Issues Directory
 We have tried to use "Tire Liners" to no avail (at a different time than the Slime problem). In theory, Tire Liners lay between the inner tube and the tire itself, thus presenting a puncture barrier to thorns, nails, and other objects that cause puncture flats. What happened over time, in every case for us, is that when we had a flat tire, an inspection of the inner tube showed a wear pattern on the tube caused by the Liner. In fact anyone could see an exact outline of the edge of the liner on the inner tube. The inner tube's leak point would always be where the inner tube was most worn from the Liner. We quit using liners and replaced all the inner tubes and the unusual high rate of flat tires problem went away.
Tools (Touring Issues and What to Carry):
Top Mechanical Issues Directory
FIRST: Some Important Tool Touring Issues
- Duplicate Tools (a double edged) Issue: In traveling groups, there is usually no need to carry duplicate specialty tools. However ...
Caution: Sometimes, bikers part ways or loose bikes or equipment (for a variety of reasons). The concern is about the parting biker having or having had a special tool or something else that the group needs or will need (like tickets, keys, codes, telephone numbers, ...). Make a mental note to protect the remaining group's travel and safety integrity when member equipment/knowledge separation occurs. This usually means that someone in the group needs to remember to get the needed object/information from the departing biker or that the object needs to be purchased (or ordered or a particular issue needs to be addressed) at the next opportunity. - About Tongue and Groove Pliers (narrow mouth): In many cases a good Channel Lock type of pliers can perform many bike wrench requirements/functions. AKA Channel Lock, water pump, or grip lock pliers. Ideally, the tool mouth/head should be narrow enough to fit in tight/narrow places, but not so narrow as to break under pressure. This is one of those rare cases where a cheap looking, inexpensive light duty (versus heavy duty) Tongue and Groove Pliers is quite functional and half the weight of heavy duty Tongue and Groove Pliers.
- About Knives:
- If a person is going to have a knife for touring, they may as well have a Swiss Army type knife that at least has a big and small blade, awl, scissors, bottle & can opener, Phillips tip screw driver, flat tip screw driver, and tweezers. For some people (like us), the knife must also have a cork screw!
- Most bikers don't want anything in their pockets while biking, but as soon one stops for any duration in a remote area, people should have a knife on their person.
- Always know where the knife is located and if there is one knife between a couple of cyclists/campers, it is a nice courtesy to let the other cyclist/camper know where the knife is located.
- Post Script: We carry a second knife in/with the kitchen ware - it is only to be used for cooking and the chief cook will get very <insert word here> if the knife is used for anything other than kitchen work - ALL lasting friendships and relationships have boundaries, learn them.
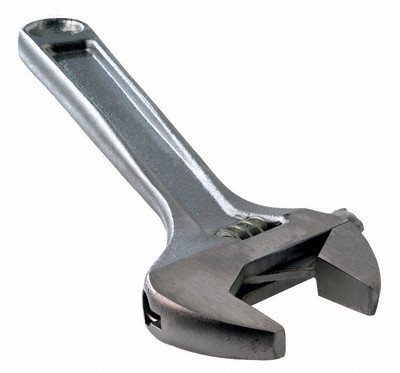
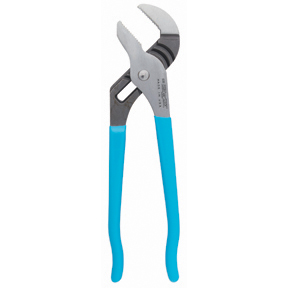
While Touring, What Tools Should A Cyclist Carry?
This information was getting spread out over this website. This tool information is now consolidated under two functions. The answer is a fuction of two variables: How many cyclists? How many days? Note that the amount of Days is directly related to Travel or Tour Distance.
- See Bicycle Touring Tools Checklist for a list of tools to consider for touring as an
individual, couple, or small group (3-6). - See Expedition Tools Checklist for a comprehensive list of tools to consider for
touring for over 30 days or to carry for large groups (7-16) to very large groups (Events).
Locking the Wheel: Front Brake Lock Band/Strap/Wrap and/or Wheel Stop:
Top Mechanical Issues Directory About Parking a Bicycle
- It is the STEERING WHEEL BRAKE that needs to be engaged (usually this is the front brake). Locking the rear wheel will not prevent the steering from turning outward and then rolling laterally.
- Some handlebar setups, particularly more or less straight mountain bars, may allow one to use a Rubber Band type of wrap, such that the, continuous ring, band could be left on the bike bar while one is riding and then the band could be slipped over the brake lever while parking (leaning the bike against something). Thus one would not have to deal with band search and store activity/issues. BUT IF NOT POSSIBLE
- One could use a Velcro type of strap (as well as Matt or Bren's Elastic Hair Band), be the device homemade or something that already exists like a reflective leg band strap, to wrap around the brake lever and handlebar grip.
- Side Kick stands do NOT prevent bike wheel roll, Bipod Kick stands Do Prevent bike roll.
- There is something to be said for using cheap, unappealing, and ugly wrap devices (since one is walking away from the bicycle).
- This is a big issue for touring bikes, because the bikes tend to have a higher center of gravity due to all of the higher/elevated pack mass and these bikes do tend to roll and fall more often than typically unladen street bikes.
- Opening the gap of a STI grip leaves the possibility of getting debris in there. See Previous, just mentioned Integrated Brake/Shifter solution for creating a STI cover.
WHY Lock a Wheel? BECAUSE a free rolling bike nearly always falls over, which at worst damages a bicycle component or dents the frame, and at best only scratches something.
Engaging a brake on a parked, fully loaded, touring bicycle prevents bike free rolling and the likely-subsequent bike fall damage.
Locking/Engaging a bicycle Brake is performed in order to keep a bike from rolling. It is the steering's wheel (versus the drive wheel) that needs our attention, usually this is the front wheel but on occasion the steering wheel can be a rear wheel on some trike and quad wheel setups.
Situations: The wheel that is used for steering direction needs the attention, because it can, both, roll and/or rotate due to wind. Some bikes may have a higher center of gravity (with a heavy rack or handlebar bag) and this exacerbates the fall over situation. Sometimes a bike may even get bumped by an innocent bystander, kid, bicycle, or animal and then roll and fall over. On tours with groups, it is not uncommon for a fellow rider's pannier to accidentally brush a parked bicycle and cause the parked bike to fall over.
Caution, A Common Problem: A bicycle is about 9 times more likely to fall over and damage itself than it is likely to be crashed. This statistic is based on personal observation.
Actual Cases:
- We had a bike with a STI grip (integrated brake and shift system) fall over, from resting on a tree, to the ground. Between the tree and ground objects, the STI got filled with micro debris (bark, humus, and dirt). While cleaned, the STI never operated as smoothly again. STI's are very expensive to replace.
- At a market, while on tour, a bike that was leaned against a building (resting on its handlebar) free rolled a little rearward and the front wheel turned inwards, the bike then rotated away from the building and fell, scratching the top tube and tearing a hole into the side of the seat.
- Numerous times, we have seen bikes fall over while parked against a building, tree, fence post, large planter, or even on a kick stand.
Solutions: The root of this solution comes from Kevin Kelly (kk.org) and Alan (ecovelo.info) via Matt or Bren (bikehacks.com). Not wanting his bike to fall over while leaning it against something, Kevin Kelly places a taper-trimmed wine cork in the open area of his STI applied brake, thus keeping the brake locked well enough to keep the wheel from rolling, therefore preventing a bike roll and subsequent fall. See pictures below. Alan went the next step and applied an elastic hair band around the brake lever and handlebar grip.
Now there is a commercial product available; it is a fat band with a tab (for pulling over the brake handle). The most direct way to stop the wheel from rotating is to strap the wheel through the spokes, around the rim, and anchor it to the frame (often a water bottle cage). Some brake handles have brake locks.
Why didn't I think of that: So here is another idea, Why not, also, use a Rubber Band type of material, elastic, garter(?), or a Velcro Strap (like a pant leg strap) to wrap around the Brake Lever and Handlebar Grip!
Caveats
Brake Handle Position Note: In the USA, most brakes for the front wheel are on the left side of the handlebar. In Europe and for most Motorcyclists (who ride bicycles) the front wheel brake is located on the Right side of the handlebar.
Brake Lever Strap (I.e., Parking Brake): The way that the original concept was learned here, was via Matt or Bren at bikehacks.com (http://bikehacks.com/ecovelo-parking-brake-for-your-bike/). They, in turn, got these ideas from Kevin Kelly at kk.org (http://www.kk.org/cooltools/archives/001289.php who uses a cork to hold open a STI brake assembly and more recently from Alan at ecovelo.info (http://www.ecovelo.info/2008/07/21/parking-brake/) who has used an Elastic Hair Band to lock down a brake lever. All of these ideas are good. Following are some helpful visual images:
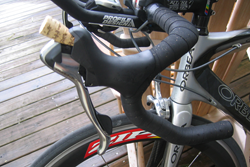
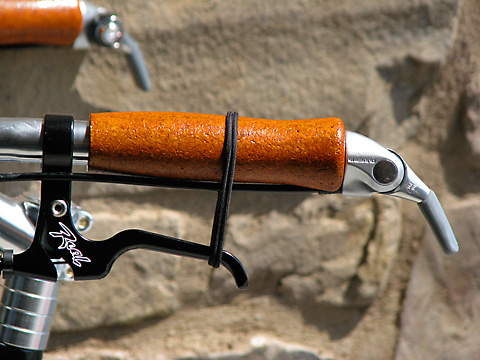
Amanda and Rich Ligato of vagabonds had another nice field solution; they put a bungee cord between their bike frame (bottle cage area) and the front wheel (wheel or spoke) in order to stop bike roll and fall over.
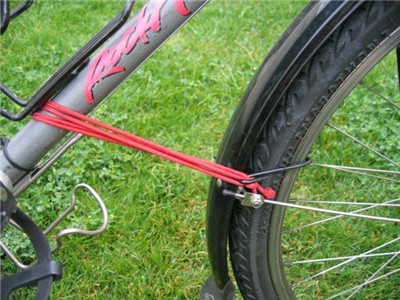
About Parking a Bicycle
Top Mechanical Issues Directory About Parking Brakes (Stop tire Roll and Fallover)- NO Kickstand, Laydown the Bike:
LAY the BIKE on its LEFT SIDE, NOT the Right Side. -
It is a good habit to lay the bike on its Left Side because the Derailers (especially the Rear Derailer) are usually on the right side of the bicycle. Learn to protect the derailer side of the bike. Why, because at some point in time a stick, rock, or obstacle is going to bend or otherwise damage a transmission component and the learning lesson may be expensive or be costly in terms of time lost either not being able to ride or in chasing down a bike shop in order to fix or replace the damage.
- It happens that panniers, especially the right rear pannier, often protect the rear derailer from issues that cause rear derailer damage. It happens that the pedals on the crank-arms protect the front derailer.
- Courtesy and Where to Park:
- It is Bad Karma to negatively interfere with the actions or attempted actions of other people (whether or not one is cycling).
- Blocking doorways, entryways, workways, pathways, walkways, roadways, or bike ways by standing or bicycle parking is very déclassé.
- In a group, Blocking cycle paths or roadways is easy to unintentionally do when the leader/map reader is stopping in order to orient one's self for a map reading or for route directions and other bikers queue up behind the leader; it is wise for fellow cyclists to get off to the side of the route and not block traffic (bike, pedestrian, or motor).
- When parking for personal matters, it is very helful to other cyclists, pedestrians, and vehicles for the cyclist to get completely off of the travel way. Move far enough off the road or pathway, that if you were to fall or drop something, you (or it) still would not be on the travel way.
- Kick Stands (Kickstands):
- Side Mount Kickstand: I have yet to see a side mounted kick stand hold up a fully loaded touring bike with the slightest of wind or touch.
- Bipod Kick Stand: A huge advantage of a bipod kickstand is being able to park the bike wherever the cyclist wants; it frees the cyclist from having to park with other bikes without kickstands that are either leaning against a structure or building and it frees the cyclist from having to lay the bike on its side (which takes up a lot of space, especially if there are 20+ bikes in the same area). ALSO: A Bipod Kick Stand allows a touring cyclist to perform fairly easy maintenance on the crank, chain, rear wheel, front and rear derailer (the very things most likely needing attention while on tour).
- Emergencies and First Aid Kits (learned from Wally Werner):
- Most Experienced Cyclists deliberately keep their first aid kits in a right side pannier because out of habit, even when they have a kickstand, in emergencies cyclists tend to lay the bike on the left side therefore the upside pannier will be on the right side (it is easier to get to the upside pannier than the downside pannier).
- People pulling trailers still lay or lean their bike on the left side. First Aid Kits need to be in an easy to access location, either: just inside a zippered waterproof carrier bag or just under the trailer's cover flap (which may be more easily front and/or rear accessible, they are hardly ever easily accessible from the side). It is an art to reach inside a bicycle's mono wheeled trailer and remove anything without disturbing or unbalancing the connected bicycle.
All About Thread Lock Compounds (aka: Threadlock):
Top,
Mechanical Issues Directory,
Touring Equipment and Supplies.
Why this is important? Bolts and Nuts may (and often do) unfasten in the middle of a tour, possibly leaving a cyclist stranded but more likely adding a couple of unexpected days to a tour in an undesirable location while the cyclist(s) figure a way to manage the effects of a broken or missing bike part. One mitigation scheme is to carry spare nuts and bolts but another mitigation scheme is to carry a Tread Lock compound and fasten the Bolts and Nuts preventively (discussed herein). Said rather simply, Thread Lock causes nuts and bolts to temporarily adhere to one another and the setting will last until a lot of wrench torque is applied to the fasteners.
This information comes from Barnett's Manual DX [Bicycle Repair and Maintenance] 6th Ed - Electronic, by John Barnett, Barnet Group Inc, 2008; Adventure Cycling Magazine or its Web Site; Tom Dobruck, of Permatex; and from our own experiences, see True Accounts.
Thread Lock Chemical Compounds, In General:
- Thread Lock is an anaerobic (sets without air) expansion compound that takes on the property of glue.
- Thread Lock compounds are TOXIC - Don't Touch, clean hands immediately - read instructions.
- There are two main differentiating Thread Lock product type characteristics -
They are either Temporary or Permanent. Only Use Temporary. - Thread Lock does NOT work on plastic NOR on nylon (core/liner threads on some nuts).
- The temporary compound cracks and crumbles under release pressure but the permanent compound will not budge without damaging or breaking the assembly, however heat can be applied to some permanent compounds to make them release. It's best to Avoid Permanent Thread lock for Bicycles.
- Thread Lock compound also inhibits oxidation and/or galvanic [metal to metal bonding] corrosion.
- There are many Thread Lock compounds brands/products which may work equally well - Read/study the properties on the label (found in Bike Shops, Auto Parts Stores, and Hardware Stores.)
- Until about 2010, Thread Lock compounds were not available in bike shops nor hardware stores, one had to go to or special order to a big city fastener specialty store or tool supply store. At or after 2010, Thread Lock compounds could be found in some major hardware stores (big box stores). If one has a choice, the small Tube is more functional for bike touring than the little bottles but a little bottle is better than nothing. Loctite's Medium Strength (called Blue) or the equivalent brand's medium strength is the single best strength choice to carry and use for bicycle touring.

- Generally, the bolts closest to the wheel axle seem to take the brunt of the travel vibrations and those nuts and bolts seem to be the first to loosen.
- The first nuts or bolts to loosen are most typically the pannier rack support fasteners and the fender fasteners. If traveling for more than two or three days, those bolts will need Threadlock.
- Keep a clean/dry rag or tissue handy, when applying Threadlock.
- It seems that most people (including moi) apply too much the first time and a much of the control problem derives from the delivery system (bottle design). No problem, just wipe off excess or wipe off all of it and try application again.
- Threadlock is usually applied as one drop spread around the threads of a Bolt at the insertion end. Some larger Bolts may use two drops. The measured length of the Threadlock fluid/drop is typically .15 inch (1/8) or 2 mm (no more than .25 inch or 4 mm) on the threads at the end of the Bolt. If applied to a Nut apply 1/2 a drop (takes luck, skill, or practice) or one drop (max) - there is usually no choice as to where to place the drop because the Nut opening is often smaller than the Threadlock brush or nozzle.
Caution: New bottles and tubes of Threadlock often deliver more fluid than intended.
Caution: Be careful opening Threadlock, as the contents may be under a little pressure and
Be Extra Cautious at altitude when opening a new container.
If too much Threadlock fluid/gel is applied to the object, then immediately wipe away the excess or just wipe it clean and start over. This excess application issue happens to everyone sooner or later. - Known problem nuts or bolts should get some Threadlock applied.
- While on Tour, apply Threadlock to nuts and bolts as they are discovered loose (or for replacement of missing fasteners). It does not take long to develop a feel for this type of maintenance.
- Caveat: Threadlock is for active bicycle touring and not for shipping. Do not just apply Threadlock everywhere. Don't use Permanent Threadlock or Superglue (except for dire circumstances). Oil and Threadlock are not used in conjunction (as the compounds offset each other's properties). Threadlock, so far, is Not effective on plastic/nylon lined nut fasteners (nylon linings serve the same purpose as Threadlock compounds).
- Caveat: Threadlock will not work on plastic lined nuts and may actually weaken the plastic's tight friction property.
- Use Loctite 222 (Temporary) "Purple" (colored fluid - not bottle color) on small bolts of less than 7mm diameter.
- Use Loctite 242 (Temporary) "Blue" (colored fluid) on bolts of 7mm or larger diameter.
- Loctite 272 and 277 are Permanent compounds and are colored "Red."
- Presently, all Loctite bottle colors are Red (or a shade of Red) and all bottle caps are White.
- Many long range bike travelers use temporary Loctite for pannier bolts (and other fasteners that come loose) on bike tours - Be careful that one is using temporary Loctite and NOT permanent Loctite.
- The previous Loctite types are known by their color and are often referred to by their color name.
- John Barnett, of BBI, recommends that if a bicyclist only wants to carry one Loctite bottle/type, then they should carry Loctite 242 and use it for all fasteners.
- Only one small bottle needed per tour group. Bottles are 10 ml and 50 ml ($20-$45 USD respectively in year 2008) - NOT Cheap.
- If a bolt is already installed, and a person wants to apply a penetrating temporary locking chemical compound use Loctite 292 (which is Green in color).
- For reasons unknown, one cannot find Loctite Numbered Compounds in Bicycle Shops, Hardware Stores, nor Auto Shops (although the stores may carry other Loctite products) - Apparently, this is some sort of Distribution Legal Issue. These Loctite products can be found Online and in commercial "Fastener" type stores.
- Permatex Low Strength Threadlocker Purple is a temporary thread lock compound for bolts less than 7mm, Purple is their low strength thread lock color. The product ID is 24024 and only comes in a 6ml tube.
- Permatex bottles and Tubes are Blue colored with White caps.
- Threadlocker LS Purple is directly equivalent to Loctite 222.
- Permatex Medium Strength Threadlocker Blue is a temporary thread lock compound for bolts less of 7mm and larger, Blue is their medium strength thread lock color. It can be found in a small tube, small bottle, or larger bottle
- Threadlocker MS Blue is directly equivalent to Loctite 242.
- Permatex makes a Threadlocker Red, which is more or less permanent (can be removed with heat) which equates to the Loctite 272 and 277 products.
- Permatex makes a Threadlocker Green, a temporary compound added after a bolt is fastened, which is equivalent to Loctite 292.
- Permatex Threadlockers seem to be more easily found in Hardware and Auto type supply stores.
- ND Part# 111 (equivalent to Loctite 222)
- ND Part# 121 (equivalent to Loctite 242)
- ND Part# 146 (equivalent to Loctite 277)
- ND Part# 137 (equivalent to Loctite 272)
- Their coloring scheme seems to match Loctite's color scheme
- Their Product Numbers are different from the part numbers. Product numbers seem to be in the sequence of [Part#]+[VolumeCode] such that a 10 ml bottle of 111 would have a product number of 11110, or a 50 ml bottle of 121 would have a part number of 12150.
- ND thread Lock compounds are less expensive than Loctite's.
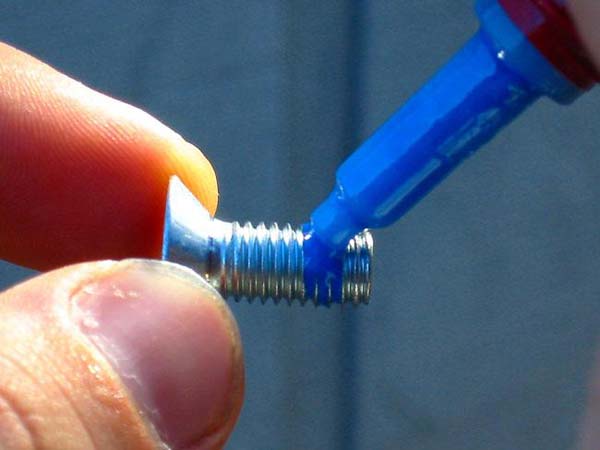
BRANDS (Three Examples of Thread Lock Compound)
LocTite (usually found in Tool Stores or Hardware Stores):
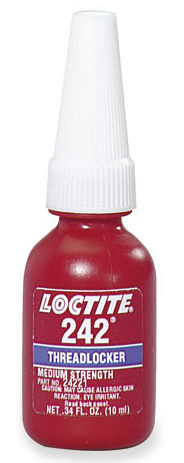
Permatex (usually costs the least and can be found in Auto and Hardware Stores):
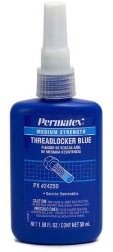
Vibra-Tite (ND Industries; Nylok-Detroit Corporation) - usually found in Tools Stores:
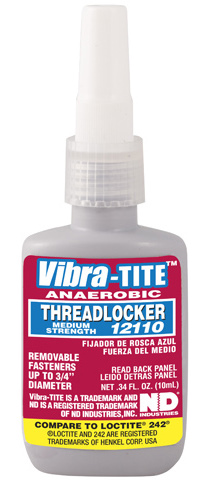
Bicycle Touring Equipment and Supplies:
Bicycle Touring Equipment and Supplies
- Table of Contents -
Top,
Bike Equipment & Supplies:
Racks,
Panniers,
Trailers
(Trailer Tongue Collar,
Trailer Splash Shield),
Handlebar Bag,
Handlebar and Bar Ends,
Rack Bag(s), Frame Bag, Handlebar Stap/Bag, Wheel Extension with Long Bag, Third Wheel,
Stoker Bag,
Bar-End as Brake/Shifter Guard
Seat Post Bag (aka Saddlebag),
Cargo Net,
Map Case or Holder,
Mount: Cue Sheet, GPS, Smartphone,
Night Lighting,
Carry Bag,
Brake Lever Strap/Lock - Parking Brake,
Bottles and Cages,
Pedals,
Skewers,
Fenders,
Kick-Stand,
Threadlock Compounds,
Related Bicycle Set-Up Dialogue:
Positive Tour Bicycle Design Attributes,
Tour Bicycle Setup/Configurations
-
This category addressees:
- The items put on bicycles/cycles or our backs that help us carry the tour load.
- The items put on bicycles/cycles to make touring safer, more accessible, or more pleasurable.
- The items used to mount or contain the tour load.
ALL About Bicycle Racks:
Top,
Bike Equipment & Supplies:
Racks,
Panniers,
Trailers
(Trailer Tongue Collar,
Trailer Splash Shield),
Handlebar Bag,
Handlebar and Bar Ends,
Rack Bag(s), Frame Bag, Handlebar Stap/Bag, Wheel Extension with Long Bag, Third Wheel,
Stoker Bag,
Bar-End as Brake/Shifter Guard
Seat Post Bag (aka Saddlebag),
Cargo Net,
Map Case or Holder,
Mount: Cue Sheet, GPS, Smartphone,
Night Lighting,
Carry Bag,
Brake Lever Strap/Lock - Parking Brake,
Bottles and Cages,
Pedals,
Skewers,
Fenders,
Kick-Stand,
Threadlock Compounds,
Bicycle Racks support Panniers, tied-down Bags, top-of-rack Bags, and strapped on Items. Rack design, durability, and mount to the frame matters. Try to select Bike Frames with built-in mounts (braze-on's) for mounting carry Racks.
- The best Touring Bicycle Frames have built in Rack Mounting Points and will be sold with Front and Rear Racks already mounted and especially made for that bike/frame.
- It is more difficult to mount racks to bicycles with full-suspension. In most cases the design does not allow rack mounting and therefore most Mountain Bike riders pull a trailer. Many Mountain Bikes are not designed to pull a Trailer and may quickly develop rapid wear problems and shaky ride issues (resonance, see Bike Wobble).
- There are custom racks made for some front suspension bike racks (internet and magazine search - see right side image).
- On road or trail tour, the mechanical items that are hidden by/from panniers will need close inspection (bolts, brake system, wheel mount skewers, hub, spokes). If three days have gone by without a close look, pull off the panniers and perform a close inspection.
- Pannier racks do not fail very often, but when they do, the situation may quickly become catastrophic. When racks fail, they may damage the wheel (hub, spokes, tire, tube), rear derailer, or brake system (disk or pad). Pay attention, daily, to mount snugness on the trail and carry spare bolts, washers, spacers and maybe special repair material (like duct tape and wire).
Use temporary Thread Lock compounds (like Permatex or Loctite brands) to keep bolts from slipping out. Do NOT use permanent glue (unless that is the only solution to get out of a desperate situation). See About Threadlock Compounds. - Finding and mounting pannier racks on non suspension, rigid, rear frame (AKA Hard Tail) and rigid fork bicycles, is relatively easy.
- Try to use/purchase racks that also facilitate the carrying of bags on the top of the rack (for both front and/or rear racks) as well as support panniers on the side of the rack.
- Racks take a lot of road bounce/vibration abuse - Durability is more important for touring (than looks or weight).
- Finding racks for flexible suspensions is a little more difficult but achievable. Sometimes finding racks for suspension bikes becomes very specialized for just that bike and maybe the bike manufacturer and/or dealer is the best or only source. Sometimes it is better to let a good bike shop find the rack(s) and perform the mounting.
- Generally, when road touring (including dirt roads) the side mounted pannier is carried as low as practical (about 5 to 10 inches off the ground). This method provides a lower center of gravity and better handling and control for the cyclist. When trail, single track, or no-track touring is involved (including double track jeep, logging, forest access roads or no existing road) then the side mounted pannier needs to be carried a little higher off the ground (about 10 to 15 inches off the ground). Thus a higher carried load better facilitates road obstacles (trail rocks, shrubs, rogue sticks, tall grass).
- Sometimes there is a rack mounting choice for how high to mount the rack above the ground, sometimes there isn't. Very often, the panniers themselves have height adjustment mounting capabilities, sometimes not. When possible, look into these attributes before making a purchase.
- Some cyclists, especially mountain riders, pad the top of their rack(s) with duct-taped foam padding or self stick rubber pad(s), thus extending the life of strapped gear bags. Dense Foam Water Pipe Insulation/Wrap for skinny/narrow/small tubes can be used around the rack sides of the top plate.
- The rack is a slightly better design if the side tubes on the top plate are flush with the top plate. If the tubes are not flush, then anything strapped or tied down to the top of the rack (like a waterproof bag) will wear faster over time (over long tours) than if the top plate and side tube were flush. If the side tubes on the top plate are NOT flush, then sometimes the top plate can be built up with self stick rubber pads or with insulation foam.
- Skewer Issue: In some cases, for some bikes, a different width skewer may be needed, based on whether one uses a skewer mounted front rack (common on mountain bike front shock fork mounts).
Caution: If traveling and transporting or shipping a bicycle, be sure to bring the correct skewer. The problem of forgetting evolves from having one skewer for when the rack is mounted and a different skewer for when the rack is un-mounted. Since the bike is usually broken down for shipping, it is easy to remember to ship the rack but forget that the rack requires a different skewer than riding without a rack (like for local riding). - Way before a Tour, Panniers should be Tested, Fitted, Rigged, and Loose Ends Taped-Secured-Trimmed. Duct tape may be used to sound proof and secure loose straps. We use rubber bands or velcro bundle ties (found in electronic stores) to tie otherwise long straps into a tight coils to keep the straps from dangling, yet be serviceable for different load requirements.
- It takes about a half a day to setup new panniers and a little test ride over washboard road will determine very quickly how well loaded panniers will ride or even stay on the rack. Then, a person will likely need another fifteen to thirty minutes for micro fitting adjustments.
- People are always amazed at how many wild animals are walked or biked in upon when all is quite, even in groups! It is wise to quiet down any Rack and/or Pannier noise issues. Un-necessary noise will drive a rider nuts on a tour.
ALL About Panniers:
Top,
Bike Equipment & Supplies:
Racks,
Panniers,
Trailers
(Trailer Tongue Collar,
Trailer Splash Shield),
Handlebar Bag,
Handlebar and Bar Ends,
Rack Bag(s), Frame Bag, Handlebar Stap/Bag, Wheel Extension with Long Bag, Third Wheel,
Stoker Bag,
Bar-End as Brake/Shifter Guard
Seat Post Bag (aka Saddlebag),
Cargo Net,
Map Case or Holder,
Mount: Cue Sheet, GPS, Smartphone,
Night Lighting,
Carry Bag,
Brake Lever Strap/Lock - Parking Brake,
Bottles and Cages,
Pedals,
Skewers,
Fenders,
Kick-Stand,
Threadlock Compounds,
Pannier or Pannier derives from Middle French and Latin meaning Bread Basket
(literally: pertaining to bread). Now, Pannier equates to Saddle Bag.
- Panniers, clean and with all parts in working condition (tight bolts, nuts, screws; straps and buckles; reflectors plastic-devices, cloth-strips; hooks, clamps; rubber mounts, pads)
- Additional weight, anywhere, changes the handling characteristics, to include steering. Practice with loads (real or simulated). Don't take on single track until ready and capable. Start with paved roads and then dirt roads.
- Ideally, for the long haul (survival), one wants each of the two wheels to support 50% of the total weight. At issue, for single rider bicycles, is that most cycles are designed to carry a greater portion of the riders weight to the rear tire, therefore, when packing panniers (front and back), a rider would need more of the packed weight in the front of the bike.
- Note: Heavier front loads require more arm strength, therefore some riders place more weight in the rear and some riders prefer to pull a loaded trailer (thus freeing up front weight for control and changing the percentage of weight on the bike's tires). Mountain trail touring tends to have better handling with more of a 40% front / 60% rear distribution (and no trailer), or an almost empty bike pulling a fully loaded trailer. Each of these scenarios has different riding, handling, and steering characteristics.
- Cool Story! (<<actual picture on right side>>)
- Note: Tire wear, between the front and back tire, is proportional to weight distribution. So many people try to rotate their tires near the estimated halfway to replacement point in order to get the most out of their tires (maximum distance). Keep in mind that tread is needed for traction, control, and safety, so the tire's replacement point will still have a safe amount of tread. [And when a new tire can be purchased is a factor as well: Bikers tend to take advantage of bike shops when they can be found because touring tends to mostly be away from bike shops. That is, change tires early versus later.]
- Generally, carry the smaller but heavier objects in the front: tools, parts, lube, stove, fuel, and cook ware. In addition, the (front) handlebar bag tends to also contain small but dense objects.
- Larger, bulky, and less dense objects tend to be placed in the rear: sleeping bags and pads, tent, ground cloth, dehydrated food, clothing.
- Wally Werner, Adventure Cycling Guide (many expeditions), carries his group first aid kit on the right side of his bike, because in an emergency he knows to lay his bike on the left side (to protect the derailers from the ground) and quickly access his first aid kit which is always just under his pannier flap. In his case, he's had plenty of practice.
- Generally, pack heavy stuff low, light stuff high (thus lowering the center of gravity or keeping it as low as practical). Pack for rapid access to rain gear, first aid kit, map, phone, flash light, matches, camera, and wallet - no matter where the item is stored. Also, see previous list item.
- Note: If there is a Handlebar Bag, some of these items should be carried there. Handlebar bags are frequently detached and carried by the biker into Museums and other places of interest (where bikes are not allowed).
- Sleeping Bag and sleeping pad on top (because they are light weight).
- All panniers have individual fitting and mounting characteristics, learn them. Some panniers clamp with lever, some use a bent metal hook and need periodic stretch or shrink adjustments to nylon straps, some attach to and detach from special quick connect mounts, some can be secured with a mini locking cable. Experience: Remove panniers when transporting bikes on the exterior of a vehicle. We had one come off the bike's rack while traveling on a rough road and it got run over by a truck
- Pannier racks and bags can have compatibility-fitting issues between the bike, bag, rack, and mount - Resolve before purchase or travel. Additionally, some pannier racks allow or facilitate a top of rack bag in addition to the side mounted bags (which can help balance the load by distributing more weight to the front).
- Some Panniers are noisier than others when in motion. Rivets make noise, Velcro does not, and plastic buckles tend to be very quiet (assuming one is not dragging a loose strap). Metal hooks make noise but can be noise dampened with rubber/plastic tube wraps/covers. Also electrical tape or 'duct tape' wraps can dampen sound.
- Pannier bag types range from small to large to expedition sized. Most bike stores do not carry large expedition bags in stock. Some bags have many pockets and access points and some have none. Some are waterproof, most are water repellent. We have never found this to be an important tour issue but we store our items inside a waterproof storage sack first and set the storage sack in the pannier. Very often, while camping and remote we leave the panniers mounted on the bikes and only bring in the content sacks.
- Some bags are more durable than others. Choose for tour needs and resolve all compatibility, fitting, and security issues. Some attach and detach easier than others (whose properties can be as problematic as convenient, as some easily detachable bags may come off easier as a result of a good pot hole or rogue tree branch). Some facilitate external strapping of extra loads, most don't.
- Keep DEET and Water Purifier (Chlorine Dioxide liquid) in lowest area in waterproof containers (like plastic zip lock type bag) as it can/will leak and destroy plastic, nylon, and leather. If one doesn't have a waterproof pannier, its better to use waterproof rubber/synthetic storage bags for clothing and for anything that needs to be dry. The best sack is the clear plastic storage sacks/bags which allow one to see items inside the bag. If, unavailable, then Hydroseal type waterproof bags work well (treated nylon with special coated material). Waterproof bags are commonly found in kayaking/canoe type boating supply stores or online or in larger camping supper stores.
- Warning: Things can still get wet in waterproof panniers!
- Warning: Panniers can be stolen and even if the pannier is locked or secured, items can be stolen, and if the buckles are secured, a knife can open a pannier. We've never had a problem but in populated areas we always have an eye on the bikes or the bikes are parked inside an otherwise secure building/barn/garage/facility. Luckily, we are usually passing through cities, or have a place to stay where the bikes and equipment may be stored, or we park next to the ticket booth where an agent agrees to literally watch the bikes (and we still chain and lock the bikes and take the handlebar bag(s) containing important items and documents with us).
- Comment: We are NOT going to suggest where to place the touring accruements, but we have evolved a system where we physically place our gear pretty much in the same spot for each different trip.
- Comment: Some people conduct air travel with pannier(s) as carry-on luggage (be mindful of the contents and hooks) - Robert B.
- See Bike Camping Checklist for other Travel Gear
- See On-Bike Clothing Checklist for Bicycle Clothing
- See Off-Bike Clothing Checklist for Camp/Tour Clothing
- See Clothing Issues for braod Tour Clothing Topics
- See Cooking Equipment for Cook Ware
- See Cooking Equipment for Food Stuffs
- See Fire and Cooking Issues for related Travel Issues
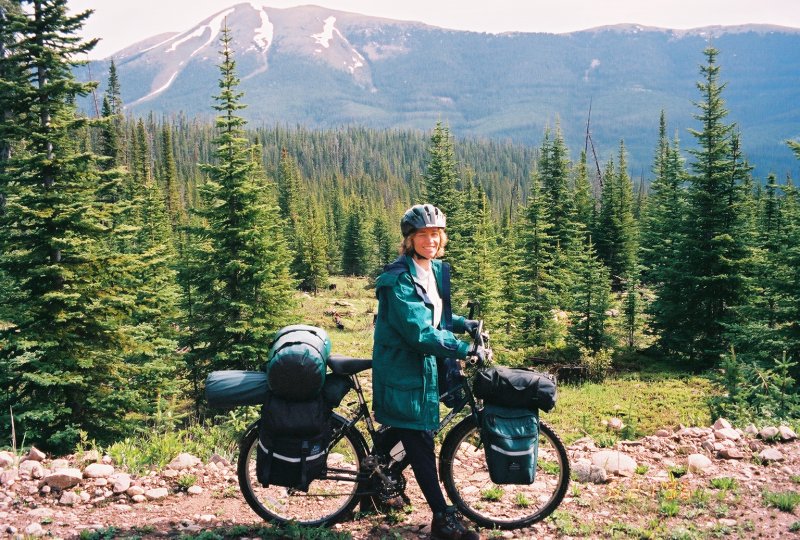
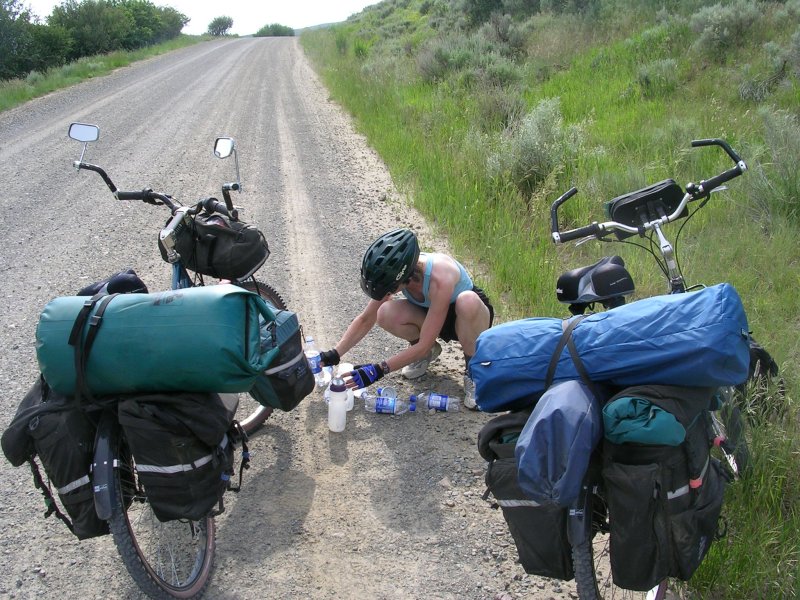
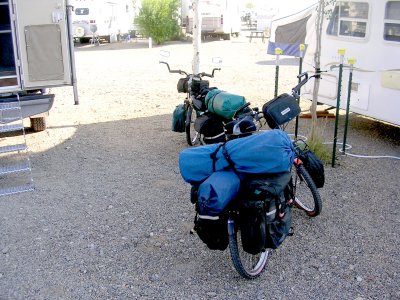
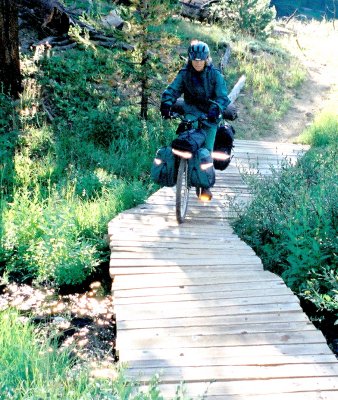
"Travel by U-Haul" - Shelly Mossey (NYC Bicycle Courier)
ALL About Bike Trailers and Trailer Types:
Top, Bike Equipment & Supplies:Racks, Panniers, Trailers (Trailer Tongue Collar, Trailer Splash Shield), Handlebar Bag, Handlebar and Bar Ends,
Rack Bag(s), Frame Bag, Handlebar Stap/Bag, Wheel Extension with Long Bag, Third Wheel, Stoker Bag,
Bar-End as Brake/Shifter Guard Seat Post Bag (aka Saddlebag), Cargo Net, Map Case or Holder,
Mount: Cue Sheet, GPS, Smartphone, Night Lighting, Carry Bag, Brake Lever Strap/Lock - Parking Brake,
Bottles and Cages, Pedals, Skewers, Fenders, Kick-Stand, Threadlock Compounds,
- Trailer, clean and all parts functioning appropriately.
- Caution: It is difficult to have an unbalanced load on a bike trailer, BUT insure that it is balanced AND NEVER have a load that allows the tongue to go upward when it is not connected. Each left/right half should weigh about the same. Ideally, a super heavy item should be placed centered over the axle or as near to the axle as possible.
- Warning: A partial trailer load needs to be stored such that it is balanced and won't be able to shift - Loads that shift can be dangerous and cause a cyclist to lose balance, control, or a vibration resonance.
- Warning: Downhill runs and downhill running speeds may facilitate or induce some kind of vibration resonance that starts with a trailer wag (like a dog's tail wag). If the wag is not brought under control by gently but rapidly slowing down, the wag shake force and wag frequency may increase to the point of loss of control. First of all, avoid this kind of mechanical behavior; slow the bicycle down (under 10 MPH/16 KPH) and stay in control as soon at the first hint of tail wag. We learned this the hard way.
See Successful Recovery Following the Note. - Note: The vibration resonance trailer wag issue (just presented previously) seems to be more prevalent or more associated with single wheel, in-line, trailers that mount to the rear bicycle wheel axle/skewer.
- Successful Recovery: This may not work for every situation but this has worked for me (learned from motorcycles). If the handlebar starts to wobble (a wobble is when the handlebar ends shakes fore and aft while the front wheel shakes left and right [effecting steering] where the shakes may occur two or more times per second - These shakes seem to be the physics, physical, and mechanical result of a tail wag) then physically steering the bicycle in slight, little, 'S' patterns while/and gentle braking may help obtain/regain control of the bike. Braking only, in a straight line, may/can exacerbate the wobble frequency and/or force. My memory seems to recall that front wheel braking alone can exacerbate the resonance and that gentle rear wheel braking while gentle 'S' turning was more effective. The 'S' driving pattern that worked for me is about 2 or 3 feet, left and right of an imaginary straight line track (track being the normal course where one proceeds as desired).
-
 Warning - Bicycle Handling Skill: If a person locks their arm muscles, while holding the handlebars while moving/riding/cycling, to the point that there is no absorption of road/bicycle vibration, then a person can cause a front wheel steering wobble. This steering wobble, if allowed to continue, can result in a loss of steering control. It happens that this same mechanical issue can happen in aircraft. This same issue is taught to some pilots in flight school, especially to helicopter pilots. There are two important points to learn from this physics anomaly. One, riding tense with tight grips can cause problems, and two, if a person is in one of those tail wag situations, then recovery requires a more gentle grip on the handle bar (as opposed to a locked 'Death Grip').
 - Check each end of the Trailer Mount (Bicycle and Trailer). Assure that a snug dirt free clean fit exists. Lubricate as may be appropriate but wipe off any excess. Consider the appropriateness of having a spare coupling, skewer, pins, or mount device.
- A spare bicycle chain may be in order, depending on tour distance, duration, and type Caution: Bicycle Chains wear out twice as fast when towing trailers!
- Waterproof Trailer Bag. If a cyclist doesn't have a waterproof Trailer bag then use waterproof DrySeal or plastic/rubber bags for clothing and anything that needs to be dry. Clear plastic bags allow a traveler to see items inside the bag - available at Canoeing and Kayaking stores (online too).
- Foam Pad (or Thin Plywood or Thin Counter Top Laminate) to protect the Trailer Bag or other Gear from wear. Some trailers have a metal screens that after a while cause wear on gear or bag covers. It is a weight reduction measure (by the mfgr) that puts a burden on the cyclist to guard for gear wear. Wood and Laminate will last longer and foam has to be inspected every now and then for wear patterns.
- Bicycle Kick-Stand or something similar. Issue, Trailer/Bike Support Notes
- Trailer Tire Spare Inner Tube(s)
- Three Metal Tire Tool/Lever Bars (as a minimum: one metal tool and two plastic) Assumption: Tire Changing Tools and Kit are available (listed under previous Bike checklist segment)
- Caution: Tire removal is very difficult on trailers because the tire is smaller and fits much tighter on the tire rim. Therefore metal tire tools may be needed (so they don't break).
- Experience: We broke a plastic tire tool/lever, and most are plastic, while removing a trailer tire to fix an inner tube flat. It was a little cool morning (about 45°F) but in any case the tire removal activity was extremely difficult. We now have metal tire changing tools used just for trailer tire removal.
- Caution: Metal tire tools are much more likely to puncture or damage an inner tube than plastic tools.
- Comment: In an emergency, flat tip screw drivers can be used - We did it as kids! Initially, we punctured half the tubes in the process.
- Trailer Spare Tire (Optional, depending in remoteness and terrain)
- Trailer Spare Nuts, Bolts, Washers, and
- Other related trailer/bike parts or spare parts (mount, connector, skewer, flag, bottle cage, bungee cords, extra ties, velcro straps, straps, ..., ).
- Stuff all unused/extra shipping protection bags into one bag (usually the biggest bag) to help keep them organized for later use
- Safety Reflectors, Tape, Cloth, and/or Flag(s)
- Wheel Grease (2 oz tube available at good bike stores) and/or Oil
- Owners Manual, Repair Manual, Packing/Assembly Manual
- Owner Information Demographics List with the cyclist's Home and Away contact numbers and another dependable number like a close friend or relative that is likely to be around or available during the travel absence (like a parent)
- Itinerary with accommodation telephone numbers
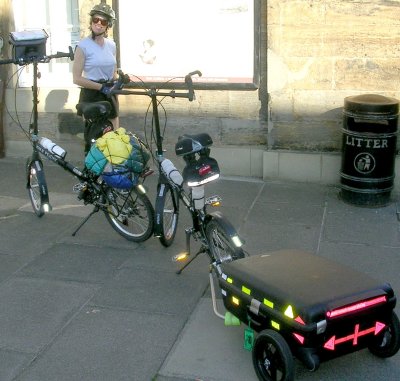
Trailer Tongue Collar:
Top, Bike Equipment & Supplies:Racks, Panniers, Trailers (Trailer Tongue Collar, Trailer Splash Shield), Handlebar Bag, Handlebar and Bar Ends,
Rack Bag(s), Frame Bag, Handlebar Stap/Bag, Wheel Extension with Long Bag, Third Wheel, Stoker Bag,
Bar-End as Brake/Shifter Guard Seat Post Bag (aka Saddlebag), Cargo Net, Map Case or Holder,
Mount: Cue Sheet, GPS, Smartphone, Night Lighting, Carry Bag, Brake Lever Strap/Lock - Parking Brake,
Bottles and Cages, Pedals, Skewers, Fenders, Kick-Stand, Threadlock Compounds,
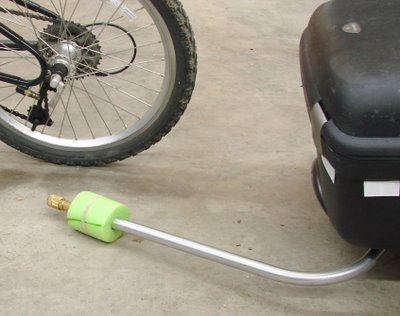 Directions for making Styrofoam Trailer Tongue Collar(s):
When the styrofoam wrap is attached to the trailer tongue, it keeps the trailer hitch connector off the ground and therefore out of the dirt.
Directions for making Styrofoam Trailer Tongue Collar(s):
When the styrofoam wrap is attached to the trailer tongue, it keeps the trailer hitch connector off the ground and therefore out of the dirt.We took a child's styrofoam swimming noodle, in our case colored lime green, and cut two segments (for each bike) into four inch lengths, using a regular saw. Yes, it's messy, read on. Then we cut a diagonal cut on one side all the way into the hollow. In this manner, the styrofoam collar may be attached and removed from the suitcase trailer tongue. A butane lighter was used to melt the rough cut edges - Be careful, its easy to light the styrofoam on fire and the flame is nearly
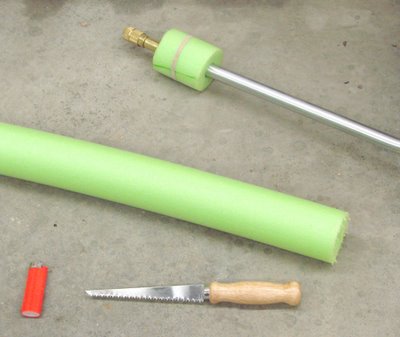 invisible (a person can hear it burning but may not see it burning). We additionally learned to wrap a thick rubber band (or two) around the styrofoam tube to help keep the styrofoam collar on the trailer tongue. The rubber band is a requirement. The only travel issue that we have had is that the styrofoam collar may slide down the tongue toward the suitcase - it sort of does not matter while towing the trailer on the bike, but just before disconnecting the trailer from the bike, insure that the styrofoam collar is near the coupler - the best place is right over the rubber coupler bolt. HIDDEN BENEFIT: These same Collars can be used on the Handlebar when packing the bike or for carrying in a travel bag - It helps prevent handlebar rubbing/scratching. CAUTION: When a trailer is carried in the back of a vehicle these Styrofoam wraps can break free and fly away. NOTE: Over time, the styrofoam compresses and the rubber band(s) become more important.
Trailer Yoke Splash Shield:
Top, Bike Equipment & Supplies:Racks, Panniers, Trailers (Trailer Tongue Collar, Trailer Splash Shield), Handlebar Bag, Handlebar and Bar Ends,
Rack Bag(s), Frame Bag, Handlebar Stap/Bag, Wheel Extension with Long Bag, Third Wheel, Stoker Bag,
Bar-End as Brake/Shifter Guard Seat Post Bag (aka Saddlebag), Cargo Net, Map Case or Holder,
Mount: Cue Sheet, GPS, Smartphone, Night Lighting, Carry Bag, Brake Lever Strap/Lock - Parking Brake,
Bottles and Cages, Pedals, Skewers, Fenders, Kick-Stand, Threadlock Compounds,
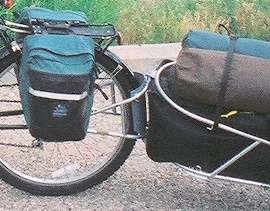 Home made Trailer Yoke Splash Shield made for the mounting yoke of a BOB Yak. The shield is part of a segment of metal chimney stove pipe (already pre-curved). Tools used were a hammer, pliers, and aluminum (grayish) looking spray paint (for finished product). It is mounted with electrical conduit brackets, that are shaped like the letter "P", using very short carriage bolts, small washers, lock washers, and plastic locknuts.
ALL About Handlebar Bags:
Top, Bike Equipment & Supplies:Racks, Panniers, Trailers (Trailer Tongue Collar, Trailer Splash Shield), Handlebar Bag, Handlebar and Bar Ends,
Rack Bag(s), Frame Bag, Handlebar Stap/Bag, Wheel Extension with Long Bag, Third Wheel, Stoker Bag,
Bar-End as Brake/Shifter Guard Seat Post Bag (aka Saddlebag), Cargo Net, Map Case or Holder,
Mount: Cue Sheet, GPS, Smartphone, Night Lighting, Carry Bag, Brake Lever Strap/Lock - Parking Brake,
Bottles and Cages, Pedals, Skewers, Fenders, Kick-Stand, Threadlock Compounds,
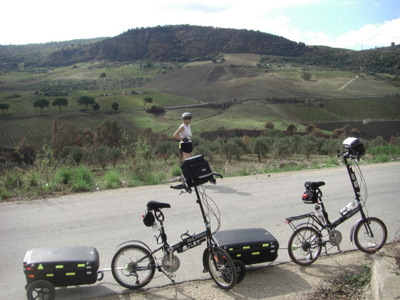 A Handlebar Bag is a storage device that fits onto the handlebar. It can be used to store things that are important to the rider, typical things as large as a wallet to things as small as coins or chapstick. The handlebar bag can be big or small in size. Probably one of the biggest potential travel benefits of a handlebar bag is its ability to hold and display a map, like a miniature dashboard. Some touring cyclists do not travel with a handlebar bag; typical reasons for not using a handlebar bag are its added travel weight and weight added to the front-end steering thus effecting speed, response quickness, and maneuverability.
The following are issues to consider for a handlebar bag (from our experiences):
- It is important that the handlebar bag mounting hardware be able to attach at different angles. Cyclists seem to mount handle bar bags anywhere from Top parallel to the ground up to Top at almost 45° (so as to facilitate easier or quicker map reading from the saddle).
- It is better to have insertible partitions inside the bag, in order to: separate items, hold items upright (so they are easily accessible), and to keep small item from sinking underneath all of the bigger items. Better bag systems have partitions with Velcro flanges/edges that allow a cyclist to position partitions as desired. Beware that some bag system partitions don't attach to anything and they are fairly useless.
- Front Pocket
- Side Pockets
- Key holder loops
- Reflective exterior markings
- Generally, the more options that the handlebar bag has, the happier the cyclist will be in the long run.
- : Some handlebar bags are 100% waterproof, some are water resistant, some have waterproof covers. We don't have waterproof handlebar bags and it has never been an issue, but we do keep some things in their own zip lock type plastic bags on occasion (wallet, passport, and phone). Also, sometimes, we keep DEET in a leak proof container (as we had a leaky DEET bottle once).
- A bag carry strap is very important and useful for toting the bag off the bike. This is a big deal!
- CAUTION: Loaded Handlebar Bags make the bicycle top heavy and Handlebar Bags are the leading contributor to 'Parked Bike' fall over; be sure to read about the Brake Lever Strap.
- Some handlebar bag map cases are mounted by snap-on rivets. These rivets may make vibration noises while riding and may be very irritating after a while.
- Some handlebar bag map systems use Velcro mounting. Velcro mounts are quieter for riding and are easier to mount and un-mount.
- On the road, one conducts a lot of map reading with the map in its case, mounted or not. The easier it is to remove a map case from a handlebar, the better for the cyclist
- A cyclist folds and re-folds the map(s) frequently, as one's track moves across the map(s) route over time. Easy map holder access in very important.
- Major handle bar mounting Questions/Issue: How does the bag's mount attach to the handlebar?
- Some 'handlebar bag mounts' attach by a wire (like a strap). The wire connecting strap system is very secure and does not undo easily (it is a good news bad news story). Often the wire strap must be cut in order to remove a handlebar bag mount but users of this system never need to remove the mount, they just remove the bag). Keep replacement wires handy (not cheap).
- Some 'handlebar bag mounts' attach with clamp systems (using nuts and bolts) for fastening. The nut and bolt Clamp method of attachment is more serviceable for bike shipping, when the mount must be removed in order to pack the handlebar. Thus, the clamp method favors bicycle break-down and re-assembly for bike shipping. Keep spare nuts, bolts, and washers handy.
- How does the bag attach to the mount?:
- Most bag mounts (bag to bar) allow for quick connect and disconnect and this is desirable, so as to remove the bag and carry it into a room, facility, tent, museum, ... . On the other hand, the bag should not pop off on its own due to riding in rough terrain (which happened to us once).
- Some bag mounts have locks. The handlebar bag is the one item that we always detach from the bike to carry into stores, bathrooms, lodging, museums, cafés, ... . So, note that the lock system has not benefitted us.
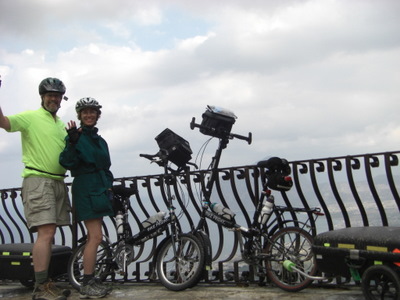

About Handlebars and Bar Ends
Top, Bike Equipment & Supplies:Racks, Panniers, Trailers (Trailer Tongue Collar, Trailer Splash Shield), Handlebar Bag, Handlebar and Bar Ends,
Rack Bag(s), Frame Bag, Handlebar Stap/Bag, Wheel Extension with Long Bag, Third Wheel, Stoker Bag,
Bar-End as Brake/Shifter Guard Seat Post Bag (aka Saddlebag), Cargo Net, Map Case or Holder,
Mount: Cue Sheet, GPS, Smartphone, Night Lighting, Carry Bag, Brake Lever Strap/Lock - Parking Brake,
Bottles and Cages, Pedals, Skewers, Fenders, Kick-Stand, Threadlock Compounds,
-
After cyclists have toured for a while as self contained fully loaded bikers, they come to realize that there is a difference between the touring cyclists' needs and the road cyclists' needs for the steering device called a handlebar. In the racing world, one wants light duty, very narrow, drop bars. After touring for a while, a cyclist recognizes a need for being able to ride in more positions, especially more upright, and the rider may desire a wider handle bar for better steering control because of the tour load. Those light duty racing bars flex to much for heavy touring, they may even allow a resonance to enter the steering system.
- Handlebars can be very personal to cyclists.
- A bicyclist will feel better at the end of the day if they can ride in a variety of positions. Changing the rider's position allows the resting of some muscles while working other muscles - this is a characteristic of all long distance riders. A handlebar that facilitates a variety of riding positions will enhance rider endurance, especially in the long haul. Traditional drop bars meet this requirement, in fact we have seen drop bars mounted on cross country mountain bikes and we have seen forearm rests mounted on tour bikes. The addition of bar-ends can help tremendously for any handlebar. There are P shaped handlebars, H shaped handlebars, C shaped handlebars, drop bars (traditional road style), inverted drop bars (for bend-over relief, much like upright bar ends), half-drop bars, L shaped add-on bars, and other aftermarket handlebars designed for long distance touring (or rider special needs).
- Touring handlebars should be tougher and longer in tube length (side to side handlebar width). Performance Handlebars are usually small in size, length, and lightweight (designed for a narrow profile bent over race position). Touring Bike Handlebars need to be able to mount additional hardware/accessories on the handle bar (or sometimes on the bike Stem/Headset). See next Tour Bike Setup section.
- Riding bent over for hundreds of miles gets tiresome in a hurry, one needs a multiple rider position handlebar capability and one way to achieve this by having bigger/longer handlebars that allow multiple holding positions for the hand (thus giving other hand, arm, shoulder, back, and neck muscle groups a way to relax while still pedaling). The riding posture that allows a rider to last the longest is to ride sitting upright (basic human ergonomics).
- Some people (need to) setup their bikes with handlebar stem shock/suspension mount. It can for a physical need to have a suspension type ride for the shoulder and arm areas. When road riding, for the most part, control is not an issue, but control can be an issue when one needs to be correcting their course while the suspension seat or handlebar is flexing at the same time that one is steering or pedaling - it takes a short while to become accustomed to this feature (flexible steering or pedaling). Some people cannot adapt to this feature.
- Handlebars should be strong enough to be able to take a few mishaps/drops/crashes.
- Lights (front and rear - be aware that gear tied to a rear rack often blocks a rear light mounted on the seat, seat bag, seat stem, seat stay or seat post)
- Bar End, Extra Bar, Bar Rest (both for multi-position ride duration comfort as well as to protect the brake lever and sometimes the shifter lever when a bike falls over as well as for crash protection).
- One should have designed space or room on the bike handlebar, stem/head (sometimes), and frame, in order to mount devices or equipment. This is yet another reason for a larger elongated frame for a Touring Bike and a good reason to have a side-to-side wider sized Handlebar. Some typical and common add-on tour aids are:
- Bell, Alarm, Polite Noise Maker
- Computer-Speedometer-Odometer
- Handlebar Bag, Map Case, Trip Notes, GPS Mount
- Mirror (can also be helmet or glass frame mounted) - everyone should ride with a mirror
- Map Holder
- Cue Sheet Holder
- Smartphone Holder
- GPS Holder
- Camera/Movie Recorder
- Bar End and/or Brake and Integrated Shifter Guard
After a while touring cyclists recognize a need to be able to put more touring accoutrements on a handlebar, like a bell, a nice night light, a speedo-computer, a handlebar bag perhaps with a map holder or maybe a cue sheet holder and/or a smartphone holder or a GPS holder, plus a camera/movie recorder, and perhaps a mirror.
The latest developments have front hub dynamos charging a battery in the handlebar stem which in turn has USB ports that the paraphernalia on the handlebar may connect (like a smartphone, GPS holder, camera/movie recorder, computer, or cell phone).
Rack Bag(s), Frame Bag, Handlebar Stap/Bag,
Wheel Extension with Long Bag, Third Wheel
Top,
Bike Equipment & Supplies.
- These items are discussed and presented under Bicycle Confirgurations for Touring.
Stoker Bag
Top, Bike Equipment & Supplies:Racks, Panniers, Trailers (Trailer Tongue Collar, Trailer Splash Shield), Handlebar Bag, Handlebar and Bar Ends,
Rack Bag(s), Frame Bag, Handlebar Stap/Bag, Wheel Extension with Long Bag, Third Wheel, Stoker Bag,
Bar-End as Brake/Shifter Guard Seat Post Bag (aka Saddlebag), Cargo Net, Map Case or Holder,
Mount: Cue Sheet, GPS, Smartphone, Night Lighting, Carry Bag, Brake Lever Strap/Lock - Parking Brake,
Bottles and Cages, Pedals, Skewers, Fenders, Kick-Stand, Threadlock Compounds,
-
A Stoker's Bag is a smaller handlebar bag which may or may not have a clear plastic map/document display. A stoker is the back seat pedal-er on a tandem (or triple, +). Some tandem stoker handlebar areas are spacious and allow plenty of room for back seat navigation and a big case, other stoker handlebar areas are smaller (designed for shipping or to take up a small garage space at home).
Bar-End as Handlebar Guard and Brake/Shifter Cover Guard:
Top, Bike Equipment & Supplies:Racks, Panniers, Trailers (Trailer Tongue Collar, Trailer Splash Shield), Handlebar Bag, Handlebar and Bar Ends,
Rack Bag(s), Frame Bag, Handlebar Stap/Bag, Wheel Extension with Long Bag, Third Wheel, Stoker Bag,
Bar-End as Brake/Shifter Guard Seat Post Bag (aka Saddlebag), Cargo Net, Map Case or Holder,
Mount: Cue Sheet, GPS, Smartphone, Night Lighting, Carry Bag, Brake Lever Strap/Lock - Parking Brake,
Bottles and Cages, Pedals, Skewers, Fenders, Kick-Stand, Threadlock Compounds,
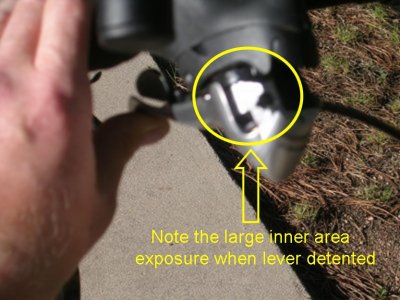 CAUTION: One should consider using mountain bike bar ends as guards for handlebar brakes and shifters. One bike fall (from falling over the kick stand or slipping down from a structure or from crash impact) can cause debris to enter the system and gum up the inner workings or even break a shifter or a brake component.
 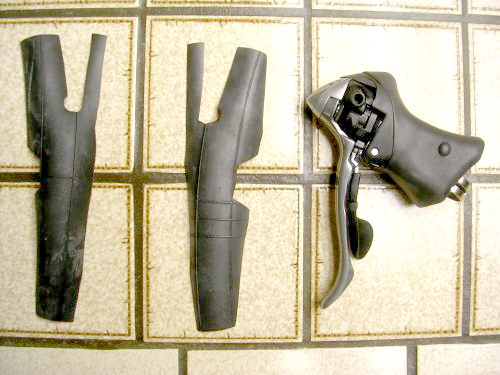 Experience: We have learned from our mountain bikes that the bar ends can protect and guard the brake and/or shifter system from damage. Integrated Brake/Shifter systems are even more susceptible because they are more complicated (& expensive) and actually more open to getting debris inside their inner workings. See above image.
Brake/Shifter Cover/Guard Instructions: See image at left. Cut an old tire inner tube to the shape demonstrated in the picture. It may take two attempts. Additionally, use self stick Velcro circles, about 3/8 inch or about 1 centimeter round diameter. The ambient air temperature must be warm to hot! First, Use a clean dry towel or paper towel to wipe the powder residue from the inner tube. Second, use Acetone (NOT Paint Thinner, NOT Mineral Spirits - they add oils) and a clean cloth to finish cleaning the inner tube residue, especially paying attention to the areas for placing/sticking the Velcro pads. While the inner tube may be just a little tacky from the acetone wipe and while the ambient temperature is warm, apply the Velcro sticky pads. Leave the cover/guard component alone for 24 hours and then mount the cover/guard to the brake/shifter system (see the next picture).
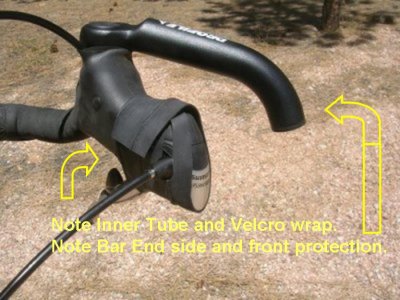 Experience: We cover our Integrated Brake/Shifter assembly with a home made inner tube wrap that keeps dirt and debris out of Brake/Shifter moving components (because when a bike falls, often the first thing to impact is the brake/shifter lever if there is no guard thus causing the assembly to open and expose the moving components to foreign objects and damage). All the sophisticated system needs, to be damaged, is one tiny one millimeter stone chip, a piece of bark, or a stucco chip to reduce functionality or even ruin a touring trip.
On the road in a foreign country's remote location, a durable bicycle and smart riding are important for success and survival.
Seat Post Bag (aka Saddlebag)
Top, Bike Equipment & Supplies:Racks, Panniers, Trailers (Trailer Tongue Collar, Trailer Splash Shield), Handlebar Bag, Handlebar and Bar Ends,
Rack Bag(s), Frame Bag, Handlebar Stap/Bag, Wheel Extension with Long Bag, Third Wheel, Stoker Bag,
Bar-End as Brake/Shifter Guard Seat Post Bag (aka Saddlebag), Cargo Net, Map Case or Holder,
Mount: Cue Sheet, GPS, Smartphone, Night Lighting, Carry Bag, Brake Lever Strap/Lock - Parking Brake,
Bottles and Cages, Pedals, Skewers, Fenders, Kick-Stand, Threadlock Compounds,
-
On many bikes this is where the spare tube and tire patch kit is kept along with a few tools (the most commonly used tools). It is a good place to keep a multi tool and a couple bandages. Maybe an ID, money & clip, and cell phone are kept there. It is a user discretion item.
Bungee/Cargo Net:
Top, Bike Equipment & Supplies:Racks, Panniers, Trailers (Trailer Tongue Collar, Trailer Splash Shield), Handlebar Bag, Handlebar and Bar Ends,
Rack Bag(s), Frame Bag, Handlebar Stap/Bag, Wheel Extension with Long Bag, Third Wheel, Stoker Bag,
Bar-End as Brake/Shifter Guard Seat Post Bag (aka Saddlebag), Cargo Net, Map Case or Holder,
Mount: Cue Sheet, GPS, Smartphone, Night Lighting, Carry Bag, Brake Lever Strap/Lock - Parking Brake,
Bottles and Cages, Pedals, Skewers, Fenders, Kick-Stand, Threadlock Compounds,
- The Bungee Cargo Net is handy for keeping a raincoat handy or temporarily storing anything.
- The Bungee Net is worth taking on a bike tour where the tour company supplies the bikes.
- Be aware that there are (at least) two kinds of Bungee Nets:
- One kind of Bungee Net has two mounting/connecting hooks and is meant to drape over a front or Rear Rack and/or Pannier from one side to the other (typically hooking at the bottom of the rack's frame).
- The other common kind of Bungee Net has four mounting hooks and it is typically used on top of a Trailer and typically is mounted as a square or a diamond cover pattern.
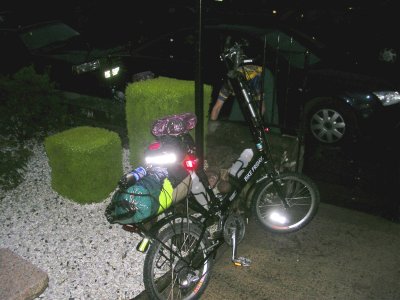
Navigation: Map Case or Map Holder:
Top, Bike Equipment & Supplies:Racks, Panniers, Trailers (Trailer Tongue Collar, Trailer Splash Shield), Handlebar Bag, Handlebar and Bar Ends,
Rack Bag(s), Frame Bag, Handlebar Stap/Bag, Wheel Extension with Long Bag, Third Wheel, Stoker Bag,
Bar-End as Brake/Shifter Guard Seat Post Bag (aka Saddlebag), Cargo Net, Map Case or Holder,
Mount: Cue Sheet, GPS, Smartphone, Night Lighting, Carry Bag, Brake Lever Strap/Lock - Parking Brake,
Bottles and Cages, Pedals, Skewers, Fenders, Kick-Stand, Threadlock Compounds,
- Some handlebar bag map systems use Velcro mounting. Velcro mounts are quieter for riding and are easier to mount and un-mount.
- On the road, one conducts a lot of map reading with the map in its case, mounted or not. The easier it is to remove a map case from a handlebar, the more convenient for the cyclist.
- A cyclist folds and re-folds the map(s) frequently, as one's track moves across the map(s) route over time. Easy map holder access in very important.
- The best map holder that I have ever had was Velcro mounted to the holder and the map display was a doubled over plastic document holder which opened up, thus doubling the display area to read a map/chart. The map could be mounted fully open by Velcro - that was mighty convenient at times (from an unknown manufacturer in Hungary). This is a big deal with larger map sizes, like with using Michelin Europe maps with a high scale distance ratio or on Adventure Cycling's Great Divide Maps.
- It is very handy if the document holder is larger (versus smaller).
- It is very handy if the document holder has the space to physically hold 2-3 maps. It is not unusual to have a local hotel town map to navigate out of a town (thus avoiding high traffic motor vehicle areas), an enroute travel map (like a tour map or Mobile travel map), and yet a third Google Printout of the evening's Hostel or Campground's location.
- Most map holders have Velcro straps for mounting to the handlebar and stem. Unfortunately most designs are for stems to be rearward of the handlebar but some bike setups have stems forward of the handlebar (for a variety of reasons, especially for touring) - those riders seem to have less options.
- Some map cases can have a hard mount to the frame's Up-Tube. The issue is that the mount may or may not interfere with rear brake or rear shifter cable runs.
- Some handlebar bag map cases are mounted by snap-on rivets. These rivets may make vibration noises while riding and may be very irritating after a while (Ortlib).
Mount: Cue Sheet, GPS, Smartphone:
Top, Bike Equipment & Supplies:Racks, Panniers, Trailers (Trailer Tongue Collar, Trailer Splash Shield), Handlebar Bag, Handlebar and Bar Ends,
Rack Bag(s), Frame Bag, Handlebar Stap/Bag, Wheel Extension with Long Bag, Third Wheel, Stoker Bag,
Bar-End as Brake/Shifter Guard Seat Post Bag (aka Saddlebag), Cargo Net, Map Case or Holder,
Mount: Cue Sheet, GPS, Smartphone, Night Lighting, Carry Bag, Brake Lever Strap/Lock - Parking Brake,
Bottles and Cages, Pedals, Skewers, Fenders, Kick-Stand, Threadlock Compounds,
- Here are the usual problems, make sure that whatever you look at addresses the issues:
- The actual phone mount wears or breaks and the phone falls off the bike.
- Rain, mud, dirt get into the ports, controls, or body.
- The covering membrane fogs up.
- The covering membrane prevents some touch screen activation.
- These mount devices and phones take a heck of a lot of vibration and bounce abuse. Mounts can crack and break at the weakest point and phones can quit working.
- Some phone containers are more weather proof than others. It seems that the more weather proof the container, the less flexibility the user has for access to side mounted controls (like power, camera, volume, cable access).
- Universal versus Custom Fit: The more custom fit the holder/system the more that the user has access to all of the phones controls. The more custom fit the device the less likely that the device will be usable after performing a phone trade-up (buy a new phone). There is a convenience-reuse trade off.
- Some membrane covers don't allow full access to the touch screen.
- Camera Use: It depends where the camera is located on the phone. Some holders do not allow camera use, some do.
- Huge arguments about listening to Music on ear plugs while cycling. For rider safety reasons, NOT one insurance company, touring company, or event will approve of listening to music while biking, YET many riders still plug in. Some carrier devices facilitate earphone access, some DO NOT.
- Some riders mount speakers (to avoid the earphone issue) - Most other riders do not want to hear other rider's music - This is especially a big deal in wilderness or open country areas.
- Camera Use and the ability to move the picture/movie taking angle. Clear camera/lens view.
- Sealable Ports
- Control(s) Access.
- Mount and Phone position flexibility. 360 degrees around, 180 degrees up/down?
- Ease of mounting and repositioning the mount.
- Liners holder/containers for multiple Phones over time.
- Reach volume and side buttons.
- Full Screen Access
- Rain Proof
- Some manufacturers make phone models that are more weather resistant that their main product lines.
- It is a big deal where the camera is located on the handlebar and the camera usually needs lots of rotation room/space. These systems take up a lot of handlebar real estate and can be incompatible with handlebar bags. There is a user need to rotate phone for various camera angles.
- Bike handlebar mountable for multiple positions and bar angles.
- Hold the phone securely in place for any bike activity.
- System with rubber bumpers can grip, hold, and cushion the phone
- Universal Handlebar and Stem mounts.
- Easy placement and removal of phone from/to the cradle
- Easy viewing angle adjustment.
- Rugged Mount System - There are many blog complaints if systems breaking or becoming useless in one day.
Night Lighting (Bike or Helmet; Head, Tail, or Other; Blinking or Steady, Battery or Generator):
Top, Bike Equipment & Supplies:Racks, Panniers, Trailers (Trailer Tongue Collar, Trailer Splash Shield), Handlebar Bag, Handlebar and Bar Ends,
Rack Bag(s), Frame Bag, Handlebar Stap/Bag, Wheel Extension with Long Bag, Third Wheel, Stoker Bag,
Bar-End as Brake/Shifter Guard Seat Post Bag (aka Saddlebag), Cargo Net, Map Case or Holder,
Mount: Cue Sheet, GPS, Smartphone, Night Lighting, Carry Bag, Brake Lever Strap/Lock - Parking Brake,
Bottles and Cages, Pedals, Skewers, Fenders, Kick-Stand, Threadlock Compounds,
- We generally do NOT leave our bike light on the bike during daylight hours for mountain trails or rough dirt roads but we often leave lights mounted for road tours. In cities, it is a security issue (bike accessories like lights and pumps seem to dissapear in cities). On trails it is a wear issue (mounted lights have more frequent breakdowns). Therefore, we may store the lights.
- Make an effort to know where the bike light(s) is(are) located (when not mounted).
- If the lighting device is constantly falling out/off of the bike, then be looking for a better/newer system. Bicycle lighting is worthy of a quality investment.
- When camping we carry a separate two AA battery camp/tent light that hangs or stands easily (for tent/camping) - this same light expands into lantern mode (from beam mode).
- Some people only use their bike light and accept the tent lighting inconveniences. Having camped like that, we once discovered that a light shined into a styrofoam cup will radiate light like a lantern - it is the only positive thing about styrofoam that we know (for the record, we found the cup).
- Always have night lighting for a bike on a tour. One never knows what events will conspire to have a person or persons driving into the dark evening.
- Generally, no one likes driving at night, because that usually means something untoward happened during the day. Almost everyone who has a few tours under their belt, even short duration tours, has a hard luck story that caused them to have to arrive somewhere by bicycling at night.
- There are times when some people want to drive at night (other than just for fun or for some night time bike event). Those times are usually weather or climate related (i.e.:, crossing a desert or hot arid plane, cooler temperatures, head wind days, calmer weather, ...).
- Some people need more light than others. We have found the simple battery inside the LED light device (vs separate battery) mounted on the handlebar/steer tube/fender to be quite sufficient for touring, both for seeing and for being seen.
- Some bikes and/or people prefer generator systems. In the negative, there may be generator/tire wear issues, alternating dimness/brightness issues, and wiring integrity issues. In the positive, there are no battery charge issues.
Addendum: Newer options exist for buying/having wheels that have [electric light] generators built into the Hub. These are part of a lighting system and all of the issues should be considered before such a purchase is made (hub maintenance, disk brake fitting/compatibility issues, wiring, light/bulb, fitting/compatibility with panniers, handlebar bag or load fitting issues). - Tail light(s) are a wise investment and may be legally required. We once had lost a mounted headlight and could not find our stored flashlight, so we removed the red lens cover of the tail light to use it for a camp/tent light - now, most tail lights have red LCD bulbs.
- Caution: For some unknown reason, it seems that red tail light lens covers are easily lost while biking and especially while transporting bikes. We have learned, over time, to pack our front and rear lights away and break them out only for road use. It may be wise to duct tape the lens caps (small strips along the seam).
- Reflectors and Safety: Many bikers remove the factory reflectors, we don't. In addition, all of the reflective material on the saddle bags and clothing help with making a biker much more visible at night. Consider carrying a reflective triangle (on person or equipment). Making one's self visible during the day or night will probably save one's life, more than once.
- There are places where having a blinking head light, blinking tail light, or strobe light on a bike at night is Against the Law - Please know that there is a difference between having a blinking light on a bike, versus having a blinking light on a person.
- Head/helmet mounted lights are becoming more popular. The advantage is that everywhere a person looks is lit up. The disadvantage is when a person looks at other people it diminishes or ruins the other person's night vision capability.
- When riding with other bikers, blinking tail lights are quite an annoyance and distraction - run on steady. Head\/helmet mounted lights are quite an annoyance and distraction, especially when looking at a person or riding directly behind another bike as the constant light bobbing and mirror reflections are particularly fatiguing and stressful to fellow riders - get some distance and avoid directing light beams into other people's faces.
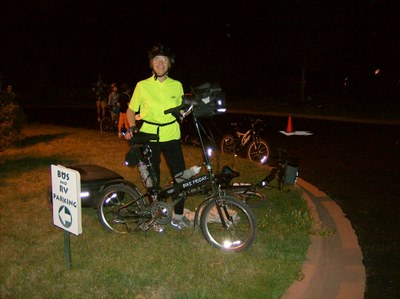
"Every time I see an adult on a bicycle, I no longer despair for the future of the human race." - H. G. Wells
About a Carry Bag/Case for Bicycle Transport:
Top, Bike Equipment & Supplies:Racks, Panniers, Trailers (Trailer Tongue Collar, Trailer Splash Shield), Handlebar Bag, Handlebar and Bar Ends,
Rack Bag(s), Frame Bag, Handlebar Stap/Bag, Wheel Extension with Long Bag, Third Wheel, Stoker Bag,
Bar-End as Brake/Shifter Guard Seat Post Bag (aka Saddlebag), Cargo Net, Map Case or Holder,
Mount: Cue Sheet, GPS, Smartphone, Night Lighting, Carry Bag, Brake Lever Strap/Lock - Parking Brake,
Bottles and Cages, Pedals, Skewers, Fenders, Kick-Stand, Threadlock Compounds,
Listed separately is a detailed description of Bicycle Packing for Shipping or Transport
Please Note that there are many times when, if one asks if one can carry a bike on public transportation, the answer will be "NO." So that a cyclist won't be stranded somewhere, it is often best to not ask. If the driver asks about what's in the bag, then the answer should be "it is equipment" or "sporting equipment" (bikes are sport equipment, a person just don't say or show what kind of equipment it is and the cyclist keeps the bike enclosed and sealed).
- Bag, Clean and Serviceable, Working Zippers/Closure Mechanism
- Packing Instructions, add on instructions/notes
- Bike part/piece/component covers/protectors
- Loose Parts/Pieces Bag(s)/Case(s)
- Disposable Cleaning Rags, especially for chain grime, dirt, and grease removal
- Foam Wraps, Styrofoam Shields (see creation instructions)
- Packing Straps (Velcro Straps)
- Bag Tag / Ownership ID Tag: One never knows when a bag tag will be the one thing that gets a lost/forgotten/misplaced bag and contents returned. Bad things can happen when one's routine gets interrupted or changed.
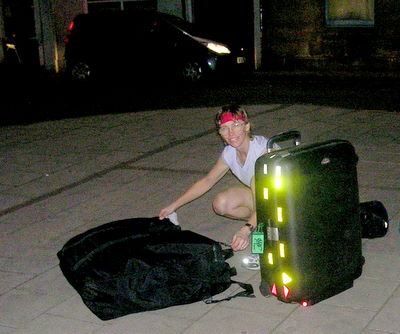
Brake Lever Strap/Lock - Parking Brake
Top, Bike Equipment & Supplies:Racks, Panniers, Trailers (Trailer Tongue Collar, Trailer Splash Shield), Handlebar Bag, Handlebar and Bar Ends,
Rack Bag(s), Frame Bag, Handlebar Stap/Bag, Wheel Extension with Long Bag, Third Wheel, Stoker Bag,
Bar-End as Brake/Shifter Guard Seat Post Bag (aka Saddlebag), Cargo Net, Map Case or Holder,
Mount: Cue Sheet, GPS, Smartphone, Night Lighting, Carry Bag, Brake Lever Strap/Lock - Parking Brake,
Bottles and Cages, Pedals, Skewers, Fenders, Kick-Stand, Threadlock Compounds,
-
This issue is extensively discussed at Parking Brake prevents Bike Roll and Fallover.
Bottles and Cages
Top, Bike Equipment & Supplies:Racks, Panniers, Trailers (Trailer Tongue Collar, Trailer Splash Shield), Handlebar Bag, Handlebar and Bar Ends,
Rack Bag(s), Frame Bag, Handlebar Stap/Bag, Wheel Extension with Long Bag, Third Wheel, Stoker Bag,
Bar-End as Brake/Shifter Guard Seat Post Bag (aka Saddlebag), Cargo Net, Map Case or Holder,
Mount: Cue Sheet, GPS, Smartphone, Night Lighting, Carry Bag, Brake Lever Strap/Lock - Parking Brake,
Bottles and Cages, Pedals, Skewers, Fenders, Kick-Stand, Threadlock Compounds,
- Carry the biggest water bottle that will fit in the cages. Some people just carry water filled Coke bottles.
- Mount as many water bottle cages as is practical.
- Keep Full Water Bottles or Containers, Keep Hydrated!
- Refill water bottles at every convenience. Do NOT pass up free water fill-up opportunities.
- Ensure Tight Lids, carry extra bottles in a pannier or trailer bag.
- On self contained tours, 6-8 water bottles per person should be carried per day (or carry bulk water or carry large 2 liter soda bottles in a pannier). Carry extra bottle is a pannier/bag.
- It is always wise to bring in at least one water bottle to a tent or room at night and if it is likely to get near freezing, then bring in all of the water bottles. In mountains, it is always possible to freeze at night.
- Be careful around DEET or fuel as the solution may dissolve water bottle plastic. Some Oils are just as problematic.
- We use protective flip top lids on our water bottles. One good ride through a cattle ranch will have a rider thinking about the dirt, poop particles, and urine on the road being thrown-up by the wheels and landing who knows where (like on the water bottle nipple).
- Be careful with water bottles in a tent, avoid spillage, and store bottles in the same place, usually near a doorway.
- We've learned to drink Coffee (hot or cold), Hot Chocolate, Gator Aide, and Fruit Drinks from Bike Bottles.
- We have marked our non-water bike bottles (kava, choc, gator) so as to limit cross flavors.
- We have marked all water bottles with our name.
- We have a dozen bottles and they all go on a tour. There are times when all bottles are full of water (arid and desert areas) and there are times when not all bottles are full.
- Lynn Hamilton, AC Expedition Leader, uses an insulated, leak proof coffee mug, that also fits her bike's water bottle cage.
- Water bottles can carry warm water for Do-It-Yourself Showers or emergency medical flushes.
Pedals
Top, Bike Equipment & Supplies:Racks, Panniers, Trailers (Trailer Tongue Collar, Trailer Splash Shield), Handlebar Bag, Handlebar and Bar Ends,
Rack Bag(s), Frame Bag, Handlebar Stap/Bag, Wheel Extension with Long Bag, Third Wheel, Stoker Bag,
Bar-End as Brake/Shifter Guard Seat Post Bag (aka Saddlebag), Cargo Net, Map Case or Holder,
Mount: Cue Sheet, GPS, Smartphone, Night Lighting, Carry Bag, Brake Lever Strap/Lock - Parking Brake,
Bottles and Cages, Pedals, Skewers, Fenders, Kick-Stand, Threadlock Compounds,
-
Pedals can be very personal. We don't make a reccomendation here.
- Stock/Flat/Clean (nothing on the pedals)
- Mountain
- Toe Clip
- Toe Basket
- Shoe Clip
- Basket and Strap
- Big Platform
- There are straps made to put on pedals to help keep the foot on the pedal.
- The Stoker on a tandem usually needs some kind of Clip/Basket/Strap to keep from kinking the Captain (yes there is a joke in there).
- Test after test has been conducted that always seem to indicate that there is no advantage for non-professional cyclists to use Shoe Clips (versus an open pedal).
- Tire Pumps that are mounted where the foot-pedal cycle takes place are often exposed to kicking, dislodging, and making 1 click per revolution sounds.
- Use an anti-seize grease or regular grease when mounting pedals.
- Most pedals mount with a 15mm wrench, often found on a multitool with wrenches.
- Regular auto-wrenches are often to thick to fit between the pedal and the crank arm, bike wrenches tend to be much thinner.
- A 'Pedal Wrench' is a very useful tool to have at home.
- On the road or tour, if a multi-tool wrench is inadequate, but a light weight tool is desired, use a 15mm Cone Wrench. [The Cone Bearing resides inside a wheel hub and it takes 2 narrow wrenches to fit in that area which often has two side by side lock nuts, ERGO the narrow wrenches that fit in that tight space are called Cone Wrenches.]
- Some pedals mount to a quick release pedal mount. Quick Release pedals are commonly used on bikes setup for break-down and shipping.
- Many cyclists who tour a lot do not mount there tire pumps at all, as they tend to get gritty in operation over time and they tend to be a common item that is stolen off bikes.
There are a few diferent kinds of pedals:
About Skewers
Top, Bike Equipment & Supplies:Racks, Panniers, Trailers (Trailer Tongue Collar, Trailer Splash Shield), Handlebar Bag, Handlebar and Bar Ends,
Rack Bag(s), Frame Bag, Handlebar Stap/Bag, Wheel Extension with Long Bag, Third Wheel, Stoker Bag,
Bar-End as Brake/Shifter Guard Seat Post Bag (aka Saddlebag), Cargo Net, Map Case or Holder,
Mount: Cue Sheet, GPS, Smartphone, Night Lighting, Carry Bag, Brake Lever Strap/Lock - Parking Brake,
Bottles and Cages, Pedals, Skewers, Fenders, Kick-Stand, Threadlock Compounds,
Caution - Caution! It is possible to bring a wrong lengthed Skewer to a distant Bicycle Tour. The problem cause results from owning/having different lengthed skewers for different pieces of bicycle tour equipment.
THIS CAN END A TOUR BEFORE IT GETS STARTED!
- Skewer Notes about Various Bicycle Configurations:
- Many people use the same bike for daily bicycle riding at home as they do for a fully loaded touring; however the touring configuration may require a different setup with 1 or 2 different skewer(s) than the daily ride setup. See the following specific issues.
- In some cases, for some bikes, a different width skewer may be needed, based on whether one uses a skewer mounted front rack (common on mountain bike front shock fork mounts).
- In some cases, for some bikes, a different type skewer may be needed based on whether one uses a full mounted rear trailer skewer (like setup for BOB Yak type trailer or Single Wheel trailers).
- In some cases, for some bikes, a different type skewer may be needed based on whether one uses a side mounted rear trailer skewer (like setup for Nomad type trailer or some Two Wheel trailers).
- Warning: Most cyclists and mechanics try to have both/all skewer's Cam Lock Levers on the same side of the bike, usually the left side (but it does not matter) so that they can quickly view them in one quick safety sweep. Most mechanics aim the skewer's Cam Lock Lever to the rear, so that they will not catch on a passing object. Many touring cyclists have no choice but to aim the skewer's Cam Lock Lever at some other up or down angle just to work around a bike rack or other mounted component, the skewer's Cam Lock Lever angle does not matter AS LONG AS the skewer's Cam Lock Lever has room to be fully depressed (or else it can come undone on its own).
- On the trail, the mechanical items that are hidden by/from panniers will need close inspection (bolts, brake system, wheel mount skewers, hub, spokes). If three days have gone by without a close look, pull off the panniers and perform a close inspection. This inspection is often accomplished along with a good chain cleaning/wipe/oiling session.
- Sometimes, some tour guides, carry spare skewers and common trailer connecting pins or pieces.
- The emergency rear derailer hanger fits on the rear skewer and there is a lot of fore and aft adjustment/set-up lee way (on the hanger slot), but a cyclist should make sure that the skewer is long enough to be able to add an emergency derailer hanger (takes about 4mm or 1/4 inch of added length).
- There is no worse feeling than being dropped off at some remote village and you forgot the correct mounting skewer for your bike's equipment that is actually on-hand.
Fenders
Top, Bike Equipment & Supplies:Racks, Panniers, Trailers (Trailer Tongue Collar, Trailer Splash Shield), Handlebar Bag, Handlebar and Bar Ends,
Rack Bag(s), Frame Bag, Handlebar Stap/Bag, Wheel Extension with Long Bag, Third Wheel, Stoker Bag,
Bar-End as Brake/Shifter Guard Seat Post Bag (aka Saddlebag), Cargo Net, Map Case or Holder,
Mount: Cue Sheet, GPS, Smartphone, Night Lighting, Carry Bag, Brake Lever Strap/Lock - Parking Brake,
Bottles and Cages, Pedals, Skewers, Fenders, Kick-Stand, Threadlock Compounds,
-
Fender Pros:
- Minimizes mud, dirt, water, and grime accumulation from ground, water pools, ditches, or mud holes from the rider, equipment, and/or bicycle.
- Keeping grime off a rider and a bike, in an all day rainy tour ride is a big deal. Rain suits may protect a rider but will not protect a bike or its equipment. Warm rain is usually OK to a rider, but mud and grime in clothing or on a rider will quickly become annoying.
- Keeping a bicycle clean will extend its life over time and will probably extend the riders satisfaction with the bicycle over time.
- Maximum fender benefit comes from as full a fender length as practical, often with a little mud flap at the fender's bottom that may easily slide over sticks, shrubs, and some bigger things like rocks or logs.
- Does not keep rain (or rain splashed dirt) off of a rider, supplies, equipment, and/or bicycle.
- Not all (read as most) bikes are set up from the factory to support fenders.
- While fenders are effective, many non touring riders won't ride (or avoid riding) in bad weather whether or not they have fenders.
- Touring Cyclists are a small percentage of the total cyclist population; therefore manufacturers tend to ignore them (and ignore Touring Cyclist's money). Oddly, Touring Cyclists have more discretionary money to spend than any other class of cyclists.
- Manufacturers who compete with other manufacturers may keep bike costs lower by not having fenders.
- Most manufacturers of touring bikes do not provide fenders nor the fittings for easily attaching fenders. By the way, this would help Touring Cyclists immensely. It is very difficult to find a touring bike whose design includes fender consideration. It is even more difficult to find a touring bike whose design includes easier break-down for shipping.
- After market fenders often compete with racks and trailer mounts for axel space for mounting fenders. This is particularly a problem on the rear wheel.
- For people who ship bikes, Fenders take more time to assemble and disassemble, especially when this function is not engineered into the system design. Even Bike Fridays (designed for shipping and quick setup or breakdown, require the removal or remounting of fenders for shipping - same with kick stand and racks).
- Most Road Touring Cyclists use fenders for Road Tours and Adventure Cycling recommends them for such.
- Typically, Mountain Bikes setup for just a trailer and/or ultralight travel will not have fenders.
- Typically, Mountain Bikes setup with panniers will have fenders.
- If pulling a trailer and if practical, consider that a person or the equipment may benefit from trailer wheel(s) fender coverage. Many trailers do not have fenders (BOB Yak is an exception).
Fender Cons:
Kick-Stand
Top, Bike Equipment & Supplies:Racks, Panniers, Trailers (Trailer Tongue Collar, Trailer Splash Shield), Handlebar Bag, Handlebar and Bar Ends,
Rack Bag(s), Frame Bag, Handlebar Stap/Bag, Wheel Extension with Long Bag, Third Wheel, Stoker Bag,
Bar-End as Brake/Shifter Guard Seat Post Bag (aka Saddlebag), Cargo Net, Map Case or Holder,
Mount: Cue Sheet, GPS, Smartphone, Night Lighting, Carry Bag, Brake Lever Strap/Lock - Parking Brake,
Bottles and Cages, Pedals, Skewers, Fenders, Kick-Stand, Threadlock Compounds,
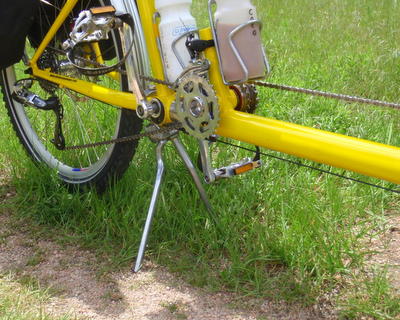
-
Basically, ALL single side kick stands don't work well (meaning that bikes fall a lot).
The only bicycle kick stand that works properly is a bipod.
- The "iron triangle" (they are too heavy and bulky, and they are sometimes found on the front wheels)
- The "two leg" (they are light and only recently available, not cheap).
- One of the neat things about a bipod is that one may easily perform some kinds of bike maintenance while on the road, so to speak.
- Another advantage is being able to park in a group and not have to look or fight for space to lean the bike or lay it on the ground.
- Numerous times, we have seen bikes fall over while parked against a building, tree, fence post, large planter, or even on a kick stand
- Side Kick stands do NOT prevent bike wheel roll.
- Two Legged Kickstand will allow for easier bike maintenance on the road because the kickstand allows the rear wheel to come off the ground and puts the bike in a stable position to perform wheel work, drive train work, or brake work.
- Keeps bicycle out of dirt, soil, or rocks.
- Keeps bike clean.
- Keeps bike from being scratched (from being on the ground or while moved on the ground.
- Allows easy access to the bike from either side.
- Keeps one from having to use some ones else's property as a support.
- Bike falls or slips on another's property may damage that property and create at best, bad feelings, and at worst, financial liability.
- Bikes with side stands should also use some sort of front brake lock (strap, hair band, rubber band, ...) seem to hold up better from accidental falls.
- Most manufacturers of quality bicycles do not offer kickstand (or fender support) in the bicycle's design, thus making it more difficult for Touring Cyclists to obtain this kickstand option. Manufacturer's behave this way because it is a majority opinion - The minority gets no option but to make their own effort at their own cost.
- Bikes on side stands, seem to fall over with regularity.
- Bikes on side stands that are accidentally touched or blown by the wind seem to fall over easier.
- Bikes with handlebar bags seem more prone to fall over than other touring bikes.
- When a bike falls, it often takes out other bikes.
- Accessing gear on a bike on a kick stand is very delicate operation.
- Bipods and other double leg stands are very heavy and are cumbersome to access when a trailer or pannier is being used. In other words, the very thing that Touring Cyclist's need for touring gets in the way of the best kind of kickstand.
There are two kinds of bipods:
Carl Mattson showed us and demonstrated an Esge/SKS Double Leg Kick stand on his tandem - we were amazed and ordered one that night on the Internet! Web search for Esge/SKS Double Leg Bicycle Kickstand (not cheap) - it is worth it!
Knowledge About Bicycle Tour Navigation,
Destination, and Places of Stay
Top
Sun Navigation Method
- Never count on getting a map at the destination. It is rumored that Columbus likely sailed with existing maps of portions of the New World!
- One can use Yellow Highlighter on colorfast printed maps (printed by professional printers; for a few dolars more, some computer printer inks are colorfast). In some cases one may want to use a different colored highlighter as sometimes the color hides information written in the highlighter's color. Highlighter can be removed with Clorox Bleach and a cotton swab (allow time for drying, usually about four hours, on tours perform the bleach-swabbing before night and the map will be dry by morning).
- When planning or scoping a route on a map, consider writing/indicating key change/mileage/distance points on the map itself, especially when Map Keys or Information Boxes are hidden away by map folding. When one is in the moment on a bicycle tour, one is not likely to stop and fully open a map and read Keys or Information Boxes that are beyond the fold (but sometimes one must - poor map design). On Adventure Cycling's bicycle route maps, we indicate route mileage points next to the stars (course changes) so that we can more quickly match the map's key information to a particular map point - this is very handy when actually touring on a bike.
- Navigation Lessons: In Old World cities and some older New World European founded cities, street names may not be continuous, many streets or highways are not marked, or destination signage may not exist. Thus, the following navigation scenarios exist:
- Old town street names are often, only, for three or four block segments.
- Streets can bend or dog leg.
- Intercepting a street by taking a short cut can lead to:
- Miss-direction due to unexpected or uncharted street direction changes.
- Missing the street because it does not extend beyond a few blocks.
- In a one kilometer distance on a more or less straight street, an old city street may have six or more different street names. Also:
- Street naming has usually resulted from town growth over a period of time (measured in centuries).
- Very often the buildings with the same street name are from the same century or growth era.
- The dwelling's architectural age is noticeably older as one approaches the oldest part of the town.
- To make matters even more interesting, the oldest centers of old towns have often burned down a couple of times in the most recent one thousand years (and may have the newest looking buildings).
- Street Names may only be posted at one spot (where a biker may not know or ever find) or the street names may not be posted at all.
- Some streets in older neighborhoods may be one way streets (created from necessity because of their narrowness as well as the congestion caused by city growth.
- Advertising and destination signage are often not allowed. As a navigator a traveler must be familiar with map reading and relative positioning.
- Road Signs:
- Outside of North America a road sign, with a turn arrow or a road turnoff for an approaching Street or City, does not necessarily mean that the turn is the very next road turnoff. This is especially true for a sign in a city placed in front of a minor street. The sign just means that the street turnoff is coming soon, it may be the next street or a following street, or the turn may be within a couple hundred meters.
- As a navigator, one must be flexible and able to cross reference a turn with other relative aids (like street names, destination town names, road position, map validation, ...).
- Road navigation is especially an issue for the back roads of Europe and for inner Village street navigation.
- In some of these old towns that are centuries old, we've learned to look at the wear patterns of the street to determine the main throughway.
- Signage for turnoffs is problematic in old towns.
- Travelers may not get road crossing warnings for road or highway turn offs. The road intersection may just appear and may not be marked.
- When one is cycling and there are one or more road side tables and/or rest areas, learn to take advantage of these facilities for rest/snack breaks. Just as important, by observation, the existence of these facilities usually implies that no commercial establishments are in proximity. Conversely, where there are no road side tables or rest areas, that generally implies that a commercial establishment is nearby nor coming soon. Of course road side rest areas are designed and spaced for automobile traffic and traffic speeds, like 50 miles apart or one hour apart at automobile speed, and on bicycles an entire touring day can happen in 50 miles.
- Being lost (or suffering through a lack of map and landmark match-up) is an opportunity to ask for help and meet interesting people. We have never been mistreated or mislead and local peoples love to help outsiders on bikes. We've met some really interesting people in this manner and we've had some excellent off the beaten path sightseeing and restaurant recommendations.
- Some buildings, structures, and dwellings are so old or well known that they don't have a formal postal address, its just X House, X Farm, X Mill, X Monument, or X Castle. The locals have known where the place was located for centuries and there may not be any local signage. A map may not have the location marked accurately either (an X just north of town when its actually located south or west of town). Be Flexible and enjoy the little curves that touring throws, it's all character developing!
- Thanks to the cell phone, it is not unusual to call the destination location shortly before the expected arrival time to get specialized final directions. This is especially helpful to bicyclists who are often at the end of a long day and may not want to expend or even have the energy for being lost or for back tracking. We've had caring hosts, for unexpected late night arrivals, voluntarily stand in the road so that we would not miss their location. We have also missed destination places because we expected signage or lights to be turned on at night.
 Caution: Some caring proprietors will (insistently) offer to lock/secure the bicycle(s) in a storage room, for your safe keeping. This is good, well meaning, and for your security and the proprietor's protection. However, the managers are often the only person with a key. The potential problem, based on experience, is that managers often show up just at breakfast time or check out, which is often at 8 or 9 AM. So, cyclists in these situations need to make any early departure desires known to the manager - managers will always accommodate the cyclist's needs, often we have been given the manager's key. This is particularly an issue in hot climates or hot days where the cyclist(s) must have an early morning start. PS, don't be surprised to find that one is parking their bike next to the owner's Mercedes or BMW.
- If a traveler is going to be late and there are reservations, call the destination facility and let them know the travel status. This act is greatly appreciated at the other end and it keeps them from worrying about the traveler or their fare and it may allow them to get an early dinner or perform last minute tasks.

"The bicycle is the most civilized conveyance known to man.
Other forms of transport grow daily more nightmarish.
Only the bicycle remains pure in heart."
- Iris Murdoch, The Red and the Green
Bicycle Tour Sun Navigation
(or How to Sun Navigate Anywhere):
The Sun and its Position are related to Time and
The Sun and Time can Infer Information about Each Other
How to use the Sun for Navigation, How to use the Sun to Tell Time, About Using the Sun for Navigation, About Using the Sun for Time, Learn to tell direction with a sun position and sun travel knowledge, Learn to tell time with a sun position and sun travel knowledge, Bicycle Tour Navigation, Destination, Places of Stay Knowledge, bicycle tour sun navigation, how to navigate using the sun, Destination Knowledge tricks, Bicycle Sun Navigation, Sun Navigation, about sun naviation, how to sun navigate, how to sun navigate on a bicycle tour, how to sun navigate on a bike tour, how to use the sun to navigate on a bike tour, bicycle tour navigation,
Top,
Compass Picture with Degrees (Refresher Aid),
Navigation Topic Introduction (Previous Subject)
If the sun is out, one can learn to tell direction with a little sun position and sun travel knowledge. One's knowledge is greatly enhanced if they have a watch (timepiece). For simplicity's sake, we're only addressing navigation in the Northern Hemisphere, north of the Tropic of Cancer. The same logic works for the Southern Hemisphere, south of the Tropic of Capricorn (but the sun crosses the sky in the north instead of the south).
The voice in Italics is our Tenderfeet Boy Scouts, average age 12. Play along.
- Sun Position and Navigation Facts 101:
- The earth rotates 360° per day (24 hours) - Borrring
- The earth rotates 15° per hour - OK, this is interesting
- The Sun always rises in the East and sets in the West (no matter which hemisphere).Duh
- When the Sun is at its highest point in the sky, it is both, noon for that particular spot, and an imaginary line between the Sun and the closest point on the horizon forms a perfect North-South line. Interesting
- The sun crosses the sky in an elongated arc across the sky, from East to West OK
- It takes just about the same amount of time and arc distance for the sun to rise to its highest point as it takes to go from the highest point to set. This has possibilities. Keep in mind that there is a difference between high noon at a particular spot and 12:00 O'clock noon on a watch. Oh? A Watch's Time is set to a time zone so that many nearby locations may operate from common and shared clock time. BTW, the difference between the local time zone and an exact spot on earth is, and must be, addressed by astronomers in Local Sidereal-Time and Solar-Time. Cool
- On any particular day, when sun shadows are at their shortest, that shadow is pointing north (because the sun crosses the sky in an arc across the southern sky). Also, it is noon for that spot. Again, with the time stuff.
- Navigation Reasoning Factors (AKA Deductive Reckoning or DED Reckoning):
- It really helps to understand a Compass:
- A compass has 360° (for that matter, any Circle). Click here for a Quick Compass Review
- North is at 0° which is the same as 360°, East is at 90°, South is 180°, West is 270°.
- Here's a mental exercise (we actually play this game with Scouts; it helps build a mental global positioning image).
- You are facing East. Which way is North? <one should be pointing to left side>.
- You are facing Southwest. Which way is Northwest? <should be pointing to right side>.
In the game with Scouts, everyone gets a turn in the middle using different directions.
Next challenge level.
- You are facing 270°. Which way is South and how many degrees is it?
<South is to the left and it is 180°>. This is a little tough on 12 year olds because it is Trigonometry and most of them are just starting basic Algebra. Heck, it's tough on grown-ups too.
- The sun is at 180°. You are not facing the Sun, we need to be travelling Northeast. Which way is it and how many degrees is that on a compass? Mental math occurs here. <It's over the left shoulder when one is facing South and the heading is 45°>. Pat yourself on the back and welcome to basic navigation. - Understanding where the sun rises and sets helps us to Navigate in the mornings and evenings. Oh yeah, we get it, but what about midday.
- If one were to face the sun at noon, one would be facing South. OK, OK, but what about the other times of the day?
- The typical human closed fist (balled fist, no outward thumb) held upright at full arm extension, covers about a 7 to 8°Arc, so two fists equals about 15°Arc (see where this is going). 15°Arc equals about 1 hour of earth rotation time (even in the winter, there's just less sun light in the day). *Remember; don't use the thumb at all in making your fist. This method gets a little funky when measuring from the horizon to directly overhead without the use of some object like a tree or building (to help mark the Fist counts) but guess what, there's another method for noon stuff. OK. Now what?
- 1 Fist ~ 7~8° or 30 minutes of relative Sun Travel (actually the earth rotates)
- 2 Fists ~ 15° or 1 hour
- 3 Fists ~ 24° or 1.5 hours
- 4 Fists ~ 30° or 2 hours
- 5 Fists ~ 37° or 2.5 hours
- 6 Fists ~ 45° or 3 hours
- We can use our Fist Knowledge to tell Time and to Navigate. This is Cool, but what's with all the time stuff. We can use our fist to project ahead or behind the Sun's relative direction to estimate time or direction. for example, say that it's about 2:00 PM (1400 Hours), we can count 4 fists backwards from the Sun to find the 180° due south line and then make easy heading direction plans from there. Awesome!
- Here's an example of Interpolation. Let's say that sunrise comes up at 6 AM. We have a map, a route to travel that requires a Northwest heading, but we don't have a compass. It is now 9 AM (about half way between sunrise and high noon - Remember that the highest point of the sun in the sky is, both, Noon and Due South or 180°). Where would we expect the sun to be. Ewwww Cooool, it would be in the Southeast! Our heading? Directly opposite! I am so proud of you.
- Sun Position and Navigation Facts 201 (What the Celts and Mayans Knew):
We're still discussing navigation skills for the northern hemisphere. - The Sun only rises and sets at true East and West twice a year, on the Equinox. The Equinox days are generally March 20 and September 22 (actual dates and times vary up to one earth day). The amount of daylight and night are equal only on these event dates.
- The Sun reaches its most Northern and most Southern arcs on the Solstice. The Northern Solstice is generally on June 21 and the most Southern Solstice is generally on December 21.
- The Summer Solstice is the longest day in the Northern Hemisphere and The Winter Solstice is the shortest day in the Northern Hemisphere
- The earth's tilt angle to the sun is 23.44° (which roughly translates to three Fist Measures - hold that thought; The result of the earth's tilt angle is indicated in Henges and Sun Temples but it is not likely that the ancients made the link to the earth's orbit tilt or even realized that the sun was at the center of earth's orbit).
- Each day, after the Spring Equinox, the Sun rises and sets a little more to the North until it reaches its most northern arc on the day of the Summer Solstice. After the Summer Solstice the sun starts to rise and set a little more to the south each day, passing through the Equinox and reaching its most southern arc on the Winter Solstice.
- The amount of daily Sun rise and set location change is slightly greater during the Equinox times and slightly slower for the Solstice times (an effect of Spatial Geometry).
- The overall angle between sunrise and sunset locations on the horizon form winter solstice to summer solstice is 46.9° (23.4° north of an east-west line to 23.4° south of an east-west line - also a total of six fists); This is significant and worthy of attention when conducting DED Reckoning.
- During Navigation calculations for the morning and evening, perform your own interpolation considering the following (Generally):
- March and September: add -5° to 5° north (depending on which side of the Equinox date)
- April and August: add 5° to 15° north
- May and July: add 15° to 20°
- June: add 20° to 23° north
- Sun Position and Tropical Land Navigation 301:
- There are nearly always 12 hours of sunlight in the Tropics (between the Tropic of Cancer and Tropic of Capricorn). On the equator itself, actual sunrise and sunset time differences are measured in minutes and near the Tropic lines, the sunrise and sunset time differences can approach an hour and a few minutes. BTW, Tidal activity is very minuscule between the Tropic Arcs - Tidal effects increase as one heads toward the poles.
- The time of sunrise and sunset may shift, based on location North or South within the tropics.
- The Sun still rises in the East and sets in the West.
- Fist counts work very well for time calculations. Mornings and evenings are easier to calculate than in the mid day. Measurements at mid day can be taxing and difficult.
- One must know the Date (which implies the time of the year, for which one should generally know that Sun is heading further north or further south for the daily sunrise and sunset).
- Depending on where one is located, the midday stick shadow may point south or north or not exist at all. On the June Solstice the stick shadow will either not exist or it will point south. It is just the opposite for the December Solstice, the stick shadow will either not exist or it will point north.
- Noontime still occurs at the shortest shadow of a straight stick, only now there may be no shadow at all at noon time.
- It takes about 15 minutes of time to determine a good East-West line (in lieu of other signs of nature, not discussed here); field expedient E-W lines can be made in 2 or 3 minutes.
- Place a stick in the ground at a deliberate angle (usually 45-60° to the earth).
- We're watching the tip of the stick's shadow, the sharper the better. Mark it with something small and identifiable that won't blow away.
- The tip of the shadow will move East as the sun travels West.
- In about 15 minutes, Mark the shadow point, again, with a different small object.
- The line formed is an East-West line.
- The last mark is due East. Ergo, facing East, North is on the left and South is on the right, and West is behind.
- Compass Information 501
- The North and South Magnetic Poles are not at the same place as the Earth's rotational axis poles. Therefore one has to address deviational differences between compass readings and directions and true North-South earth grid (longitude and latitude) readings and directions.
- Every ten-thousand years or so, due to a flux of molten iron inside the earth's core, the magnetic fields do a flip-flop (South to North and North to South). The Sun performs a magnetic pole flip-flop every eleven years and it is associated with strong sun spot activity and solar flares. We don't really know the effect that such a change will have on Earth.
- Chinese compasses orient southward, while most of the rest of the world orients northward. This may not have any meaning but some people suspect that the Chinese, whose civilization had and studied the compass before any other known civilization, may have had a compass before the last magnetic pole change on earth.
- Many magnetic field specialists think that the earth is due for a magnetic pole change now or they feel that such a change is imminent. No one knows how it will affect earth and navigation on earth. Many feel that there will be a period (a month?) of mixed up regional variations and weak compass readings, maybe like a hundred regional north and south pole readings. Luckily, major airlines and ships use GPS navigational systems so the impact of a magnetic change is probably greatly reduced.
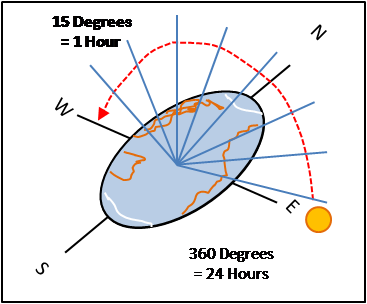
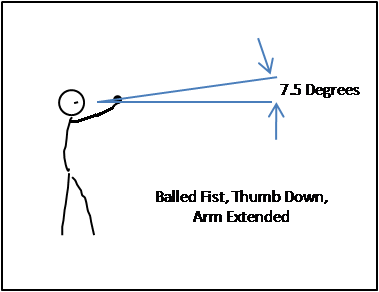
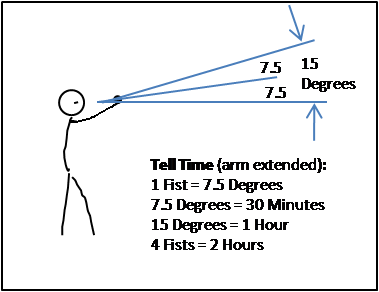 Here's a useful Fist Measure* reference table:
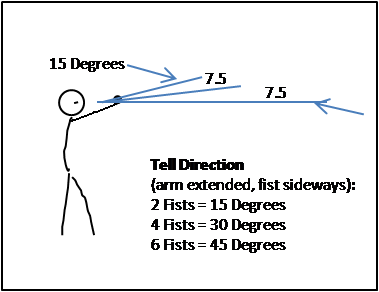
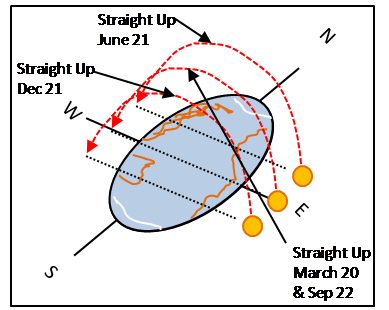
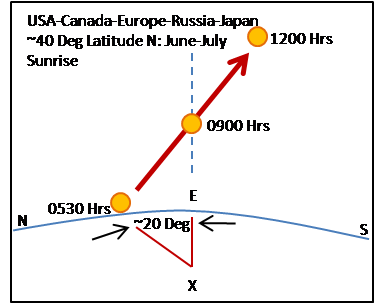
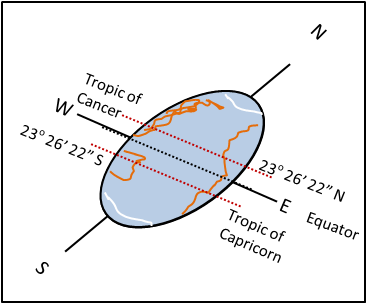
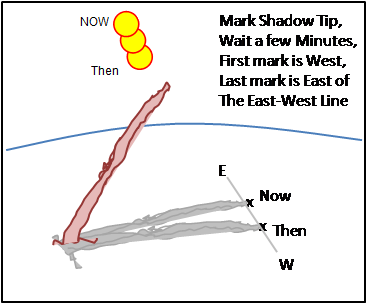
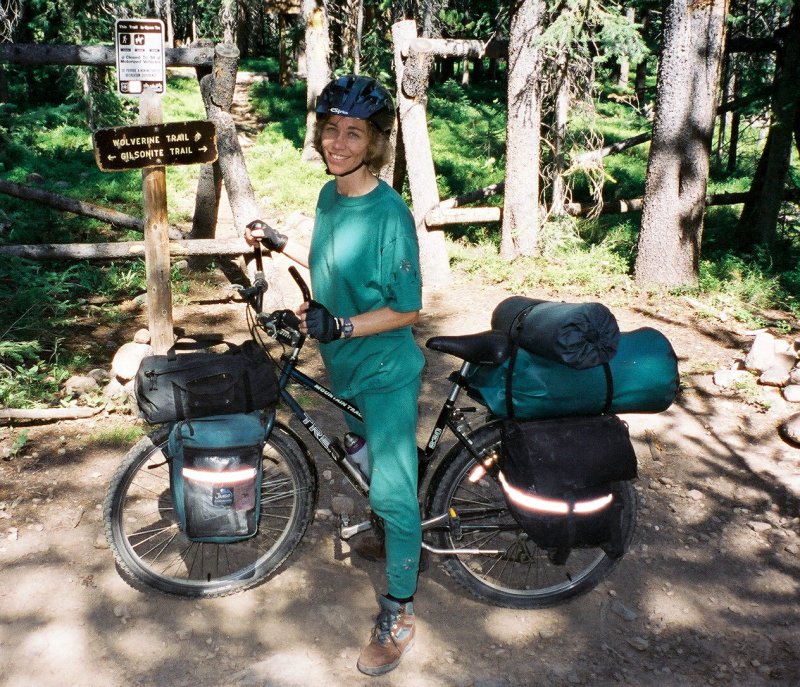
"It is by riding a bicycle that you learn the contours of a country best,
since you have to sweat up the hills and coast down them."
- Ernest Hemingway
About Round-Abouts (aka Circle Navigation and Survival):
Top- So far, for us, the major round-about's have had signs that show which road radial is the desired exit. Learn to look for and quickly study the sign to learn the desired exit/turn by count, by name, and by road number because there are often five or six spokes and the foreign language can make it difficult to understand all factors, plus the exit itself may only have one of the exit clues (highway number or next town name). The place to stop and get one's mind and group together is at or before the sign (not inside the circle). Quick studies only work if the cyclist knows where one is located (road name/number wise) and where one is going (by road name and by city). Knowing where one is usually comes from a prior map consultation. The next city listed on a sign for a circle may not be the destination city/town/village name - again, it helps to know one's map position/location.
- In multi lane traffic, no matter left or right side driving traffic rules, the next exit is always the outside lane and through traffic is the inside lane.
- Circles with more than four arteries or more than two lanes are problematic. Those circles usually have signage. The main issues are:
- Other Drivers Want to Know Where a Cyclist is Heading: Point in the direction that one needs to go, but don't point in a manner that makes it look like a turn signal. We usually point a little skyward (like up at a 25° to 30° angle) and move the hand and arm inward and outward in line with the direction (such that the elbow is moving in and out of 180° to 90° angles). Usually 2 or 3 repetitions communicates the need (and its hard to drive and signal at the same time).
- The Cyclist is in the Incorrect Lane and Needs to Change: Start pointing 45° downward toward where the cyclist needs to be - other drivers will let the biker in. The cyclist actually points to the spot that one need to be. Always express appreciation - We either give a head nod of thanks and/or mouth or say the word for "Thank You" and/or we give a hand wave.
- The Cyclist is in the Correct Lane and Needs to Change: If one is in the correct lane but needs to change, then use a combination signal and hand-finger pointing method. No one cares which arm is used for signaling. Most people know that its harder to signal and pedal at the same time, just don't be too brief in the signal, other people are busy too.
- In light traffic in small towns we follow the normal rules of etiquette, to include proper lane selection, but nine times out of ten, everyone one else usually yields to a biker in the circle. We try not to pause, or it messes up the smooth flow of the other traffic. If a car stops for us, even though it had the right away, we go. One must pay attention, but we find auto driver behavior to be consistent.
Bicycle Speed/Distance Calculator or Computer
TopAmong bikers they are called 'Computers' or 'Travel Computers'.
- Each subsequent direction can be based on getting the predecessor direction correct.
- A few people, especially those with a touch of lesdyxia, are prone to reading errors.
- Most people will have reading-meaning interpretation problems at some point.
- This is why the expression, 'a picture is worth a thousand words'.
Our Italian Setup Guide acted shocked that we did not have a bike computer. We were shocked that no one had told us that is was a requirement [we brought our own bikes and packed from their checklist]. A bike computer was not even a site recommendation for items to bring. We were shocked that the instructions were only in text. There was absolutely NO indication that the touring instructions would be in text, otherwise we would have bought a bicycle computer. At the time of this writing (2007), good computers run $25-50 (USD) and simple computers are available for $15. We would have been quite happy to have a simple computer. We were not even offered a bicycle computer to buy, borrow, or rent. Furthermore, we just left a very big city where we could have purchased such an item. We've been touring for decades and have never used anything but a map or a series of maps.
At Slater, Colorado, on the Wyoming State Line; traveling on the GDMBR, 2005, June.
Bicycle Tour Weather Indicators, Secrets, and Survival;
Bicycle Tour Weather Issues;
Bicycle Tour Planning:

Top,
Lightning Facts and Lightning Survival,
Altitude Sickness, Climate Acclimation, Hypothermia,Geography, Riding in the Rain
There are 2 aspects of weather for which touring cyclists are concerned:
- General Macro Undesired Weather Patterns that we want to avoid, hopefully from good planning.
- Specific Micro Undesired Weather Patterns that we want to avoid, hopefully from keen observation.
rain prediction, weather prediction, how to ride a bike in the rain, how to ride a bicycle in the rain, how to bicycle tour in the rain, how to bicycle tour in the rain, bicycle rain survival, weather rain survival, bicycle weather secrets, bicycle rain secrets, bicycle tour weather prediction, bike tour weather prediction, bicycle tour weather indicators, bike tour weather indicators, how to tell when it is going to rain,
Macro Undesired Weather Patterns and Issues
- Avoid crossing the Himalayas in the Winter Time
(it is tough enough in the Summer). - Avoid crossing the Serengeti during Monsoon Season.
- Avoid the Argentine Pampas during Rainy Season.
- Avoid the Southeast USA during Hurricane Season.
- Avoid India and Bangladesh during Cyclone Season
- Avoid Southeast Asia during Typhoon Season.
- . . .
- The best way is to ask and read about the Weather Patterns in the geographic area for which the cyclist is interested in visiting.
- Ask travel agents.
- Read internet reports for best season (there is a reason for 'Tourist Season').
- Ask around before and as you travel.
- International Weather on HF Radio Frequencies (listen via a classic 'Grundig' or Grundig like travel radio, get digital). There usually is a regional weather report and station on the air, but it may still be an hourly report surrounded by music, news, and/or commercials.
- Another way (I am almost sorry to say) is to watch the weather on TV while in foreign countries. Somehow, I seem to catch the news (it is the same everywhere) between cleanup after a day's ride and before supper. If a cyclist is familiar with Weather Maps [hint hint], then one can watch a major weather warning or prognosis on TV and not understand a word of that language. I did this once in France and twice in China, luckily we were far enough away from the coast and from upslope mountains for the rains not to mal-effect us.
- Weather Radio Alerts (United States and Europe).
- 'There's an Ap for That!' - Smartphone.
 There is a lot of 'Common Knowledge' here, but no one knows everything; Cyclists in Planning Mode want to avoid entry into geographical areas during their known bad weather cycles, for example:
How does one learn about these Regional Weather Patterns?
Listing from Active to Re-active Method Order:
It is very easy for a Touring Cyclist to become isolated and not to pay attention weather outside of one's vision. A cyclist should know about evolving weather conditions as well as other kinds news that may affect one's life. The Internet is becoming a good source for this kind of information (Smartphones, Notebook Computers, Cyber Cafés and Libraries are good tools to help the Touring or Planning Cyclist). See a few Online Weather Sources
Micro Undesired Weather Patterns and Issues
-
The following web sites provide additional information about clouds, cloud meaning, reading clouds, and pertinent weather facts:
- http://www.mountainsurvival.com/weatherbasics.html
- http://www.quick-facts.co.uk/weather/clouds.html
- http://www.namesofclouds.com/index.html
- If you see a Cumulonimbus Cloud (which is a local big dark storm cloud and not a weather front and not a hurricane arm - See the preceding pictures), the big question is whether the storm is going to dump rain on you or by-pass you?
-
In the Northern Hemisphere, 99 times out of 100:
- If you face the wind and the storm is off to your right hand side, then the storm will come toward you.
- If you face the wind and the storm is behind you, then it is likely to pass from behind you to your left rear.
- If you face the wind and the storm is off to your left hand side, then it is likely to move further away from you on your left side.
- If you face the wind and the storm is directly in front of you, then it is likely to pass in front of you to your right front.
- This storm behavior is typically just the opposite in the Southern Hemisphere.
- If you are on the sunny side of a Cumulonimbus Cloud it may not look as threatening as is potentially possible.
- When you see regular Cumulus Clouds (white round, puffy, cotton candy looking) starting to build vertically (you can actually see them grow) at mid day, that is a good indicator that there will be late day or evening thunder showers. One usually cannot know or guess where it will rain, one can usually be assured that it will rain and it will probably have lightning. See where NOT to camp for Lightning Storm Survival.
- When an 'Anvil' forms on a Cumulonimbus Cloud, the pointy end of the Anvil indicates the direction the cloud's movement. Unfortunately, if you are under the cloud, you will never see the Anvil, but you can judge by the winds movement (per the first four bullets above).
- If you see a Cirrus Stratus Clouds (See the preceding pictures):
- If you are on the open plains, then you usually have 3 days until storm weather arrives.
- If you are in a coastal location or humid location, then you usually have 2 days until a weather front arrives.
- If you are in mountains, then you have from 3 hours to 2 days until a weather front arrives.
- Cirrus Stratus Clouds actually form the leading edge of a weather front.
- Cirrus Stratus Clouds can be thicker, more tubular, and closer together.
- Cirrus Stratus Clouds can completely fill the high sky.
- From our experience, if you see Cirrus Stratus Clouds only in one area or quadrant of sky, then very often only that area gets the rain. There is often a geographic anomaly that factors (mountains, large lakes, elevation differences, ...).
FREEZE/THAW Effect: This is a clue that it is freezing at night and thawing during the day.
- The Freeze-Thaw action is a hint that it will be COLD AT NIGHT and that a cyclist will want to protect their water from freezing (usually by bringing the sealed water bottles/containers into the tent at night).
- The Freeze-Thaw effect leaves a little frozen water expansion gap around the stones as freezing water expands the gap and then the liquid water disappears as the water thaws during the day.
- The Freeze-Thaw Cycle tends to repeat itself daily at the location where it is observed.
 Migratory Fowl, particularly different kinds of Geese, actually use the winds of weather fronts to cover the most flight distance for their effort.
- Note: There is a difference between flocks flying in and out of feeding grounds or ponds versus flocks flying at high altitude and covering major distance.
- Note: The Migratory Birds seem to know which side of the weather front will produce the most favorable winds for their preferred travel direction. Sometimes the birds fly in advance of the front but sometimes they fly on the back side of the weather front.
- Note: If you have already biked through a weather front (or you have noted the passage of a weather front - fronts usually are associated with precipitation, dense clouds, and a 90° change in wind direction) and you see migratory birds in flight, then it is not difficult to figure that the birds are on the back side of the front. This is still helpful information, it usually means that the weather is safe for travel again (or the migratory birds would not fly).
- Before the Summer Solstice (February-June) most migrating birds are heading Northward (in the Northern Hemisphere).
- After the Summer Solstice (June-November) most migrating birds are heading Southward (in the Northern Hemisphere).
- Never camp on high ridge lines, these locations receive the most lightning strikes, the most rain, and the most wind (Rookie Mistake):
- Windward and Leeward Mountain and Big Hill Issues:
- Most mountains and big hills have Windward and Leeward Sides.
- One can tell the Windward side because it will always have more vegetation (because it gets more rain).
- Typically, the heavy part of a rain storm falls on the windward side of the mountain.
- In either hemisphere, weather tends to go from west to east (mainly due to the rotation of the earth).
- The good news is that the Windward Side is usually the best side to look for water; the bad news is that it is the windiest, wettest, and most lightning struck side of the two sides.
- It is usually less windy and dryer on the leeward side of a mountain or big hill.
- Cyclists need to consider where they are located at certain times of the day while considering the potential for bad weather so that they can decide to camp early and safer on the near side of a mountain crest or determine (i.e. make a decision) whether they have enough rain free and lightning free time to crest the pass and camp on the other side.
- Do NOT camp near a mountain crest within a mile of either side of the crest/pass - That's a Danger Area with increased risk of rain, lightning, and wind.
- Field Decisions (called Tactics) for determining whether to 'stay put' or 'move-out' need to incorporate the fact that rain will slow movement by at least 2 MPH/3 KPH and if it is on a dirt road (common in the mountains) add another 2 MPH/3 KPH to the travel speed slow down for a soft road. This does not address wind, yet another decision factor - See Tour Planning Traps and Pitfalls for other movement decision factors.
- Weird Science: Totally true, sometimes.
- Dandelions and Clovers (and some other plants) fold their flower petals prior to rain or storms. If you notice flowers, in general, closing at mid day the be wary of a storm coming but know that some plants, particularly Morning Glories, close up their flowers at or near sunset (having nothing to do with storm activity).
- Birds, Bees, and Butterflies in particular disappear before rain storms.
- Wild Life in general, starts disappearing and/or all background wild animal, bird, insect noises animals stop just before a heavy rain or a storm.
* Warning * - PAY ATTENTION: This same Disappearing Behavior may also indicate that a predator is nearby (bear, lion, wolf, dog, cougar, puma, jaguar, man, you, ...). - Ants start very active local work before major storms. Ants usually get busy with mound building, sometimes wall building around the entrance hole (a high probability for rain), and they may close their hole (highest probability of impending rain or flood conditions).
- Cows herd up and stand together or lay down together (cows do not like to lay on wet ground and it is a instinctual defensive posture, wild predator scents are hidden during heavy storm activity). Furthermore, most herding animals tend to group together and in general they will keep their tails/back-ends to the wind so that they may depend on their sense of smell for airborne scents on the wind to tell if a predator is about and they will use their eyes to observe downwind movement.
- Curly hair straightens out in humid conditions (or as humidity builds up just before a storm).
- Heavy Duty Electrical Power Lines make more humming noise and more crackle noise than usual as the humidity goes up (especially preceding foul weather).
- Ancient Sailors Axiom: 'Red sky at night, sailors delight. Red sky in morn, sailors take warn.' A red sky in the morning means that wind and weather will come from the east; generally any weather or wind that comes from the east is never good.
- Earthquakes and Tsunamis: Animals, particularly livestock and outdoor pets start acting very animatedly and/or agitated just a few minutes before an earthquake and they often seek open ground. Coastal animals behave the same but often, additionally, seek higher ground.
- Tsunami Water Boil Alert: It has been reported many times that just before a Tsunami strikes the coast, that the water seems to flatten out, become less wave active, AND the water looks like it is boiling or just getting ready to boil (in a bigger version of a pot of water, little bubbles start to rise-up in different spots and water seems to rise-up like there is a hose underneath supplying water up-ward).
- Earthquake Do and Do Not: Never get under a desk, it is the biggest mis-information ever! Do not stand in an arch-way. Do get beside a sturdy desk, couch/sofa, file cabinet... Do get beside an archway. Position yourself to move, to spring away from falling objects... More about Earthquake Survival
- Travel Experience: I've stayed in foreign lodging with a TV and have discovered that while I cannot understand the local language, I can read a weather map display. There have been times that I learned of bad weather coming via foreign TV (weather fronts and two typhoons). Also, it never hurts to ask hotel clerks or shop owners about the weather.
- Unproven, but ... Do NOT tie a tent guy line to a metal/barbed-wire fence or fence post. I have heard stories of cows being next to a barbed wire fence, a distance away from a lighting strike, where it is reported that the lighting has traveled through the wire and killed one or two cows next to a fence. What happens is that a rancher may find one or two dead cows next to a barbed wire fence immediately after a lightning storm.
- Riding in the Rain: The issue that bothers most riders in the rain is wearing full length rain gear because it can be hot and/or cumbersome.
- Attitude: Many people, including this author, have an inherent resistance or dislike for riding in the rain especially when one needs to ride for days at a time in 'off and on' rainy weather. 'Sometimes one must ride in the rain', there may be schedules and/or pre paid appointments to keep. One may be participating in a pre-paid tour. Usually after a person has suited up, the best way to get going and to get motivated is just to start pedaling slowly (or slower than normal). I usually find that when it is physically raining, that I don't heat-up. It seems that heating up occurs when first starting (before the rain assault) and also just after the rain ends (which may be a periodic break or a final storm break).
- Lightning: We have sat out lightning storms - Sometimes it is wise to not be in the open on bikes. Do read about Lightning Facts and Lightning Survival.
- Heat-Up and Humidity: One of the major problems with wearing rain gear in a rain storm is that it gets warm and humid underneath that gear. A rider can get wet from their own body moisture. This body moisture subject is not about body sweat; our bodies put out moisture (that's why sleeping bags need to be aired out). Even with breathable waterproof rain gear, the under-clothing can still get wet because the air transfer breathing rate cannot exceed necessary transfer rate for moisture evaporation, i.e., the rider needs to slow down their work effort or they will still get wet underneath their rain gear. Oddly, once a person finds their happy speed for pedaling in the rain, if it is cold out then they can work harder without sweating or putting out too much moisture. If it is warm out, then most riders need to slow down their work effort to stay dryer and sometimes it does not matter if one gets wet.
- Heat-Up and Humidity Controls: A rider does have some control over the riding heat-up effect. They can un-zip or un-button their rain gear fasteners and they can roll-up sleeves and pant legs. Some rain jackets allow the removal of sleeves.
- Waterproof Outerwear (GoreTex or similar): In general, the best rain gear is a breathable and waterproof material (GoreTex like) Jacket and Pants.
- Issues and Experience: During warm or hot days with rain, a cyclist can roll up rain pant leggings so that the pants become shorts, but in such conditions, boots and shoes will fill-up or collect water from rain running down the legs or from wheel splash (even if one has fenders) - In this case waterproof sandals wear a little better for cycling (but maybe not for camping or more serious demands of footwear).
- Some waterproof pant leggings are too tight to roll up (it can be a choice of style versus practical use over time). Loose rain gear, while not looking stylish, wears a little more comfortably over the long haul.
- Some jackets have hoods but most cyclists do not like hoods (as they can fill with air and mal affect the ride).
- There are waterproof rain covers for bike helmets and in many cases, fully loaded bike riders are probably carrying a waterproof full brim Field or Boonie styled hat or a Dessert Hat with a front brim and a neck cover cloth for off the bike.
- The best footwear is either a waterproof sandal (common in warm sunny climates) or waterproof footwear (from boots to bike shoe styles). A lot of Guides and Experienced Bike Tourists wear bike riding sandals (some available with pedal clips). [Unfortunately, this author's feet do not like sandals.]
- Regarding sandals or any footwear: A cyclist must have already broken in the footwear on their own feet before riding long distances.
- Most long range fully loaded cyclists know that style gets compromised a
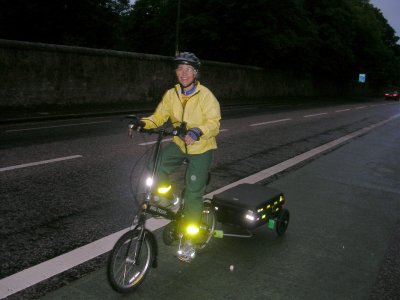 little for practicality. Loose fitting rain gear that works on and off the bike is far more practical than tight slip stream racing styles (which by the way are often water resistant but NOT waterproof).
 - Multi-Use Reminder: In a situation where a cyclist is going to ride for 800 miles, 1600 miles, or 2400 miles the cyclist has a choice, does the cyclist want to carry two different rain suits for 'on and off' the bike or does the cyclist want to carry one rain suit for both situations? Most long-range touring cyclists will opt for a single Rain Suit (Outfit) that will address the most situations (rain, cold, and snow). In which, the Waterproof Jacket can also serve as the Cold Weather outer-layer (shell) and if it is cold out, they may wear a fleece jacket or heavy jack-shirt as a middle layer.

Most adults have a good sense for Weather Issues and Patterns. There are just a few lessons learned over time that we would like to share.

Lightning Facts / Lightning Survival:
Top
Weather Indicators, Secrets, and Survival
 We frequently find ourselves overnighting in high altitude places in the mountains or crossing mountain passes mid to late day when the thunder storms form up. We have learned to watch the weather for various signs (clouds, cloud types, temperature, and wind) and to pay attention to our surroundings (lightning struck trees and fire signs). Radio reports are never specific enough to help, except for reporting weather fronts. We specifically look for lightning strike signs1 (scars on trees, twisted trunks, fire sign) so that we know specific places to NOT be located during a storm. We have been in some very intense lightning storms and we have sat out many heavy duty thunder showers.
Contrary to the popular expression, Lightning not only hits twice, lightning hits some geographical prominent areas repeatedly. So the reason that a cyclist/camper looks for lightening strike tree signs and burn areas IS TO AVOID THEM! Don't take shelter there, don't camp there!
LEARN TO READ THE SIGNS. 1
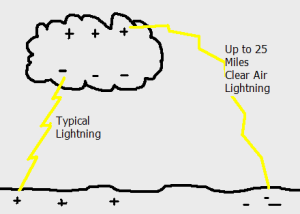
- If a person is within thirty seconds of the sound of thunder of a lightning flash, then a person can be hit by lightning. Storm direction does not matter.
- There are two types of cloud to ground lightning strikes:
- Cloud Bottom to Ground - The bottom of cloud is negatively charged and the lightning discharge seeks positively charged ground.
- Cloud Top to Ground - The top of the cloud is positive charged and the lightning discharge seeks negatively charged ground.
- The Cloud Top to Ground lightning discharge is the Deadliest and is often called a clear air lightning strike because the strike can easily be 5 miles from a cloud (the distance record is 25 miles). This is the reason that swimming pools close at the first sound of thunder.
- Lightning is typically about 1 to 1.5 inches thick. It appears larger because the electricity has super heated the air and the moisture in the super heated air reflects the bright light and gives the appearance that the electrical bolt is 12 to 18 inches wide.
- Sometimes people can see the glowing effect of charged particles on the ground or a grounded object, like a tree, climb up towards the sky just before a strike. This activity is called "Discharge Laddering" or just Laddering for short.
- Sometimes a person can feel the Laddering effect on the body as a tingling sensation or as hairs standing on end. Sometimes the laddering effect can be seen or heard as little metal objects may vibrate (in your pocket or on a table top).
- There is NO Safe Place Outdoors. Closed vehicles offer some protection, Not because they are on rubber tires but because they have a steel cage and thick windows to block or deflect a lightning bolt. Hikers and Bikers Do NOT have any protection and must use their wits.
-
NOAA (Melbourne, FL), near the Lightning center
of the United States, on their NOAA Website, near the bottom of their
online web page, states:
 "If a person is caught in the open and lightning is nearby, the safest position to assume is the Lightning Crouch. Crouch down on the balls of the feet, keeping them as close together as possible. Cover the ears, and do not allow other body parts to touch the ground. Keep in mind that this position should be used only as a
LAST RESORT! It WILL NOT guarantee safety!" - Lightning does not always seek the tallest tree, it can hit any tree (or any other object for that matter) and lightning can strike the same object more than once. If there are trees around, while lightning often does discharge through a tree top it does not have to, it can go directly the ground, to a short tree, between trees, or go to or through any other object.
- Lightning can bounce off an object and discharge at a peculiar angle or distance. Lightning can also travel laterally along the ground, especially if the ground surface is wet.
- Ranchers have reported cows killed along a barbed wire fence, where lightning struck the wire elsewhere.
- Lightning can splinter into different sizes.
- True Stories: Terry got hit by a lightning splinter, the noise of the main bolt about six feet in front of her made her instinctively jump off the ground, which probably saved her life. Terry, as a child, also had a pet Lamb get hit by lightning, six feet in front of her. Dennis had a stack of fire wood blow-up about twelve feet in front of him, he had to duck spinning pieces of wood which hit a tin roof above him.
(1) When lighting hits a tree, one of four things happen (NOT Mutually Exclusive):
- Maybe Nothing (it happens).
- The lighting runs down one side of the tree and destroys the bark, leaving a streak scar of exposed tree interior. These trees usually live but the trees are stressed and will not hold up well to subsequent micro-biological plant or animal attacks.
- The tree can super-heat and twist on its hollowed cell fibers. The tree is dead. Details:
- Lightning can cause a fire in the tree or on the ground.
- The lightning can super-heat the tree at the cellular level. As the heated cellular steamed liquid leaves the cell membranes, only the plant fiber structure remains. In less than a second, the steamed tree (life) liquid evaporates (or at least departs the cell) and lets the tree collapse onto its own hollowed cellular skeleton for support - The process of the tree collapsing onto its empty cell membranes results in the tree becoming shortened and twisted (about one turn for every 8 to 12 feet of height).
Foot Note: Heat from a High-Intensity Fire, as in a large forest fire, can also cause this same Death Twist (see second pictures above).
Altitude Sickness, Climate Acclimation, Hypothermia
Top, Altitude (Sickness/Treatment), Climate Acclimation (Problems/Solutions),Hypothermia (Symptoms/Treatment), Geography, Bicycle Tour Planning
Altitude Sickness
In General, be healthy and in shape; drink lots of water; sometimes if coming from Sea Level, arrive a day (or two) early in order to properly acclimate to new surroundings. If a cyclist is not healthy or in shape, then it will take longer to acclimate. From this author's general experience, it seems that a day of easy acclimation is needed for every 6-10,000 feet of elevation change (~ 2-3,000 meters) - If possible, this is a good time to take a walking tour or a bus tour of the destination's local sites. Also see other Climate Acclimation Issues, just below.- Ascending faster than 1,500 Feet (~500 Meters) per day.
- Exercising vigorously. Physically fit individuals are not protected - Olympic athletes get altitude sickness (even Edmond Hillary got altitude sickness on one of his few Mt Everest ascents).
- Sometimes Lightheadedness.
- The most common Altitude Sickness symptom is a Headache (but some people may not get a headache).
- Advanced symptoms are associated with Nausea and/or Vomiting and/or Fatigue.
- Disorientation.
- STOP Exercising.
- DO NOT Ascend any further in altitude (i.e., DO NOT go up in altitude).
- Typically, Drink Fluids (like water or fruit juices) and taking an Analgesic will help resolve the symptoms.
- If in direct sunlight, depending on temperature find shade and on hot days find a cooler location.
- DO NOT drink alcoholic beverages.
- If the symptoms do not improve, then Descend.
- Acute altitude sickness is usually not a serious condition and it usually resolves on its own with rest, water, and over-the-counter analgesics for pain control.
- Analgesics:
- Aspirin (Acetylsalicylic Acid)
- Acetaminophen (Tylenol, Excedrin, ...)
- Ibuprofen (Advil, Motrin IB, Nuprin, ...)
- Ketoprofen and Naproxen (not same but similar to Ibuprofen)
- Aspirin generally works the best for those who can take Aspirin but many people cannot use Aspirin as Aspirin may cause other medical problems.
- Maintaining Adequate Hydration will usually help reduce the symptoms of acute altitude sickness, before, during, and after the ascent.
- If nothing seems to help, seek Medical Attention.
- Most High Altitude Locations have a relatively lower humidity than lower elevations. For one thing, there is less air to hold water vapor/moisture.
- For example, Colorado's humidity is often 50% during the summer and often only 25% in the winter. In central Colorado, most valleys are 6,000 Feet to 8,000 Feet above Sea Level (~1800 M - 2400 M) and most passes are 10,000 Feet to 12,000 Feet above Sea Level (~3050 M - 3650 M).
- The very action of breathing is an exchange of internal moist air from the lungs with external dry air from the atmosphere. Breathing, by itself, causes dehydration; perspiration just adds to the body's total fluid loss (and it does not need to be heavy perspiration).
- In Drier Locations People Dehydrate (in which a headache is a common symptom regardless of altitude). Dehydration Headaches may even occur in cool desert locations at sea level (like Death Valley or the Dead Sea) because of a significantly decreased relative humidly let alone in hot desert location where a Headache may be a heat symptom.
What Causes Altitude Sickness?
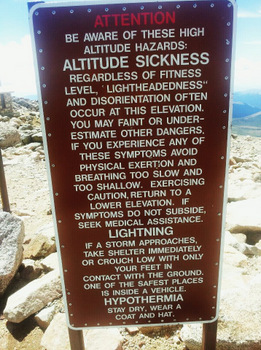 Altitude sickness occurs because there is less oxygen in the air than a person needs to breathe properly.
According to Altitude.org what triggers altitude sickness is one or both of two things.
What are the Symptoms of Altitude Sickness?
What are the Treatments for Altitude Sickness?
Hydration Issues:
Hydration Solution:
-
The solution is to drink fluids, stop exercising, and if it is also hot, find a cooler place to rest and/or get out of direct sunlight.
Climate Acclimation Issues (also called Acclimatization)
-
Changes to a human's climate causes change to a human's physiology. Changes in a persons physiology affects their performance, thinking, and health.
- Generally arriving at a destination one to two days early will help one adapt to a new climate at Go Time.
- In many cases, cyclist's can't afford one to two days of extra time off on each side of a trip, but is sure helps, especially when one has changed time zones by 12 hours or changed altitude by 6-10,000 feet (2-3,000 meters).
- Some people handle climate changes better than others as a reflection of health, age, and genetics.
- Sleep and hydration remain the most immediately controllable physiological factors no matter the degree of change.
Some Classic Causes of physiology adjustments are changes in: Altitude, Humidity, Temperature, Biome, Weather, Season, Food/Diet/Nutrition, Time Zone, and there are other factors.
Some further readings about the affects of Climate Change are available at:
http://anthro.palomar.edu/adapt/adapt_2.htm
http://jeb.biologists.org/content/213/6/912.abstract (noted for it references)
Effective Acclimation Solutions:
Hypothermia
- The most common touring cyclist Hypothermic exposures comes from bikers pedaling in Mountain Environments between lower elevation warm or hot environments, especially when the bikers come from a warm environment - The cyclists just did not pack cold weather gear.
- The second most common cyclist exposure to Hypothermic conditions is being located somewhere where, for that instance, the weather suddenly becomes un-seasonably cold; often this is an Arctic (or Antarctic) Air Mass that reaches Temperate Climates unexpectantly - The cyclists just did not pack cold weather gear.
- Another common cyclist weather situation is being caught in a Spring or Fall Rain Storm (in either hemisphere) and riding in cold temperatures all day; the situation is compounded if it is raining. Riding in 40°F/2°C temperatures all day, even if it is not raining, will cause the body's core temperature to slowly drop over the course of the day - In these cases, a cyclist will be merrily pedaling along and near the end of the day the biker(s) will suddenly realize that they are cold and exhausted at the same time (their exercise was keeping them warm up to the point of running out of energy).
- Other less common ways exist for a cyclist to be
- In a Cold Environment and
- Un-Prepared.
- Cold Shivering
- Higher Blood Pressure
- Rapid and/or Erratic Heart Rate
- Rapid Breathing
- Urination or Urge to Urinate
- Increase in Blood Sugar (some people feel/sense this)
- Mental Confusion
- Unstopable and/or Very Active Shivering
- Uncoordination
- Slow Movement
- Movement, like Pedaling, Needs Effort
- Walking or Bike Steering Becomes Difficult
- Blood Retreats from the Skin Surface, people become Pale in Skin Color
- Blue Ears, Lips, and Fingers
- Decreased Heart Rate
- Decreased Breathing Rate
- Decreased Blood Pressure
- Difficulty to Speak
- Difficult to Think
- Forgetting some Things of Importance
- Difficult to Use Hands
- Difficult to Walk, can Hardly Pedal, Stumbling
- Get out of a cold wind
- Get Warm
- Get Dry (out of wet clothing)
- If a building or structure is nearby, use it
- Don't be afraid to Stop a Motorist
- If possible, have the victim Breath Warm Air
- Drink warm water or beverage (warm the core, no alcohol)
- If available, use Chemical Hand/Foot/Pocket Warmers
- If necessary, set up a tent
- If necessary, break out a dry sleeping bag
- If necessary, break out a stove
- If necessary, place a very warm water bottle in the arm pits and groin area
- If necessary, put a warm person into a bag with the cold person, rotate if necessary
- Worst Case Scenario: The victim may go into shock and/or have cardiac problems
- Get Medical Attention
- Helmet (always wear)
- Carry Clothing Layers: Jacket, Heavy Shirt, Full Gloves
- Carry Rain Gear: Jacket (often the same, waterproof), Pants, Gloves (often the same; ALL Outer Wear Waterproof)
- Shoe Covers (waterproof)
- Cell Phone (for the area traveled)
- Optional: Balaclava (we always carry)
- Optional: Chemical Heat Hand Warmer, pair in package (we always carry)
- Optional: Head Cover or Waterproof Helmet Cover
- Anything made of cotton is undesirable (holds/retains water/moisture); Synthetic Clothing is Best
Hypothermia is the condition of the body core becoming to cold. There are official temperatures for a normal range and stages below normal (by the way, when the core temperature is above the normal range, it is called Hyperthermia, aka Heat Exhaustion). The issue in this presentation is about recognizing the symptoms and actively treating the affected person or persons, and it just might be self treatment.
How Most Cyclist Become Hypothermic:
Cyclists don't usually set out to go to cold environment unprepared, what happens is that the temperatures become unexpectedly cold and the cyclists find themselves Un-Prepared. Fore Example:
![]()
See the #4 Theme?
We cannot do anything about Unexpected Cold Temperatures.
All that we can do is Be Prepared!
![]()
Hypothermia Symptoms:
Be Familiar with these Hypothermia Symptoms.Alcohol and/or Being Wet will ALWAYS Exacerbate a Hypothermia Situation!
-
Mild Symptoms (any mix):
Intermediate Symptoms (any mix):
Advanced Symptoms (any mix):
****************************************************************************************
In the Most Severe Stage of Hypothermia, the victims want to curl up,
find a small cubby hole, and for some unknown reason some
Hypothermia victims undress.
****************************************************************************************
Hypothermia Treatment:
Hypothermia Prevention (Be Prepared):
Bicycle Camping and Outdoor Travel Issues
Top, Outdoors DirectoryCamping: Keep Handy, Tent Survival, Site Selection, Stealth Camping, Camp Tools, Ground Cloth, Space Blanket, Sleeping Bag, Liner, Cover, Sleeping Pad, Insect Repellant, Batteries, Tent/Food/Cooking, Wierd Facts
Cooking Gear: Food, Stoves, and Fuel are separate Subjects
Food: Enough Food (Planning Strategy), Meal Planning Considerations, Slow to Cook Foods,
Foods that Don't Carry Well, Eating Correctly on Tour , On/Off-Bike Tour without Cooking, On-Bike Energy Foods),
Group Food Issues, MRE Issues, Pack it OUT, Food Reserve, Food Security and Bear Proofing,
Food Storage Wisdom, Miscellaneous Food Issues
Stove and Fuel: Stove-Fuel Types, Environmental Variables, Stove Environment Match, Clasics, Fuel Types,
Int'l Flight/Travel Stove/Fuel Issues, Hardware/Repair, Resupply/Fuel, Field, Group
Fire and Cooking: Emergency Stove, Emergency Fire, Fire Lighting
Clothing: Synthetic versus Organic, Storms and Clothing, Survival Secrets, Culture + Clothing Issues,
How Much Clothing (and Gear) to Carry
Water: Enough Water, Clean Water Risks, Filter/Purifier, Boiling, Management, Collection Methods Cold Weather
Sanitation Issues: Basics, Good Habits, How to Poop Outdoors, Ways to Bathe
Cleanup Issues: Dish Washing, Caveats, Laundry
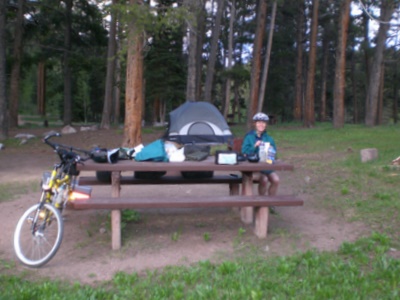 It is difficult to perform a self supported bicycle tour for 7 days in any direction without Camping being a viable option for at least one of the tour nights. On the other hand, there are places on this earth where one can travel by bike and not see an electrical outlet for 7 days. In as much as These Facts are TRUE, it is extremely helpful to touring cyclists to gain knowledge of the outdoors, camping and cooking. THIS IS what Bicycle Adventure is about for many people.
The following sections evolved, first, from lessons that we recorded as we were transitioning from back packers to bicycle tour'ers, then from lessons learned as we were teaching others. It really helped us to be Scout Leaders with plenty of Scout experience (about the authors). Then we started joining with other cyclists, groups, and clubs and that experience rounded out our own knowledge. We have learned something from every cyclist that we have ever met and our knowledge continues to grow and so does our sharing.
Basic Outdoor Items to Always Have on Hand - 'Be Prepared':
Top, Outdoors Directory:Keep Handy, Tent Survival, Site Selection, Stealth Camping, Camp Tools, Ground Cloth, Space Blanket, Sleeping Bag, Liner, Cover, Sleeping Pad, Insect Repellant, Batteries, Tent/Food/Cooking, Wierd Facts
- A cyclist should be able to quickly find the following items BY BLIND FEEL,
at all times, on the road or in camp:- Knife
- First Aid Kit,
- Lighter, Striker, and/or Waterproof Matches,
- Flash Light, Torch,
- Spare Batteries, and
- Rain Protection Gear.
Tent Survival (Two Meanings),
Know How to Use a Tent:
Top,
Outdoors Directory:Keep Handy, Tent Survival, Site Selection, Stealth Camping, Camp Tools, Ground Cloth, Space Blanket, Sleeping Bag, Liner, Cover, Sleeping Pad, Insect Repellant, Batteries, Tent/Food/Cooking, Wierd Facts
- Know how to set up beforehand - attach any cords or lines that should normally stay with the tent. Already have pre determined how many stakes are needed and have added any heavy-duty/other kinds of stakes.
- Have done any seam sealing or waterproofing (usually not needed for new tents).
- The very lightest shelter is a plastic tube. Second lightest is a Bivy Sack:
- Tent Choice (weight vs safety):
- Tents without bottoms are lighter weight.
- Tents that are fully enclosed keep creepy crawlers out.
- Tent Choice* (weight vs privacy):
- Tents facilitate more privacy and body necessities but weigh more than Bivies or tubes.
- Bivies and Tubes are restrictive to evening/morning body necessities (dress, wash, brushing teeth, using a P bottle, sleeping uncovered on hot nights, ...).
- If away from the area, keep the tent doors and windows closed. This action keeps surprise rain, hail, and critters out. If Hot, OK to open windows with screens as long the windows are protected from rain or rain is improbable.
- Hydration is extra important to bike riders and backpackers, so one must learn to be careful with water bottles in a tent.
- We keep our bottles at the entrance, either just inside the tent or outside in the vestibule.
- Always bring a couple of water bottles inside the tent. If you know that temperatures will reach the 40's F/10's C, or if the cyclist is located in a dessert or high altitude mountain (8000'/2400m +), camping or not, then bring all water inside (it is both a security and a freezing issue).
- We keep a "P" Bottle at either side of the entrance, depending on the situation.
*A few of the Great Divide Race Finishers have told me that they started with Tubes or Bivy Sacks but after a week or two (of a 3-4 week long race) they bought a Small Tent.
Bike Camping, Bicycle Camping, How to Choose a Bicycle Camp Site, What to bring bicycle camping, How to Choose a Bike Camp Site, What to bring bike camping, about tent camping, about stealth camping, about wild camping, wild camp, wild camp precautions,tents, sleeping bags, ground cloth, foot print, space blanket, camp cooking, camp stove, camp fuel,
The Skill of knowing 'Where to Place a Tent':
Top, Outdoors Directory:Keep Handy, Tent Survival, Site Selection, Stealth Camping, Camp Tools, Ground Cloth, Space Blanket, Sleeping Bag, Liner, Cover, Sleeping Pad, Insect Repellant, Batteries, Tent/Food/Cooking, Wierd Facts
- Choosing a Campsite:
In a Perfect Campsite Selection: One wants to be uphill on a gentle slope, on smooth water adsorbent ground, out of the wind or blowing rain, not near a lightning rod, and located where the sun will shine first thing in the morning. - Avoid high ridge lines as these areas attract lightning.
- Avoid areas with lightning scarred trees.
- Avoid dense brush/growth areas as there is no way to stop a fast moving fire (started nearby).
- If there are many trees avoid the tall ones. If there are a few trees avoid them but consider using the shade. Avoid bird hangouts (for poop and noise). Avoid sap dripping trees, and avoid lightning attractors.
- Where is the rain going to go? Don't pitch a tent at any low point, river bed, gully, depression, drain channel, or flash flood area/plain.
- In camp grounds find out where the sprinkler heads are located, don't set up on top of or next to a sprinkler head.
- Where one has a choice, avoid windy areas, use natural wind blocks (bushes, trees, boulders, buildings).
- Learn or figure where the food will be stored: 1) NOT in the Tent, 2) Bear Vault, 3) Bear Bag. Don't put the tent under the Bear Bag location.
- On gentle slopes arrange the tent length inline with the downhill run (not sideways to the slope). Most experienced campers will align the entrance at the bottom of the slope (versus the top of the slope or sideways to the slope).
- No matter where the tent entrance is, the sleeping bags must be inline with the downhill run (sometimes called fall-line) and the heads at the uphill end (or else bodies will slide into each other over the course of the night or blood will rush/pool at head).
- Usually the first thing one does when pitching a tent is place stakes into the ground, 1, to hold it in place, and 2, rationalize the layout. Never setup a tent without staking at least one corner (usually four) or one may discover what is meant by the term Maytag (the tent blows away and tumbles everything inside - Law of Nature: tumbling tents are attracted to water or cliffs).
- If one is in a remote area next to a water source (pond, creek, ...), don't pitch a next to the water: it scares wild game that need access to the water and it is generally ugly (spiritually and literally).
- In campgrounds, try to not be next door to the latrine, store, shower, or next to major walk ways; avoid groups that drink alcohol, play/sing music, or are loud.
About Stealth Camping (aka Wild Camping):
Top, Outdoors Directory:Keep Handy, Tent Survival, Site Selection, Stealth Camping, Camp Tools, Ground Cloth, Space Blanket, Sleeping Bag, Liner, Cover, Sleeping Pad, Insect Repellant, Batteries, Tent/Food/Cooking, Wierd Facts
Stealth Camping (aka Wild Camping) is described as 'Camping in a location where the legal status of camping is unknown.'
- Only Experienced Cyclists, Campers and Travelers should attempt stealth camping.
- The practice is most common among Solo Bikers and on occasion by Couple/Pair Bikers.
- The situation is that the cyclists, for whatever reason, are caught at sundown (or near sundown) in an area that has no known hotel, place of lodging, or campground.
- There are no signs specifying public or private property.
- There are no signs prohibiting camping or resting.
- There is no way for a cyclist to tell if one is on BLM land, open/undesignated county property, state property, Federal property (of another type/jurisdiction), or property of any kind (which permits overnight camping).
- The look of the place may be that perhaps others have camped there before; it may be something like an unofficial automobile/truck rest area or a road side pull-off/break area - The area may or may not have trash cans.
- There may be a scenic view or pastoral view/feel.
- There may be a car, truck, or camper at the site when a cyclist arrives.
- On the other hand, the selected area may be 100 yards away from a road, fence, visible traffic, or structures.
- Stealth/Wild Camp Precautions/Warnings:
- The cyclist usually scouts out the place during the remaining daylight, but for whatever reason it may be a drop dead-tired emergency rest area selected in the middle of darkness.
- The rider must stop for health reasons to let the body rest and recharge itself, hopefully with water and nutrition.
- Typical or common emergency camp reasons are delays caused by: bike repair, bonk, hypothermia/physical/heat exhaustion (inability to think clearly), illness, dizziness, injury, injured partner (muscle strain), threats and/or road rage from a vehicle driver.
- The cyclist usually finds a spot that will be out of the way of any motorized traffic pulling off the road and from the view of motorized roadway traffic.
- The cyclist may or may not pitch (set up) a tent.
- The cyclist probably will not have visible light nor a visible camp stove fire (and definitely NO Campfire).
- Sleeping in the open is common (sleeping bag on top of a space blanket (or ground cloth), flashlight and weapon of protection handy). Some Cyclists use the waterproof tent cover as a top cover.
- Usually an area is selected that will not likely have auto traffic trough it but if that is a concern, place the bikes and anything that reflects light between you and the likeliest automobile approach direction. If some other vehicle is there, if the situation is right, perhaps ask them to position their vehicle to protect you and/or get their approval to use their vehicle as a protection barrier.
- A cyclist usually makes arrangements to have a tent strike (take down) before first light and maybe have packed the tent in a pannier/trailer by sunrise and the cyclist may be cooking or eating breakfast just after sunrise.
- Before departure: leave no trace, cover/fill any peg holes, and make the area look like a 'stealth camper' was never there (and maybe leave the place a little better than found).
Camp Tool Issues: Hand Axe, Saw, Hammer/Mallet:
Top, Outdoors Directory:Keep Handy, Tent Survival, Site Selection, Stealth Camping, Camp Tools, Ground Cloth, Space Blanket, Sleeping Bag, Liner, Cover, Sleeping Pad, Insect Repellant, Batteries, Tent/Food/Cooking, Wierd Facts
- A device is needed to pound in tent stakes in many places with hard ground and no rocks, yet who wants to carry a heavy weight on the trail? A light weight plastic tent/stake mallet will suffice in hard terrain. A good Camp/Tent Hammer will be light weight plastic and will have holes or slots in the handle for pulling up tent stakes.
- Where found in some areas, a four inch hammer stone will work just fine - Good campers leave a good stone for the next site user.
- Hand Axes are too heavy to carry (even a weapon argument yields to a light weight knife). A foldup or collapsible type camping saw is far more productive tool than a hand axe.
- Humor:
- When a boy holds a Hammer, everything looks like a Nail.
- When a boy holds an Axe, everything looks like a Target.
- When a boy has a choice between using an Axe or a Saw, he will Always Choose the Axe.
- Do NOT let a person less than 15 years old have an Axe or Knife unless they have demonstrated mature knowledge of its use. Even Boy Scouts require a boy to have a Knife and Axe Certification (called Tote'N'Chip) before they may touch a knife or axe - This knowledge is available online.
Plastic Sheet or Ground Cloth (aka Foot Print):
Top, Outdoors Directory:Keep Handy, Tent Survival, Site Selection, Stealth Camping, Camp Tools, Ground Cloth, Space Blanket, Sleeping Bag, Liner, Cover, Sleeping Pad, Insect Repellant, Batteries, Tent/Food/Cooking, Wierd Facts
- Place under the tent bottom, protects tent bottom from wear, keeps dirt/mud off tent, allows clean tent folding/packing, for packing - shake and the fold ground cloth dirt side to inside.
- In some cases a tent can be rolled up in the ground cloth (clean side to the tent). We've done it either way, but very often the sack that the tent comes with will not expand wide enough to allow the ground cloth to be rolled with the tent - Use experience and judgment here.
- If packing a wet tent (it happens): Fold wet tent inside the ground cloth and stop to sun dry the tent at the first opportunity (which is often in the mid day sun and it beats waiting for four or five hours for the sun to come up). Thus, allowing the cyclists to get moving (if or when desired).
- Space Blankets make good ground cloths. In addition to being waterproof, Space Blankets have an interesting physical thermodynamic attribute in that the shiny side reflects heat. This same material is what and why Fire Rangers wrap themselves when trapped by a flash fire (to reflect heat away). On cold nights place the shiny side up (to help keep in the tent and sleeping bag) and on hot nights place the shiny side down (to allow heat to escape and to reflect ground heat back into the earth).
- When using space blankets or square shaped plastic sheets as ground cloths under a tent, it is wise to fold back (or fold under) the end and side pieces of the sheet that stick out of the tent BECAUSE the sheet can collect rain or tent run off and trap it under tent, potentially cause the tent floor, sleeping bag, clothing, and gear to get wet.
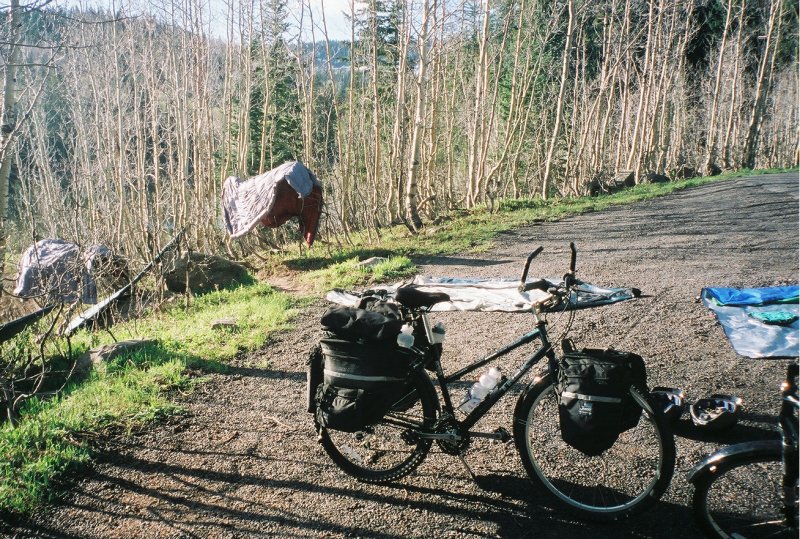
Space Blanket (AKA Emergency Blanket):
Top, Outdoors Directory:Keep Handy, Tent Survival, Site Selection, Stealth Camping, Camp Tools, Ground Cloth, Space Blanket, Sleeping Bag, Liner, Cover, Sleeping Pad,Insect Repellant, Batteries, Tent/Food/Cooking, Wierd Facts
- They Work - Read Instructions.
- It may be used as the ground cloth.
- It may be used as a Picnic Blanket.
- It may be used as a Dining Fly. We use a Space Blanket that has pre-tied nylon guide lines (parachute cord) attached to each corner, so that we can use it as a dining fly, ground cloth, or picnic Blanket.
- It may be used as an additional insulating layer between the bags and the tent bottom, a common usage in the winter as well as in mountain climates.
- It can be used as a dining fly, but don't use the cooking fly in the tent as the food smells may attract unwanted visitors.
- Space Blankets make good ground cloths. In addition to being waterproof, Space Blankets have an interesting physical thermodynamic attribute in that the shiny side reflects heat. This same material is what and why Fire Rangers wrap themselves when trapped by a flash fire (to reflect heat away). On cold nights place the shiny side up (to help keep in the tent and sleeping bag) and on hot nights place the shiny side down (to allow heat to escape and to reflect ground heat back into the earth).
- When using space blankets or square shaped plastic sheets as ground cloths under a tent, it is wise to fold back (or fold under) the end and side pieces of the sheet that stick out of the tent BECAUSE the sheet can collect rain or tent run off and trap it under tent, potentially cause the tent floor, sleeping bag, clothing, and gear to get wet.
Sleeping Bag(s), Liners and Covers:
Top, Outdoors Directory:Keep Handy, Tent Survival, Site Selection, Stealth Camping, Camp Tools, Ground Cloth, Space Blanket, Sleeping Bag, Liner, Cover, Sleeping Pad, Insect Repellant, Batteries, Tent/Food/Cooking, Wierd Facts
- Sleeping Bag):
- At home, always store hung or loose, never store packed or compressed.
- All bags need to be unrolled and fluffed at the campsite to be effective insulators of warmth.
- Its Not a good idea to stuff tomorrow's clothing in a bag to warn them, because body moisture will ruin any insulation benefits.
- When sleeping in a bag, it is unwise to burrow into the bag and breathe inside the bag. The moisture from the breath will rob the bag of its insulating capabilities.
- In cold air situations, it is very wise to sleep with the head outside of the bag and to wear a cap on the head (stocking cap is best). The head hood on a mummy bag was invented to serve the purpose of a stocking cap, but many people cannot tolerate the total confinement of a mummy bag and prefer open square end bags.
- Goose down bags are lighter and compress better than micro fiber bags, useless if wet, use river float proof cover, we store in kayak bag). Wet bags need immediate attention and can drastically change the joy of a journey.
- Micro fiber bags dry faster than goose down bags (hours vs days, better expedition durability & survivability, functional if wet, store in waterproof cover/container/bag)
- Sleeping Bag Liner (Optional):
- There are commercial liners but many people use a folded cotton sheet.
- A few sleeping bags have interior tie strings for liners but most don't.
- Most people use "blanket" size safety pins to connect bag and sheet (attach at the seams to prevent cloth tears).
- In the US South or tropical areas, people may use a sheet on top of a light weight (summer) sleeping bag or blanket, and maybe crawl into the bag if it cools down (and may not want to attach the sheet to anything).
- Sleeping Bag Cover, aka Bivy Sack (Optional):
- There are GoreTex type covers that facilitate two capabilities. This supports an alternate camping style.
- One capability is that a person can sleep in the open, without carrying a tent.
- Some covers have little rain flies to protect the head (on flexible hoops [best] or by pole and stake).
- Another capability is that sleeping bag covers provide additional insulation and warmth and can give some summer type bags usefulness into cooler Spring and Fall temperatures.
- The vast majority of sleeping bag covers are for single sleepers, however, there are a few designed for two sleepers but the advantages are almost lost when compared to a two person tent.
- Of the few Great Divide Racers that we know, a couple of them started the race with Bivy Sacks and ended up buying a small light weight tent, about a third of the way into the race. The point is that a Bivy Sack can be (or become) too restrictive or confining to some people, some times (or over a short time frame).
Sleeping Pad:
Top, Outdoors Directory:Keep Handy, Tent Survival, Site Selection, Stealth Camping, Camp Tools, Ground Cloth, Space Blanket, Sleeping Bag, Liner, Cover, Sleeping Pad, Insect Repellant, Batteries, Tent/Food/Cooking, Wierd Facts
- The lightest insulator is a cardboard windshield sun screen. Second lightest is a plastic-bubble/Mylar (like) automobile windshield sun screen.
- The best insulator is a closed cell foam pad. The more foam, the more insulation. Foam is heavy, therefore weight/depth trade off compromises exist.
- Some commonly used trail camp sleeping pads are thin with super insulation, very light weight, waterproof, but with no or very little cushion effect (thus making the tent location extra important for smooth ground selection).
- The better, interim, ground insulators are thin covered foam pads and self inflating foam pads (but they are slightly heavier and are not waterproof).
- Plastic Air Mattresses absolutely are the worst sleeping pad. If they work on the first use, they will spring air leaks within a day or two.
- At home, store foam sleeping pads unrolled and re-plug only after obtaining atmosphere equilibrium.
- In the field, to pack inflatable pads, open the air valve to let air out, completely roll the pad tightly (compressing with the knees), then replug. Perform the same rolling and air squeezing task a second time with a close air valve, for tight rolls release the air only at the end of the rolling process and replug when done. This process creates the tightest pad roll for better cover bag fit and it minimizes the space that it takes up when packed, strapped or loaded. We use two giant rubber band like straps around each end of the rolled pad to keep the roll together/tight.
- When packing the pad roll (or fold), it may be stored in its original bag (usually not waterproof) or we may store the pad in a large waterproof bag along with the sleeping bags and camp pillows; all depending upon our mode of travel for that particular trip.
- In the field, when setting up for the night, allow the pad to self fill. After about fifteen minutes of inactivity on the pad, close the valve. One may top the mattress off with a couple of breaths and then close the valve but avoid wet/moisture breaths, as this may facilitate bacterial growth inside the bag over time).
- Couples who are tired of mismatched, always slipping apart pads, may enjoy the benefits of a double pad. A double pad is the same weight as two full pads, bulkier to carry for one person, but the benefit is that the pad never separates and most double pads still allow different fill/pressure levels for each side.
- Double pads are great for facilitating zip together sleeping bags.
About Insect Repellents, DEET and Permethrin:
Top, Outdoors Directory:Keep Handy, Tent Survival, Site Selection, Stealth Camping, Camp Tools, Ground Cloth, Space Blanket, Sleeping Bag, Liner, Cover, Sleeping Pad, Insect Repellant, Batteries, Tent/Food/Cooking, Wierd Facts
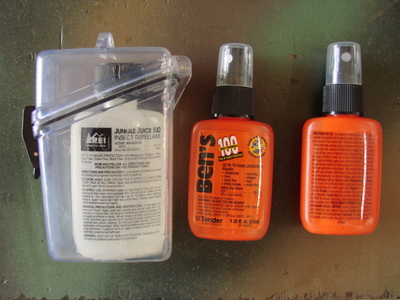 ABOUT DEET: 100% DEET works best and has tested best as an insect repellent, especially for mosquitoes, but DEET may pose a health hazard. In over 2,000,000,000 applications of DEET, there have been just over 30 reported skin irritant reactions (rash like). DEET can and will destroy GoreTex and Plastic, melts it. In Alaska, the leading killer of Grizzlies are Mosquitoes, literally sucking the life out! In the mainland US, the West Nile Disease is spreading by Mosquito. Malaria and other known diseases (like sleeping sickness) can be spread by Mosquitoes. There is a likelihood that the mosquito can carry the bird-flue virus as well as other pathogens. One can purchase other types of bug repellent but none are scientifically proven to be better than 100% DEET. Choose. Spray cans with DEET easily ruins synthetic material. BEST APPLICATION: Hand apply liquid from bottle to skin or cotton clothing. Don't apply to eyes or other body orifices, don't apply to synthetic clothing, rubber (synthetic or real), don't apply with glove.
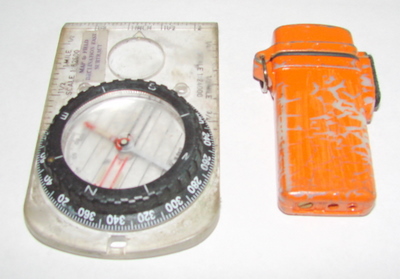 DEET USE WARNING: More plastic coated equipment (knife and tool handles), synthetics (GoreTex, polar fleece, nylon with waterproof coating), painted/lacquered finishes (bikes, lighters), leather (driving/shooting gloves, handlebar wraps), rubber (gloves, grips, wraps) and plastic ware (like compasses, GPS cases, iPod/music devices, and eating ware) has been ruined by DEET than by animals or rough handling. The contents of DEET or its dispensing agent dissolves synthetic materials. Even when the DEET container is double bagged in plastic zipper locked bags, after traveling for a while, the DEET container/bottle seems to leak and the storage bags seem to acquire at least one tiny hole which allows the liquid to get out. It is wise to try to carry DEET at the lowest point in a bag / pannier / box / container. This is particularly more of a problem on Bicycles and ATVs as they tend to have many more bounces per minute than other forms of transportation (thus a higher risk factor for causing both a DEET container leak and a puncture in the outer container/bag).
DEET Cautions:
- Never apply DEET with gloves on - it will ruin the gloves.
- If there is DEET on the fingers and one touches anything, the DEET will remove writing or graphical images from the things that are touched, like Bike Cassette/Sprocket Ring Indicator Numbers, camera lettering and icons (on/off, movie, shutter speeds, flash, ...), compass ticks and markings, and any enamel on anything (e.g., GPS, iPod, Cell, ...).
- If one uses a spray bottle with DEET, learn to spray it on the bare palm and then hand apply it to skin areas.
- If one sprays DEET on Plastic, Nylon, or GoreTex, the DEET will destroy it.
- Don't get repellent anywhere near anyone's eyes, lips, or arm pits.
- Complements Permethrin which CAN BE washed/sprayed onto/into clothing, especially any synthetic ware.
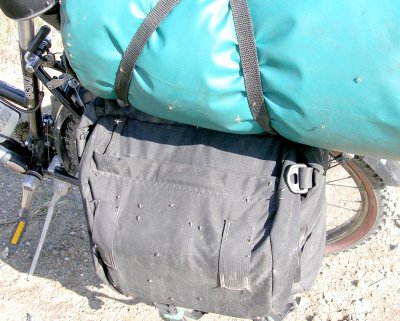
Permethrin Cautions (Proper usage requires prior clothing wash or spray application):
- Cats DIE every year from flea and tick baths (containing Permethrin) meant only for dogs
- Kills ticks on contact, kills lice and some mites associated with mice carriers
prevents mosquito-borne diseases such as dengue fever and malaria and probably West Nile disease - Travelers keep reporting that they are not bothered by insects while
on tropical outings
(when other people were bothered mercilessly) - Is meant for clothing only (do NOT use on a living body)
- Is used by spraying clothing or dip washing clothing
- Seems to be effective up to six clothing washes
- Complements DEET which usually cannot be placed on clothing, especially anything synthetic
- Has seen prior Military and European exposure
- Is a relatively new insect repellent to the USA Public
- Is NOT for direct skin contact
- READ the instructions!
- Is TOXIC to Cats
- Do NOT leave treated clothing laying around where pets are a concern
- Has Low human absorption but has traced its way into breast milk
Batteries and Battery Management:
Top, Outdoors Directory:Keep Handy, Tent Survival, Site Selection, Stealth Camping, Camp Tools, Ground Cloth, Space Blanket, Sleeping Bag, Liner, Cover, Sleeping Pad, Insect Repellant, Batteries, Tent/Food/Cooking, Wierd Facts
- The AA battery is the most common battery in the world. This knowledge should be applied to head lights, flash lights (torches), position lights, tail lights, cameras, and phones.
- Some people keep flashlight/headlight batteries opposed when not in use (plus to plus or minus to minus) which prevents accidental discharging and it slows down normal energy leakage.
- When spare batteries are placed in storage, tape or place them such that all positive ends are on the same side - This prevents slow energy leakage that occurs when positive ends are near negative ends, as those pesky electrons will jump across space and discharge the battery.
- For the same reason, don't store batteries loose and don't store them near metal or other conductive materials (like carbon fiber).
- Always take advantage of an opportunity to charge rechargeable batteries, especially cell phones, cameras, and computers. Be aware that many lodging facilities have switches on the wall as well as the outlet and that they both have to be turned on in order to facilitate a successful electrical charge. Also, be aware that some hotels (with rooms having an electronic card key) turn off all electrical power to the room when the electronic key card is not inserted into the "I'm-Home" slot. Thus, when a person leaves the room and takes the key, the computer that was thought to be charging may be NOT charging at all, and, in fact, if it is powered up it will be discharging.
- Issues and Solutions for Charging Batteries.
Tents and Food and Cooking Issues:
Top, Outdoors Directory:Keep Handy, Tent Survival, Site Selection, Stealth Camping, Camp Tools, Ground Cloth, Space Blanket, Sleeping Bag, Liner, Cover, Sleeping Pad,Insect Repellant, Batteries, Tent/Food/Cooking, Wierd Facts
- Warning: There is a strong need to NOT cook in, or have food in, the tent.
- Food smells attract Bears, other carnivores, and opportunistic omnivores (not only like skunks and raccoons but chipmunks and field rats/mice).
- Little omnivores, while people are sleeping or away, can bite or tear their way into a tent in order to get to the food. At best, the food supply can be contaminated and the food can be replaced, or at worst these food destruction activities cause an end to an otherwise nice bicycle tour.
- Avoid storing or preparing food in the tent. - It is wise to set up a cooking area away from the tent. Fifty feet away (or more) is recommended but sometimes in some environments twenty-five feet is the best available.
- If the weather is bad, cook under the fly, if the weather is good, sit on the fly.
- Store food in a Bear Bag or Bear Safe. Bear bags work in remote areas but not in areas where bears have a lot of human exposure (like in or near car camping areas). So far, Bear Safes have proven to be indestructible. Don't forget that toiletries (like mouth wash and toothpaste) and medicines also have scents that often attract wildlife - store with the food!
Weird Facts to Know:
Top, Outdoors Directory:Keep Handy, Tent Survival, Site Selection, Stealth Camping, Camp Tools, Ground Cloth, Space Blanket, Sleeping Bag, Liner, Cover, Sleeping Pad, Insect Repellant, Batteries, Tent/Food/Cooking, Wierd Facts
- The waxy powder of an Aspen tree will provide about a SPF 8 Sunblock equivalent (it works). Brush tree with finger tips (firmly, 2 inch stroke) and then apply directly to the skin (1 square inch for each finger).
- The gaps between Ponderosa Pine Bark plates allows someone to smell the tree's aroma (like Butter Scotch to most, Vanilila to SOME). Usually trees about 1-1.5 Foot (.3-.5 Meter) in diameter has the strongest aroma. Trees can communicate by smell, they are known to react to fire smoke and to pest attacks (and they probably have a things are normal scent).
- Cottonwood trees have a Bubble Gum scent under their bark (in bigger trees). Please don't pull off bark unnecessarily.
Cooking Gear and Cooking Gear Issues
For Self Supported Bicycle Touring
Top,
Outdoors Directory,Cooking Equipment: Food Issues, Stove, Fuel, Fire (for Cooking), Food Security and Bear Proofing,
Bicycle Tour Planning, Bicycle Tour Style
-
See Cooking Gear/Supplies/Equipment Checklist for a detailed item listing.
The related Cook Topics of Food, Stove, Fuel Fire (for Cooking), Food Security and Bear Proofing are located in separate discussion areas.
When planning a Bicycle Tour, one of the initial decisions is to Determine 'What Cooking Gear to Bring',
IF ANY.
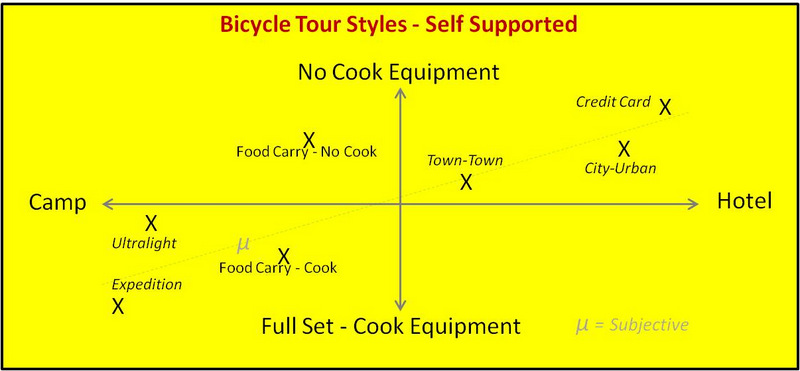
Knowing what Cooking Gear to bring is a reflection of one's planned Bicycle Touring Style which could range from Expedition to Ultralight on Camping Tour Styles or to Bring NO Cook Gear on a Non-Cooking Tour Style or on a Non-Camping Tour Style. The Cooking Equipment Carried may range from:
- Plastic Bags, Knife, and Spoon (for Non-Cook Food Carry, e.g. self made Sandwiches)
- Pot, Knife, Spoon, Stove (for Ultralight Camping, e.g. Dehydrated Packets)
- Complete Cook Set (for an Expedition/Fully Loaded Bike, e.g. Self Contained)
OBJECTIVE:
Take the LEAST NEEDED Amount/Quantity/Volume that meets the
Situational Requirements.
Every trip has different needs
and everything listed isn't needed for every trip.
Cooking Gear/Equipment/Supplies Related Issues
-
Warning: There is a strong need to NOT cook in, or have food in, the tent.
- Food smells attract bears, other carnivores, and opportunistic omnivores (not only like skunks and raccoons but chip monks and field rats/mice).
- Little omnivores, while people are sleeping or are away, may bite or tear their way into a tent in order to get to the food. At best, the food supply may be contaminated and the food may be replaced, or at worst these food destruction activities cause an end to an otherwise nice bicycle tour.
- Avoid storing or preparing food in the tent.
- It is wise to set up a cooking area away from the tent. Fifty feet away (or more) is recommended but sometimes in some environments twenty-five feet is the best available.
- If the weather is bad, cook under the fly, if the weather is good, sit on the fly.
- Optional Cutting Board: We use a piece of scrap Formica board that is about a 1 foot square and sometimes it doubles as a stove support on the ground (or snow) and it works as a picnic table stove heat/burn protector. It may also double as a wind shield (along with an aluminum heat protector).
- Heat Diffuser Plate: A Heat Diffuser also serves as grill spreader so as to place smaller items on the stove (like Scorch Buster brand).
- Plastic Bags (with Zip/Zipper/ZipLock closures): Are very utilitous for carrying a variety of things, most of which are unplanned.
- Marking Pen (waterproof felt tip): Very handy for marking plastic bags and other things.
- Windproof Lighter: We have yet to see a propane/butane lighter, especially a 'Wind Proof' lighter, be dependable above 7,000 Feet Altitude (˜2,000 Meters).
- Magnesium Strikers: Magnesium Strikers always work (assuming that the magnesium strip/strap still exists!) no matter the weather conditions or altitude.
- Plastic Sealable Container: Wally Werner, AC Expedition Leader, carries a plastic sealable container, approximately 10x5x2 inches, such that the bottom serves as a bowl, the lid serves as plate, and the entire thing may hold and protect two sandwiches. He carries a plastic fork and spoon inside.
- Drinking Ware: Bottles, Cups, Mugs:
- We've learned to drink Coffee (hot or cold), Hot Chocolate, Gator Aide, and Fruit Drinks from Bike Bottles.
- Some people must have a drinking cup or mug. When we lived in Seattle, decades ago, Dennis' bike had a coffee cup holder, from a car, mounted on his handlebar.
- We have marked our non-water bike bottles (kava, choc, gator) so as to limit cross flavors. We have a dozen bottles and they all go on a tour.
- Lynn Hamilton, AC Expedition Leader, uses an insulated, leak proof coffee mug, that also fits her bike\'s water bottle cage.
- There are times when all bottles are full of water (arid and desert areas) and there are times when not all bottles are full.
- All of our bike bottles have a flip top lid cover, to protect the drinking nipple from road elements (as all wild animals and cattle trucks use the road for relief).
- Midsized (15-25 Oz) insulated mugs have more utility than small mugs or cups; for one thing, they encourage more hydration. Drill a hole in the lid top and the handle and run a nylon cord through, it will keep the lid from walking away
- Bottle Brush:
- Best scenario, one fits all.
- Use soap water followed by sanitizing rinse (Clorox bleach or such).
- For:
- Water Bottles
- Hydration Packs/Systems
- Bulk Water Bladder/Dromedary
- Drinking Cups/Mugs
- Soap and Washing Notes:
- Store any Bleach/Clorox like sanitizer at a low location-position-spot in order to minimize any leak damage.
- Use a good quality bleach storage bottle which is to be kept inside a secure zip lock type bag.
- A few travelers use one soap type for everything: Dishes, Personal Bathing, Laundry and Bike Cleanings.
- Ideally one wants something that is both effective and easy on the environment. There are a few choices out there, like CampSuds (find in Camping Type Stores or Online) for example, but know that even a bar of soap may be used for everything.
- We carry a mini-bottle of liquid soap from a camp store and bar soap for personal use. Dennis has only used shampoo three times in his life; Terry foregoes shampoo, but will use it if it is supplied in a place of stay.
- GREEN: Always try to choose bio-degradable and earth friendlier soaps.
- Wash Container(s):
- For Dish Washing, either use one pot for washing and rinse from another boiled water pot or use a small plastic container/tub (which only has to be pot sized).
- Some people carry little open plastic box tubs (like Tupperware).
- There is a blow up plastic tub on the market; it has easy storage.
- We often carry the cut bottom of an old empty Clorox Bottle.
- Some people use the same container for body bathing and dish washing; some people have two containers (usually very small plastic tubs). It is all a matter how one sanitizes the system when they are done using the containers; boiled water and maybe a few drops of a Clorox like sanitizer will do the job.
Food Management, Food Gear, and Food Issues
Top, Outdoors Directory,Food: Enough Food (Planning Strategy), Meal Planning Considerations, Slow to Cook Foods,
Foods that Don't Carry Well, Eating Correctly on Tour , On/Off-Bike Tour without Cooking, On-Bike Energy Foods),
Group Food Issues, MRE Issues, Pack it OUT, Food Reserve, Food Security and Bear Proofing,
Food Storage Wisdom, Miscellaneous Food Issues - Camping/Cooking Food Checklist
This section addresses common bicycle tour food issues. Topics range from cooking to non-cooked meals, having enough food, quick food preparation (cooked or not), food security and bear protection, and some group food issues.
TWO Tour-Style/Tour-Strategy Questions for any Bicycle Tour.
-
Q1) How much Bicycle Tour Cooking will be Required (a lot, a little, or none)?
- Some touring cyclists will not camp and will not cook.
- Some non-camping cyclists carry a stove and fuel for
cooking some meals. - Some cyclists carry the very smallest propane stove and fuel canister only for emergencies
- Some cyclists use a stove only to heat up water for coffee or tea.
- The cyclist is relegated to about 2-3 hours for frozen or refrigerated foods, sometimes 8 hours if it is packed insulated and it will not leak (Frozen Vegetables - Yes, Ice Cream - NO).
- Most Raw Fruits and Vegetables can last 1-3 days but some fresh Vegetables like lettuce (leafy greens) are only good for 2-3 hours.
- In fact, this is why many cyclists eat salads at the vendor's location. Canned foods, Dehydrated foods, and MRE type foods will usually outlast the bike tour.
- Sun Exposure or Freezing Temperatures are not good for any foods.
- Dehydrated meals are lighter to carry than MREs and that dehydrated meals are best utilized where water is available at some point and MRE type meals are great in areas where water may not be available.
- In a pinch, if one cannot heat water, Dehydrated Meals can rehydrate in 2-3 hours if mixed with water. Usually cooking is not required for dehydrated meals, one can eat the meal as soon as it is rehydrated.
- Bread Loaves will last 2-3 days.
- Cereals and Grains will keep for a couple weeks if kept dry and sealed.
- Most milk products will only last a few hours but some packaged/block cheese can last a day or two if packed and protected appropriately.
- Dried Deli Meat Slices will usually last a day if packed and protected appropriately.
- Cooked and wrapped tube sausages (Summer, Chorizo, Pepperoni, ...)will last 2-3 days if packed and protected appropriately (cool place out od the sun).
- More Food/Meal Bicycle Tour Packing Considerations (Allergy, Health, Nutrition, Fresh versus Dehydrated, ...)
- Be sure to review How to Bicycle Tour without Cooking.
- How much food to carry is discussed in the following section.
- On-Bike Non-Cook Energy Food (Energy Food or Just-in-Case Food)
- On/Off-Bike Non-Cook Food (Non Cooking Tour Meals),
- Off-Bike Camping or Cooking Food (Traditional Backpacking Meals)
A1) The Answer determines whether a cyclist needs to carry Cooking Gear (Stove/Burner, Fuel, Pot(s), Lid(s), Cutlery, ...) at all. The Ratio of Cooked Meals to Un-Cooked meals Hints toward How prepared the cyclist needs to be with Extended Cooking Gear. Usually the higher the ratio of cooked meals, the greater the support of extended kitchen supplies (handle(s), lid(s), glove(s)/mit(s), spoon, grater, diffuser, openers, carry case, ...) not to mention spices and cleaning supplies (being sanitary is very important).
-
Some Cyclist Tour Characteristics:
Q2) Will the Bicycle Tour require a cyclist to Carry Food?
 A2) The Answer determines whether food will be carried
(if any) and the answer Hints toward what kinds of food to carried (if any). Sometimes a tour can be conducted without carrying any food, however most riders carry at least a day's worth of food/energy. To Carry any Food requires storage space on a bike (usually a pannier or a rack bag).
-
Some Food Type Carry/Pack Characteristics:
There are varying food needs and expectations for varying bicycle touring styles.
FYI: Cooking Equipment/Supplies
Food is so controversial and is often very personal. Generally, most cyclists 'Carb-Up' for the meal before they start cycling (this is usually the morning meal) and Cyclists generally eat more Protein for the ongoing travel fuel. Supper tends to be the meal for other kinds of foods, beverages, and deserts.
See Base Foods Checklist for a list of commonly used camping food goods. Bon Appetito!
Enough Food (A Food Planning Strategy):
Food: Enough Food (Planning Strategy), Meal Planning Considerations, Slow to Cook Foods,Foods that Don't Carry Well, Eating Correctly on Tour , On/Off-Bike Tour without Cooking, On-Bike Energy Foods),
Group Food Issues, MRE Issues, Pack it OUT, Food Reserve, Food Security and Bear Proofing,
Food Storage Wisdom, Miscellaneous Food Issues
In the BIG PICTURE there are at least FOUR
Bicycle Tour Food Planning STRATEGIES (Methods/Styles)

- Eat as You Go; carry virtually no food (Live off the Land', Buy Food as Needed, Credit Card Touring).
- Carry just enough food to make it from Town to Town (such that Food may be purchased at day's end or beginning, sometimes for more than one day).
- Carry enough food for an Entire Trip (usually about a 7 day maximum).
- Carry the amount of food needed for each Travel Leg (a Travel Leg 'Starts and Ends' at a Food and Water Supply Point).
Food Planning and Bicycle Tour Caveats:
- Ideally, a cyclist needs to have just enough food to get from the last food supply point to the next food supply point.
- Food Planning cannot be performed without Water Planning at the same time. One must determine their water supply points be that source from a tap, a store, or by operating a water filter/purifier..
- In some cases food does not need to carried at all; the cyclist merely stops at stores or restaurants for the duration of the bike tour. Of course in most of the world, that cannot be done but many urban areas support such a tour (Tokyo-Yokohama-Yokosuka, Hong Kong-Guangzhou-Macao, DC-NYC, Cergy-Paris-Fontainebleau, ...), in fact that riding style fits what is called the Credit Card cycle touring method.
- In more remote areas, one must pay attention to the detail of identifying the food supply points and carry enough food to safely travel between supply points. This is usually done by using sources like Maps, Published Books, Magazine Articles, Internet Stories, or by word of mouth.
- Determine the distance legs between food supply points, use Bicycle Tour Distance Metrics to determine how much distance can be traveled per day, and calculate how many meals are needed (per day, per person), and account for what can go wrong (called Risk), some situations require more Risk Contingency than others. Convert travel distance and time to days of travel and calculate meals from there.
- 0.3 Day = 1 Meal per Person
- 0.5 Day = 2 Meals per Person
- 0.8 Day = 3 Meals per Person
- 1.0 Day = 3 Meals per Person
- ...
- The food that is purchased/brought along is a reflection of the cooking/non-cooking bicycle tour style. Most people vary there styles over time, any style that works is OK. See Cooking Meals or Non-Cooking Meals for further planning details.
- It is possible to purchase and carry food for the entire bicycle tour and never cook.
- The good thing about dehydrated food is that it is light weight and virtually does not spoil; as long as the water for cooking does not have to be carried (it is best when the water source is at the camp/meal-preparation site). Camping stores are often the best place to purchase pre-packaged dehydrated camp meals (on site or online). Many things on the home cupboard/pantry are dehydrated, for example: Noodles, Rice/Quick-Rice, and Mac-n-Cheese is probably the most popular dehydrated meal.
Important Considerations for Meal Planning:
Food: Enough Food (Planning Strategy), Meal Planning Considerations, Slow to Cook Foods,Foods that Don't Carry Well, Eating Correctly on Tour , On/Off-Bike Tour without Cooking, On-Bike Energy Foods),
Group Food Issues, MRE Issues, Pack it OUT, Food Reserve, Food Security and Bear Proofing,
Food Storage Wisdom, Miscellaneous Food Issues
- There are several competing food issues and a bicyclist usually deliberates to make balanced decisions about what food to bring and carry. Some decision factors are allergies, health (individual and group), food nutrition (food groups and balance - carbohydrates, protein, cereal, dairy, fruit, vegetable [green and orange], fiber), individual or group cooking sanitation and habits, vitamin balance (natural or supplemental), individual preferred or required supplements, food availability, preferences, total (or remaining, available, or distributed) weight, expected or likely stock duration (spoilage or expiration related), time remaining (day, period, or tour), next supply point (or opportunity), availability of water.
- Fresh vs Dehydrated foods (food availability, tour expectations, water availability), local food sanitation and health safety, food reserves or emergency-reserves, country or border laws or restriction, supporting equipment for preparation/cooking/eating, preparation (complexity vs simplicity), preparation time (required and available), season, storage, storage temperatures, cooking temperatures (stove and equipment issues), outside temperatures, sometimes night time temperatures, altitude, predators, protection (travel and animal), storage container size/durability/flexibility, money (availability and country denomination), living off the market, costs, spices, timelines, deadlines, known regional issues (food quality, food born diseases, known illnesses), and other external environmental or political factors (food gets scarce or expensive in conflict areas).
Slow to Cook Foods (Usually to Avoid):
Food: Enough Food (Planning Strategy), Meal Planning Considerations, Slow to Cook Foods,Foods that Don't Carry Well, Eating Correctly on Tour , On/Off-Bike Tour without Cooking, On-Bike Energy Foods),
Group Food Issues, MRE Issues, Pack it OUT, Food Reserve, Food Security and Bear Proofing,
Food Storage Wisdom, Miscellaneous Food Issues
- Natural Rice, in any of its many forms, takes about 30 minutes to cook (without special rice cookers).
- Min Rice takes, well, 5 minutes to cook. Most non-white rice is more nutritional than most 5 Minute rice packages.
- All food takes progressively longer to cook above 7,000 Feet, especially Rice
- Potatoes take 45-90 minutes to cook except when chopped up (like Hash Browns), be they fried or boiled.
Foods that Don't Carry Well:
Food: Enough Food (Planning Strategy), Meal Planning Considerations, Slow to Cook Foods,Foods that Don't Carry Well, Eating Correctly on Tour , On/Off-Bike Tour without Cooking, On-Bike Energy Foods),
Group Food Issues, MRE Issues, Pack it OUT, Food Reserve, Food Security and Bear Proofing,
Food Storage Wisdom, Miscellaneous Food Issues
- There are Foods that DO NOT carry well, or they are heavy, or they do not last long. Some examples are Lettuce, Tomatoes, Mushrooms, Cuts of Meat, Cheese Slices, Cartons of Milk, Cans of Vegetables, Cans of Fruit, Cans of Stew, Bottles of Cokes/Sodas, ...
- Often these foods are consumed the same day or evening that they are purchased. Often, these foods are bought from a road side vendor or at a store in a town or village as one is passing through and the food is consumed on the spot, that day, or that evening's place of stay.
- These foods are not usually carried on the trail for any duration.
- This concept applies to beverages too, usually only water is used or carried beyond Day 1 (of the purchase), versus Liquid Milk or Juice or other Beverages like Wine, Beer, or Sodas. Water may be resupplied at a stream, ditch, or faucet while enroute (not so for other beverages).
- See the next section for some related issues and solutions.
Eating Correctly on Tour:
Food: Enough Food (Planning Strategy), Meal Planning Considerations, Slow to Cook Foods,Foods that Don't Carry Well, Eating Correctly on Tour , On/Off-Bike Tour without Cooking, On-Bike Energy Foods),
Group Food Issues, MRE Issues, Pack it OUT, Food Reserve, Food Security and Bear Proofing,
Food Storage Wisdom, Miscellaneous Food Issues
- In many cases, it is advantageous to supplement nutrition/diet by eating fruit and vegetables (greens and orange) from restaurants or grocers (or similar vendings) than to carry the food for any duration. Lettuce, especially, and fresh greens do not travel well.
- Cans of Fruit and Vegetables are heavier than real fruits and vegetables because they are packed in a water/liquid and stored in a can/container which makes them quite a bit heavier to carry and that is often the reason for eating them on the spot, sometimes, versus carrying the load on a bike for a few days.
- Very often, when cyclists cannot easily obtain fruit or vegetables (because they are out of season or not available as fresh), fruit or vegetables are often eaten out of the can (outside of the store or market), away from the entrance area, so as to not be too déclassé, but near a trash-can so that one does not have to carry extra heavy (liquid) weight or metal-cans.
- Don't take food into restaurants or eat in areas reserved for proprietary food sales.
- Get rid of commercial packaging/weight by putting the food contents in plastic zip lock type plastic bag(s), thus minimizing what one carries on the tour.
- Typically, cyclists on the trail are very Spartan about what they carry for food or beverage.
- It is convenient to occasionally eat at restaurants, stores, or even convenience stores, especially for vegetables. The trick for cyclists is, both, diet balance and to know where food stores/markets/stall exist (or are expected to be located, like in town centers/squares in smaller villages).
- In unknown areas, mountains, deserts, and sparsely populated areas, cyclists have to carry larger food reserves and devote more attention to planning well. Plus, most of us cannot afford or always plan on eating out; good Planning Rules!
- When cyclists are in experienced travel mode, one will find that most meals are completely prepared in about 15 minutes and consumed in 5 minutes, and cleaned up in 10 minutes. This is a rough metric with some exceptions for special occasions.
- All food takes progressively longer to cook above 7,000'/2100m. As one goes up in altitude, the boiling point of water lowers. Above 10,000'/3000m, if there is a need to boil water for safety (to kill microbes) then one needs to boil the water increasingly longer for increased altitude. The website at engineeringtoolbox.com has boiling point altitude graphs in Fahrenheit-Feet and Centigrade-Metric. If it matters, the only way to correctly tell the temperature is with a Thermometer. Pots must be covered to reach temperatures above that elevation's boiling point (in order to get the temperature up to 212F/100C). The boiling point is actually tied to atmosphere pressure but generally the following altitudes provide the following boiling point temperatures:
     7000'/2100m-200F/93C
     8000'/2400m-197F/92C
     9000'/2700m-196F/91C
    10000'/3000m-194F/90C
    11000'/3300m-192F/89C
    12000'/3600m-190F/88C
Bike Tour without Cooking (or minimal stove use):
Food: Enough Food (Planning Strategy), Meal Planning Considerations, Slow to Cook Foods,Foods that Don't Carry Well, Eating Correctly on Tour , On/Off-Bike Tour without Cooking, On-Bike Energy Foods),
On-Bike Energy Foods), Group Food Issues, MRE Issues, Pack it OUT, Food Reserve,
Food Security and Bear Proofing, Food Storage Wisdom, Miscellaneous Food Issues
- Bike Tour with Non-Cook Foods (original suggestion from Bertrand Van, Coast to Coast - Canada, most of Europe, then supplemented by members of FaceBook's Bicycle Touring [Riders Forum]): There can be different levels of non-cooking, maybe a stove is used just for hot beverages, or hot breakfast, or maybe just for one hot meal a day.
-
Positive Attributes
- No Cooking
- No Stove(s)
- No Petroleum storage or purchase issues.
- Huge time savings
- Huge touring weight savings
- When possible incorporate eating all-to-many meals from Roadside Vendors, 7/11s, Petro Markets, Grocery Stores, Restaurants, ... .
- Many times a rider may eat at a grocery store (or such) in order to obtain an overall food group balance (say a Salad for fiber, roughage/ruffage, and a mix of fresh fruits and/or vegetables) and not have to worry about carry weight, food spoilage, or trash disposal.
-
Negative Attributes
- Difficult to do in very remote regions where a rider may have to carry many days of food and/or water.
- If no stove, then virtually no emergency warmups, thawings, or hot beverages
- Some people use liquid petroleum (like Coleman stove fuel) for chain and part cleaning/maintenance (meaning that sometimes liquid fuel serves multiple purposes).
- Sometimes, in order to to save weight and storage for a stove and fuel a rider may be making a trade off to carry more weight in canned goods and heavier foods (versus dehydrated - more water moisture to keep foods hydrated and/or more liquid stored in cans of vegetables or other foods).
- If a cyclist needs to carry a lot of food, then dehydrated foods are lighter and have virtually no spoilage issues.
- Non-Cooked Food and/or Pre-Cooked Foods for Bicycle Tour/Travel:
- Proteins: Nuts (especially pre-opened Sun Flower and Almond - biker favorites); Peanut Butter (or other ground nut spread, like Nutella, Almond); Canned Beans, Canned Legumes (Humus); Jerky, Dried Meats, Cured Meats, Smoked Meats, some pre-cooked Meats and Sausages (canned or deli); Canned Devilled Ham or Chicken eaten in one sitting after the can has been opened, other canned Cooked Meats: Fish (sardines, smoked salmon, ...), Lamb, Bird, Beef [not for everyone], Pork [not for everyone], most sliced meats from a deli eaten that day. Canned Milk and/or Instant/Powdered Milk (instant milk seems to go better on cereals, rather than as a straight drink but sometimes it is also mixed with a Chocolate, Strawberry, or flavored condiment [liquid or powder]). Fresh Dairy Products are good protein sources but may spoil quickly (eat soon - like Yogurt in cups, Milk, Cottage Cheese), Cheese, Hard Boiled or Pickled Eggs (they often cannot last beyond a day); some sealed Puddings; [my wife and I survived in our 20's on French Bread, Cheese, and Wine].
- Protein based Sandwiches: Peanut butter and Jelly Sandwiches (PBJ) or other durable sandwiches (Nutella, ground nut, meat, SPAM, ham, ground legume like humus); sliced meat sandwiches; sliced cheese sandwiches.
- Nutrition Bars (often balanced protein, carbohydrates, fruit sugars, fat, and fiber - All Long Lasting): Granola bars, Mueslibars, Power Bars, Peak Bars, Snickers, Chocolate, Mixed ingredient Cookies, trail mix.
- Fruit (Dehydrated, Natural, or Canned): Any Fresh Fruit; especially Bananas (no peals on road - very déclassé), Apples, Oranges, Grape Raisons, Peaches, Melons, Pineapple, Mango; Dried Fruit in general; Jams & Jellies; Roadside Berries particularly Blackberries, Red Blackberries, and Raspberries (common in midsummer in the EU and USA countryside). In countries where fruit washing, cleanliness, and personal sanitation are questionable: Bananas, Oranges/Tangerines/Mandarins, Water Melon, Melons, Dragon Fruit, and peelable fruits are simple road foods with manageable storage solutions
- Vegetables Fresh Fruits (many have to be eaten at purchase time, some last a day or two, Also Dried, Dehydrated or Canned, mix the colors: White, Green, Yellow, Red and Orange: Carrots, Tomatoes, Cucumbers (travel well), Onion, Garlic; Canned: corn, peas, beans, Pork & Beans; Avocado; Celery (often as a dip stick with a protein like peanut-butter); Fresh Greens like lettuce will not usually last a day (let alone a few hours); many times a Take-Out/Take-Away Salad is available for purchase at a town store.
- Carbohydrates: Bread (Loaf, Baguette, mini, stick, flat ... usually wheat or multi grain), Sliced Bread (some people carry plastic sandwich containers which also work as bowls), Tortillas (Taco or Burito soft shell/wrap); International Breads: Aish Merahrah, Anpan, Appam, Bing, Bolani, Broa, Chickpea bread, Hallulla, Baht, Roti, Bagels (plain and/or cheese, onion ...); Crackers, Muffins, Biscuits; Pringles (Potato Chips), Chips; Pretzels, Pastries. Note - most fruits and vegetables are about 50% carbohydrates;
- Sugar: Some riders carry faster acting sugars: white or brown sugar, syrup, honey, candy (often as a last resort or for desert). Some cyclists make up their own recipes (often honey based or fruit liquid reduction based [find online]). Some riders carry an emergency nutrient like Gator Aid (type of powder, gel, or a nutrient packet (like Hammer-Gel brand/type of supplement often found in Bike Shops).
- Grains: Muslix, Cereal (with milk or water), Granola, Energy Bars (Types Vary), Breads, Muffins, Trail Mix (different kinds fit different categories), Nuts.
- Desserts: Brownies, Fudge, Ice Cream from Vendors (eat on the spot), Cookies, English Biscuits, Chocolate Chip Cookies, Oatmeal Cookies, Wafers, Raison Cookies, Shortbread, Oatcake, Cake, Pie, Candy.
- Beverages: Water (sometimes flavored, sometimes flavored with Flavor Squirt Bottles, sometimes Gatorade type drinks with electrolytes [see next sections]), Tea, Coffee (instant or buy hot), Chocolate (instant or buy hot), Vegetable Juice (V8), Energy Drink, and Boxed Juices. In countries where washing, cleanliness, and personal sanitation are questionable, then boiled water is a safe beverage along with boiled water tea, coffee, factory canned or bottled Beer, Coke (carbonated sodas), Energy Drinks, Water with Gas/Gaz, and to a lesser extent Plain Bottled Water (Plain Water is the most counterfeited beverage in most countries, never accept a container that was opened for you, ALWAYS open it yourself). Sometimes Bottled Wine is a safe beverage choice [not for everyone].
- Meals, Ready to Eat (MRE) and Bag Lunches:
- Canned MREs: Their only drawback is that are heavy because they are NOT dehydrated. These are good meals in areas where it is difficult to locate water (or access to water is undependable).
- Sometimes a Hostel, Hotel, or Inn will give cyclists a warm breakfast and optionally allow cyclists to make their own bag lunch. On occasion, they may make a bag lunch for the rider.
- See the next set of bullets.
On-Bike Energy Food (Camping or Not):
Food: Enough Food (Planning Strategy), Meal Planning Considerations, Slow to Cook Foods,Foods that Don't Carry Well, Eating Correctly on Tour , On/Off-Bike Tour without Cooking, On-Bike Energy Foods),
Group Food Issues, MRE Issues, Pack it OUT, Food Reserve, Food Security and Bear Proofing,
Food Storage Wisdom, Miscellaneous Food Issues
- Trail Mix and Energy Supplement Drinks with Electrolyte are listed as something to carry no matter what, under Sustenance for Cycling Only Tours (cycling without Camping).
- Road/Trail Food (while traveling, for ongoing Energy Supplement): Trail Mix, Nuts, Banana(s), Bread and Cheese, Jerky, Fruit (Fresh or Dehydrated).
- There are all kinds of Trail Mix and it seems that, sooner or later, everyone supplements their mix with an interesting, missing, or experimental food item (or two).
- Concentrated Energy Fuel, choice(s): Energy Powder (Packet or Canister), Energy Gel (Packet), Energy Bars, and/or Energy Liquid (last choice to carry because of extra liquid/water weight to carry, but energy drinks are very popular rest stop purchases).
- Make Your Own Electrolyte: This List comes from the Pandemic Flu Survival Planning Checklist:
- Table Salt, 3/4 teaspoon
- Baking Powder, 1 teaspoon
- Sugar, 4 tablespoons
- Juice or Water, 1 quart/liter/bottle *
- Keep the ratio of the first three items as is, vary the concentrate a little for taste, the sugar must be real (NOT substitute/artificial)
- Keep the maximum/final fluid amount as one liter/quart or one (tall) bike bottle.
- Juice, real or dehydrated, usually has its own, helpful, nutrients.
- Any Juice (concentrate, real/regular, or instant/dehydrated powder, like Cool Aid) will suffice.
- Orange and Berry are popular flavors for Electrolyte created juices.
- * Adjust so that all other ingredients are added first. Juice from concentrate is also OK, plan ahead to insure proper mixing space. It is OK if the Juice portion is a little diluted and it is OK if the liquid is just straight water.
- Not that many cyclists carry Baking Powder (NOT the same thing as Baking Soda), but it is commonly kept in the home or found in markets (to include 7/11 type convenience stores).
- In a pinch, Baking Soda may be used in lieu of Baking Powder, but it will likely be bitter, so perhaps add another teaspoon of sugar.
- Baking Powder is typically composed of Baking Soda (pure sodium bicarbonate, bitter), Cream of Tater (acid), and Starch (base).
Field Adjustments:
Group Travel / Travel Group Food Issues:
Food: Enough Food (Planning Strategy), Meal Planning Considerations, Slow to Cook Foods,Foods that Don't Carry Well, Eating Correctly on Tour , On/Off-Bike Tour without Cooking, On-Bike Energy Foods),
Group Food Issues, MRE Issues, Pack it OUT, Food Reserve, Food Security and Bear Proofing,
Food Storage Wisdom, Miscellaneous Food Issues
- On long tours, People in Groups quickly become intolerant of having to waits for meals (Complex or Not); In any case, consider interim hold over appetizers.
- In groups of travelers, especially where member cyclists may spread out over the course of a day, it is important to make it to camp on time if one has a special camp duty (like cooking) or one is carrying special equipment (like the cook pot or group stove). People tend to get a little 'fussy' about waiting for scheduled event when they do not happen on time with any degree of regularity.
- A lot of guides/leaders try to distribute group carried gear that is important to the evening meal such that it arrives with the cyclists who tend to bike quicker that the remaining group. There tend to be the same cyclists that nearly always arrive early as well as the same cyclists who tend to later (this is normal behavior). If cyclists are left to their own process improvement, the group members will often figure an improved solution on their own.
MRE Issues (Meal, Ready to Eat, Military in Origin):
Food: Enough Food (Planning Strategy), Meal Planning Considerations, Slow to Cook Foods,Foods that Don't Carry Well, Eating Correctly on Tour , On/Off-Bike Tour without Cooking, On-Bike Energy Foods),
Group Food Issues, MRE Issues, Pack it OUT, Food Reserve, Food Security and Bear Proofing,
Food Storage Wisdom, Miscellaneous Food Issues
- Some MREs contain 'Just-Add-Water Heat Tabs' (not cheap, but lightweight, quick, and efficient)
- MREs make great reserve food supplies (because they tend to be light weight and compact) and MREs are great for regular touring fare.
- Most MREs come in a Mylar type bag, where one cuts off only the top (or knife slits along the top) and then one pours a measured amount of boiling hot water into the packet and then one waits a prescribed amount of time, typically 5 minutes.
- Be careful to not let the bag spill. The bags have no self support. We typically keep the bag(s) inside a pot where the pot gives support and if the contents spill, the food is recoverable. Everyone seems to drop or spill a bag at least once in their lifetime. - Most MREs are good enough to very good, for taste. All of them meet their stated nutritional values. MRE scrambled eggs are the worst, avoid-terrible, tastes like broken poached rubber and water. STORY: According to my Uncles, the taste of cooked powdered eggs has not changed since WWII (where cooks would leave egg shells by the tent entrance, so as to try to fool the troops).
- MRE military versions may be found online and in some Surplus Stores (civilian MREs are lighter weight, overall, but don\'t carry extra items like paper napkin, gum, matches, plastic ware, or energy bar snacks/desert).
- MRE civilian versions may be found in better Camping Stores as well as online.
- We have bought MREs and other Food online from foreign countries and had that food delivered to our foreign start address (thus avoiding any national-agricultural imported food issue).
Trash Bags (Pack it OUT!) - Leave No Trace - Philosophies:
Food: Enough Food (Planning Strategy), Meal Planning Considerations, Slow to Cook Foods,Foods that Don't Carry Well, Eating Correctly on Tour , On/Off-Bike Tour without Cooking, On-Bike Energy Foods),
Group Food Issues, MRE Issues, Pack it OUT, Food Reserve, Food Security and Bear Proofing,
Food Storage Wisdom, Miscellaneous Food Issues
- If you brought it in, then bring it out.
- Always leave a place better than you found it.
- In most of the world, when one thinks that they are by one's self, one isn't.
- Always do the right thing and Karma will favor you.
- Unfortunately, the good news is that empty plastic bags are quite commonly found nearly everywhere and one (or more of them) may serve as your trash bag.
- We generally carry a trash bag, like a sandwich bag, for two to four days, keeping our own trash in there as well as something picked up along the way, typically trash picked up from a site where we slept or ate.
- When we purchase food items for touring, we strip most of unnecessary packaging. Often we get rid of commercial boxes and non-resealable containers at the place of purchase (or at home). We may keep/tear-off instructions, if the product is new to us and we will probably keep a sealed parchment type container if the entire contents will be used in one meal session.
- We often place dry goods into (zipper like) resealable plastic bags.
Arrange and Carry Reserve Food for International Tour on Day 1:
Food: Enough Food (Planning Strategy), Meal Planning Considerations, Slow to Cook Foods,Foods that Don't Carry Well, Eating Correctly on Tour , On/Off-Bike Tour without Cooking, On-Bike Energy Foods),
Group Food Issues, MRE Issues, Pack it OUT, Food Reserve, Food Security and Bear Proofing,
Food Storage Wisdom, Miscellaneous Food Issues
- Start a trip carrying some reserve food. This action may allow cyclists to get moving or keep moving at key times and therefore not leave a person extra hurried or worried in case of a breakdown or other untoward situation.
- Because of International bans on shipping or importing food, particularly meat, cheese, and fruit we sometimes order pre-packaged meals from the country that we are visiting and have the packages shipped to the starting point (usually a B&B or a Hotel). The typical military or civilian MRE (Meal, Ready to Eat) is often technically NOT legal to "import" into most countries (because they often contain meat). So the food pre purchase offers an immediate source of food or an emergency food reserve.
- We have made pre-arrangements with a B&B or Hotel to hold our food delivery until we arrive in country and we pre-arrange to have the same facility hold our excess luggage for us while we bike tour. If they won't hold our food or gear for us, we will look for another place to stay. So far, with one exception, the B&B's were quite willing and no Hotel has ever denied such a request.
Food Security
(Food Storage, Bearbag, Bear Vault, Bear Proof Trash Containers):
Food:
Enough Food (Planning Strategy),
Meal Planning Considerations,
Slow to Cook Foods,Foods that Don't Carry Well, Eating Correctly on Tour , On/Off-Bike Tour without Cooking, On-Bike Energy Foods),
Group Food Issues, MRE Issues, Pack it OUT, Food Reserve, Food Security and Bear Proofing,
Food Storage Wisdom, Miscellaneous Food Issues
- Bear Bag System: Nylon cords (2 count, 40~60 feet each, burn ends so no unfraying), 1 or 2 pullies, throwing sock, bag (sleeping bag sack or dedicated duffel size for group). When the group size gets around 8 then another bag will be needed, also there may be a dedicated food bag and a separate toiletries bag.
- Throwing Sock: Place a rock or heavy object (like your foldup knife) in the sock and tie the sock to the cord/line/rope/cable and then throw the sock across a tree limb. We have yet to have a perfect throw on a first attempt. Good Luck!
- Bag: We used one of the sleeping bag stuff sacks as a bear bag. Larger groups will need a bigger bag, maybe a dedicated bag about duffle size.
- Pulley or Pullies: These bags get fairly heavy, especially with a couple or a group putting in toiletries (the other things with a bear attractant scent), so we actually bought and used two small pullies (purchased at a hardware store) to cut the line pull weight in half. As a couple we can get by with one pulley.
- Cord: We use Nylon woven fiber cord, aka Parachute Cord or Construction Cord. It will hold a bazillion pounds but the problem is that when pulling on the cord to run the bag up a tree limb, the cord places a lot of pressure in a very small part of the hand surface.
- Cord Handle: Loop the cord (like with a bowline type knot) or one time we had and used a plastic tube about 4 inches long that was used as a front fork spreader used for shipping.
- Caution: The more that you are in Bear Country, the more smarter a person has to be about the Bear Bag's height above the ground and the further from camp a bag needs to be located. Some bears around the Yellowstone area expect campers to have hung a Bear Bag and it is the Bear's duty to find the bag(s).
- Bear Safe: A Bear Safe (a special designed, jaw proof, HD Plastic or Kevlar Container) is the item to have (not cheap). At present there are two sizes for camping, about 12" tall x 12" round (medium) and about 18" tall x 12" round (big). When we camp, we just leave the bear safe on the ground but away from the immediate camp area. For additional information about bear proof food containers, search online or visit [www.bearvault.com, www.backpackerscache.com, www.wild-ideas.net, Campmor, REI, or EMS].
Note: At present, we are using 1 or 2 large Bear Safes (not a Bear Bag). About 1/3 to 1/2 of our Bear Safe is used for Medicine and Toiletries. - Caution: There used to be two widths for a Bear Safe, about 12 inches wide and another at maybe 7-8 inches wide. The 8 inch wide size is not wide enough and if that is what a cyclist has from older days, Do NOT use it as a bear safe.
- Warning: There is a strong need to NOT cook in, or have food in, the tent.
- Bear Proof Trash Containers: Some campgrounds have bear vaults for food storage. Wally Werner of Adventure Cycling has been an advocate of placing the bear bag into a bear proof trash container for overnight security and retrieving the bear bag early the next morning.
Travel trips are often 'Terminated' because of a great loss of travel time to recover anything lost, destroyed, or contaminated, like FOOD - It often takes one to three days to re-supply and another one to three days to return back to the trip's food loss location. The great time loss is typically because the travelers have deliberately placed themselves into very remote geographic location and it takes a while to get there. By and large only a long expedition styled adventure can recover from such a travel time loss (because there is already a commitment by the traveler(s) to allocate a substantial amount of time to the journey).
Therefore, to avoid such a loss of travel time (and money), food packing, storage, and security must be exercised with attention to detail. Most people's food loss did not come from big game like bears, the food loss or food contamination came from rodents (particularly mice, rats, and chipmunks) and midsized animals like raccoons and skunks. Food carelessly laid about has been lost to birds (particularly to crows and ravens) and canines (both domestic and feral). I know of one small group bicycle expedition where food and equipment were stolen (it set them back a week but the summer long journey continued).
Food Storage Management Wisdom:
Food: Enough Food (Planning Strategy), Meal Planning Considerations, Slow to Cook Foods,Foods that Don't Carry Well, Eating Correctly on Tour , On/Off-Bike Tour without Cooking, On-Bike Energy Foods),
Group Food Issues, MRE Issues, Pack it OUT, Food Reserve, Food Security and Bear Proofing,
Food Storage Wisdom, Miscellaneous Food Issues
- Do NOT keep smellables in the tent; that also includes any toiletries: Toothpaste, mouth wash, shampoo, conditioner, perfume, aftershave, some dish soaps, bar soaps, medicine, some medical salves, pills, ... and vitamins smell good to a bear (or to other carnivores or omnivores).
- Food smells attract bears, other carnivores, and opportunistic omnivores (not only like skunks and raccoons but chipmunks and field rats/mice).
- There is a large minority of Guides and Scout Leaders who advocate that In the Evening do NOT brush teeth with toothpaste, gargle with mouthwash, or wash with anything scented - Save it for a morning activity. The rest of the story (that I believe to be true) is that a young Boy Scout sleeping in the open with others woke up to a Black Bear, inches away, smelling his breath.
- Little omnivores, while people are sleeping or away, may bite or tear their way into a tent in order to get to the food. At best, the food supply may be contaminated and the food may be replaced, or at worst these food destruction activities cause an end an otherwise nice bicycle tour.
- Mice are responsible for more tent and food destruction than Bears.
- Examples of some other times to be careful with food are:
- When the food is ready but before everyone eats they are otherwise engaged, like breaking camp or setting camp and no one is paying attention to a container of food (like oatmeal or stew) being unattended.
- Sandwiches are made but are unattended.
- A cyclist or two are late to arrive and some prepared food has been set aside which is now unattented.
- Bigger birds (Blue Jays, Crows, Ravens, Magpies) are very brave when no one is around. They have no problem with landing on a table and flipping a cover off a plate, bowl, or pot. They also have no problem with pecking into a plastic food bag or MRE bag. If the food is not covered, they won't need to land.
- Avoid storing or preparing food in the tent.
- It is wise to set up a cooking area away from the tent. Fifty feet away (or more) is recommended but sometimes in some environments twenty-five feet is the best available.
- If the weather is bad, cook under the fly, if the weather is good, sit on the fly. We use a Space Blanket with nylon guy-line cord pre-tied to the corners, such that we can use the space blanket as a dining fly or a ground cloth.
- There are public parks where the bears are not afraid of humans and they know to look for bear bags for food.
- Some Park Bears will tear a window out of a car to get to food stored in a visible cooler.
- A tent does not stand a chance; a bear can rip any tent to get to food.
- Away from public parks and campgrounds, bears tend to avoid humans.
- Leftover Food Issue (it's rare but it happens): Using judgment, if a person is in a proper situation, then pack it out. However, if the food needs to be left behind, take it at least 300 yards/meters and leave the food in the open so that birds and small animals will get to it quickly. Don't leave food near a trail or a campsite, the trick is to dispose of food in such a way that there is not an association with people/location/and food. We appreciate when those before us behaved similarly.
- Store toiletries and medicines with the food.
- Learn to buy unscented toiletry products (soap, no perfume, toothpaste, ...).
- Don't put the tent under the Bear Bag location or vice versa.
Miscellaneous Food Issues:
Food: Enough Food (Planning Strategy), Meal Planning Considerations, Slow to Cook Foods,Foods that Don't Carry Well, Eating Correctly on Tour , On/Off-Bike Tour without Cooking, On-Bike Energy Foods),
Group Food Issues, MRE Issues, Pack it OUT, Food Reserve, Food Security and Bear Proofing,
Food Storage Wisdom, Miscellaneous Food Issues
- Wellness Caution: Day 3 or 4 is typically a sick day for someone. It can be a result of poor meal preparation and/or clean-up habits (among other reasons).
- Hard to Chew Food: When the temperature is at or below 40° F (or 4 ° C) Energy Bars and other foods may become as hard as Cement. If they are kept in a clothing pocket, they will remain soft and chewable.
Stoves and Fuel Issues
Top, Outdoors Directory,Stove and Fuel Issues: Stove-Fuel Types, Environmental Variables, Stove Environment Match, Clasics, Fuel Types
Ideally, a long range touring cyclist wants a light weight, simple to operate, dependable, stove, that operates on the common fuel of the area or areas being visited. If there are problems in the field, then repair should be simple to perform and any hardware issues should be easily remedied with common parts.
Stove Type and Fuel Type Issues:
Top, Outdoors Directory,Stove and Fuel Issues: Stove-Fuel Types, Environmental Variables, Stove Environment Match, Clasics, Fuel Types
This is the Global Situation, these are Generalizations with a Few Exceptions:
- In North America, Europe and some Far East areas, Propane/Butane stove systems are the standard and typically wood fires are more limited (Not Allowed).
- In most of the rest of the world, the most available fuel type is Unleaded Gasoline however, in remote Africa, the Middle East (oil poor areas), and remote China the indigenous populations typically cook on Alcohol Stoves, thus Alcohol can be the primary fuel in some geographic areas.
- Propane (or other Butane blend) and Unleaded/White-Gas still remain the most popular, in that order.
- Most new white gas stoves will burn unleaded petrol (since about 2003), but validate.
- As a minimum, if using liquid petroleum stoves, make sure that they burn White Gasoline (sometimes called White Gas) as well as Unleaded Gasoline (for automobiles, use the Lowest Octane for vehicles) but know that some stoves, for a greater purchase cost, can additionally burn Diesel and Kerosene Fuels. Note that it is the additives, in any liquid fuel, that clog up the stove jets.
- Coleman Fuel and similarly competing fuels are made from Naphtha, a grade of oil distillation between gasoline and kerosene (for its boiling point) but it is a type of White Gasoline. It happens that 'Coleman' is fairly well known international brand name associated with White Gas or Coleman Fuel and the term may be used in remote countries to mean White Gas (and not the brand of White Gas/Naptha that Coleman sells). Learn a whole lot more about White Gas, Naphtha and Foreign Terms.
- Alcohol, a most underrated cooking fuel. 'Denatured Alcohol' and variants like Alcohol 95 or its lower grade/quality alternate Rubbing Alcohol or Medicinal Alcohol (NOT the same) are commonly found at Pharmacies (including Muslim countries) and/or Hardware, Marine, or Paint Stores (all less common in remote areas). Alcohol Stoves can be found online and in larger outdoor stores (like REI). While fairly useful Alcohol stoves may be made from a Tuna Can (or Military MRE Cookie Tin), we suggest sticking with something more industrial for global travel. More about Alcohol Stoves or Alcohol Fuel - Also see next bullet.
Note: This same tin can stove works with Diesel, Kerosene, and JP4. - One pleasant Green thing about Alcohol is that an Organic Sourced Alcohol (ethanol, ethyl, pure grain alcohol, medical grade ethanol, medicinal alcohol, moonshine [versus fossil fuel]) may come from an organic, renewable, source (Distilled Grapes, Fruit, Corn, Wheat, Rice, Millet, Potatoes ...) and usually burning organic alcohol does not leave pollutants as severe as some petroleum products. Any type of Alcohol does not burn as hot or heat water/food as fast as petroleum variants but Alcohol gets the job done.
- A Sterno type stove or 'Sterno Can' may also make a nice backup stove, as does a tin-can and some diesel fuel (use only outdoors). Sterno is an alcohol variant.
- Touring Issue: On camping type tours that are longer than three days, it is wise to have two stoves, period. Sometimes we carry a quality main and a simple (clamp on the fuel bottle) backup, or we deliberately carry an alternate fuel backup system (white gas/unleaded, propane, or alcohol.). Read onward for decision indicators.

Environment and Variables for the Stove's Use:
Top, Outdoors Directory,Stove and Fuel Issues: Stove-Fuel Types, Environmental Variables, Stove Environment Match, Clasics, Fuel Types
- Will the traveling take place in one area that consistently has the same fuel sources available?
- Will the traveling take place across areas that have different fuel supply types (unleaded, white gas, kerosene, diesel; or propane, butane; or alcohol, ...)?
- Will the traveling take place across areas that have unknown fuel sources?
- Does one need two stoves that burn the same fuel OR burn different fuels?

Matching a Stove to the Touring Environment and the Cyclist's Needs:
Top, Outdoors Directory,Stove and Fuel Issues: Stove-Fuel Types, Environmental Variables, Stove Environment Match, Clasics, Fuel Types
- Two identical type stoves, using the same fuel and storage bottles/canisters - A most typical solution. There is a lot of merit to having two identical stoves (only need one repair kit; no part, piece, or component matching issues; they generally handle identically).
- One heavy duty [main stove] and one light duty [backup] that burns the same fuel and has the same storage containers - Common for soloists.
- Two stoves of differing fuel types (typically white gas and propane, but sometimes white gas and alcohol) - This offers the best risk coverage for International Travel but forces one to carry more fuel/weight.
- Our Travels: We tend to always carry two stoves that use the same fuel and we often use both stoves at cooking time - We own several different types of stoves, so our systems familiarity is up to speed. Typically, in the USA, we use propane stoves, starting a trip with two stoves and no less than three fuel canisters (sometimes more, sometimes with partially used canisters from previous travels). There is nothing like, plug it in, and turn it on for simplicity, especially at the end of a long, wet, uphill climb to end a day. We mark canisters (and fuel bottles) with desired usage order numbers. Outside of the USA we have rations drop shipped to our destination start address (thus avoiding any agricultural import issues for fruits, meats, or farm products), we have bought and used self heating rations, and we have used Propane Fuel systems (as well as having lived off the local economies). We have had fuel delivered at quite a cost, but it was still, overall, cheaper than spending a day shopping with many unknown travel variables. For us, time is always fixed and limited; we can't change the fixed schedule nor change the return day or prepaid flight. We do call and/or email logistics arrangements beforehand. We long for the day where we can travel somewhere on a flexible and open time schedule.
One seldom has time and money together. - Dennis Struck
Stoves Selected by Experienced Cyclists and tour Leaders:
Top, Outdoors Directory,Stove and Fuel Issues: Stove-Fuel Types, Environmental Variables, Stove Environment Match, Clasics, Fuel Types
- Self supported, experienced, touring cyclists like,
Either: - Propane stove systems
(like Optimus or Primus systems) with a detached fuel canister.
- OR - - White/Unleaded-Gasoline pump systems (like Coleman or MSR) with a detached pumped fuel bottle.
- Most self supported bicycle 'Tour Groups' with a paid/hired leader in the USA, use two stoves; typically both stoves are combination White-Gasoline/Unleaded-Gasoline fuel systems that sit on small attached fuel tanks (like the Coleman Exponent).
- Expedition Tour Group Leaders prefer heavy duty, durable, and relative simplicity over light duty - stoves get beat up by cycling tour groups.
Fuel Types and their Advantages and Disadvantages:
Top, Outdoors Directory,Stove and Fuel Issues: Stove-Fuel Types, Environmental Variables, Stove Environment Match, Clasics, Fuel Types
- Versus -
Liquified Gas (Propane/Butane)
Liquid Fuel (White or Unleaded Gas) Stove Advantages and Disadvantages:
- At about 12,000 Feet (3650 M) or higher, Liquid Gasoline Fuel systems burn more efficiently and controllable than Propane/Butane Fuel systems.
- At about 15° F (-10° C) or lower, Liquid Gasoline Fuel systems burn more efficiently and controllable than Propane/Butane Fuel systems. How many cyclists cook meals above 12,000 Feet (3650 M) or below 15° F (-10° C)?
- The advantages of an attached/combined burner and liquid fuel tank are that separate pieces don't get separated among different packers, there is always fuel (assuming the tank is full) and the system is ready to use as soon as it is unpacked, the system tends to be 'beefier' (heavy duty), and there may be directions printed on the tank (making life easier for new cyclist campers).
- WARNINGS: The disadvantages of an attached burner and liquid fuel tank are that one cannot have a camping type Oven set on the top of the burner and then tightly wrap a wind screen/reflector around the base - It is possible to overheat the fuel tank and burn up the entire system. If one is to use a camp oven system then use a burner that is separate or detached from the fuel source by means of a connecting cable. The connecting fuel cable must be heavy duty (like braded metal wiring over neoprene and NOT just a piece of plastic tubing that will easily melt). Plastic On/Off Fuel Control Knobs on some stoves have been known to melt from intense oven heat (metal knobs or controls are better). Sometimes these systems leak while transported, especially if the fuel is under pump pressure. Experience: When liquid gasoline stoves go bad, they start leaking fuel, usually while the stove is burning. Dennis had to grab one, once, and run it out of an extra large tent of a Wilderness Base Camp. We threw sand and dirt on it to put the flame out. The situation had the potential for becoming much worse. The same thing happened in a Scout Camp, in the outdoors, but the fault may not have been the stove's mechanics.
- The advantages of separate burner and liquid fuel pump bottle are that they are lighter and take up less space; components can be readily interchanged (or replaced). The insulated braded wire connecting fuel hose (or something ruggedly similar) allows one to use a oven system that uses a reflector around the burner such that the entire system can get quite hot (for baking) and not get so hot as to superheat a mounted fuel tank.
Liquefied Gas (Propane/Butane) Stove Advantages and Disadvantages:
- It is not unusual for temperatures in the desserts or mountains to reach freezing but for us, our propane stove has never been mal affected. We have never had altitude problems with a propane stove but we haven't had to cook above 11,000 (3350 M). If we ever face either of these challenges, we'll have at least one white-gas stove system.
Experience: We always bring all, or some, of the water and fuel into the tent at night, thus avoiding many cold temperature issues. We do NOT bring any food into the tent. - Canister Stoves, are very reliable and don't need servicing like White-Gas Stoves. We've never had a canister stove failure, but we have had two White-Gas stoves leak hot burning fuel (but not for over 15 years). All White-Gas stoves need servicing at some point (which is why they have repair kits).
- To the best of our knowledge, there is no such thing as a one piece propane/butane canister and stove. HOWEVER:
- A burner may be attached directly to the fuel bottle's outlet, OR
- A burner may be connected remotely via a fuel transfer hose to a fuel bottle. - Burners on top of tall propane/butane canisters are prone to having large pots of food tip over, even from a good gust of wind (because of their narrow canister base). Ergo, it is better to place small clamp on burners only to the shorter 4 oz propane/butane canisters.
WISDOM: A person should NOT tightly wrap a wind-screen around a cooking pot/pan/oven, flame burner, and fuel canister for a high heat output or a long duration burn - Be sure that the Fuel Storage container is separated from the flame/heat wrap area.
Cooking Requirements for high heat output or a long duration burn, like to perform oven type baking, should be performed on a burner that is detached from the fuel canister via a connecting hose. Field baking is often performed with a clever combination of pots and/or frying pans (or woks) mated together, or sometimes someone has brought a miniature camp oven. In any case, remote/detached burners are safer for this kind of cooking that requires high heat output or a long duration burn with a wind screen. - Burners for propane/butane stoves seem to have a much better low heat control for lower temperature settings (like simmer, warm, or luke warm).
- Some 'stove systems' are designed to quickly heat 'their' pot using 'their' heat shield. This is OK for cooking for 1 to 3 people, but not OK for larger groups (too time consuming, too ineffienct). Replacing a damaged proprietary component on the trail is nearly impossible; these systems are usually built to close fitting tolerances.
- Some stoves are designed for high heat output to more or less boil water quickly; these same stoves cannot be used or used very well to perform low heat functions, like to keep a cooked meal warm over a period of time, to simmer. On longer tours, good cooks like to start experimenting. If you have a cook that experiments in the kitchen (first of all, be thankful), get a stove with good control at low flame settings; usually propane systems are better at low heat settings.
Experience: During the summer, in Colorado Mountains, we have had water bottles left on bicycle cages freeze or partially freeze overnight.
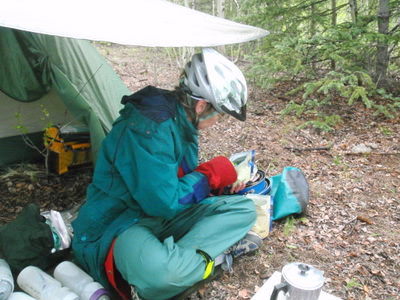
The Importance of a Good Cook:
Charles Goodnight, famed Cattle Trail Boss of the American West, invented the Chuck Wagon for Quality Food Logistics Support [get the cowboy humor, Charles-Chuck Wagon] and he hired the very best cooks, knowing that Good Food was always at the heart of any sustained and successful trail drive.
Cowboys were known to ride a Hundred miles just to eat a pastry or doughnut with a cup of good coffee.
Hmm, Just like the modern cyclist!
International Travel Issues with Stoves and Fuel
Top, Outdoors Directory: Int'l Flight/Travel Stove/Fuel Issues, Hardware/Repair, Resupply/Fuel, Field, Group- One cannot fly with fuel! Fuel (propane or liquid fuel) must be purchased at the destination; purchasing fuel can be a royal pain and easily take up the majority of a day if one is not suitably prepared. Consider learning where or how to secure fuel before arrival. Consider having it shipped within the destination/country; this applies to food/rations also.
- One cannot fly with a stove that smells like fuel! Per a blog article by Darren Alff, a one piece liquid fuel stove may not be clean or dry enough, even if empty enough (and it should be totally empty) to pass airport security or even leaking fluid standards. Don't even try to bring a stove as carry-on luggage. Darren states that one should use a detachable fuel system for international travel (for destination cycling). This suggests that one should to leave the canisters behind when departing and/or totally empty and dry out liquid fuel bottles.
- Stoves that burn liquefied gas (mainly butane or butane-propane mixtures), sometimes called Canister Stoves, offer instant lighting (for a price - it is worth it!). liquefied gas stoves are especially practical for travel in the USA, Europe, Japan, and populated areas of Asia and North America (versus Mongolia, Afghanistan, Alaska, and the Yukon)
- The most accessible and most available fuel on the planet is Unleaded Gasoline (not wood, not propane). By-the-way, cooking with wood is becoming a lost skill; it is probably a skill worth knowing, as at some point the knowledge may be useful in some trek through a remote region. See Pot Soaping.
- White Gas stoves to be used for International Travel should also burn Kerosene & Diesel fuels as well as Unleaded Gasoline (use the lowest octane automobile fuel). For the Record, in 2010, a good White-Gas/Unleaded-Gas stove costs 40-60 USD. A Stove that uses White-Gas/Unleaded-Gas, Kerosene, and Diesel fuels costs about 160-200 USD.
- Anything that burns kerosene and diesel should also handle JP4 or JP5 (aviation/jet engine/propulsion fuel - high grade, lower flash, kerosene) [NOT JP6 NOR JP7] - this advice from a former military pilot (Dennis).
- White Gasoline is Gasoline with nothing in it, no additives, just ultra clean. It is possible that in some countries White Gasoline may be a mix of two or more distilled gasoline types with slightly different boiling points (and flash points) but for all practical purposes White-Gas is just gasoline. White Gasoline can be used in any automobile gasoline engine in an emergency situation.
- Coleman Fuel and similarly competing fuels (that show an image of a Coleman pump stove and/or Coleman pump lantern on the container) are made from Naphtha. Look for the word 'Naphtha.' Naphtha is White Gasoline (this knowledge from a Coleman representative). If one looks at the ingredients on the backside label, one will/should find 'Naphtha' listed somewhere. The corollary is that if one has found Naphtha listed on the back label of something that looks like it is pump lantern or pump stove fuel, it probably is pump lantern or pump stove fuel. Experience: We have never had an experience in foreign travel where anyone has lied to us about such things. If one can't speak the local language (or even if one can), break out the actual stove and ask (gesture by pantomiming the pouring of liquid into the stove). One will get gestures of agreement or violent non-agreement; it's not hard to figure out if it is OK.
- Interestingly, internationally, the word 'Coleman Fuel' seems to be as well known, as 'White Gasoline'. Some other words for White Gasoline are: shellite, gasoline, petro, naphtha, hexane, heptane, benzene, benzine, or benzin, as well as words that contain blanc, blanco, or bronco (latinized words meaning White). Some countries use different words and in some cases the same words may have different meanings; learn the words for white gasoline and unleaded gasoline for any country that you may visit. Learn a whole lot more about White Gas, Naphtha and Foreign Terms.
Stove Hardware Issues:
Top, Outdoors Directory: Int'l Flight/Travel Stove/Fuel Issues, Hardware/Repair, Resupply/Fuel, Field, Group- Be sure that any white gas stove, minimally, also burns unleaded gasoline.
- White gas stoves require some form of fuel pressurization (by manually pumping). Know how to and have tested/operated all/any new stoves before touring.
- One must have appropriate and serviceable fuel containers/canisters that work with the particular stove/s.
- Always buy and use systems that are universal in their fittings and fuel types, or else one might be stuck with a system that only has supplies in one geographic region.
- Canister Stoves are very simple, convenient, and most carry instant lighters built into the burner (always buy built in lighters/igniters).
- Always have repair kits and instructions for white gas stoves (a good reason to have two identical stoves and carry only one repair kit). Get familiar with repair kit functions, usually the sales person or a fellow traveler has experience - Keep the instructions, Read the instructions.
- Always have a spare canister or bottle.
- Fuel Bottles, usually (to be purchased) should be in about 25-30 ounce sizes. Mark all Bottles and/or Canisters in the desired usage order (using judgment for different sizes, partial vs full, and when/where for the next supply opportunity). In addition, remember that white-gas stoves that sit on top of the fuel tank also hold 15-25 ounces of fuel.
- It is our experience that bottles of 10 to 20 ounce size are not practical for touring by bicycle; buy the larger storage containers.
- We have seen melted plastic knobs on gasoline and propane stove systems, avoid Plastic Knobs buy systems with all Metal Components (or as little plastic as is possible).
Re-Supply/Re-Fuel Issues:
Top, Outdoors Directory: Int'l Flight/Travel Stove/Fuel Issues, Hardware/Repair, Resupply/Fuel, Field, Group- - Until recently, the smallest quantity of Coleman fuel was
1 gallon (3.78 Liters). Often, Backpackers and Cyclists would make a one gallon purchase at a store and be forced to leave some fuel in the Container, as they could not safely carry all of the fuel (too heavy, too bulky, or not enough safe storage containers/bottles). This problem does go away with bigger groups (like five or more campers to help spread the load).
- Coleman, now, has a 32 ounce (0.94 L) plastic bottle for sale (assume disposable). One may not have to buy extra metal fuel storage bottles (we have yet to find or try). Not all retail stores have this size, call around, typically they are found in camping/outdoor type stores and they are available online (but shipping can be expensive).
- Coleman and some other competing vendors, now, have a 1 quart (~.97 L) of mostly Naphtha (Coleman Fuel basis) in a metal container, which is available in some camping type stores. This may help small groups not have to leave partial cans of fuel. - Usually, in a group, white gasoline (liquid stove fuel) is carried across 2 to 6 lined metal safety storage bottles; these bottles are typically distributed evenly among the touring group. Unfortunately, in some cases, only one gallon fuel containers are available for purchase and sometimes not all of the fuel can be used. Very often, cyclists are forced to leave some fuel with the sales establishment. On occasion, while this has not happened to us, one may ask if anyone left any partially used fuel containers. On occasion, some people get lucky.
- We have not seen a need for more than 6 bottles for any trip to include those heard about from other expedition thru tours.
- Propane/Butane Canisters typically are 4 oz or 8 oz in size. Most canisters, when nearing empty, have low pressure delivery issues; we just swap out canisters at this point. There is a newer 16 oz Canister available now. We number our canisters so as not have more than two partial full canisters with a two stove/burner setup. Always have a permanent marker or grease pencil on tour.
In the Field Issues:
Top, Outdoors Directory: Int'l Flight/Travel Stove/Fuel Issues, Hardware/Repair, Resupply/Fuel, Field, Group- Fuel transfer is always and only conducted on cold stoves usually before or just before using the stove for cooking (NEVER on a lit stove, a hot stove, or a stove that was just used!).
- Fuel bottles and canisters should be marked for usage order (grease pencil, permanent marker).
- White Gas stoves can sometimes be fussy but they work in a wider range of cold temperatures and are reported (by mountain climbers) to work better in higher altitudes (but we have not witnessed any altitude or temperature issues with propane). Of course we are not cycling in freezing temperatures. We live in Colorado at 7,500 FT (2200 M) and everything has been tested up to 11,000 (3,300 M). Note that we try to camp at or below 10,000 FT (3000 M) or below tree-line, just for healthy breathing at night. Note that butane lighters quit working around 7-8,000 FT (22-2400 M). Use matches up to about 11,500 (3500 M), then magnesium strikers.
- Burners that sit on top of Propane/Butane Canisters are better served on the low profile, low center of gravity, smaller 4 oz canister than on a 8 oz canister (totally avoid 16 oz canister for direct mount burners - one good breeze may dump a complete meal onto the ground). Detached Burners (connected by a hose) work well with any canister size. We mix our canister size purchases so that 4 oz canisters exist primarily as a backup/spare and we try to use larger canisters as the primary fuel source. Once one uses a 4 oz spare, then a numbering system is needed to indicate a practical and functional usage order (or one goes through all of the mental gymnastics each time one heats something or one gets stuck with one stove and no backup - not a fun scenario).
Group Travel Issues:
Top, Outdoors Directory: Int'l Flight/Travel Stove/Fuel Issues, Hardware/Repair, Resupply/Fuel, Field, Group- Stoves and Bottles should be distributed among cyclist but cyclist types loosely fall into one of two categories. Those that typically arrive to camp early and those that typically arrive later. It does not take long to learn typical cyclist patterns and most people know their classification before starting a group tour. Wally Werner of Adventure Cycling calls these groups Rabbits and Turtles. I'm a Turtle [there is an old bar room joke there]. Soooo the point is that for good group tour organization purposes, one wants Rabbits to carry the Stoves, as they are usually the first to arrive at camp, so that they may initiate boiling/warming water for the cook(s).
- It is noteworthy that whoever is on duty for cooking needs to make extraordinary effort to arrive at camp relatively early on his or her cooking day so as be able to serve supper to the group in a timely manner.
Fire and Cooking Issues
Top, Outdoors DirectoryFire and Cooking: Emergency Stove, Emergency Fire, Fire Lighting, Food Reserve, Food Security
- The first rule of fire making is that the fire maker must be prepared to put it out. Have water handy, a cover, and/or something like a large thick flannel shirt.
- More and more places, especially in the USA and Europe, do not allow wood fires or open fires.
- Pot Soaping: If one has to cook with wood (or sticks, straw, grass ...) for fire, then pre-soap the outside of the cooking pot so that suet will wash/clean off easier/better; for washing in these conditions, besides using a Brillo pad, clean sand may be used to scrub a pot's outside. When soaping a pot, the thinnest of water and soap mixed will serve (don't worry about thick areas - cleans easily). The best application is liquid dish soap but as young Scouts we directly rubbed the pot's side with a bar of soap that was dipped in water (don't worry about clumps).
- We always carry one new Brillo Pad (in a plastic sealed bag) although we have not used one for years - It's a just in case thing. There is nothing wrong with blackened pot sides, in fact dark exteriors on pots/pans makes them heat faster, one just doesn't want suet on packed cooked ware as it dirties other gear or containers.
- A Sterno type stove or 'Sterno Can' may also make a nice backup stove, as does a tin-can and some diesel fuel (use only outdoors) - See Emergency Stove, Next Bullet.
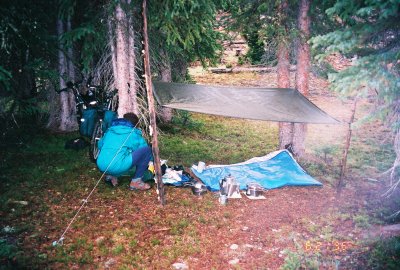
Emergency Stove (or Hobo Stove):
Top, Outdoors DirectoryFire and Cooking: Emergency Stove, Emergency Fire, Fire Lighting, Food Reserve, Food Security
- Diesel, Kerosene, White-Gas: A metal can about the size of a small tuna fish can is an ideal size (but not a requirement) will serve as a fire container. Remove the lid, leave the bottom intact. Cut holes cut just below the upper/open edge (from little finger nail size to thumb nail size), mix and alternate the holes with spacing such that the container will still support a loaded pot or pan. Pour in about .25-.50 inch of fuel. Exercise all safety precautions (see Emergency Fuel below).
- Alcohol: One needs a taller flame to obtain the highest heat output. Use an empty Coca-Cola sized can or something the size of a Campbell's Soup can. Remove the lid, keep the bottom. Punch 4-5 holes about 1.5-2 inches up from the bottom, evenly spaced, about .25-.35 inches round. Also punch about 5 holes, about .25-.35 inches round, .5 inches from the top, evenly spaced; 5 holes, about .25-.35 inches round, about 1.0 inches from the top, evenly spaced; and 5 holes, about .25-.35 inches round, 2.0 inches from the top, evenly spaced. Avoid punching holes in such a manner as to weaken the can's support of a pot or pan. Pour in about 1.0 inch of fuel. Exercise all safety precautions (see Emergency Fuel below).
Emergency Fuel and
When to NOT Make a Fire and
Some Other Field DONT'S:
Top,
Outdoors DirectoryFire and Cooking: Emergency Stove, Emergency Fire, Fire Lighting, Food Reserve, Food Security
-
First of all, consider Wood if it is an option. Also consider other liquid fuels of the area/region (alcohol, diesel, kerosene, lamp oil, JP4, or cooking oil; use white gasoline or unleaded gasoline as a last resort [its more volatile but manageable]). Make a Hobo Stove per the previous instruction. Use all safety practices, to include: open area, over dirt, cleared space, not indoors, not in a tent nor under a tarp, never pour fuel into the stove while it has a flame and note that the flame is often invisible. Don't pour out any remaining liquid until it's absolutely cool and safe (sometimes flames are invisible). Don't try to recover unused fuel, way too dangerous. Sometimes a person may find two cans such that one fits inside the other - use the bigger can for storage and for extinguishing the fire. The fire can/stove will get very smutty. It may be wise to have old news paper or disposable rag for handling.
- In ultra remote areas, wood fires are not unusual but be smart about the situational issues. It is wise to:
- Have cooking and cleanup done by night fall.
- NOT have night fires as fires can attract unwanted human visitors.
- Generally, one cooks on a small fire using sticks and twigs as fuel.
- Generally one does not need a Council Fire or even a traditional Boy Scout sized cooking fire.
- Keep the fire small and simple.
- Often the fuel wood is placed next to the pot, bulk upwind but spread around.
- Remember to soap the outside of pot (discussed about 5 bullets upward).
- Not have smoky day time fires that can be seen for miles
- Shield fires from the wind and long range view.
- Sometimes eat cold food and not have a fire at all.
Fire Lighting Notes (Fire Starter, Wind Proof Lighter, Matches, and Magnesium Striker):
Top, Outdoors DirectoryFire and Cooking: Emergency Stove, Emergency Fire, Fire Lighting, Food Reserve, Food Security
- Some people carry emergency fire starter material; usually this is a little cube of something bought commercially or it may be homemade (like wax or paraffin drizzled onto Lint from a clothes dryer). Clothes dryer lint makes a great fire starter. Carry the fire starting material in a sealed plastic lunch bag.
Note: In some countries, the word 'Paraffin' means Kerosene, here Paraffin means a white waxy flammable substance. - It is wise to have at least two fire starting igniter sources {book of matches, sealed waterproof matches, cheap butane lighter, magnesium striker; battery and two wires; 9v battery and steel wool}.
- CAUTION: We have yet to see a propane/butane lighter, especially a "Wind Proof" lighter, be dependable above 7,000+ Feet Altitude (˜2,000 Meters).
- Magnesium Strikers always work (assuming magnesium exists!) no matter the weather conditions or altitude. Magnesium Strikers make a spark, NOT a flame.
- Generally, we camp with books of matches and a cheap 7/11 disposable butane lighter for short trips and we will also have a magnesium striker for longer trips.
Go quietly, alone; no harm will befall you." - John Muir, American Environmentalist
On the Road, Living with:
Water, Sanitation, and Cleanup
Water Management and Use Directory
Water: Enough Water, Clean Water Risks, Filter/Purifier, Water Boiling, Water-Camp Management,
Water Collection Methods, Cold/Freezing Weather
Sanitation Issues: Basics, Good Habits, How to Poop Outdoors, Ways to Bathe
Cleanup Issues: Dish Washing, Caveats, Laundry
These Water and Water Related Subjects are often linked together through the use of water, both for consumption as well as for cleaning (for ourselves or for our gear). Cyclists (Human Beings) need clean (uncontaminated) water in order to SURVIVE.
- Water Management is the Most Important thing that a Cyclist does on a Bicycle Tour.
- Water access and security from water needs is the number one ranked issue for sociological "Human Needs" according to Maslow and Herzberg.
- Cyclists need to learn and execute behaviors that will help keep themselves and those traveling with them hydrated and sanitary (from a hygiene perspective to a safe food and water consumption perspective).
Water Management and Issues
- Some Bicycle Riders have never operated a Water Filter or Water Purifier and some Bicycle Riders never will.
- Some Bicycle Riders will not ride a bicycle where they cannot obtain Bottled Water or Safe Tap Water, their Bicycle Touring Style will always endure them to City and Urban riding and sometimes to Local towns within their riding radius, and they are happy.
- Some Bicycle Adventurists have learned to operate a Water Filter, Water Purifier, and/or learned to buy Boiled Water from a Roadside Vendor - The Cyclists of this Bicycle Tour Style will have a much greater Bicycle Touring Area, Bicycle Touring Experience, and a potential for Great Adventure.
- 45% of all Travel Leg distances are attainable in 1 day.
- 70% of all Travel Leg distances are attainable in 2 days.
- 85% of all Travel Leg distances are attainable in 3 days.
- 95% of all Travel Leg distances are attainable in 4 days.
- 99.9% of all Travel Leg distances are attainable in 7 days.
- Ideally, a cyclist needs to have just enough water to get from the last water supply point to the next water supply point.
- Water Planning must be performed simultaneously with Food Planning. One must determine their water (and food) supply points (see Travel Leg Planning). The water source may be from a water tap, a store, by operating a Water Filter/Purifier, or performing a water collection and sanitation process. A cyclist MUST KNOW where WATER SOURCES are located.
- A touring cyclist should always have water on the bike and a touring cyclist should always have a way to carry bulk water supplies on a bike. It is OK to have empty containers, but the containers should be available to the cyclist. Lately, the fill-up or roll-up when empty neoprene 2-3 Gallon (8-12 Liter) containers have serviced cyclists quite pleasingly.
- Water is the single most important item to manage on a bicycle tour.
- Water Analysis is a process that needs to be done, particularly in the route planning phase. The ability or inability to access water will alter a planned touring leg.
- Water Planning involves identifying water source locations and determining the largest distance to be traveled between water supplies. The cyclist must be able to carry enough water to safely travel between water locations (or make a planned travel route change).
- Given average temperatures and humidity a non-cycling person is supposed to consume 2 liters of water per day. Cyclists usually drink 4 liters per day (average temperatures and humidity). There does seem to be a lot of individual variation and it really helps to know and understand the individual needs of the touring cyclist(s). Water needs decrease with cool temperatures and increase in warmer temperatures. Furthermore, additional water may need to be carried for food preparation, food hydration, cooking and eating ware clean-up, and personal cleanliness.
- Most cyclists carry several water bottles per person (7-8 bottles as big a bottle as will fit in the cage) and usually additional bottles are carried inside a pannier or trailer. Sometimes, fewer bottles may be carried if the cyclists knows of interim water sources along the route (common for urban touring). The carried bottles are not necessarily always full. In addition, the cyclist usually needs to carry 1 or 2 bulk water containers. Often a bulk water container is carried empty but filled at an evening campsite.
- In desert/outback regions, water is so important that a trailer or third wheel is often used just to carry bulk water supplies. If a water shortage comes on unexpectantly, then the cyclist needs to consider night riding and day sleeping as well as shifting to a water conservation mode (avoiding salty foods and avoiding the use of water for personal cleaning or dish cleaning) - This is called a Dry Camp.
- Usually water sources are more commonly available on a bicycle tour than food supply/re-supply sources (but not always). Food and Water resupply points must be planned and determined simultaneously. Usually, water is available at the same places that food is available.
- The further away that a cyclist is from water, the more that the cyclist must guard and protect their water supply.
- In very remote desert regions a cyclist must validate the availability of water at remote planned water supply points (as best they can just before setting off). Streams and wells have been known to go dry (for a variety of reasons). A cyclist may need to double up on their water load for such contingencies (or change their plans).
- It is Impossible to obtain Pure Water from a Water Purifier or Water Filter from a hand operated Water Purifier or Filter used on a bicycle tour.
- A Water Purifier or a Water Filter are Two Different things. A Water Purifier removes more matter, pollutants and microbes than a Water Filter (usually by use of a smaller filter (measured in microns) and at least one other active method (using light/radiation, or electrical charge, or a direct or indirect chemical/substance/material).
- Based on personal experience (and definitely not based on marketing literature), Almost all hand held portable Water Purifiers for hikers and campers are clogged and useless after their first filtration session (in anything but clear water). Some Water Purifiers will last two sessions, and that is it (in actual dirty water and not in a laboratory).
- Water Purifiers cost 2-3 times as much as Water Filter ($120 vs 50, 2012 prices).
- A Water Purifier or Water Filter replacement filter/cartridge costs about 1/2 of the original complete product cost.
- With regard to water borne illness, from the start of a tour, a cyclist is dealing with water safety probabilities, and not guarantees of filtration effectiveness; thus a cyclist is facing degrees of statistical risk and acceptable safety risks.
- There are no guarantees for a Water Purifier or a Water Filter to prevent a cyclist from getting sick or having an illness.
- One's individual Health, Age, and Condition has a lot to do with water safety probability.
- There is nothing wrong with asking for safe drinking water. Most cultures teach that A Person should NOT be denied water when they ask for it. Even in the American Depression Years, virtually no one was denied water who asked for it. In addition, the further that one is from big cities the more friendly and helpful are the people (no matter the country).
- First: Try to get safe drinking water from safe water sources (before using a water purifier/filter) - Read On:
- Some common safe water sources are: potable water from a tap or hose (depending on the location); boiled water from a home, vendor or merchant; or bottled water from a store.
- When local ground water is questionable (like for most of Europe and Asia), some safe alternatives are to buy Bottled Water or Boiled Water (the latter is common in Asia - go to a store, vendor, or home and ask to buy Boiled Water).
- Second: Use Common Travel Methods to Get Hydrated without buying water directly. A touring cyclist may buy water mixed as a safe beverage, such as: Tea (in Asia) or Coffee (Europe and South America) made from boiled water; factory bottled or canned beverage (apple juice, orange juice, grape juice); carbonated beverages (ginger ale, seven up, coke, safe local favorites); or bottled or canned beer (don't drink too much, two can maximum or one is pitting a diuretic against hydration).
- Boil all of the Water that you Filtered (including water from a Water Purifier). Unless the water is known to have come from a safe source, Boil the Water (See Water Boiling Instructions)
- Filtration: There are levels of Filtration from a screen strainer (or shirt or cloth fabric) to a manufactured filter which filters to a measure of Microns (1 millionth of a Meter) or even sub-micron. In 2012, the EPA declared .02 Micron as a sufficient filter size to remove all germs (bacteria, protozoa, cyst, parasites) and 99% of all viruses in order to be called a 'Water Purifier'. Water Filters now filter down to about 1 micron (formerly to about 10 Microns), which traps out most bacteria (aka germs). Most Bikers, Hikers, and Campers have access to hand held portable Water Filters and Water Purifiers designed for outdoor use. Water Purifiers tend to both filter and chemically treat water. Read more About Water Filters/Purifiers.
- Light Radiation: There are devices that have a battery operated ultraviolet light whose radiation kills germs and viruses. Usage conditions almost have to be perfect for it to work, it produces a low volume of water (12-16 ounces), which requires many applications over time to produce the water volumes that a cyclist requires (typically 2 gallons/day/person). The product is certain to improve over time. At present, it will not work with cloudy water at all.
- Chemical Treatment: With the objective of killing Microbes (germs, bacteria and viruses) a person adds a measured chemical to the water, like 'Chlorine Dioxide'. Chlorine Dioxide is available in tablet form as wells as liquid (typically a 12 or 24 tablet pack [or something close to that] or about a 1 or 2 ounce bottle). The use of any Chlorine like treatment is always balance between killing just the microbes in the water and not harming the drinker of the water and still having water that tastes clean. The EPA states that 'Chlorine Dioxide' is not fully effective for 4 Hours (most outdoorsmen find 4 hours to be rather impractical). Another Chemical is Iodine [Don't use it anymore]. The issue with Iodine is that it did not kill as many germs as Chlorine and it did not kill any viruses, and in small doses it was OK in the human body, but once one was used daily for two or three weeks, it starts to become a health risk for the thyroid and maybe the liver and/or pancreas.
- Heat: Use heat to kill germs; Boil the Water. Note that boiling water will not kill all germs as some germs and bacteria are heat resistant (like those found near volcano vents above and below water, for example). At one time it was advised that 5 Minutes of boiling water was sufficient, now the EPA is stating 30 minutes (most outdoorsmen find 30 minutes to be rather impractical).
- Filters at .02 Microns (or smaller) are legal 'Water Purifiers'
this specification removes ALL bacteria (germs) and 99% of all Viruses. - Boiling Water for 30 minutes kills almost all viruses.
- 'Chlorine Dioxide' water treatment is Fully Effective at 4 Hours.
- It is said that rivers and streams in North America do not have water born Viruses.
- Viruses from water mainly come from Human and Animal Fecal (Birds, Game, Cattle, ...
so always get water from as upstream as is possible). - It is reported that All waterways in the USA have Giardia (a stomach churning one celled protozoa parasite that causes vomiting and diarrhea).
- See Water Collection Methods - The Water Collection Method Matters!
- A smaller filter screen (measured in sub-microns, .02 Microns or smaller).
- They often have a second active method for removing microbes like light/radiation, or electrical charge, or a direct or indirect Chemical.
- They usually have a Charcoal Filter or a processing method that removes substances that smell and taste bad in the water.
- A filter (not quite as small as a Water Purifier's filter, often 1 micron).
- Sometimes they have a charcoal filter (if present, it may operate as a second filter) which tends to remove substances that smell and taste bad.
- The ADVANTAGE of a Water Purifier is that it makes water that is relatively safe to drink (it is not a guarantee against some small viruses or poisons). Water processed through a Water Purifier can be drunk immediately.
- The DISADVANTAGE of a Water Purifier is that because its smaller filter, it clogs easier (which renders the tool unusable until the filter cartridge is replaced). Water Purifiers cost more, 2-3 times more than a Water Filter and replacement filter cartridges cost about 1/2 of the original unit cost. I have clogged water purifiers many timess, often in a 15 minute time frame, at then, $80/cartridge. When the spare cartridge is incompacitated, the user is SOL (Sorry* Out of Luck, *some people have a different S word in mind).
- The ADVANTAGE of a Water Filter is that because of its slightly larger filter screen it processes more water (however that water still needs to be boiled and/or chemical treated). In the field, given equal treatment with a Water Purifier, a Water Filter will operate 2-3 times longer. In the field, having something to filter water is better than having nothing to filter water. Adding Water Treatment Drops (like 'Chlorine Dioxide') and Boiling are minor inconveniences compared to having NO water processing capability at all. It costs less to operate a Water Filter than a Water Purifier.
- The DISADVANTAGE of a Water Filter is that because its larger filter, the processed water still needs to be boiled and/or chemical treated.
- Avoid using Dirty, Muddy, or Stagnant Water.
- Dirty/Muddy/Stagnant water pre-filtering should be performed by pouring cloudy water or water with particulates through a cloth over a large collection kettle/pot/container/tub.
- Let the sediment of water in a kettle/pot/container/tub settle. Settling usually takes about 15 minutes. Then Filter Pump the water from the clear water that is above the sediment and/or below the film. This collection process may need to be repeated several times in order to obtain 2 gallons of water (the typical daily amount water needed per person per day).
- Talk to other cyclists, hikers and backpackers who have actually used water filters and purifiers in the field, especially Touring Cyclists
- Visit big camping type stores (like REI, EMS, Cabelas) that sell more than one product line of Water Filters and Water Purifiers and have the sales person explain and maybe demonstrate the differing products. If you cannot visit in person, then go online with the intent on getting up to date on safe drinking water technology.
- It is my experience that the product marketing hype for gallons of water processed are conducted in lab controlled environments and the statistics are not a reflection of real outback product use. I've had brand new Water Purifiers stop pumping in about 25 pump strokes because the filter was clogged.
- Read the directions for operating and maintenance, each pump system is different. This is one topic area for which a cyclist needs to be smart. Carry the instruction in the unit's supply bag (the instructions are usually waterproof).
- If the pump won't move water (assuming no obvious twig or pebble in the intake), that cartridge is done, swap the cartridge out for a new one.
- This is NOT in any Instructions: Make every effort to keep the input and output lines away from one another - It is NOT wise to contaminate the output line (going into your drinking bottle) with the input line (that has Giardia Bacteria on it).
- It just does NOT seem Practical to carry the Input and Output Lines of the Water Pump in the exact same bag.
- The Water Filter/Purifier Input Line/Hose/Tube goes into the lake, stream, ditch, pond to suck water out, the line lies in contaminated water (water with microbes, germs, viruses, rot, slime, algae, ... and animal fecal).
- The Water Filter/Purifier Output Line/Hose/Tube goes into clean/sanitary Water Bottles or into a clean/sanitary bulk container/jug/bladder.
- It just seems like the dirty water Input Line/Hose/Tube from the dirty source should not be stored with, nor even touching, the Output Line/Hose/Tube that delivers water into a clean Water Bottle or a clean Water Bladder/Jug/Container.
- It just seems intuitive to keep these things stored separately.
- By-The-Way, the water filter pump device usually comes with little colored rubber caps for the Input and Output nipple fittings (for the tube lines) - use them for travel and home storage.
- It is best when two people work together during the water pumping process.
- When the system is first setup, have the helper hold the output line away from any ground or water contamination; work the pump such as to send water all the way through the system to collect any residue from the last use; and then squirt/eject a steam out to the water source or the ground. Eject enough water such that any water that was in the system has been cleared out - It does not take long to perform this task. The process clears the line of anything that may have arrived prior to and during setup.
- The pumping process takes physical effort and two (or more) people can alternate pumping and line management (next item).
- It really helps keep the lines in place if one person is operating the pump while the other person positions and repositions the water intake (strainer or pre-filter device - it tends to get pulled and jerked around by work efforts) and the other person also changes water bottles and/or bladders (or whatever container is being used) as need be.
- Upon completion of the water pumping task, conduct any required post operation cleanup (per the instructions). This step usually performs an internal filter back wash or back flush. Be sure to maintain the line separation integrity.
- Store the lines separate from each other. We use plastic zip lock type plastic bags and we usually carry some spare plastic bags.
- We store the water filter system in its own side pannier pocket - Nothing else is stored with it.
- Some water filter cartridges are ceramic and they can crack if dropped or hit by something. A cracked water filter cartridge is useless and unsafe to use, throw it out and replace it with a new cartridge. If the cartridge was broke inside a Water Filter/Purifier, the Filter/Purifier system will have to be sanitized before it can be re-used.
- Only use a water filter/purifier device when there are no other sanitary water sources available.
- Learn to take advantage of found water when you pass by it.
- It is important to know, just because a cyclist won't be camping for another 3-6 hours, which is no reason to NOT tank up now with water. Water may not be available later.
- It's important to develop a skill for knowing where water is and where water is not.
- Learn to camp where water is available, especially for cooking and cleanup (functions that need sanitary water). The big reason is to avoid having to carry the extra weight of water for any distance.
- It is the exception, but not unusual, where one tanks up with water at mid day and travels another 3-6 hours for distance. Camp may be a Dry Camp but the cyclist/group was prepared.
- As a camping courtesy (the difference between a Tenderfoot and a First Class Camper) don't camp right next to the water source; it scares wild life and domestic life (like deer or cattle), it threatens some animals (predators like bears and lions), it looks ugly from afar (trust me), and it often brings ill feelings and bad karma from other campers and from mother nature.
- If we are using a 'Water Purifier' we still treat the water with a commercial 'Chlorine Dioxide' water treatment chemical for camping (in our case, 5 drops per gallon or 2 drops per liter/quart/bottle).
If we are using a 'Water Filter' we boil the water (usually for 5 minutes, even though the EPA says 30 minutes) and we still treat the water with a commercial 'Chlorine Dioxide' water treatment chemical for camping (in our case, 5 drops per gallon or 2 drops per liter/quart/bottle).
- Test the System. It is not unusual for the last filter operation to have placed/imbedded bacteria on the filter and it grew over time and clogged the filter.
- Usually cleaning the water filtration system (by the book - we immerse in Clorox'ed water) will kill or remove almost all germs or viruses. Fill a sink (about 4 gallons of water) ad add a cup of Clorax Bleach.
- Changing cartridges at the start of a new cycling tour is not an unusual event.
- Usually, once a filter has been wetted, even if it is put back on the shelf, it is useless after about a month.
- If a water filter/purifier has been idle for a year or so, and it is not pre-tested, it has a high probability of failing in the field.
- Before and after a trip, soak the system in chlorinated water. If the old filter cartridge is tossed out, don't put in a new cartridge until testing just before the next trip/tour.
- Always have at least one spare filter cartridge. If going for a week or more carry two spare replacement filter cartridges.
- Do any maintenance (rubber gaskets, grease seals, ... ), conduct per instructions. If insecure about what to do, ask (salesperson, local expert, check online, or lastly call the manufacturer).
- Boil the water (EPA says 30 minutes/We boil for about 5 minutes [longer at altitude]) and then let it cool (compensate for altitude, boil until water actually reaches 100°C/212°F - this is often a judgment call without a thermometer at altitude).
- As the water cools, no bubbles, add the commercial chemical treatment (like Chlorine Dioxide) per the directions (usually two drops per liter/quart or five drops per gallon [best ratio]), mix and let set (EPA says 4 Hours/We wait about 5 minutes).
- In lieu of a commercial chemical treatment like Chlorine Dioxide, Unscented Clorox has worked very well so far, for us.
- Avoid using Iodine water treatment (Explained Elsewhere).
- WARNING: DO NOT USE IODINE for water treatment - Continued use of Iodine Tablets over a long period of time (like an long expedition) has been known to cause liver problems.
- RULE: Always take advantage of available water. Top Off Water when traveling by available water (like campgrounds, Mom & Pop Grocery Stores, Fuel/Petro Stations, Restaurants, Tourist Stops (usually at a money cost), and sometimes at a home-ranch-farm [usually with interesting intercourse], grocery markets, road side stands [always an adventure], ...) especially when you are traveling in (or are about to travel in) remote places where water can be scarce. When traveling, with safe watering holes few and far between, top off the water bottles at every opportunity.
- Hydration Packs: In some situations, some cyclists like a dedicated hydration pack (water only) or a combination water and pack with a small storage area. Camelback is a common brand name. These hydration-water systems facilitate on demand water drinking through a rubber straw like tube while cycling. The cyclist can hydrate while on the move (without stopping). Some of the water packs also allow additional items to be packed in the backpack. This system is fairly common among mountain bikers pulling a load on a trailer and among ultralight bikers who may be carrying about 30 pounds / 60 kilos of total gear on just a bike. Non bulky things may be carried in the hydration pack's gear area.
- Water Bladders are very practical for storing bulk water, but only when needed. Bladders that collapse flat (or into a roll) store easily when empty are preferred. The Water Bladders are usually carried empty but are filled for the evening camp. On trips of three or more days, it is wise to have a backup water bladder. The role-up when empty cloth neoprene type of water bladder seems to endure very well. Plastic bladders exist but they do not last very long as they spring leaks at fold points. Some water bladders are standardizing their inlet to easily accommodate some water filter/purifier outlet fittings. Quality purchases matter here.
- We typically fill the bladder(s) only for evening camp. Sometimes we gather water just before arriving at camp, sometimes we gather water at camp, and sometimes we have to setup camp then bike to a water source (usually back to a known source). Having water and a shelter are always a top priority. When biking, we typically run on 4 to 5 (liter/quart sized) water bottles per person, per day (more when hot, less when cold).
- Before camp departure in the morning, we typically top off all bike bottles from the water bladder(s) so that the bladders may be rolled and stowed away. But, sometimes in arid and dessert travel stretches, we may keep a full or partially full water bladder available in a pannier.
- In dirty water areas or risky water areas, ask for boiled water. Sometimes, one just has to carry/tow bulk water supplies.
- Hydration is extra important to bike riders and backpackers, so one must learn to be careful with water bottles in a tent. Always have at least one fullwater bottle in the tent (because of freezing or animal mischief) - it's just a wise thing to do. We keep our bottles at the entrance, either just inside the tent or outside in the vestibule. We also keep a "P" Bottle on the other side of the entrance.
- We've learned to drink Coffee (hot or cold), Hot Chocolate, Gator Aide, and Fruit Drinks from Bike Bottles. Some people must have a drinking cup or mug. When we lived in Seattle, decades ago, Dennis' bike had a coffee cup holder, from a car, mounted on his handlebar (no big deal now because it's common, but I was among the first to do so). We have marked our non-water bike bottles (kava, choc, gator) so as to limit cross flavors. Lynn H, AC Expedition Leader, uses an insulated, leak proof coffee mug, that also fits her bike's water bottle cage.
- On Bike Tours in other countries where the ground water is non-potable we often buy bottled water. During the mid-morning, mid-afternoon, or lunch time stops we may drink boiled water tea, bottled beer, or bottled soda(s) which are all safe drinks (due to manufacturing standards and laws). By the way, fruit that peels are usually safe to eat (like bananas, grapefruit, and oranges).
- We have and carry a dozen water bottles and they all go on a tour, we just may not be filling every one of them for each travel leg. There are times when all bottles are full.
- All of our bike bottles have a flip top lid cover, to protect the drinking nipple from road elements (as all wild animals and cattle trucks use the road for relief) since the tires lift up road debris onto the bike frame and onto its caged water bottles.
- The only water available may be at a stagnant pond, road side ditch, or cattle field [been there, done that, still around].
- Still Water (typically from a Ditch)
- Moving Water (typically from a Creek)
- Dirty Water (typically from Stagnant Water)
- One cloudy water processing episode will clog up a Water Purifier's Filter, often before a gallon of water is processed. A Water Filter does not fare much better, it may last for 2-3 gallons of processed water.
- FOR BOTH A WATER FILTER AND A WATER PURIFIER IT IS EXTREMELY IMPORTANT TO ONLY USE AND PROCESS CLEAR WATER (which is usually found in normal and steady running lakes or rivers/brooks/creeks, which should NOT have any dirty runoff material).
- Viruses in water mainly come from Human and Animal Fecal (Birds, Game, Cattle, ...
so always collect water from as upstream as is possible). - Always collect water upstream from any Industry, Construction, Dwellings, Stock Yards, Wild Game, Fowl, or Habitation).
- Moving Water is usually cleaner and preferable. Pump the water from the middle layer. The bottom layer has dirt and the most decomposition; the top layer has the most micro beasts as well as floating crud; the middle layer is, statistically, the place of least count per CC of biological critters.
- Still Water: It is wise let the water sit in a container for about 15 minutes, let it settle, then pump only the clear water from the middle layer. The container may be a pot, bucket, plastic sheet, or space blanket supported by sand or rocks. This will greatly enhance pump filter survival (or it clogs up and will not work).
- In a water channel, in order to position the water intake for the clearest water (in the middle flow layer), we place the pump intake line between two rocks, one rock holds the intake line down (it wants to float) and the second rock is used to turn the line upward and hold the intake port nearer the middle layer of water.
- Caution: Avoid filtering cloudy water. It is our experience that filters-purifiers will not last for more than one cloudy water session. Always carry a spare filter - Yes, they get pricy
- Note: So far, by our experience, No filter-purifier is as good as advertised.
- Water in a Container (pre-collected dirty water sitting in a big bucket or such): It is wisest, to let dirty water sit in a container for about 15 minutes, let it settle, then pump-purify only the clear water (usually in the middle). The container may be a pot, bucket, plastic sheet or space blanket supported by sand or rocks. This will greatly enhance pump filter survival. Avoid filtering cloudy water.
- Water Treatment: Usually, water does not have to be treated if it went through a water purifier; otherwise boil the filtered water per the Water Boiling Instructions and treat it with a Chemical Treatment per its instructions.
- Spare Filter: Always carry a spare filter.
- Lesson: Always bring in at least a couple of water bottles, whether in a hotel, hostel, or tent.
- When overnighting in freezing temperatures (this can be any mountain in the middle of summer), pay careful attention to NOT let water freeze. It takes too much time and energy to thaw frozen water and it takes too many human calories to warm water in the body.
- Bring water in bottles into the tent and position them away from cold areas. In some environmental conditions, some people sleep with a warmed bottle or two.
- When about to bike, hike, or camp in Freezing environments, when a biker can, fill water containers with Hot Water. Sometimes the container needs to be warmed up before filling with Hot Water.
- Water Always Freezes at 32° F / 0° C, but at higher altitudes with dry humidity (mountains), it feels warmer! Water Boils at lower temperatures at higher altitudes, which is potentially both a sanitation and cooking issue (air pressure).
- At sea level water boils at 212° F or 100° C - As a rule of thumb, for every 500 Feet elevation (or 150 Meters), water boiling temperature drops 1° F (or .5° C).
Enough Water (Planning Strategy):
Top, Outdoors Directory:Water: Enough Water, Clean Water Risks, Filter/Purifier, Boiling, Management, Collection Methods,
Cold Weather, (Bicycle Tour Style, Bicycle Tour Planning)
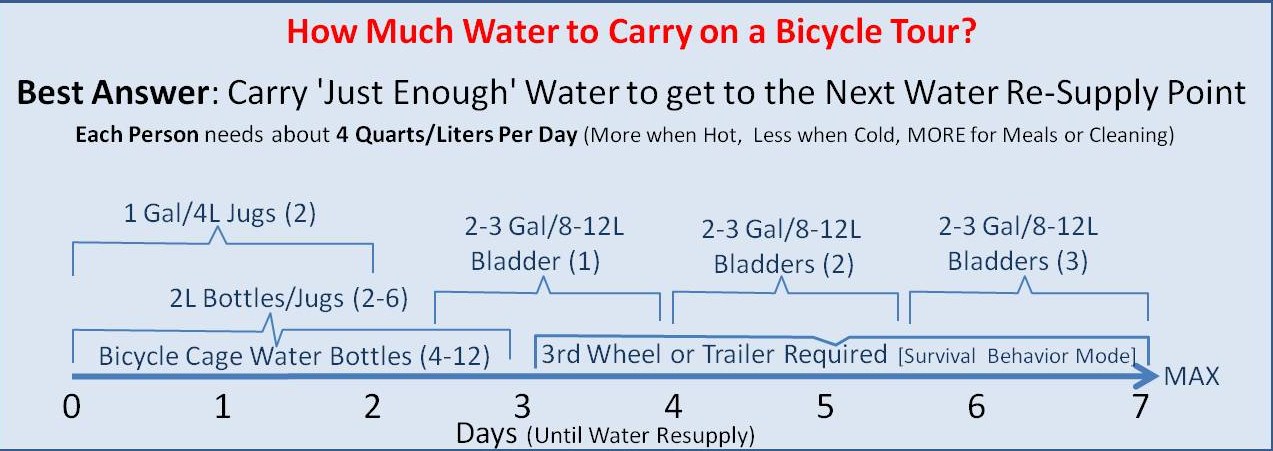
Water is the Most Important Human Need (only after Security from Immediate Danger to One's Life [Maslow & Herzberg]). Planning Bicycle Tours around access to water is not a new planning idea and limiting ones Bicycle Touring Style around water is not new either.
Generally: (Copied from Travel Leg Distance Planning )

Know the Clean Water Risks:
Top, Outdoors Directory, Water Issues:Enough Water, Clean Water Risks, Filter/Purifier, Boiling, Management, Collection Methods
Cold Weather
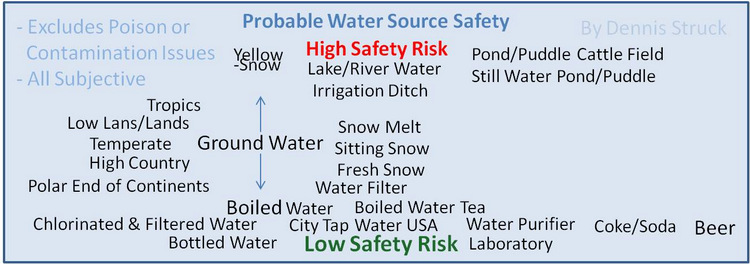
-
Facts:
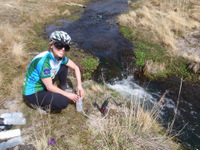
-
Costs:
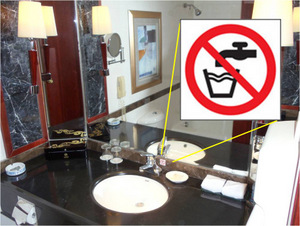 Risks:
Culturally:
Lessons, Experiences and Practices:
About Using Water Filters or Water Purifiers:
Top, Outdoors Directory, Water Issues:Enough Water, Clean Water Risks, Filter/Purifier, Boiling, Management, Collection Methods
Cold Weather
The Environment of Creating Clean Water to Drink:
Generally, there are only a few practical Field Methods for processing Raw Water for Human consumption, some methods are better than others, some methods can be situational.
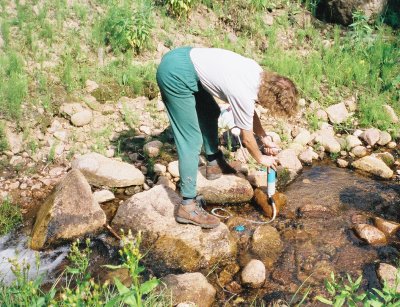
Personal Notes: We usually use (from above, most common to least common): 1+3 (filter or purifier + ClO2); 1+3+4 (filter, boil then ClO2). For ourselves we have never boiled water for as long as 30 minutes.
Latest EPA Health Safety Specifications/Recommendations:
North America Water Generalizations:
Water Filter versus Water Purifier:
-
A Water Purifier removes all matter, germs, and viruses (99%) because it has:
Note 1: One of the traditional issues with using portable Water Purifiers (versus Water Filters) was that the system filter clogged up too easily, often times in the first water processing session, thus leaving a cyclist to face tougher methods of water purification or leaving the cyclist with no way to purify water. That was very frustrating and that was the reason for people using Water Filters - At least Water Filters operated for most of the Bicycle Tour on One Filter.
Note 2: No Filter/Purifier system can remove pollution contaminants or poisons.
Advantages and Disadvantages: Water Filter versus Water Purifier:
See Water Collection Methods - The Water Collection Method Matters!
Longevity Tricks of the Trade (for Extending Water Filter/Purifier Use):
-
How to Extend the Life of a Water Filter/Purifier System:
Before Making a Purchase (of a Water Filter/Purifier):
Operational Survival Hints (For the Water Filter/Purifier)
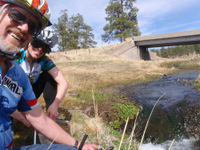
In General (About Water Filter/Purifier Management)
Before Any Cycling Tour (Regarding Water Filter Management)
Water Boiling Instructions:
Top, Outdoors Directory, Water Issues:Enough Water, Clean Water Risks, Filter/Purifier, Boiling, Management, Collection Methods
Cold Weather
Before Boiling, See Water Collection Method.
Water BOILING is performed in Two Stages:
Water Management Routine(s):
Top, Outdoors Directory, Water Issues:Enough Water, Clean Water Risks, Filter/Purifier, Boiling, Management, Collection Methods
Cold Weather
Water Collection Methods:
Top, Outdoors Directory, Water Issues:Enough Water, Clean Water Risks, Filter/Purifier, Boiling, Management, Collection Methods
Cold Weather
How one collects water is Important because the Water Filter/Purifier may otherwise Clog-Up pre-maturely.
There are three different water collection methods:
Water Filter/Purifier Usage Notes:
Water Management in Cold or Freezing Temperatures:
Top, Outdoors Directory, Water Issues:Enough Water, Clean Water Risks, Filter/Purifier, Boiling, Management, Collection Methods
Cold Weather
Most people do not set out to go to freezing environments. What happens is that one may wake up to three inches of snow on the ground and frozen water bottles left outside or on the bikes. Often, the snow is completely evaporated or dried out by noon, thus causing a delay that probably was not anticipated.
Sanitation Issues
Top, Outdoors Directory, Water Issues:Sanitation Issues: Basics, Good Habits, How to Poop Outdoors, Ways to Bathe.
Sanitation is about staying healthy for the long haul. Sanitation relates to personal hygiene, personal bathing, dish washing, and laundry. Sometimes the parts of one subject will overlap with another subject, like washing dish towels used for cleaning dishes in a laundry. Sanitation tries to address each issue from each perspective.
 Long-Term Survival is based on not getting sick or injured. Most people can be sloppy for about three days (and get away with poor sanitation habits), but then Mother Nature rears her head and smites thee.
- Wash your hands with soap or germicide after bladder or bowel relief; wash your hands before preparing or eating a meal. Soap remains the best long term agent/survival-tool for killing germs (while other sanitation substances do exist); soap is available for sale at most commercial areas enroute for travelers (store, shop or roadside stand). There are other native sanitation products that seem to be effective in the same native/indigenous areas.
- Carry a Bar of Soap; keep it handy in a plastic zipper type bag. We usually keep Soap, Toilet Paper, Sani-Wipes, and Trash in separate plastic bags but located in the same pocket/pannier area (usually in front).
- P - Bottle: Keep a large mouth plastic container and lid (an old empty salsa bottle, for example) about 25-30 ounce in size, and use it for night time liquid relief. No more late night scrambles in a dark country side from a tent (or cabin or hostel with no toilet) looking for a toilet or a place to go. Empty the container in the morning and rinse it appropriately for pannier storage. We call this container a "P" bottle. [See Picture Right-Side and Up.]
- All experienced travelers of remote areas, regardless of wealth, position, or power, have a stash of toilet paper somewhere. For short duration tours, take partial used role(s) of toilet paper from home, flatten & compress the roll to take up less space; the toilet paper will fit in quart sized plastic zipper bags. For longer duration tours take full rolls of toilet paper and; the toilet paper will fit in gallon sized plastic zipper bags.
- Keep the fresh toilet paper in a zip lock bag to protect it from moisture or paper flaking. We pack out used paper (other than what is buried) in another gallon sized plastic bag - we also place other accumulated trash in the same bag and we have been known to leave an area a little cleaner than we found it, a common practice among travelers (as well as to collect and leave more firewood, if appropriate). Whenever we pass through a town or village we dump the trash in a receptacle but sometimes it can be three of four days between towns or trash can availability. We may or may not keep the plastic container bag, depending on bag wear or bag contents.
- When one is away from big cities anywhere or in a depressed economic area, most toilet facilities will not have toilet paper or if they do have paper, it may be gone - A person may have to pay to use a Toilet/WC. Always have local small coinage. We used to be bothered by paying for toilet use, but now we appreciate that a facility exists at all and that it is clean and has paper.
- Bike it In, Bike it Out. Leave NO Trace!
- Banana peels on the ground are very déclassé. >>>>>
- Flip top water bottles offer better protection from road elements. This was particularly noteworthy after a cattle truck splashed by us, but note that cattle and sheep trucks travel on all roads and all off road biking is done in animal country.
- Caution: Avoid being on the outside of a road curve with (or downhill from) a cattle or stock truck - stuff slides!
Caution: If a biker is waiting at a stop (light or sign) they are naturally positioned on the edge of the outside lane, such that if a stock truck pulls up beside the cyclist, because of the designed curvature of the roadway, that person is downhill from the truck. -
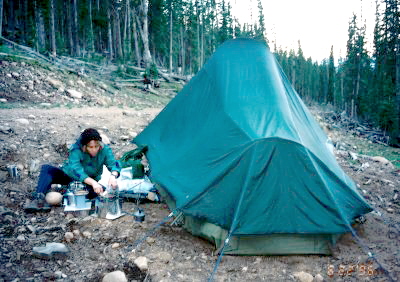 Handy Wipes, in foil packets like those dispensed at some restaurants, or Baby Wipes are quite handy for cleaning sunscreen off the fingers and for cleaning up after a tire flat, chain break, chain sprocket slip off, bike assembly, or even cleaning up for a trail lunch.
 - Baby wipes serve another good purpose on road weary bottoms.
- We usually have both cleaning wipe types and they can be purchased in bulk at X-Mart.
- We carry about six to ten foils per ride, three or four with the tire changing tools, the remainders in the handlebar-bag.
- We also put about a One Inch depth of baby wipes into a quart sized plastic zip bag and keep it handily available along with the toilet paper (which is also stored in a waterproof plastic sandwich bag).
- We pack out everything but human waste - We never leave trash anywhere.
Find a private place (or as private as possible) with soft dirt, gravel, or sand.
Note: One does not make business near camp, food, or water systems.
Note: 100 feet is usually a practical safe distance and 100 yards is a group sanitary safe distance, but sometimes either distance can be impractical.
Note: Place all removed belongings in one spot.
Note: Do the best for the situation at hand and think about others that may follow.Dig, with a metal foldup garden trowel (or real garden trowel or plastic camping trowel), a "cat hole" about a foot deep and four to six inches wide. Pile the dirt to the side because it is coming right back to the hole. In rock strewn sites, a space between rocks may be necessitated and then be covered with a three rock cover.
Note that we are using an orange colored plastic trowel from a Camping Store.
Note that experienced people place the toilet paper roll on the trowel handle.Do business.
Note that plastic bag is used to carry the toilet paper and protect the paper from dirt or water while also protecting gear from paper flaking.Cover the business and paper work (arh arh) with the previously removed clean dirt - The shovel never touches the waste.
Cover the filled hole with two crossed sticks (best), or crossed grass bunches, or three rocks (stacked smaller & centered upward). All markings are the international sign for don't step, dig, or go here.
Note: Some people carry handiwipes to wash/clean/sanitize their hands at the poop spot, some leave said materials at the bike. It is impossible to carry enough saniwipe or handiwipe tissue for hand sanitation on a long tour. On 3 or 4 day tours, we do carry enough saniwipe and/or handiwipe tissue, but on long tours we rely on a good ol soap bar (more utilitous than liquid soap and its associated bottle management). We usually use bicycle squirt bottles to wash the hands with bar soap (small, carried in its own plastic bag), sometimes at the poop site or sometimes back at the bicycle.
Note: Remember to pick up your belongings (gloves ...)!
Dennis had to go back once.- This information is contained in older Boy Scout and Wilderness Survival Hand Books.
- Learn to NOT step on X's, don't camp over X's, and don't picnic over X's.
- Solar Shower System (most difficult to setup, very time consuming, good for a base camp):
- Components: Water Bladder (usually black colored to attract light/heat), a way to hang the water bladder (nylon cord [does not rot], metal S hook, W shaped hook made of Heavy Duty Wire), hose/tubing, water flow cut off (binder clip, clothes pin), nozzle, sometimes a little S hook to hang the nozzle (make from HD Coat Hanger), storage bag for all but bladder. Optional: plastic sheet (1 yard/meter square).
- Consider making something to hold soap and shampoo or such.
- Consider using a plastic sheet for feet/ground dirt protection (it may also be used for sitting/kneeling on the ground for meal prep).
- The shower assembly may be one unit, but it is wise to have a system that works with a standard bulk water carrier (so that the bulk carrier may be used by itself - more functional - less weight to carry).
- Showers may be very messy over dirt. Best surface, in order: cement, stones/pebbles, wood plank(s), moss, sand. Consider wearing a Waterproof shoe (flip-flop, Teva, Croc, Keen, ...) .
- Sometimes the shoes have to be washed or cleaned after one has dressed.
- A ground cloth or space blanket may be used for a modesty barrier.
- A cyclist may warm the water in a stove pot or such and then add the water to the water bladder.
- Often, the effort for setting up a portable shower and the post clean-up process is not justified.
- Water Bottle Shower/Bath (easier setup, need private space yet):
- Components: Water Bottles, stove, pot, plastic sheet (1 yard/meter square).
- Use the bike's water bottles. Take three or four full water bottles, empty half of each bottle into a pot, bring the water to a near boil, refill each water bottle.
- Have a warm water bathing experience. The cyclist needs to handle the privacy issue and it really helps to have a clean plastic sheet to stand upon.
- Showers may be very messy over dirt. Best surface, in order: cement, stones/pebbles, wood plank(s), moss, sand. Consider wearing a Waterproof shoe (flip-flop, Teva, Croc, Keen, ...) .
- Sometimes the shoes have to be washed or cleaned after one has dressed.
- A ground cloth or space blanket may be used for a modesty barrier.
- Bathing from a Pot or Container (Plastic/Other Containers Recommended):
- Mitigating Issue #1 is whether one has just a One Container Wash System or a Two Container Wash System. A cyclist may or may not have a designated washing container/basin - We recommend having such. We always carry a wash basin which is the cut bottom of an old Clorox bottle. It is light weight, small, and does the job. It just happens to pack/fit inside one of our cooking pots, perfectly. Many people actually carry a quart sized plastic/Tupperware type container. We've seen others with a plastic container the size of a small camp sink. They are easy to pack, pack other things into the container.
- Mitigating Issue #2 is whether one has to bathe inside a tent for privacy or if one may bathe outside, in open space where one may pour or wring dirty rinse water directly to the ground and/or use water bottles (or shower), which is often determined by how many cyclists are around and whether one is in a common area campground. If a cyclist is solo and camping solo, then this is probably not an issue.
- A one container bathing system IS NOT an issue at all IF one may dump dirty water to the ground.
- A one container system IS an issue if one may NOT dump dirty water to the ground (because one is in a small area where one has to live, like a tent or a group camping area). Bathing may still be performed, as follows:
- Do not put soap into the pot/container. Put soap directly to the wash cloth (liquid or solid).
- Apply a little soap to the wash-cloth and wash, generally top down, in the following segments/cycles:
- Head/face (first),
- Upper body,
- Lower extremities,
- (Optional) head hair,
- Crotch, and then,
- Butt area (last).
- Sometimes the bathing segment/cycle order may be changed for special reason. After each cycle, wring the washcloth into the wash basin and refresh the wash cloth with the remaining wash water. On occasion, one's partner may refresh the bathing water.
- A Cyclist may put hot clean water into a water bottle.
- Sometimes, hair washing is saved for a motel (or a stream crossing). Sometimes, one may bathe in the open at night.
- Dress (usually in tomorrow's riding clothes, but maybe in some street clothes).
- Take the washing gear outside, dispose of the dirty water first, soap and rinse out the wash cloth, soap and rinse the pot.
- Boil water again (for a one pot system) to clean out the pot.
- If one is outside and may dump water onto the ground while bathing (common for soloists), then keep the cooking pot clean and only pour clean water from the cook pot to the wash cloth. Wring the wash cloth onto the ground (hold low, away, and downhill to prevent splatter on you).
- If one has a two container system in a tent, and then the dirty water container is a substitute for the ground. Wring dirty water into the container. When done and dressed, then dispose of dirty water.
- Pot/Container Bathing Caveats:
- ALWAYS: When Dumping or Disposing of any Water, always throw it so that it sprays over a wide area, in this manner any environmental effect is minimized (Boy Scout 101). Throw water in a direction that is away from any water source, spray-throwing water across a land area allows maximum sunlight to do its thing to the dirty water. Ergo, throw water where the sun will find it.
- Thou shalt Not: wash self, hair, or laundry at water sources, to include creeks, irrigation ditches, in water tanks, pumps, or faucets.
- One of the reasons that people stay in a motel/inn every few days is to be able to take a super cleansing shower or bath, sleep in clean sheets, air out the sleeping bag, dry out gear, and wash some laundry.
- On the road, drying the towels and wash cloths is a difficult necessity. Usually the mid day sun dries items faster than the morning or evening sun. Except in arid areas, washed gear will not dry out at night. So, the best/most-efficient time to dry clothing is in the midday sun. That means that one often stops for an extended lunch and hangs laundry on a bike, fence, or picnic table in order to dry items of use. Also, while biking, it is common to leave wet gear under a strap or net, exposed to the wind and/or sun, in order to dry objects. See Bike Tour Laundry.
- GREEN: We tend to use environmental friendlier soaps, like Camp Suds, for bathing and dish washing, but occasionally we have purchase soap on the road, like Ivory or Palmolive - just do the best you may with what is available. Another problem, like 1 gallon Coleman Fuel, is what to do with the leftover (after transferring the newly purchased liquid into your own, smaller, container[s]). Generally, we give it away, but in the absence of people around sometimes we leave it where it will be taken to a good home.
Sanitation - Basic, Important, and a Continuous Processes:
Top, Outdoors Directory, Water Issues:Sanitation Issues: Basics, Good Habits, How to Poop Outdoors, Ways to Bathe.
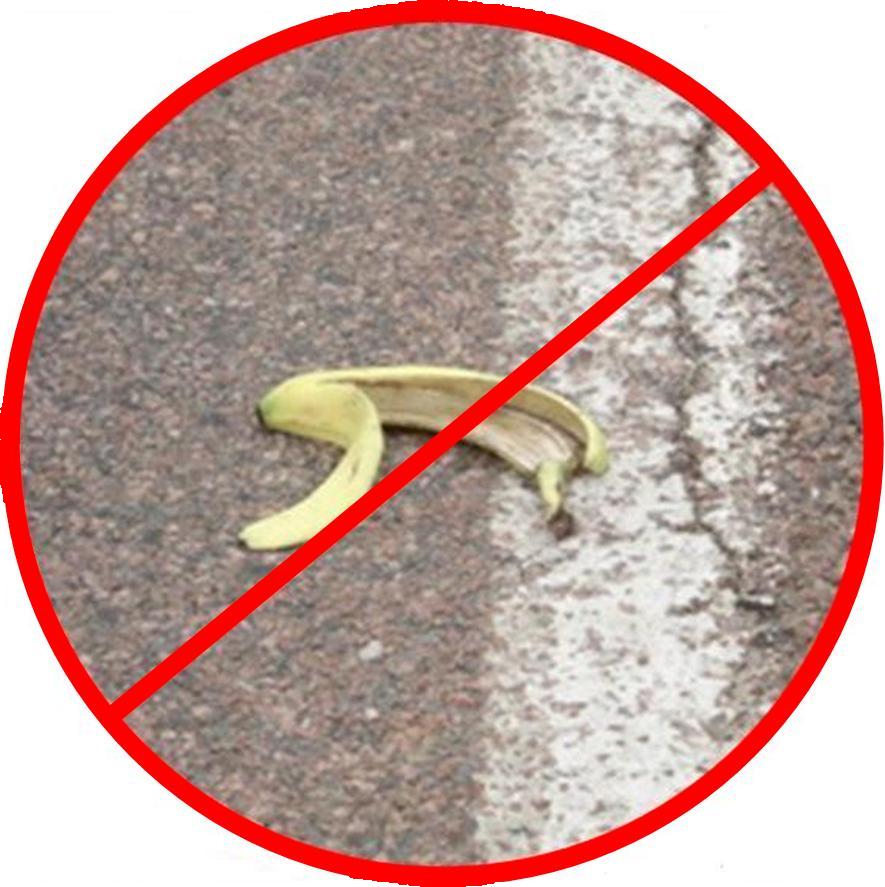
Sanitation - Good Habits:
Top, Outdoors Directory, Water Issues:Sanitation Issues: Basics, Good Habits, How to Poop Outdoors, Ways to Bathe.
Sanitation - HOW TO POOP IN THE WILD, or
How to Poop in the Woods:
Top,
Outdoors Directory,
Water Issues:Sanitation Issues: Basics, Good Habits, How to Poop Outdoors, Ways to Bathe.
No one ever writes about this topic and travel sanitation is important:
Sanitation - Personal Bathing:
Top, Outdoors Directory, Water Issues:Sanitation Issues: Basics, Good Habits, How to Poop Outdoors, Ways to Bathe.
Personal Bathing Contents:
- Solar Shower System (most difficult to setup/manage)
- Water Bottle Shower/Bath
- One or Two Pot/Container cleaning Recommendations
The longer that one is on the road, the more important is Hygiene. Try to Bathe Daily! Especially bathe arm pit, crotch and seat areas (typical areas of infection or rash while on tour).
Cleanup Issues
Top, Outdoors Directory, Water Issues:Cleanup Issues: Dish Washing, Caveats, Laundry.
This category is a catch-all for cleaning personal gear, from the bicycle, laundry (clothing + dish cloths/towels), and eating ware (dishes, pots, ...).
- Boiling water or cooking over a fire: If the pot is already black and crusty, on the outside, from the smoke of many wood fires, then use that pot as is. If one has a shiny new pot and one wants it to stay shiny, then coat the outside of the pot with a thin layer of soap, cook and/or boil water, and then wash the pot clean. The soap coating can be from liquid soap spread very thin or from water and a bar of soap - both work well. The pot will become very black but the places that were soaped will come out shiny clean after a wash. It really saves time to have soapy steel wool (like Brillo) for the cleaning. Make note of the following ...
- Cookware that is black or blackened on the outside (the fire side) actually heats up faster (than cookware that is bright and shiny).
- Covered food pots heat up much faster than uncovered food pots.
- Start the cleanup water boiling while eating the meal. Knowing this behavior is the difference between a First Class Scout and a Tenderfoot - Tenderfeet need guidance.
- Dish Washing:
- For Dish Washing, either use one pot for washing and rinse from another boiled water pot or use a small plastic container/tub (which only has to be pot sized).
- Some people carry little open plastic box tubs (like Tupperware).
- There is a blow up plastic tub on the market; it has easy storage.
- We often carry the cut bottom of an old empty Clorox Bottle.
- Some people use the same container for body bathing and dish washing; some people have two containers (usually very small plastic tubs). It is all a matter how one sanitizes the system when they are done using the containers; boiled water and maybe a few tablespoons of unscented Clorox will do the job.
- Sometimes laundry washing is done in the sink, motel laundry room, or in town (self pay/clean laundry facility - yet another reason to have coins and sometimes dollar coins)
- REMEMBER to clean/wash the microfiber personal towels, wash cloths, and dish towel too.
- ISSUE: A lot of motels have hair dryers (some on request). I (and others) have used a hair dryer to dry out a couple of washed shirts, but there comes a fine line between that behavior and spending hours doing laundry and using a hair dryer to dry clothing that gives cyclist a bad name. If one has a load of laundry and the motel/inn has a facility or there is a facility nearby, then use the facility (even if a ride is needed to town). Sometimes, because of crowds, one must do laundry at late-night or very early-morning.
- Labeling: On the road, we have and use microfiber towels for each of us (labeled), old fast dry type washcloths (labeled), and a designated wash cloth (labeled). We also have a dish cleaning cloth (labeled). Labeling prevents using the wrong item for the wrong purpose.
- On the road, drying the towels and wash cloths is a difficult necessity. Usually the mid day sun dries items faster than the morning or evening sun. Except in arid areas, washed gear will not dry out at night. So, the best/most-efficient time to dry clothing is in the midday sun. That means that one often stops for an extended lunch and hangs laundry on a bike, fence, or picnic table in order to dry items of use. Also, while biking, it is common to leave wet gear under a strap or net, exposed to the wind and/or sun, in order to dry objects.
- GREEN: We tend to use environmental friendlier soaps, like Camp Suds, for bathing and dish washing, but occasionally we have purchase soap on the road, like Ivory or Palmolive - just do the best you may with what is available. Another problem, like 1 gallon Coleman Fuel, is what to do with the leftover (after transferring the newly purchased liquid into your own, smaller, container[s]). Generally, we give it away, but in the absence of people around sometimes we leave it where it will be taken to a good home.
- From Jill, remember that some stores sell sample sized items in a different area of the store (samples sizes are often small liquid soaps and toothpaste)
- Some hotels and hostels provide washing and drying machines BUT outside of the USA they may not make this information known, the cyclist needs to ASK.
- The place of lodging may use the machines during the day and guests might be given permission to use the machines at night.
- Correct coinage can be an issue.
- Many campgrounds have washing machines but note that they are often for the use of campers (be flexible to changing one's place of stay if needed).
- It is wise to have the hosts demonstrate the machine use as there are many very strange washing machine procedures in this world (extra strange if you cannot read their written usage instructions) and really strange at a central controller for 20 machines and driers where separate wash and dry machines are selected; the wash time, soap dispensing, and dryer time is selected; and then all is paid for at the one central wall panel.
- How much does one carry of what garment type (shirts, pants, undies)?
- How often should one wash clothes?
- When should one wash clothes?
- What opportunities exist to do laundry in mass (self or service)?
- Carry/pack more underwear than shirts and pants; underwear items tend to be lighter and the benefit of more undies usually outweighs the added weight issue.
- Another way to reduce the laundry work load upon one's self is to carry/pack only clothing made of easy wash and fast dry (synthetic) material(s) like nylon, rayon, or polyester.
- Cotton, Wool, and natural fiber materials take much much longer to dry thoroughly - It is a comparison of hours versus days of drying time compared to synthetic materials.
- Another trick that experienced travelers use is to pay attention to the weather. Perform Laundry tasks on warm/hot sunny days; avoid the necessity of performing laundry tasks on cloud covered, cool, wet humid or rainy days.
- When possible, take advantage of passing through a town, city, or village that has laundry services or a do-it-yourself laundry facility. BTW, this issue is one of the few times that we consider staying at a KOA type campground for an overnight - One can usually use their washing machines and clothes dryers (and warm showers are nice too).
- It is always optimal if laundry can dry over night (when camp-ing or hotel-ing and not inhibit travel). Sometimes, it is wise to know when to 'hole up' for a day or two or three for passing monsoons, typhoons, hurricanes, tropical depressions, and/or storm fronts.
- Some work effort can be saved by soaking clothing before washing and in certain cases, apply some soap directly to a soiled or stained area for soaking.
- Liquid soaps rule (versus powder).
- Hotel shampoos work well for washing clothes.
- We use the same liquid (Green) soap for dishes, laundry, and personal washing.
- We don't carry a hair dryer (some folks do), but if it is too humid to allow clothing to dry naturally, we will consider using a hair dryer to dry a day's wash (assuming that we can't get clothes done by or at a laundry service by the next morning for a reasonable cost).
- Some hotels have public washers and dryers, ask. In the negative, ask hotel workers if there is a way to get an out-of-hotel service/business/entrepreneur to do laundry or if there is a laundry facility nearby. Maybe slip a worker a few coins for useful information.
- Towel Rack(s)
- Curtain Rods
- Seat/Chair Backs
- In the sun
- In an air flow
- Window
- Porch Rail or Porch Furnishings
- Air Vent
- Other room feature
Cleanup - Dishwashing (Old Outdoor Secrets):
Top, Outdoors Directory, Water Issues:Cleanup Issues: Dish Washing, Caveats, Laundry.
Cleanup - Caveats:
Top, Outdoors Directory, Water Issues:Cleanup Issues: Dish Washing, Caveats, Laundry
Cleanup - Laundry, or
How to Clean Your Clothes on a Bicycle Tour:
Top,
Outdoors Directory,
Water Issues:Cleanup Issues: Dish Washing, Caveats, Laundry,
Related: Clothing Issues
Ahh, the necessary drudgery of getting clothes washed. After a few days on the road, the importance of personal sanitation grows. Cyclists must pay more attention to all sanitation issues (bathroom, cooking, cleaning, personal ... ), of which bacteria free clothing must become a focused priority. There are dirt, splatter, and grease concerns (which tend to be cosmetic) and there are bacteria, yeast, mold ... concerns (which may mal affects one's health). We are addressing both cleaning issues here.
If one is on a self guided free schedule tour then washing clothes or having clothes washed isn't much of an issue other than performing the deed and getting the clothes dried because one has the time and one can time the washing with a sunny day for drying. It's those guided or time delimitated tours where washing clothes or having clothes washed is problematic because the task needs to be fit into an otherwise nearly completely booked schedule, i.e., finding time is a problem. Doing laundry is especially problematic if one is staying at hotels where there is no laundry service (which is more common than people realize, especially for foreign travel in rural areas [where most bike travelers expect/want to tour]). Laundry issues seem easier to address if one is camping, unless one has to move whether or not the clothes are dry.
Tour with an eye for Do-It-Yourself Laundry Facilities:
Philosophical Clothes Packing Interrelated Questions:
Issues and Answers (Assuming No Laundry Service Available):
One way to reduce the laundry choir(s) is to:
About Hair Dryers
Magic Hours: Dry Gear, Clothing, and Charge Battery(ies)
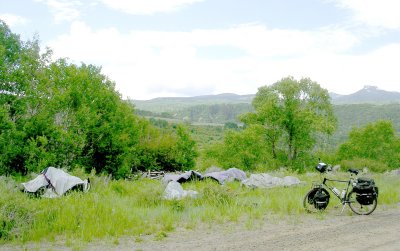 While camping, we have had to pack-up wet tents and wet clothing and travel (for a variety of reasons, one of which is knowing that the destination was sunnier or warmer). In such a case, sometimes some items can be hung over a pannier or trailer to dry while the bikes were moving, and sometimes we have just waited until the 11 am to 2 pm time window to take advantage of the sun being out in order to dry clothes (often tied to a lunch break or a travel break - See side image). This happens to be the same time to best recharge a battery with a Solar Panel Charger.
'Better Alive and Safe than Dead Right'
'A Cyclist will Never Win a Run-In with a Car'
Bicycle Tour Safety
Top, Bicycle Tour Safety, Bicycle Crash Avoidance, How to Survive a Bicycle CrashThis is a High Level View of Bicycle/Touring Safety Topics:
- Bicycle Safe to Ride (Bike Condition): System Integrity (everything works as it should, no thing is loose), Steering Works, Brakes Work, Drive System Works, Transmission System Works,
- Rider Protection: Helmet, Gloves, Glasses, Sun Glasses, Bell/Horn; Pant Cuff Straps, Reflective; Shoe Lace Tuck;
- Riders Ability to See: Clear View, Safe Rider Vision (Glasses, Contacts, ...), Sun Light Protection (Sun Glasses, FlipUp, ClipOn, ...); Head-Light/Forward Night Lighting (Spare Batteries, bulbs/diodes, charger if needed, appropriate electrical connecter (Note that helmet lights are frequently annoying to other riders as riders frequently look directly at other riders and ruin their night vision for another 30 minutes); Rear View Mirror/Device; Dynamo/hub-generator, stem capacitor/battery, USB charging port, appropriate cables,
- Bike's Ability to be Seen: Reflectors (bike, pedals, wheels, tires, triangle, bags, frame, trailer, third wheel), Position Lights (bike, bags, frame, trailer),
- Rider's Ability to be Seen: Bright Colors (not required but smart), Reflectors (wrist, ankle, shirt, ), (Note that Position Lights on Riders can be hazardous to other bike riders as it is often a line of sight issue),
- Health/Medical Safety: First Aid Kit, band-aids, DEET, Mosquito Net Hat, Guide Shirts/Pants @ 40-50 SPF, Mosquito Proof Shirts/Pants, Permethrin (pre-trip clothing soaks), Sunscreen, Nitrile or Latex Gloves, daily medicines and vitamins,
- Injury First Response: First Aid Kit, phone call, water bottle, space blanket, pen and paper,
- Emergency: Cell phone, phone call, stop traffic, ask for help, warn of condition, ask driver to deliver message ahead/behind, pen and paper, reflector triangle,
- Sun Safety: Long sleeves, sunscreen, sun glasses, bill on helmet, helmet with neck shade, gloves, helmet, long pants, off bike hats; hats with brims, neck, and ear shade; Guide Shirts/Pants @ 40-50 SPF,
- Signals/Verbal Communication: Traffic Signals (turns, slow, stop), Cyclist Ride Signals/Communication (mount up, pedals ready, animals, dogs, hazard, turn signal, ...),
- Road Hazards: Holes, debris, tacks, tracks, grids, water, sand, mud, dirt, detours, drain cover slats, missing drain covers, open rock or cement lined ditches, animals,
- Safety from Vehicles/Drivers: Big, small, fast, slow, parked in road, road hogs, block rider's view, block others from seeing rider, close pass, long vehicle turns and side or trailer will take rider out, blind intersections, distracted drivers, go-around with sudden stop and crossing turn just in front of you, pull out never saw cyclist (maybe did not look, maybe did not stop at stop sign), blind hill passing, blind hill tail-gater, blind curve passing, blind hill tale-gater; many riders are mounting video recorders on their helmet or bike to record good and bad things that happen on the road (note that many riders complain of helmet control and management issues regarding the extra length, height, weight, and leverage of cameras mounted on helmets);
- Mechanical Safety: Carry tools, tube, patches, rubber cement, lube, links; address mechanical issue, help others, conduct scheduled maintenance, wipe chain daily; inspect for worn, loose, or missing components or parts; take lessons, talk to mechanics; knowledge, experience, and education are powerful tools;
- Safe Water/Drink: Boil water, ask for boiled water, bottled water, filtered water, chemical treatment (chlorine dioxide [NO Iodine Rx/Tx]), boiled water tea, commercial beer or sodas in a can or glass bottle,
- Safe Food (Fruit that the cyclist peels): Oranges, bananas, (grapefruit, lemon, lime too);
- Stopping/Resting Safety: Don't stand on the road, don't lay bike on road, don't block road, don't lay bike in throughways or on building glass widow, don't block business conduct,
- Riding Safely: Ride Defensively (expect poor habits from drivers), ride on correct side of the road, pull off the road when your life may be at stake, 'Be Safe, NOT Dead Right', Be courteous (especially when the other person is WRONG), no texting while driving, no ear plugs, no listening to music while riding (usually aggravates other riders), know things to do to survive a crash,
- Theft Safety: Identification Markings or ID Tags on Bicycle, GPS tracking device in stem or frame (like LoJack for automobiles), Mark ID on Equipment (panniers, bags, major clothing, major gear, use waterproof markers (black on light colors and/or silver on dark colors), some people deliberately put cheap ugly decals on expensive bikes, have a good recent picture of your bike (photograph in your wallet; photo stored in your smartphone, hand device, computer, camera, online [like FaceBook]); cable and lock, built-in lock,
- Weather Safety: Carry clothing in a waterproof bag, carry ID/Passport in a waterproof document holder (a zip lock plastic bag is just fine), carry the sleeping bag in a waterproof bag, See How to Select a Tent Site; stay off ridgelines for camping, evening meals, or lightning storms; stay away from water side camp sites (flash floods and bad karma),
- Animal Hazards: Dogs, safe distance for wild game and herds, safe distance from domestic farm/ranch animals, respect property, leave gates as you found them, [Halt brand] Dog Spray,
Bicycle Crash Avoidance (See Crash Situations Ahead of Time):
Top, Bicycle Tour Safety, Bicycle Crash Avoidance, How to Survive a Bicycle Crash-
BicycleSafe.com has about 30 specific suggestions for avoiding the 10 most common Bicycle-Automobile types of accidents. Every cyclist should know these bicycling accident situations and avoidance solutions. BicycleSafe.com is a Defensive Cycling Education and a Bicycle Road Touring Survival Education rolled into one education package. Accident scenarios are reversed engineered to the point of explaining when and where a cyclist could and should recognize an evolving accident situation (the road survival part) and explaining what course(s) of action that a cyclist could and should perform in order to avoid a collision (the defensive action part). Would the reader notice a car coming up from behind with its right-turn signal on and correlate that event with a side road to the right, about forty feet in front, and know what to do? The multi-part solution is described, in detail, at BicycleSafe.com will prevent an accident and maybe save a life - Suggestion from Allen Beauchamp (FaceBook page).
How to Survive a Bicycle Fall or Crash;
Bicycle Fall/Crash Survival Lessons Learned (Minimize Injury), v5
By Dennis and Terry StruckTop, Bicycle Tour Safety, Bicycle Crash Avoidance, How to Survive a Bicycle Crash
Lessons Learned the hard way from Bicycle and Motorcycle Crashes
(Real Experience Shared by the Authors).
- Always wear a helmet and gloves, period.
- Pay Attention! Once a person is in a crash, stop denial and start looking for ways to minimize body damage.
- Keep the Eyes Open for as much of the event as is possible.
Your eyes let you read the situation as it unfolds. Closing one's eyes is usually the action that results in the most body damage and the longest recovery time. - Be fluid, if an object is going to punch the body, don't stiffen up for an impact, be loose and force the body to roll the body part along with or away from the punching object -
Move a body part along with a punch.
RESTATED: If someone were about to hit you in the face and the impact were imminent (it's going to happen - stop denial), does one stiffen up and take the impact (NO), one deliberately moves their head backward, thus minimizing force of the impact - One is going to be hit no matter what (SO actively minimize the damage!).
The more fluid a person is during a crash, the less the trauma of impact and the less the total injuries.
SEE: Mental Philosophy (below). - If one is thrown off their bike, then rolling is usually the best course of action (assuming that a person is not about to go over a cliff or such - one still has to actively think).
- If something is moving toward the eyes or the face, then move the head
(rotate, twist, and/or bend). - Be Active (as in Pro-Active). Be Alert.
- Frequently, there are things that a person can do, before coming to a rest,
that may save one's life
OR minimize any injury. - If necessary, use arm(s) or leg(s) to keep a person's falling/moving body
from hitting dangerous objects.
Dodge Stuff, roll or twist if needed. - Protecting the head is usually the most important thing to do, BUT
on occasion a person may need to focus on dodging a spearing/jabbing object. - Keep the head off the ground. Interestingly, if a person is looking at what is
happening around their self, then a person will likely be forcing their head off the ground. - Always be analyzing.
- The side (of the human body) can take the most Shock/G-Force (versus the front, back, top or head).
- The Best dismount is to land on the feet, upright, sometimes that is at running speed.
- If a person cannot land on their feet, running, then the next best controlled crash options are either, depending on ejection speed/force, angle, and body position, is to make yourself get to the Somersault or Side Slap position:
- Somersault under control then change into a Side-Slap (described in next item).
- Side Slap - Controlled landing on the side with the butt side of the hip (butt-hip corner), thigh side, slightly bent leg side, forearm and Hand-Slap (together), all at the same time!
- Keep the chest, ribs, and head all off the ground.
- Rotate, twist, and/or bend to make this happen.
- Be in a flowing fluid motion, not a statue.
- A & B together form a Judo 101 Fall Maneuver. It is worth taking one class, just to learn this maneuver. If you have ever watched the opening scene of the old Dick Van Dyke TV Series where Robert Petri (Dick Van Dyke) trips over an ottoman while entering his living room, his complete fall and rollout maneuver is a perfectly executed Judo Roll.
- If a person yells "Heiyee" during this episode, they will double their energy, gain focus, and be in control - it works!
- Do NOT allow yourself to be thrown on your chest or chin, use the arms to change the fall into a side impact.
- Avoid a stiff-arm side impact, or a stiff-leg landing.
Bend the appendages a little so the body parts won't break or be torn -
Airborne 101 (sneaky pun, intended). - Do NOT allow an impact force where the neck, shoulder, arm, and hand are
in a straight alignment!
Twist or roll to the back of the shoulder (or bones may break and/or components may be torn). - If landing square on the butt, roll to one cheek or the other, before hitting the ground. Force one's landing to one butt cheek or the other by rolling or twisting or using the legs and/or arms. Never hit the ground with both cheeks at the same time.
- We don't always get to pick how we are dismounted, but a summersault type body roll (feet over head) is better than a chin slide or back slide.

Bicycle Packing for Shipping or Transport:
TopThe following presents a brief introduction of some bicycle packing, shipping, or transport issues.
For extensive detail, see Bicycle Packing, Transporting, and Shipping.
- Traveling to Tour Destination, for two people, by flight, with bikes (one each): Two options, one for business, the other not:
- As a Business Expense: Our personal limitation is four pieces of luggage (for two people) and two carry-on briefcases (one each). The first two pieces of luggage are the bike suitcases. The third piece of luggage contains the biking paraphernalia (helmets, all travel clothing, handlebar bags, cameras, extra bottles, toiletry kits, medicines, ...) - This is usually bulky space robbing gear but not heavy per se. The fourth piece of luggage is for the conference, the good clothes to be left behind with the briefcases (and the legal reason for the trip that makes the flight trip portion become a business expense). So since four pieces of luggage is all that we can handle (plus a strap on briefcase each) then the only variable is the weight - if a bag is over weight, we pay for it, we can't redistribute into a fifth bag as it usually is not allowed or we could not manage it if we were allowed, but we have redistributed between two bags (one over weight and one under weight). This is why we often leave travel books behind and why a good five page home made itinerary pays for itself. We are usually right at the weight limit for the grand total. (Some air lines are nicer about this than others, oddly the more enjoyable airlines seem to be more strict.) See next item.
- As a Non-Business Expense: If a flight trip for a bike tour is not for a conference or business purpose, then two bikes can be carried in two cases. The cases will become bike trailers. The bike accruements and travel clothing can then be carried in one or two duffle bags. Panniers can be stowed in duffle bags too. Thus, at the destination, the bikes come out of the suitcases and are assembled as touring vehicles, and the contents of the duffle bags (to include the panniers) either gets worn on person, mounted or carried on the bike, or the contents get stowed in the suitcase trailer. That means that the duffle bag(s) must be foldable and storable in order to be stowed in a trailer or pannier, that is, the duffle bag must be flexible and foldable with or without wheels.
- Remove panniers when transporting bikes on the exterior of a vehicle. We had one come off the bike's rack while traveling on a rough road and it got run over by the only other truck on the road.
- Almost every damaged bike, from shipping, was poorly packed or loose parts were not well bagged or not bagged at all so the result was lost parts or damaged goods.
- While we have yet to assemble a bike at an airport, we do make a quick inspection of the suitcase. If the bike is not assembled and validated for bike damaged at the air port baggage/shipping/cargo area, then a cyclist may not have any legal claim for damage.
- Commercial Airlines will not knowingly allow hydraulic fluids to be carried in bikes with hydraulic brakes. The fluid is supposed to be drained before shipping.
- Commercial Airlines recommend that flyers keep tires at least 15 PSI below the tire's recommended maximum pressure.
- Commercial Airlines will not allow a passenger to carry pressured air or CO2 cartridge(s) on their person or in a carry-on bag. So far, it is still permissible to carry CO2 cartridges in the luggage.
- Some Commercial Airlines, like British Airways, allow 75 pounds per bag for International Flights while other Commercial Airlines only allow 50 pounds per bag.
- Some airlines will average or work from a total weight perspective and some airlines won't. Our Bike Fridays, with gear (almost with as much bike touring accruements as we can stuff in) seem to weigh-in naturally at about 50 pounds (plus or minus 3 pounds) per suitcase. When weighing in at airports, we often need to move a few pounds from on case to another.
-
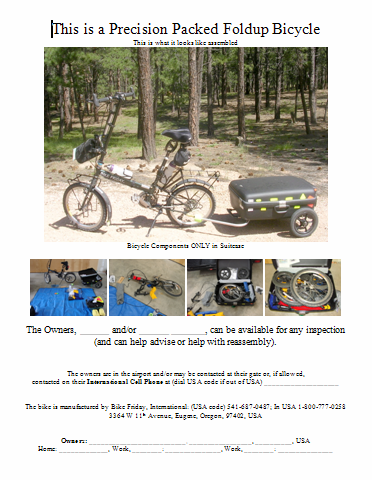 Story: My wife and I watched a foreign baggage inspector pick up a packed BikeFriday in its suitcase and drop it on a counter top from about six inches, not being mean but being in a hurry. He opened the suitcase and saw the strange contents. He then focused on the Document that we set on top (the Suitcase Bicycle Picture Document - See Image) and he picked it up to look at the picture of the assembled bicycle. He immediately realized that the contents were the same thing as pictured (a fully assembled road ready bike). He then did some courtesy probing but from a point of respect. When he was done, he closed the suitcase and gently set it down for a baggage handler to pickup.
 - A big muddy cleanup may be needed at the tour's end. If needed, consider borrowing a water hose or visiting a car wash or a creek. If nothing else consider using the remaining water, water bottles, and a rag. Perform the cleanup as soon as possible so as to leave packing time and not have to address dirt or wetness issues.
- Always dry the bike as much as one possible can before packing or shipping. Given enough time spent traveling, everyone is eventually faced with a situation where they have to pack a wet bike. One usually has about 24 hours before rust sets. So make cleaning, drying, and oiling a priority.
- Mark storage bags, as applicable, with marker pen for contents. For Example: Front Rack, Steering Tube, Fork, Seat, Seat Mast, Seat Post, ...
- Mark the water bottle cages as front and rear if they are different. Bike Friday Z Key cages are different from non-key cages.
- At the tour's end, it is useful to have disposable rags, both for bike cleanup (dirt/mud removal) and for cleaning grease/oil/grime off of the drive train. We usually carry about five or six rags in a quart sized plastic bag. We discovered that we could buy washcloth sized cleanup rags for garage use by the case at X-Mart.
- We carry a small scrap plywood rectangle, about 3 x 7 inches, for the wheel off fork moments. The plywood mini block is particularly useful for supporting the fork while mounting the shock tube/unit to the bottom headset.
- Plastic Sheet (scrap, tent ground cloth, or space blanket) for Bike assembly or disassembly (8 x 8 Feet ideal, 3 x 4 Feet minimum size). Usually the plastic tarp is for the assembler person(s) to sit on and keep loose items off of the ground/dirt and it seems to help keep passer-bye's from walking on or through the equipment on the ground.
- Spare plastic zipper lock parts bags, about 3 x 5 Inches (keep original shipping parts bags - we bought 100 count 3 x 5 Inch zip bags from Xpedex, $2).
- Handi-Wipes (or equivalent): Set aside something to clean the hand(s) afterwards (their will be dirt and grease on fingers, we use 2 by 3 inch sized in foil type wipes, bought by the box from X-Mart).
- Bicycle tool bag/kit and Z key: Smart to open the tool kit and lay it and the Z key (Bike Friday's double ended 5 & 6 mm S Wrench) directly under the frame. Usually tools should be one of the last things packed and one of the first things made available for reassembly.
- Don't pack tools or other hard or heavy objects on top of spokes or frame (as they may dent or scratch).
- The more remote a place and associated mass transportation system, the more friendly they are toward allowing bicycles on transportation vehicle. Please Note that there are many times when a person asks if they can carry a bike on public transportation, the answer will be "NO." So that a cyclist won't be stranded somewhere, it is often best to not ask. It is better to bag and carry the bike(s). If the driver/conductor asks about what's in the bag, then the answer should be "it is equipment" or "sporting equipment" (bikes are sport equipment, one just don't say or show what kind of equipment it is and one keeps the bike sealed and covered).

